
Owner's Manual


Adjust the settings - more you can do
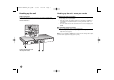
When you turn on for the first time
The menu for a language selection will appear when you turn on the unit for the
first time. You must select a language to use the unit. Use vV b B to select a
language then press ENTER and the confirm menu will appear. Use bB to
select [Enter] then press ENTER.
Adjust the language settings
Menu Language – Select a language for the Setup menu and on-screen
display.
Disc Audio/Subtitle/Menu – Select a language for the Disc Audio/Subtitle/
Menu.
[Original]: Refers to the original language in which the disc was recorded.
[Other]: To select another language, press number buttons then ENTER to
enter the corresponding 4-digit number according to the language code list.
(see page 14) If you make a mistake while entering number, press CLEAR to
delete numbers then correct it.
[Off] (for Disc Subtitle): Turn off Subtitle.
Adjust the display settings
TV Aspect – Select which screen aspect to use based on the shape of your TV
screen.
[4:3]: Select when a standard 4:3 TV is connected.
[16:9]: Select when a 16:9 wide TV is connected.
Display Mode – If you selected 4:3, you’ll need to define how you would like
widescreen programs and films to be displayed on your TV screen.
[Letterbox]: This displays a widescreen picture with black bands at the top
and bottom of the screen.
[Panscan]: This fills the entire 4:3 screen, cropping the picture as necessary.
Adjust the audio settings
Dolby Digital / DTS / MPEG – Selects the type of digital audio signal when
using the DIGITAL AUDIO OUTPUT jack.
[Bitstream]: Select this when you connect this unit’s DIGITAL AUDIO
OUTPUT jack to an amplifier with a built-in Dolby Digital, DTS or MPEG
decoder.
[PCM] (for Dolby Digital / MPEG): Select this when you connect this unit’s
DIGITAL AUDIO OUTPUT jack to an amplifier without a built-in Dolby Digital
or MPEG decoder.
[Off] (for DTS): Select this when you connect this unit’s DIGITAL AUDIO
OUTPUT jack to an amplifier without a built-in DTS decoder.
Sample Freq. (Frequency) –
Selects the sampling frequency of the audio signal.
[48 KHz]: The audio signals are always converted to 48 kHz.
[96 KHz]: The audio signals are output in their original format.
Speaker Setup – Select an option according to the analog audio connection.
[2 Ch]: Select when a 2 Channel stereo system is conected to this unit.
[5.1 Ch]: Select when a 5.1 Channel surround system is conected to this unit.
Press vV to select an option then press bB to adjust the setting.
[Speaker]: Select a speaker that you want to adjust.
[Size]: Select a size of the selected speaker. (Large, Small, None)
A size cannot be selected depending on the selected speaker.
[Volume]: Adjust the output level of the selected speaker. (-10dB - 0dB)
[Distance]: Select a distance to each speaker from the listening position. You
cannot adjust Sub Woofer speakers. (0.3m(1ft) - 6.0m(20ft))
[Test]: Select [All], a test signal is sent to each speaker. During testing, you
can select a speaker and adjust volume setting. Select [Off] to stop the test.
DRC (Dynamic Range Control) – Make the sound clear when the volume is
turned down (Dolby Digital only). Set to [On] for this effect.
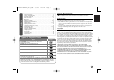
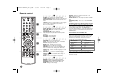
Adjust the settings
1Display setup menu: SETUP
2 Select a desired option on the first level:
vv VV
3 Move to second level:
BB
4Select a desired option on the second level:
vv VV
5 Move to third level:
BB
6 Change the setting:
vv VV
/ ENTER
ON REMOTE
8
DV398H-E.CMARLLK_1870_ENG 7/1/08 1:40 PM Page 8