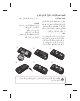
ﺍﻧﮕﻠﻴﺴﯽ E NGLIS H E N G LIS H ﺍﻧﮕﻠﻴﺴﯽ GU230 ﺑﺮﺧﯽ ﺍﺯ ﻣﺤﺘﻮﻳﺎﺕ ﺍﻳﻦ ﺩﻓﺘﺮﭼﻪ ﺭﺍﻫﻨﻤﺎ ﻣﻤﮑﻦ ﺍﺳﺖ ﺑﺴﺘﻪ ﺑﻪ ﻧﺮﻡ ﺍﻓﺰﺍﺭ ﮔﻮﺷﯽ ﻳﺎ ﺍﺭﺍﺋﻪ ﺩﻫﻨﺪﻩ . ﺑﺎ ﮔﻮﺷﯽ ﺷﻤﺎ ﻣﺘﻔﺎﻭﺕ ﺑﺎﺷﻨﺪ،ﺧﺪﻣﺎﺕ www.lg.com P/N : MMBB0356518 (1.1) GU230 Some of the contents in this manual may differ from your phone depending on the software of the phone or your service provider. www.lg.com P/N : MMBB0356518 (1.
Bluetooth QD ID B015954
GU230ﺭﺍﻫﻨﻤﺎی ﮐﺎﺭﺑﺮ -ﻓﺎﺭﺳﯽ ﺍﻳﻦ ﺩﻓﺘﺮﭼﻪ ﺭﺍﻫﻨﻤﺎ ﺑﻪ ﺷﻤﺎ ﮐﻤﮏ ﻣﯽ ﮐﻨﺪ ﺗﻠﻔﻦ ﻫﻤﺮﺍﻩ ﺧﻮﺩ ﺭﺍ ﺑﻬﺘﺮ ﺑﺸﻨﺎﺳﻴﺪ .ﺩﺭ ﺍﻳﻦ ﻣﻨﻮ ﺗﻮﺿﻴﺤﺎﺕ ﻣﻔﻴﺪ ﺭﺍﺟﻊ ﺑﻪ ﻭﻳﮋﮔﯽ ﻫﺎی ﺗﻠﻔﻦ ﺩﺭ ﺍﺧﺘﻴﺎﺭ ﺷﻤﺎ ﻗﺮﺍﺭ ﻣﯽ ﮔﻴﺮﺩ.
ﺁﺷﻨﺎﻳﯽ ﺑﺎ ﺗﻠﻔﻦ ﻫﻤﺮﺍﻩ ﻣﺤﻞ ﺍﺗﺼﺎﻝ ﺷﺎﺭژﺭ ،ﻫﻨﺪﺯﻓﺮی، ﺳﻴﻢ ﺻﻔﺤﻪ ﺍﺻﻠﯽ ﮐﻠﻴﺪ ﭘﺎﻳﺎﻥ/ﺭﻭﺷﻦ/ﺧﺎﻣﻮﺵ ﺑﻪ ﻳﮏ ﺗﻤﺎﺱ ﭘﺎﻳﺎﻥ ﻣﯽ ﺩﻫﺪ ﻳﺎ ﺁﻥ ﺭﺍ ﺭﺩ ﻣﯽ ﮐﻨﺪ .ﺗﻠﻔﻦ ﺭﺍ ﺭﻭﺷﻦ/ﺧﺎﻣﻮﺵ ﮐﻨﻴﺪ .ﻫﻨﮕﺎﻡ ﺍﺳﺘﻔﺎﺩﻩ ﺍﺯ ﻣﻨﻮ ،ﺑﻪ ﺻﻔﺤﻪ ﺁﻣﺎﺩﻩ ﺑﻪ ﮐﺎﺭ ﺑﺮﮔﺮﺩﻳﺪ. 2 ﮐﻠﻴﺪ ﺗﻤﺎﺱ ﺷﻤﺎﺭﻩ ﺗﻠﻔﻦ ﺭﺍ ﻣﯽ ﮔﻴﺮﺩ ﻭ ﺑﻪ ﺗﻤﺎﺱ ﻫﺎی ﻭﺭﻭﺩی ﭘﺎﺳﺦ ﻣﯽ ﺩﻫﺪ.
ﻧﺼﺐ ﮐﺎﺭﺕ ﺣﺎﻓﻈﻪ ﻓﺮﻣﺖ ﮐﺮﺩﻥ ﮐﺎﺭﺕ ﺣﺎﻓﻈﻪ ﺩﺭﭘﻮﺵ ﮐﺎﺭﺕ ﺣﺎﻓﻈﻪ ﺭﺍ ﺑﺎﺯ ﮐﺮﺩﻩ ﻭ ﻳﮏ ﮐﺎﺭﺕ micro SDﻭﺍﺭﺩ ﮐﻨﻴﺪ ﺩﺭ ﺣﺎﻟﯽ ﮐﻪ ﺳﻄﺢ ﻃﻼﻳﯽ ﺭﻧﮓ ﺁﻥ ﺭﻭ ﺑﻪ ﭘﺎﻳﻴﻦ ﺑﺎﺷﺪ .ﺩﺭﭘﻮﺵ ﮐﺎﺭﺕ ﺣﺎﻓﻈﻪ ﺭﺍ ﺑﺒﻨﺪﻳﺪ ﺗﺎ ﺑﺎ ﺻﺪﺍی ﮐﻠﻴﮏ ﺑﺴﺘﻪ ﺷﻮﺩ. ﺑﺮﺍی ﺧﺎﺭﺝ ﮐﺮﺩﻥ ﮐﺎﺭﺕ ﺣﺎﻓﻈﻪ ﻫﻤﺎﻧﻄﻮﺭ ﮐﻪ ﺩﺭ ﺷﮑﻞ ﻧﺸﺎﻥ ﺩﺍﺩﻩ ﺷﺪﻩ ﺍﺳﺖ ،ﮐﺎﺭﺕ ﺭﺍ ﺑﻪ ﺁﺭﺍﻣﯽ ﻓﺸﺎﺭ ﺩﻫﻴﺪ. ﮔﺰﻳﻨﻪ ﻣﻨﻮ ﺭﺍ ﻓﺸﺎﺭ ﺩﺍﺩﻩ ﻭ ﺗﻨﻈﻴﻤﺎﺕ ﺭﺍ ﺍﻧﺘﺨﺎﺏ ﮐﻨﻴﺪ. ﻣﺪﻳﺮ ﺣﺎﻓﻈﻪ ﻭ ﺳﭙﺲ ﺣﺎﻓﻈﻪ ﺧﺎﺭﺟﯽ ﺭﺍ ﺍﻧﺘﺨﺎﺏ ﮐﺮﺩﻩ ﻭ ﻓﺮﻣﺖ ﮐﺮﺩﻥ ﺭﺍ ﻓﺸﺎﺭ ﺩﻫﻴﺪ ﻭ ﮐﺪ ﺍﻣﻨﻴﺘﯽ ﺭﺍ ﻭﺍﺭﺩ ﻧﻤﺎﻳﻴﺪ.
ﻧﺼﺐ ﺳﻴﻢ ﮐﺎﺭﺕ ﻭ ﺷﺎﺭژ ﮐﺮﺩﻥ ﺑﺎﺗﺮی ﻧﺼﺐ ﺳﻴﻢ ﮐﺎﺭﺕ ﺩﻭﺭ ﺍﺯ ﺩﺳﺘﺮﺱ ﮐﻮﺩﮐﺎﻥ ﻗﺮﺍﺭ ﺩﻫﻴﺪ. ﻭﻗﺘﯽ ﺩﺭ ﻳﮏ ﺷﺒﮑﻪ ﺳﻠﻮﻟﯽ ﻣﺸﺘﺮک ﻣﯽ ﺷﻮﻳﺪ ،ﻳﮏ ﺳﻴﻢ ﮐﺎﺭﺕ ﻫﻤﺮﺍﻩ ﺑﺎ ﺟﺰﺋﻴﺎﺕ ﺍﺷﺘﺮﺍک ﺍﺯ ﺟﻤﻠﻪ ﭘﻴﻦ ،ﻫﺮﮔﻮﻧﻪ ﺧﺪﻣﺎﺕ ﺍﺧﺘﻴﺎﺭی ﻣﻮﺟﻮﺩ ﻭ ﺑﺴﻴﺎﺭی ﻣﻮﺍﺭﺩ ﺩﻳﮕﺮ ﺩﺭ ﺍﺧﺘﻴﺎﺭ ﺷﻤﺎ ﻗﺮﺍﺭ ﻣﯽ ﮔﻴﺮﺩ. ﻣﻬﻢ! ‹ ﺳﻴﻢ ﮐﺎﺭﺕ ﻭﺍﺭﺩ ﺷﺪﻩ ﻭ ﺳﻄﻮﺡ ﺗﻤﺎﺱ ﺁﻥ ﺑﺎ ﻫﺮﮔﻮﻧﻪ ﺧﺮﺍﺵ ﻳﺎ ﺧﻢ ﺷﺪﻥ ﺑﻪ ﺁﺳﺎﻧﯽ ﺁﺳﻴﺐ ﻣﯽ ﺑﻴﻨﺪ ،ﺑﻨﺎﺑﺮﺍﻳﻦ ﻫﻨﮕﺎﻡ ﻧﮕﻪ ﺩﺍﺷﺘﻦ ﮐﺎﺭﺕ ﺩﺭ ﺩﺳﺖ ،ﻭﺍﺭﺩ ﮐﺮﺩﻥ ﻳﺎ ﺧﺎﺭﺝ ﮐﺮﺩﻥ ﺁﻥ ﺍﺯ ﺗﻠﻔﻦ ﻫﻤﺮﺍﻩ ﺩﻗﺖ ﮐﻨﻴﺪ .
ﺗﻤﺎﺱ ﻫﺎ ﺑﺮﻗﺮﺍﺭی ﺗﻤﺎﺱ 1ﺷﻤﺎﺭﻩ ﺗﻠﻔﻦ ﺭﺍ ﺑﺎ ﺍﺳﺘﻔﺎﺩﻩ ﺍﺯ ﺻﻔﺤﻪ ﮐﻠﻴﺪ ﻭﺍﺭﺩ ﮐﻨﻴﺪ .ﺑﺮﺍی ﺣﺬﻑ ﻳﮏ ﺭﻗﻢ CLRﺭﺍ ﻓﺸﺎﺭ ﺩﻫﻴﺪ. ﺭﺍ ﻓﺸﺎﺭ 2ﺑﺮﺍی ﺷﺮﻭﻉ ﺗﻤﺎﺱ ﺩﻫﻴﺪ. 3ﺑﺮﺍی ﭘﺎﻳﺎﻥ ﺩﺍﺩﻥ ﺑﻪ ﺗﻤﺎﺱ، ﺭﺍ ﻓﺸﺎﺭ ﺩﻫﻴﺪ. ﻧﮑﺘﻪ! ﺑﺮﺍی ﻭﺍﺭﺩ ﮐﺮﺩﻥ +ﺟﻬﺖ ﺑﺮﻗﺮﺍﺭی ﺗﻤﺎﺱ ﺑﻴﻦ ﺍﻟﻤﻠﻠﯽ 0 ،ﺭﺍ ﻓﺸﺎﺭ ﺩﺍﺩﻩ ﻭ ﻧﮕﻪ ﺩﺍﺭﻳﺪ. ﺑﺮﻗﺮﺍﺭی ﺗﻤﺎﺱ ﺑﺎ ﺍﺳﺘﻔﺎﺩﻩ ﺍﺯ ﻓﻬﺮﺳﺖ ﻣﺨﺎﻃﺒﻴﻦ 1ﺍﺯ ﺻﻔﺤﻪ ﺁﻣﺎﺩﻩ ﺑﻪ ﮐﺎﺭ ،ﻧﺎﻡ ﻫﺎ ﺭﺍ ﺍﻧﺘﺨﺎﺏ ﮐﻨﻴﺪ. 2ﺑﺎ ﺍﺳﺘﻔﺎﺩﻩ ﺍﺯ ﺻﻔﺤﻪ ﮐﻠﻴﺪ ،ﺍﻭﻟﻴﻦ ﺣﺮﻑ ﻣﺨﺎﻃﺒﯽ ﮐﻪ ﻣﯽ ﺧﻮﺍﻫﻴﺪ ﺑﺎ ﺍﻭ ﺗﻤﺎﺱ ﺑﮕﻴﺮﻳﺪ ﺭﺍ ﻭﺍﺭﺩ ﮐﻨﻴﺪ .
ﻣﺸﺎﻫﺪﻩ ﺗﺎﺭﻳﺨﭽﻪ ﺗﻤﺎﺱ ﺗﻨﻬﺎ ﺩﺭ ﺻﻮﺭﺗﯽ ﻣﯽ ﺗﻮﺍﻧﻴﺪ ﮔﺰﺍﺭﺵ ﺗﻤﺎﺱ ﻫﺎی ﺑﯽ ﭘﺎﺳﺦ ،ﺩﺭﻳﺎﻓﺘﯽ ﻭ ﮔﺮﻓﺘﻪ ﺷﺪﻩ ﺭﺍ ﻣﺸﺎﻫﺪﻩ ﮐﻨﻴﺪ ﮐﻪ ﺷﺒﮑﻪ ﺍﺯ ﻗﺎﺑﻠﻴﺖ ﺷﻨﺎﺳﺎﻳﯽ ﺧﻂ ﺗﻤﺎﺱ ) (CLIﺩﺭ ﺣﻮﺯﻩ ﺧﺪﻣﺎﺗﯽ ﭘﺸﺘﻴﺒﺎﻧﯽ ﮐﻨﺪ. ﺗﻐﻴﻴﺮ ﺗﻨﻈﻴﻤﺎﺕ ﺗﻤﺎﺱ ﻣﯽ ﺗﻮﺍﻧﻴﺪ ﻣﻨﻮی ﻣﺮﺑﻮﻁ ﺑﻪ ﻳﮏ ﺗﻤﺎﺱ ﺭﺍ ﺗﻨﻈﻴﻢ ﮐﻨﻴﺪ .ﻣﻨﻮ ﺭﺍ ﻓﺸﺎﺭ ﺩﺍﺩﻩ، ﺗﻨﻈﻴﻤﺎﺕ ﻭ ﺳﭙﺲ ﺗﻤﺎﺱ ﺭﺍ ﺍﻧﺘﺨﺎﺏ ﮐﻨﻴﺪ. • ﺍﻧﺘﻘﺎﻝ ﺗﻤﺎﺱ – ﺍﻧﺘﺨﺎﺏ ﮐﻨﻴﺪ ﮐﻪ ﺗﻤﺎﺱ ﻫﺎ ﺍﻧﺘﻘﺎﻝ ﻳﺎﺑﻨﺪ ﻳﺎ ﺧﻴﺮ. • ﻣﺤﺪﻭﺩﻳﺖ ﺗﻤﺎﺱ -ﺯﻣﺎﻥ ﻣﻮﺭﺩ ﻧﻈﺮ ﺭﺍ ﺑﺮﺍی ﻣﺤﺪﻭﺩﻳﺖ ﺗﻤﺎﺱ ﻫﺎ ﺍﻧﺘﺨﺎﺏ ﮐﻨﻴﺪ.
• ﺫﺧﻴﺮﻩ ﺷﻤﺎﺭﻩ ﺟﺪﻳﺪ -ﺑﻠﻪ ﻳﺎ ﺧﻴﺮ ﺭﺍ ﺍﻧﺘﺨﺎﺏ ﮐﻨﻴﺪ. • ﺗﻨﻈﻴﻤﺎﺕ ﺑﺴﺘﻦ ﺩﺭﺏ ﮐﺸﻮﻳﯽ -ﮔﺰﻳﻨﻪ ﻫﺎی ﭘﺎﻳﺎﻥ ﺗﻤﺎﺱ ﻳﺎ ﺍﺩﺍﻣﻪ ﺗﻤﺎﺱ ﺭﺍ ﺍﻧﺘﺨﺎﺏ ﮐﻨﻴﺪ. ﻣﺨﺎﻃﺒﻴﻦ ﺟﺴﺘﺠﻮی ﻣﺨﺎﻃﺐ 1ﺍﺯ ﺻﻔﺤﻪ ﺁﻣﺎﺩﻩ ﺑﻪ ﮐﺎﺭ ،ﻧﺎﻡ ﻫﺎ ﺭﺍ ﺍﻧﺘﺨﺎﺏ ﮐﻨﻴﺪ. 2ﺑﺎ ﺍﺳﺘﻔﺎﺩﻩ ﺍﺯ ﺻﻔﺤﻪ ﮐﻠﻴﺪ ،ﺍﻭﻟﻴﻦ ﺣﺮﻑ ﻣﺨﺎﻃﺒﯽ ﮐﻪ ﻣﯽ ﺧﻮﺍﻫﻴﺪ ﺑﺎ ﺍﻭ ﺗﻤﺎﺱ ﺑﮕﻴﺮﻳﺪ ﺭﺍ ﻭﺍﺭﺩ ﮐﻨﻴﺪ. 3ﺑﺮﺍی ﺣﺮﮐﺖ ﺩﺭ ﺑﻴﻦ ﻣﺨﺎﻃﺒﻴﻦ ،ﺍﺯ ﭘﻴﮑﺎﻥ ﻫﺎی ﺑﺎﻻ ﻭ ﭘﺎﻳﻴﻦ ﺍﺳﺘﻔﺎﺩﻩ ﮐﻨﻴﺪ.
ﺭﺳﺎﻝ ﭘﻴﺎﻡ 1 2 3 4 5 8 ﻣﻨﻮ ﺭﺍ ﻓﺸﺎﺭ ﺩﺍﺩﻩ ،ﭘﻴﺎﻡ ﺭﺳﺎﻧﯽ ﻭ ﺳﭙﺲ ﺍﻳﺠﺎﺩ ﭘﻴﺎﻡ ﺭﺍ ﺍﻧﺘﺨﺎﺏ ﮐﻨﻴﺪ. ﻭﻳﺮﺍﻳﺸﮕﺮ ﭘﻴﺎﻡ ﺟﺪﻳﺪ ﺑﺎﺯ ﻣﯽ ﺷﻮﺩ. ﻭﻳﺮﺍﻳﺸﮕﺮ ﭘﻴﺎﻡ ،ﭘﻴﺎﻡ ﻣﺘﻨﯽ ﻭ ﭘﻴﺎﻡ ﻫﺎی ﭼﻨﺪﺭﺳﺎﻧﻪ ﺍی ﺭﺍ ﺑﺎ ﻫﻢ ﺗﺮﮐﻴﺐ ﮐﺮﺩﻩ ﻭ ﺑﻪ ﺻﻮﺭﺕ ﻳﮏ ﭘﻴﺎﻡ ﺟﺪﻳﺪ ﺩﺭ ﻣﯽ ﺁﻭﺭﺩ ﮐﻪ ﺗﻐﻴﻴﺮ ﻭﺿﻌﻴﺖ ﺩﺭ ﺑﻴﻦ ﺁﻥ ﻫﺎ ﺑﺴﻴﺎﺭ ﺁﺳﺎﻥ ﺍﺳﺖ .ﺗﻨﻈﻴﻤﺎﺕ ﭘﻴﺶ ﻓﺮﺽ ﻭﻳﺮﺍﻳﺸﮕﺮ ﭘﻴﺎﻡ ،ﺣﺎﻟﺖ ﭘﻴﺎﻡ ﻣﺘﻨﯽ ﺍﺳﺖ. ﭘﻴﺎﻡ ﺧﻮﺩ ﺭﺍ ﻭﺍﺭﺩ ﮐﻨﻴﺪ.
ﺍﺭﺳﺎﻝ ﺍﻳﻤﻴﻞ ﺑﺎ ﺍﺳﺘﻔﺎﺩﻩ ﺍﺯ ﺍﺷﺘﺮﺍک ﺟﺪﻳﺪ ﺟﻬﺖ ﺍﺭﺳﺎﻝ/ﺩﺭﻳﺎﻓﺖ ﺍﻳﻤﻴﻞ ،ﺑﺎﻳﺪ ﻳﮏ ﺍﺷﺘﺮﺍک ﺍﻳﻤﻴﻞ ﺗﻨﻈﻴﻢ ﮐﻨﻴﺪ. 1ﻣﻨﻮ ﺭﺍ ﻓﺸﺎﺭ ﺩﺍﺩﻩ ،ﭘﻴﺎﻡ ﺭﺳﺎﻧﯽ ﻭ ﺳﭙﺲ ﺍﻳﺠﺎﺩ ﭘﻴﺎﻡ ﺭﺍ ﺍﻧﺘﺨﺎﺏ ﮐﻨﻴﺪ. 2ﺍﻳﻤﻴﻞ ﺭﺍ ﺍﻧﺘﺨﺎﺏ ﮐﻨﻴﺪ ،ﻳﮏ ﺍﻳﻤﻴﻞ ﺟﺪﻳﺪ ﺑﺎﺯ ﻣﯽ ﺷﻮﺩ. 3ﻳﮏ ﻣﻮﺿﻮﻉ ﻭﺍﺭﺩ ﮐﻨﻴﺪ. 4ﭘﻴﺎﻡ ﺧﻮﺩ ﺭﺍ ﻭﺍﺭﺩ ﮐﻨﻴﺪ. 5ﮔﺰﻳﻨﻪ ﻫﺎ ﺭﺍ ﻓﺸﺎﺭ ﺩﻫﻴﺪ ،ﻭﺍﺭﺩ ﮐﺮﺩﻥ ﺭﺍ ﺑﺮﺍی ﺍﻓﺰﻭﺩﻥ ﻳﮏ ﺗﺼﻮﻳﺮ، ﮐﻠﻴﭗ ﺗﺼﻮﻳﺮی ،ﮐﻠﻴﭗ ﺻﻮﺗﯽ، ﮐﺎﺭﺕ ﻭﻳﺰﻳﺖ ،ﺑﺮﻧﺎﻣﻪ ﺯﻣﺎﻧﯽ ﻳﺎ ﻳﮏ ﻳﺎﺩﺩﺍﺷﺖ ﺍﻧﺘﺨﺎﺏ ﮐﻨﻴﺪ.
ﺣﺎﻟﺖ ﺩﺳﺘﯽ ﻭﺭﻭﺩ ﺍﻟﻔﺒﺎ ﭘﻮﺷﻪ ﻫﺎی ﭘﻴﺎﻡ ﺍﻳﻦ ﺣﺎﻟﺖ ﺑﻪ ﺷﻤﺎ ﺍﻣﮑﺎﻥ ﻣﯽ ﺩﻫﺪ ﺣﺮﻭﻑ ﺭﺍ ﺑﺎ ﻓﺸﺎﺭ ﺩﺍﺩﻥ ﮐﻠﻴﺪ ﻣﺮﺑﻮﻁ ﺑﻪ ﻫﺮ ﺣﺮﻑ ﻭﺍﺭﺩ ﮐﻨﻴﺪ .ﮐﻠﻴﺪ ﻣﺮﺑﻮﻃﻪ ﺭﺍ ﻳﮏ ﺑﺎﺭ ،ﺩﻭ ﺑﺎﺭ ،ﺳﻪ ﻳﺎ ﭼﻬﺎﺭ ﺑﺎﺭ ﻓﺸﺎﺭ ﻣﯽ ﺩﻫﻴﺪ ﺗﺎ ﺯﻣﺎﻧﯽ ﮐﻪ ﺣﺮﻑ ﻣﻮﺭﺩ ﻧﻈﺮ ﻇﺎﻫﺮ ﺷﻮﺩ. ﻣﻨﻮ ﺭﺍ ﻓﺸﺎﺭ ﺩﻫﻴﺪ ،ﭘﻴﺎﻡ ﺭﺳﺎﻧﯽ ﺭﺍ ﺍﻧﺘﺨﺎﺏ ﮐﻨﻴﺪ .ﺳﺎﺧﺘﺎﺭ ﭘﻮﺷﻪ ﺍی ﻣﻮﺭﺩ ﺍﺳﺘﻔﺎﺩﻩ ﺩﺭ ﮔﻮﺷﯽ GU230ﻧﺴﺒﺘﺎ ﻭﺍﺿﺢ ﻭ ﻗﺎﺑﻞ ﻓﻬﻢ ﺍﺳﺖ. ﺍﻳﺠﺎﺩ ﭘﻴﺎﻡ -ﺑﻪ ﺷﻤﺎ ﺍﻣﮑﺎﻥ ﻣﯽ ﺩﻫﺪ ﭘﻴﺎﻡ ﻫﺎی ﺟﺪﻳﺪ ﺍﻳﺠﺎﺩ ﮐﻨﻴﺪ.
ﻣﻮﺍﺭﺩ ﺫﺧﻴﺮﻩ ﺷﺪﻩ -ﻣﯽ ﺗﻮﺍﻧﻴﺪ ﺑﻪ ﭘﻴﺎﻡ ﻫﺎی ﺫﺧﻴﺮﻩ ﺷﺪﻩ ،ﺍﻟﮕﻮﻫﺎی ﻣﺘﻨﯽ ﻭ ﺍﻟﮕﻮﻫﺎی ﭼﻨﺪﺭﺳﺎﻧﻪ ﺍی ﺩﺳﺘﺮﺳﯽ ﺩﺍﺷﺘﻪ ﺑﺎﺷﻴﺪ ﻧﻤﺎﺩﻫﺎی ﺍﺣﺴﺎﺳﯽ -ﻓﻬﺮﺳﺘﯽ ﺍﺯ ﻧﻤﺎﺩﻫﺎی ﺍﺣﺴﺎﺳﯽ ﮐﻪ ﺍﺯ ﻗﺒﻞ ﺑﺮﺍی ﭘﺎﺳﺦ ﺳﺮﻳﻊ ﻧﻮﺷﺘﻪ ﺷﺪﻩ ﺍﺳﺖ. ﺭﺳﺎﻧﻪ ﻣﻮﺳﻴﻘﯽ GU230ﻣﺠﻬﺰ ﺑﻪ ﻳﮏ ﭘﺨﺶ ﮐﻨﻨﺪﻩ ﻣﻮﺳﻴﻘﯽ ﺩﺍﺧﻠﯽ ﺍﺳﺖ ﮐﻪ ﻣﯽ ﺗﻮﺍﻧﻴﺪ ﻫﻤﻪ ﻣﻮﺳﻴﻘﯽ ﻫﺎی ﺩﻟﺨﻮﺍﻩ ﺧﻮﺩ ﺭﺍ ﺩﺭ ﺗﻠﻔﻦ ﭘﺨﺶ ﮐﻨﻴﺪ. ﭘﺨﺶ ﺁﻫﻨﮓ 1 2 3 4 ﻣﻨﻮ ﺭﺍ ﻓﺸﺎﺭ ﺩﺍﺩﻩ ﻭ ﺭﺳﺎﻧﻪ ﻭ ﺳﭙﺲ ﻣﻮﺳﻴﻘﯽ ﺭﺍ ﺍﻧﺘﺨﺎﺏ ﮐﻨﻴﺪ.
ﺩﻭﺭﺑﻴﻦ ﮔﺮﻓﺘﻦ ﻋﮑﺲ ﻓﻮﺭی 1 2 3 4 ﻣﻨﻮ ﺭﺍ ﺍﻧﺘﺨﺎﺏ ﮐﺮﺩﻩ ﻭ ﺳﭙﺲ ﺭﺳﺎﻧﻪ ﺭﺍ ﺍﻧﺘﺨﺎﺏ ﮐﻨﻴﺪ .ﺑﺮﺍی ﺑﺎﺯ ﮐﺮﺩﻥ ﻧﻤﺎﻳﺎﺏ ،ﺩﻭﺭﺑﻴﻦ ﺭﺍ ﺍﻧﺘﺨﺎﺏ ﮐﻨﻴﺪ. ﺩﺭ ﺣﺎﻟﯽ ﮐﻪ ﮔﻮﺷﯽ ﺭﺍ ﻧﮕﻪ ﺩﺍﺷﺘﻪ ﺍﻳﺪ ،ﻟﻨﺰ ﺩﻭﺭﺑﻴﻦ ﺭﺍ ﺑﻪ ﺳﻤﺖ ﺳﻮژﻩ ﻣﻮﺭﺩ ﻧﻈﺮ ﺑﮕﻴﺮﻳﺪ. ﺗﻠﻔﻦ ﺭﺍ ﻃﻮﺭی ﻧﮕﻪ ﺩﺍﺭﻳﺪ ﮐﻪ ﺳﻮژﻩ ﻣﻮﺭﺩ ﻧﻈﺮ ﻋﮑﺲ ﺭﺍ ﺩﺭ ﮐﺎﺩﺭ ﺩﺍﺷﺘﻪ ﺑﺎﺷﻴﺪ. ﻭﺳﻂ ﺑﺮﺍی ﮔﺮﻓﺘﻦ ﻋﮑﺲ ،ﮐﻠﻴﺪ ﺭﺍ ﻓﺸﺎﺭ ﺩﻫﻴﺪ. ﺩﻭﺭﺑﻴﻦ ﻓﻴﻠﻤﺒﺮﺩﺍﺭی ﻓﻴﻠﻤﺒﺮﺩﺍﺭی ﻓﻮﺭی 1ﺩﺭ ﺻﻔﺤﻪ ﺁﻣﺎﺩﻩ ﺑﻪ ﮐﺎﺭ ،ﻣﻨﻮ ﻭ ﺳﭙﺲ ﺭﺳﺎﻧﻪ ﺭﺍ ﺍﻧﺘﺨﺎﺏ ﮐﻨﻴﺪ. 2ﻓﻴﻠﻢ ﺭﺍ ﺍﻧﺘﺨﺎﺏ ﮐﻨﻴﺪ.
ﺿﺒﻂ ﺍﺯ ﺭﺍﺩﻳﻮ 1ﺩﺭ ﺣﺎﻟﯽ ﮐﻪ ﺑﻪ ﺭﺍﺩﻳﻮ ﮔﻮﺵ ﻣﯽ ﺩﻫﻴﺪ ،ﮐﻠﻴﺪ ﻭﺳﻂ ﺭﺍ ﻓﺸﺎﺭ ﺩﻫﻴﺪ. 2ﺯﻣﺎﻥ ﺿﺒﻂ ﺩﺭ ﺗﻠﻔﻦ ﺷﻤﺎ ﻧﻤﺎﻳﺶ ﺩﺍﺩﻩ . ﻣﯽ ﺷﻮﺩ .ﺑﺮﺍی ﺗﻮﻗﻒ ﺿﺒﻂ، ﻭﻗﺘﯽ ﺿﺒﻂ ﺍﻧﺠﺎﻡ ﺷﺪ ،ﻣﺤﺘﻮﺍی ﺿﺒﻂ ﺷﺪﻩ ﺑﻪ ﺻﻮﺭﺕ ﻓﺎﻳﻞ mp3ﺩﺭ ﮔﺎﻟﺮی ﺫﺧﻴﺮﻩ ﻣﯽ ﺷﻮﺩ. 3ﻭﻗﺘﯽ ﺿﺒﻂ ﺍﻧﺠﺎﻡ ﺷﺪ ،ﮔﺰﻳﻨﻪ ﺭﺍ ﺍﻧﺘﺨﺎﺏ ﮐﺮﺩﻩ ﻭ ﺳﭙﺲ ﺍﺯ ﺑﻴﻦ ﮔﺰﻳﻨﻪ ﻫﺎی ﭘﺨﺶ ،ﺣﺬﻑ ،ﻭﻳﺮﺍﻳﺶ ﺻﺪﺍ، ﺍﺳﺘﻔﺎﺩﻩ ﺑﻪ ﻋﻨﻮﺍﻥ ،ﺗﻐﻴﻴﺮ ﻧﺎﻡ ﻓﺎﻳﻞ، ﺍﻃﻼﻋﺎﺕ ﻳﺎ ﺍﺭﺳﺎﻝ ﺍﺯ ﻃﺮﻳﻖ ﺍﻧﺘﺨﺎﺏ ﮐﻨﻴﺪ.
ﺗﺼﺎﻭﻳﺮ ﻣﻦ ﺑﺎﺯی ﻫﺎ ﻭ ﺑﺮﻧﺎﻣﻪ ﻫﺎی ﻣﻦ ﺗﺼﺎﻭﻳﺮ ﺣﺎﻭی ﭘﻮﺷﻪ ﺍی ﺍﺯ ﺗﺼﺎﻭﻳﺮ ﭘﻴﺶ ﻓﺮﺽ ﺗﻠﻔﻦ ،ﺗﺼﺎﻭﻳﺮی ﮐﻪ ﺧﻮﺩ ﺩﺭ ﺗﻠﻔﻦ ﺑﺎﺭﮔﻴﺮی ﮐﺮﺩﻩ ﻭ ﺑﺎ ﺩﻭﺭﺑﻴﻦ ﺗﻠﻔﻦ ﮔﺮﻓﺘﻪ ﺍﻳﺪ ﻣﯽ ﺑﺎﺷﺪ. ﮔﻮﺷﯽ GU230ﺷﻤﺎ ﺍﺯ ﻗﺒﻞ ﺑﺎ ﺑﺎﺯی ﻫﺎﻳﯽ ﺍﺭﺍﺋﻪ ﺷﺪﻩ ﺍﺳﺖ ﺗﺎ ﺑﺎ ﺍﺳﺘﻔﺎﺩﻩ ﺍﺯ ﺁﻥ ﻫﺎ ﺍﻭﻗﺎﺕ ﻓﺮﺍﻏﺖ ﺧﻮﺩ ﺭﺍ ﭘﺮ ﮐﻨﻴﺪ .ﭼﻨﺎﻧﭽﻪ ﺑﺎﺯی ﻳﺎ ﺑﺮﻧﺎﻣﻪ ﺍﺿﺎﻓﯽ ﺑﺎﺭﮔﻴﺮی ﮐﻨﻴﺪ ،ﺁﻧﻬﺎ ﺩﺭ ﺍﻳﻦ ﭘﻮﺷﻪ ﺫﺧﻴﺮﻩ ﺧﻮﺍﻫﻨﺪ ﺷﺪ. ﺻﺪﺍﻫﺎی ﻣﻦ ﭘﻮﺷﻪ ﺻﺪﺍﻫﺎ ﺣﺎﻭی ﺻﺪﺍﻫﺎی ﭘﻴﺶ ﻓﺮﺽ ،ﺻﺪﺍﻫﺎی ﺿﺒﻂ ﺷﺪﻩ ﺷﻤﺎ ،ﻣﻮﺍﺭﺩ ﺿﺒﻂ ﺷﺪﻩ ﺍﺯ ﺭﺍﺩﻳﻮ ﻭ ﻓﺎﻳﻞ ﻫﺎی ﺻﻮﺗﯽ ﺑﺎﺭﮔﻴﺮی ﺷﺪﻩ ﻣﯽ ﺑﺎﺷﺪ .
ﺍﻓﺰﻭﺩﻥ ﻳﮏ ﻣﻮﺭﺩ ﺑﻪ ﻟﻴﺴﺖ ﮐﺎﺭﻫﺎ ﺗﺒﺪﻳﻞ ﻭﺍﺣﺪ ﮐﺎﺭﻫﺎﻳﯽ ﺭﺍ ﺑﺮﺍی ﺍﻧﺠﺎﻡ ،ﻣﺸﺎﻫﺪﻩ، ﻭﻳﺮﺍﻳﺶ ﻭ ﺍﺿﺎﻓﻪ ﮐﻨﻴﺪ. ﺍﻳﻦ ﮔﺰﻳﻨﻪ ،ﻫﺮ ﻧﻮﻉ ﺍﻧﺪﺍﺯﻩ ﮔﻴﺮی ﺭﺍ ﺑﻪ ﻭﺍﺣﺪی ﮐﻪ ﻣﯽ ﺧﻮﺍﻫﻴﺪ ﺗﺒﺪﻳﻞ ﻣﯽ ﮐﻨﺪ. ﺗﻨﻈﻴﻢ ﺯﻧﮓ ﻫﺸﺪﺍﺭ ﺍﻓﺰﻭﺩﻥ ﻳﮏ ﺷﻬﺮ ﺑﻪ ﺳﺎﻋﺖ ﺟﻬﺎﻧﯽ ﻣﯽ ﺗﻮﺍﻧﻴﺪ ﺗﺎ 5ﺳﺎﻋﺖ ﺯﻧﮓ ﺩﺍﺭ ﺗﻨﻈﻴﻢ ﮐﻨﻴﺪ ﮐﻪ ﺭﺃﺱ ﺳﺎﻋﺘﯽ ﺧﺎﺹ ﺑﻪ ﺻﺪﺍ ﺩﺭﺁﻳﻨﺪ. ﻣﯽ ﺗﻮﺍﻧﻴﺪ ﺷﻬﺮ ﻣﻮﺭﺩ ﻧﻈﺮ ﺧﻮﺩ ﺭﺍ ﺑﻪ ﻟﻴﺴﺖ ﺳﺎﻋﺖ ﺟﻬﺎﻧﯽ ﺍﺿﺎﻓﻪ ﮐﻨﻴﺪ. ﻫﻤﭽﻨﻴﻦ ﻣﯽ ﺗﻮﺍﻧﻴﺪ ﺯﻣﺎﻥ ﻓﻌﻠﯽ ﮔﺮﻳﻨﻮﻳﭻ ) (GMTﻭ ﺷﻬﺮﻫﺎی ﻣﻬﻢ ﺟﻬﺎﻥ ﺭﺍ ﺑﺮﺭﺳﯽ ﮐﻨﻴﺪ.
ﺩﺭ ﺍﻳﻦ ﺑﺮﻧﺎﻣﻪ ﮔﺰﻳﻨﻪ ﻫﺎی ﺯﻳﺮ ﻭﺟﻮﺩ ﺩﺍﺭﺩ. • ﻣﺨﺎﻃﺒﻴﻦ ﺍﻳﻦ ﮔﺰﻳﻨﻪ ﺑﻪ ﮐﺎﺭﺑﺮ ﺍﻣﮑﺎﻥ ﻣﯽ ﺩﻫﺪ ﻣﺨﺎﻃﺐ ﺭﺍ ﺍﺯ ﺩﻓﺘﺮﭼﻪ ﺗﻠﻔﻦ ﮔﻮﺷﯽ ﺍﻧﺘﺨﺎﺏ ﮐﺮﺩﻩ ﻭ ﺍﻋﺘﺒﺎﺭ ﺗﻤﺎﺱ ﺭﺍ ﺑﻪ ﻭی ﺍﻧﺘﻘﺎﻝ ﺩﻫﺪ. • ﮐﺪ ﺍﻣﻨﻴﺘﯽ ﺭﻭﺷﻦ/ﺧﺎﻣﻮﺵ ﮐﺎﺭﺑﺮ ﻣﯽ ﺗﻮﺍﻧﺪ ﺑﺎ ﺍﻳﻦ ﮔﺰﻳﻨﻪ، ﺍﺳﺘﻔﺎﺩﻩ ﺍﺯ ﺑﺮﻧﺎﻣﻪ ﺍﻧﺘﻘﺎﻝ ﺍﻋﺘﺒﺎﺭ ﺭﺍ ﻣﺤﺎﻓﻈﺖ ﮐﻨﺪ .ﺍﮔﺮ ﮐﺪ ﺍﻣﻨﻴﺘﯽ ﻓﻌﺎﻝ ﺑﺎﺷﺪ )ﺭﻭﺷﻦ( ،ﺑﺮﺍی ﺍﻣﻨﻴﺖ ﺑﻴﺸﺘﺮ، ﻗﺒﻞ ﺍﺯ ﺍﻧﺘﻘﺎﻝ ﺍﻋﺘﺒﺎﺭ ﺗﻤﺎﺱ ،ﮐﺪ ﺍﻣﻨﻴﺘﯽ ﺩﺭﺧﻮﺍﺳﺖ ﻣﯽ ﺷﻮﺩ.
ﻗﺎﺑﻠﻴﺖ ﺍﺗﺼﺎﻝ ﺗﻐﻴﻴﺮ ﺗﻨﻈﻴﻤﺎﺕ ﺍﺗﺼﺎﻝ ﺣﺎﻟﺖ ﺍﺗﺼﺎﻝ .USB 1ﺫﺧﻴﺮﻩ ﺍﻧﺒﻮﻩ :ﺍﻳﻦ ﮔﺰﻳﻨﻪ ﺭﺍ ﺍﻧﺘﺨﺎﺏ ﮐﺮﺩﻩ ﻭ ﮔﻮﺷﯽ ﺭﺍ ﺑﻪ ﺭﺍﻳﺎﻧﻪ ﻭﺻﻞ ﮐﻨﻴﺪ ﻭ ﻓﺎﻳﻞ ﻫﺎی ﻣﻮﺭﺩ ﻧﻈﺮ ﺭﺍ ﺑﺎ ﺍﺳﺘﻔﺎﺩﻩ ﺍﺯ ﻗﺎﺑﻠﻴﺖ ﮐﺸﻴﺪﻥ ﻭ ﺭﻫﺎ ﮐﺮﺩﻥ ﺩﺭ ﭘﻮﺷﻪ ﺩﺳﺘﮕﺎﻩ ﺟﺪﺍﺷﺪﻧﯽ GU230ﺑﺮﻳﺰﻳﺪ. :PC Suite 2ﺍﻳﻦ ﮔﺰﻳﻨﻪ ﺭﺍ ﺍﻧﺘﺨﺎﺏ ﮐﺮﺩﻩ ﻭ ﮔﻮﺷﯽ ﺭﺍ ﺩﺭ ﺣﺎﻟﺖ PCSyncﺑﻪ ﺭﺍﻳﺎﻧﻪ ﻭﺻﻞ ﮐﻨﻴﺪ. 3ﻫﻤﻴﺸﻪ ﺳﺆﺍﻝ ﺷﻮﺩ :ﺑﺎ ﺍﻧﺘﺨﺎﺏ ﺍﻳﻦ ﮔﺰﻳﻨﻪ ،ﻣﯽ ﺗﻮﺍﻧﻴﺪ ﻫﺮ ﺑﺎﺭ ﮐﻪ ﮔﻮﺷﯽ ﺑﻪ ﺭﺍﻳﺎﻧﻪ ﻭﺻﻞ ﻣﯽ ﺷﻮﺩ ،ﺣﺎﻟﺖ ﺭﺍ ﺍﻧﺘﺨﺎﺏ ﮐﻨﻴﺪ.
ﺍﺭﺗﺒﺎﻁ ﺑﺎ ﺩﺳﺘﮕﺎﻩ ﺑﻠﻮﺗﻮﺙ ﺩﻳﮕﺮ ﺑﺎ ﻣﺮﺗﺒﻂ ﮐﺮﺩﻥ GU230ﻭ ﺩﺳﺘﮕﺎﻩ ﺩﻳﮕﺮ ،ﻫﺮ ﺑﺎﺭ ﮐﻪ ﺍﺯ ﻃﺮﻳﻖ ﺑﻠﻮﺗﻮﺙ ﺑﻪ ﮔﻮﺷﯽ ﺩﻳﮕﺮ ﻭﺻﻞ ﻣﯽ ﺷﻮﻳﺪ ،ﺗﻠﻔﻦ ﺷﻤﺎ ﻳﮏ ﺭﻣﺰ ﻭﺭﻭﺩ ﺑﻪ ﻃﻮﺭ ﭘﻴﺶ ﻓﺮﺽ ﺍﻳﺠﺎﺩ ﻣﯽ ﮐﻨﺪ. 1ﺑﺮﺭﺳﯽ ﮐﻨﻴﺪ ﮐﻪ ﺑﻠﻮﺗﻮﺙ ﮔﻮﺷﯽ ﺭﻭﺷﻦ ﺑﻮﺩﻩ ﻭ ﻗﺎﺑﻞ ﺭﻭﻳﺖ ﺑﺎﺷﺪ .ﻣﯽ ﺗﻮﺍﻧﻴﺪ ﺗﻨﻈﻴﻤﺎﺕ ﻣﺮﺑﻮﻁ ﺑﻪ ﻗﺎﺑﻞ ﺭﺅﻳﺖ ﺑﻮﺩﻥ ﺧﻮﺩ ﺭﺍ ﺩﺭ ﻣﻨﻮی ﺗﻨﻈﻴﻤﺎﺕ ﺑﻠﻮﺗﻮﺙ ﺑﺎ ﺍﻧﺘﺨﺎﺏ ﻗﺎﺑﻞ ﺭﺅﻳﺖ ﺑﻮﺩﻥ ﻣﻦ ﻭ ﺳﭙﺲ ﻗﺎﺑﻞ ﺭﻭﻳﺖ ﺗﻐﻴﻴﺮ ﺩﻫﻴﺪ. 2ﮔﺰﻳﻨﻪ ﺩﺳﺘﮕﺎﻩ ﻓﻌﺎﻝ ﺭﺍ ﺍﺯ ﻣﻨﻮی ﺑﻠﻮﺗﻮﺙ ﺍﻧﺘﺨﺎﺏ ﮐﻨﻴﺪ. 3ﮔﻮﺷﯽ GU230ﺩﺳﺘﮕﺎﻩ ﻫﺎ ﺭﺍ ﺟﺴﺘﺠﻮ ﻣﯽ ﮐﻨﺪ .
ﻧﺼﺐ LG PC Suiteﺩﺭ ﺭﺍﻳﺎﻧﻪ 1ﺑﻪ ﺳﺎﻳﺖ www.lg.comﺭﻓﺘﻪ ﻭ ﺍﺑﺘﺪﺍ ) Middle Eastﺧﺎﻭﺭﻣﻴﺎﻧﻪ( ﻭ ﺳﭙﺲ ﮐﺸﻮﺭ ﺧﻮﺩ ﺭﺍ ﺍﻧﺘﺨﺎﺏ ﻧﻤﺎﻳﻴﺪ. 2ﻣﻨﻮی ) Productsﻣﺤﺼﻮﻻﺕ( ﺭﺍ ﺍﻧﺘﺨﺎﺏ ﮐﺮﺩﻩ ﻭ ﺳﭙﺲ & Manual ) Softwareﺭﺍﻫﻨﻤﺎ ﻭ ﻧﺮﻡ ﺍﻓﺰﺍﺭ( ﺭﺍ ﺍﻧﺘﺨﺎﺏ ﮐﻨﻴﺪ ،ﺭﻭی Go to Manual & S/W download ) sectionﺑﺮﻭ ﺑﻪ ﺑﺨﺶ ﺑﺎﺭﮔﻴﺮی ﺭﺍﻫﻨﻤﺎ ﻭ ﻧﺮﻡ ﺍﻓﺰﺍﺭ( ﮐﻠﻴﮏ ﮐﻨﻴﺪ. ) Yesﺑﻠﻪ( ﺭﺍ ﮐﻠﻴﮏ ﮐﺮﺩﻩ ﻭ LG ) PC Suite installerﻧﺼﺐ ﮐﻨﻨﺪﻩ (LG PC Suiteﻇﺎﻫﺮ ﻣﯽ ﺷﻮﺩWindows XP,) . Windows Media Player ﻭ ﺑﻴﺸﺘﺮ(.
ﺗﻐﻴﻴﺮ ﺗﻨﻈﻴﻤﺎﺕ ﺻﻔﺤﻪ ﻧﻤﺎﻳﺶ ﺗﻨﻈﻴﻤﺎﺕ ﻧﻤﺎﻳﺸﮕﺮ ﺗﻠﻔﻦ ﺭﺍ ﺗﻐﻴﻴﺮ ﺩﻫﻴﺪ. ﺗﻐﻴﻴﺮ ﺗﻨﻈﻴﻤﺎﺕ ﺍﻣﻨﻴﺘﯽ ﺗﻨﻈﻴﻤﺎﺕ ﺍﻣﻨﻴﺘﯽ ﺧﻮﺩ ﺭﺍ ﺗﻐﻴﻴﺮ ﺩﻫﻴﺪ ﺗﺎ ﺑﺘﻮﺍﻧﻴﺪ ﺍﺯ ﮔﻮﺷﯽ GU230ﻭ ﺍﻃﻼﻋﺎﺕ ﻣﻬﻢ ﺁﻥ ﻣﺤﺎﻓﻈﺖ ﮐﻨﻴﺪ. • ﺩﺭﺧﻮﺍﺳﺖ ﮐﺪ ﭘﻴﻦ -ﺍﻧﺘﺨﺎﺏ ﮐﻨﻴﺪ ﮐﻪ ﻫﺮ ﺑﺎﺭ ﮐﻪ ﮔﻮﺷﯽ ﺭﻭﺷﻦ ﻣﯽ ﺷﻮﺩ ،ﮐﺪ ﭘﻴﻦ ﺩﺭﺧﻮﺍﺳﺖ ﺷﻮﺩ. • ﻗﻔﻞ ﮔﻮﺷﯽ -ﻳﮏ ﮐﺪ ﺍﻣﻨﻴﺘﯽ ﺭﺍ ﺑﺮﺍی ﻗﻔﻞ ﮐﺮﺩﻥ ﺗﻠﻔﻦ ﺍﻧﺘﺨﺎﺏ ﮐﻨﻴﺪ :ﻫﻨﮕﺎﻡ ﺭﻭﺷﻦ ﺷﺪﻥ ،ﻫﻨﮕﺎﻡ ﺗﻌﻮﻳﺾ ﺳﻴﻢ ﻳﺎ ﻓﻮﺭﺍً. • ﺗﻐﻴﻴﺮ ﮐﺪﻫﺎ -ﮐﺪ ﺍﻣﻨﻴﺘﯽ ،ﮐﺪ ﭘﻴﻦ ،ﮐﺪ ﭘﻴﻦ 2ﻭ ﮐﺪ ATMTﺭﺍ ﺗﻐﻴﻴﺮ ﺩﻫﻴﺪ.
ﺩﺳﺘﻮﺭﺍﻟﻌﻤﻞ ﻫﺎی ﺍﺳﺘﻔﺎﺩﻩ ﺍﻳﻤﻦ ﻭ ﻣﻮﺛﺮ ﻗﺮﺍﺭ ﮔﺮﻓﺘﻦ ﺩﺭ ﻣﻌﺮﺽ ﺍﻧﺮژی ﻓﺮﮐﺎﻧﺲ ﺭﺍﺩﻳﻮﻳﯽ ﺍﻃﻼﻋﺎﺕ ﻗﺮﺍﺭﮔﺮﻓﺘﻦ ﺩﺭ ﻣﻌﺮﺽ ﺍﻣﻮﺍﺝ ﺭﺍﺩﻳﻮﻳﯽ ﻭ ﺿﺮﻳﺐ ﺟﺬﺏ ﻭﻳﮋﻩ )(SAR ﺍﻳﻦ ﮔﻮﺷﯽ ﺗﻠﻔﻦ ﻫﻤﺮﺍﻩ ﻣﺪﻝ GU230 ﺑﻪ ﮔﻮﻧﻪ ﺍی ﻃﺮﺍﺣﯽ ﺷﺪﻩ ﺍﺳﺖ ﮐﻪ ﺗﺎﺑﻊ ﻣﻘﺮﺭﺍﺕ ﻭ ﺷﺮﺍﻳﻂ ﻻﺯﻡ ﻣﺮﺑﻮﻁ ﺑﻪ ﻗﺮﺍﺭ ﮔﺮﻓﺘﻦ ﺩﺭ ﻣﻌﺮﺽ ﺍﻣﻮﺍﺝ ﺭﺍﺩﻳﻮﻳﯽ ﺑﺎﺷﺪ. ﺍﻳﻦ ﺷﺮﺍﻳﻂ ﻻﺯﻡ ﻣﺒﺘﻨﯽ ﺑﺮ ﺩﺳﺘﻮﺭﺍﻟﻌﻤﻞ ﻫﺎی ﻋﻠﻤﯽ ﺍﺳﺖ ﺍﺯ ﺟﻤﻠﻪ ﺍﺳﺘﻔﺎﺩﻩ ﺍﺯ ﻟﺒﻪ ﻫﺎی ﺍﻳﻤﻨﯽ ﮐﻪ ﺑﻪ ﮔﻮﻧﻪ ﺍی ﻃﺮﺍﺣﯽ ﺷﺪﻩ ﺍﻧﺪ ﮐﻪ ﺍﻳﻤﻨﯽ ﮐﻠﻴﻪ ﺍﻓﺮﺍﺩ ،ﺻﺮﻓﻨﻈﺮ ﺍﺯ ﺳﻦ ﻭ ﻭﺿﻊ ﺳﻼﻣﺘﯽ ﺁﻧﻬﺎ ،ﺭﺍ ﺗﻀﻤﻴﻦ ﻣﯽ ﮐﻨﺪ.
ﺩﺳﺘﻮﺭﺍﻟﻌﻤﻞ ﻫﺎی ﺍﺳﺘﻔﺎﺩﻩ ﺍﻳﻤﻦ ﻭ ﻣﻮﺛﺮ )ﺍﺩﺍﻣﻪ( ﻣﺮﺍﻗﺒﺖ ﻭ ﻧﮕﻬﺪﺍﺭی ﺍﺯ ﺩﺳﺘﮕﺎﻩ ﻫﺸﺪﺍﺭ:ﻓﻘﻂ ﺍﺯ ﺑﺎﺗﺮی ﻫﺎ، ﺷﺎﺭژﺭﻫﺎ ﻭ ﺗﺠﻬﻴﺰﺍﺕ ﺟﺎﻧﺒﯽ ﮐﻪ ﺑﺮﺍی ﺍﺳﺘﻔﺎﺩﻩ ﺑﺎ ﺍﻳﻦ ﻣﺪﻝ ﺧﺎﺹ ﺗﻮﺻﻴﻪ ﺷﺪﻩ ﺍﻧﺪ ﺍﺳﺘﻔﺎﺩﻩ ﮐﻨﻴﺪ .ﺍﺳﺘﻔﺎﺩﻩ ﺍﺯ ﺳﺎﻳﺮ ﺍﻧﻮﺍﻉ ﺗﺠﻬﻴﺰﺍﺕ ،ﺑﻪ ﻏﻴﺮ ﺍﺯ ﺍﻧﻮﺍﻉ ﺗﻮﺻﻴﻪ ﺷﺪﻩ ،ﻣﻤﮑﻦ ﺍﺳﺖ ﺑﺎﻋﺚ ﺑﺎﻃﻞ ﺷﺪﻥ ﺿﻤﺎﻧﺖ ﻧﺎﻣﻪ ﺷﺪﻩ ﻭ ﺧﻄﺮ ﺁﻓﺮﻳﻦ ﺑﺎﺷﺪ. • • • • • • 22 ﺍﺯ ﺑﺎﺯ ﮐﺮﺩﻥ ﺍﻳﻦ ﺩﺳﺘﮕﺎﻩ ﺍﮐﻴﺪﺍً ﺧﻮﺩﺩﺍﺭی ﮐﻨﻴﺪ .ﭼﻨﺎﻧﭽﻪ ﮔﻮﺷﯽ ﻧﻴﺎﺯ ﺑﻪ ﺗﻌﻤﻴﺮ ﺩﺍﺷﺘﻪ ﺑﺎﺷﺪ ،ﻓﻘﻂ ﺑﻪ ﺗﮑﻨﺴﻴﻦ ﻫﺎی ﻣﺠﺎﺯ ﻣﺮﺍﺟﻌﻪ ﮐﻨﻴﺪ.
• ﺍﺯ ﻗﺮﺍﺭ ﺩﺍﺩﻥ ﮔﻮﺷﯽ ﺩﺭ ﻣﻌﺮﺽ ﻣﺎﻳﻌﺎﺕ ﻳﺎ ﺭﻃﻮﺑﺖ ﺧﻮﺩﺩﺍﺭی ﮐﻨﻴﺪ. • ﺍﺯ ﻟﻮﺍﺯﻡ ﺟﺎﻧﺒﯽ ﻣﺎﻧﻨﺪ ﻫﺪﻓﻮﻥ ﺑﺎ ﺍﺣﺘﻴﺎﻁ ﺍﺳﺘﻔﺎﺩﻩ ﮐﻨﻴﺪ .ﺑﯽ ﺩﻟﻴﻞ ﺑﻪ ﺁﻧﺘﻦ ﺗﻠﻔﻦ ﺩﺳﺖ ﻧﺰﻧﻴﺪ. ﺍﺳﺘﻔﺎﺩﻩ ﺑﻬﻴﻨﻪ ﺍﺯ ﮔﻮﺷﯽ ﺍﺑﺰﺍﺭﻫﺎی ﺍﻟﮑﺘﺮﻭﻧﻴﮏ • ﺑﺪﻭﻥ ﺍﺟﺎﺯﻩ ﺍﺯ ﻣﺴﺌﻮﻟﻴﻦ ﻣﺮﺑﻮﻃﻪ ،ﺍﺯ ﺗﻠﻔﻦ ﻫﻤﺮﺍﻩ ﺩﺭ ﻣﺠﺎﻭﺭﺕ ﺗﺠﻬﻴﺰﺍﺕ ﭘﺰﺷﮑﯽ ﺍﺳﺘﻔﺎﺩﻩ ﻧﮑﻨﻴﺪ .ﺍﺯ ﻗﺮﺍﺭ ﺩﺍﺩﻥ ﺗﻠﻔﻦ ﻫﻤﺮﺍﻩ ﺧﻮﺩ ﺭﻭی ﻣﺮﮐﺰ ﺗﺤﺮﻳﮑﯽ ﻗﻠﺐ ،ﻳﻌﻨﯽ ﺩﺭ ﺟﻴﺐ ﺟﻠﻮی ﭘﻴﺮﺍﻫﻦ، ﺧﻮﺩﺩﺍﺭی ﮐﻨﻴﺪ. • ﺑﺮﺧﯽ ﺍﺯ ﻭﺳﺎﻳﻞ ﮐﻤﮏ ﺷﻨﻮﺍﻳﯽ ﻣﻤﮑﻦ ﺍﺳﺖ ﺩﺭ ﺍﺛﺮ ﻣﺠﺎﻭﺭﺕ ﺑﺎ ﺗﻠﻔﻦ ﻫﺎی ﻫﻤﺮﺍﻩ ﺩﭼﺎﺭ ﺍﺧﺘﻼﻝ ﮔﺮﺩﻧﺪ.
ﺩﺳﺘﻮﺭﺍﻟﻌﻤﻞ ﻫﺎی ﺍﺳﺘﻔﺎﺩﻩ ﺍﻳﻤﻦ ﻭ ﻣﻮﺛﺮ )ﺍﺩﺍﻣﻪ( ﺻﺪﺍ ﺭﺍ ﺁﻥ ﻗﺪﺭ ﺯﻳﺎﺩ ﻧﮑﻨﻴﺪ ﮐﻪ ﺑﻪ ﺷﻨﻮﺍﻳﯽ ﺷﻤﺎ ﺁﺳﻴﺐ ﻭﺍﺭﺩ ﮐﻨﺪ. ﺍﮔﺮ ﺑﺮﺍی ﻣﺪﺗﯽ ﻃﻮﻻﻧﯽ ﺩﺭ ﻣﻌﺮﺽ ﺻﺪﺍی ﺑﻠﻨﺪ ﻗﺮﺍﺭ ﺑﮕﻴﺮﻳﺪ ،ﻣﻤﮑﻦ ﺍﺳﺖ ﺷﻨﻮﺍﻳﯽ ﺷﻤﺎ ﺁﺳﻴﺐ ﺑﺒﻴﻨﺪ .ﺑﻨﺎﺑﺮﺍﻳﻦ ﺗﻮﺻﻴﻪ ﻣﯽ ﮐﻨﻴﻢ ﺍﺯ ﺭﻭﺷﻦ ﻳﺎ ﺧﺎﻣﻮﺵ ﮐﺮﺩﻥ ﮔﻮﺷﯽ ﺩﺭ ﮐﻨﺎﺭ ﮔﻮﺵ ﺧﻮﺩ ﺍﺟﺘﻨﺎﺏ ﮐﻨﻴﺪ .ﻫﻤﭽﻨﻴﻦ ﺗﻮﺻﻴﻪ ﻣﯽ ﮐﻨﻴﻢ ﻣﻴﺰﺍﻥ ﺻﺪﺍی ﻣﻮﺳﻴﻘﯽ ﻭ ﻧﻴﺰ ﺗﻤﺎﺱ ﻫﺎ ﺑﻪ ﺩﺭ ﻳﮏ ﺳﻄﺢ ﻣﻨﺎﺳﺐ ﻭ ﻣﻨﻄﻘﯽ ﺗﻨﻈﻴﻢ ﺷﻮﺩ. ﻧﺎﺣﻴﻪ ﺍﻧﻔﺠﺎﺭ ﺍﺯ ﮐﺎﺭﺑﺮﺩ ﺗﻠﻔﻦ ﻫﻤﺮﺍﻩ ﺩﺭ ﻣﺤﻞ ﻫﺎﻳﯽ ﮐﻪ ﻋﻤﻠﻴﺎﺕ ﺍﻧﻔﺠﺎﺭ ﺩﺭ ﺣﺎﻝ ﺍﻧﺠﺎﻡ ﺍﺳﺖ ﺧﻮﺩﺩﺍﺭی ﮐﻨﻴﺪ .
ﺍﻃﻼﻋﺎﺕ ﺑﻴﺸﺘﺮ ﺑﺎ ﺷﺒﮑﻪ ﻣﺨﺎﺑﺮﺍﺗﯽ ﺧﻮﺩ ﺗﻤﺎﺱ ﺑﮕﻴﺮﻳﺪ. • ﺍﻃﻼﻋﺎﺕ ﺑﺎﺗﺮی ﻭ ﻣﺮﺍﻗﺒﺖ ﺍﺯ ﺁﻥ • • • • • • ﻻﺯﻡ ﻧﻴﺴﺖ ﺷﺎﺭژ ﺑﺎﺗﺮی ﮐﺎﻣﻼ ﺧﺎﻟﯽ ﺷﻮﺩ ﺗﺎ ﺁﻥ ﺭﺍ ﻣﺠﺪﺩﺍ ﺷﺎﺭژ ﮐﻨﻴﺪ. ﺑﺮﺧﻼﻑ ﺳﺎﻳﺮ ﺳﻴﺴﺘﻢ ﻫﺎی ﺑﺎﺗﺮی ،ﻫﻴﭻ ﺗﺄﺛﻴﺮ ﺣﺎﻓﻈﻪ ﺍی ﻭﺟﻮﺩ ﻧﺪﺍﺭﺩ ﮐﻪ ﺑﺘﻮﺍﻧﺪ ﺑﻪ ﻋﻤﻠﮑﺮﺩ ﺑﺎﺗﺮی ﺻﺪﻣﻪ ﻭﺍﺭﺩ ﮐﻨﺪ. ﻓﻘﻂ ﺍﺯ ﺑﺎﺗﺮی ﻫﺎ ﻭ ﺷﺎﺭژﺭﻫﺎی LG ﺍﺳﺘﻔﺎﺩﻩ ﮐﻨﻴﺪ .ﺷﺎﺭژﺭﻫﺎی LGﺑﻪ ﮔﻮﻧﻪ ﺍی ﻃﺮﺍﺣﯽ ﺷﺪﻩ ﺍﻧﺪ ﮐﻪ ﻋﻤﺮ ﺑﺎﺗﺮی ﺭﺍ ﺑﻪ ﺣﺪﺍﮐﺜﺮ ﺑﺮﺳﺎﻧﻨﺪ. ﺍﺯ ﺑﺎﺯ ﮐﺮﺩﻥ ﻳﺎ ﺍﻳﺠﺎﺩ ﻣﺪﺍﺭ ﺍﺗﺼﺎﻝ ﮐﻮﺗﺎﻩ ﺩﺭ ﺑﺎﺗﺮی ﺧﻮﺩﺩﺍﺭی ﮐﻨﻴﺪ.
ﻟﻮﺍﺯﻡ ﺟﺎﻧﺒﯽ ﻟﻮﺍﺯﻡ ﺟﺎﻧﺒﯽ ﻣﺨﺘﻠﻔﯽ ﺑﺮﺍی ﮔﻮﺷﯽ ﺗﻠﻔﻦ ﻫﻤﺮﺍﻩ ﺷﻤﺎ ﻣﻮﺟﻮﺩ ﺍﺳﺖ. ﺍﻳﻦ ﻟﻮﺍﺯﻡ ﺩﺭ ﺯﻳﺮ ﺷﺮﺡ ﺩﺍﺩﻩ ﺷﺪﻩ ﺍﻧﺪ. ﺷﺎﺭژﺭ ﺑﺎﺗﺮی • ﻫﺪﺳﺖ ﺍﺳﺘﺮﻳﻮ • ﮐﺎﺑﻞ ﺩﺍﺩﻩ ﻫﺎ • ﺭﺍﻫﻨﻤﺎی ﮐﺎﺭﺑﺮ ﺗﻮﺟﻪ • ﻫﻤﻴﺸﻪ ﻓﻘﻂ ﺍﺯ ﻟﻮﺍﺯﻡ ﺟﺎﻧﺒﯽ ﺍﺻﻞ LGﺍﺳﺘﻔﺎﺩﻩ ﮐﻨﻴﺪ .ﻋﺪﻡ ﺭﻋﺎﻳﺖ ﺍﻳﻦ ﺍﺻﻞ ﻣﻬﻢ ﻣﻤﮑﻦ ﺍﺳﺖ ﺿﻤﺎﻧﺖ ﻧﺎﻣﻪ ﺭﺍ ﺍﺯ ﺩﺭﺟﻪ ﺍﻋﺘﺒﺎﺭ ﺳﺎﻗﻂ ﮐﻨﺪ. • ﻟﻮﺍﺯﻡ ﺟﺎﻧﺒﯽ ﻣﻤﮑﻦ ﺍﺳﺖ ﺩﺭ ﻧﻮﺍﺣﯽ ﻣﺨﺘﻠﻒ ﻣﺘﻔﺎﻭﺕ ﺑﺎﺷﺪ .ﺑﺮﺍی ﮐﺴﺐ ﺍﻃﻼﻋﺎﺕ ﺑﻴﺸﺘﺮ ،ﻟﻄﻔﺎً ﺑﻪ ﺷﺮﮐﺖ ﻳﺎ ﻧﻤﺎﻳﻨﺪﮔﯽ ﺧﺪﻣﺎﺕ ﻣﺎ ﺩﺭ ﻣﺤﻞ ﺧﻮﺩ ﻣﺮﺍﺟﻌﻪ ﮐﻨﻴﺪ.
ﺍﻃﻼﻋﺎﺕ ﻓﻨﯽ ﻋﻤﻮﻣﯽ ﻧﺎﻡ ﻣﺤﺼﻮﻝGU230 : ﺳﻴﺴﺘﻢ/ GSM 850 / E-GSM 900 : DCS 1800 / PCS 1900 ﺩﻣﺎﻫﺎی ﻣﺤﻴﻂ ﺣﺪﺍﮐﺜﺮ +55 :ﺩﺭﺟﻪ ﺳﺎﻧﺘﯽ ﮔﺮﺍﺩ )ﺩﺷﺎﺭژ( +45ﺩﺭﺟﻪ ﺳﺎﻧﺘﯽ ﮔﺮﺍﺩ )ﺷﺎﺭژ( ﺣﺪﺍﻗﻞ-10 :ﺩﺭﺟﻪ ﺳﺎﻧﺘﯽ ﮔﺮﺍﺩ 27
LG Electronics Inc. LG Twin Towers 20, Yeouido-dong, Yeongdeungpo-gu, Seoul, Korea 150-721 GSM 850 / E-GSM 900 / DCS 1800 / PCS 1900 Quad band Terminal Equipment GU230 R&TTE Directive 1999/5/EC EN 301 489-01 V1.6.1, EN 301 489-07 V1.3.1, EN 301 489-17 V1.2.1 EN 301 511 V9.0.2 EN 50360:2001, EN62209-1:2006 EN 60950-1:2001 EN300328 V1.7.
GU230 User Guide — English This guide will help you understand your new mobile phone. It will provide you with useful explanations of features on your phone.
Getting to Know Your Phone Main screen Call key Dials a phone number and answers incoming calls. 2 Charger, Cable slot, Hands-free connector End/Power key Ends or rejects a call. Turns the phone on/off. Returns to the standby screen when you use the menu.
Installing a Memory Card Lift the memory card cover and insert a microSD card with the gold contact area facing downward. Close the memory card cover so that it clicks shut. To remove the memory card, gently push it as shown in the diagram. Formatting the Memory Card Press Menu and select Settings. Choose Memory manager, select External memory, press Format, and then insert the security code. WARNING: When you format your memory card, all the content will be wiped.
Installing the SIM Card and Charging the Battery Installing the SIM Card When you subscribe to a cellular network, you are provided with a plug-in SIM card loaded with your subscription details, such as your PIN, any optional services available and many others. Important! › The plug-in SIM card can be easily damaged by scratches 1 or bending, so be careful when handling, inserting or removing the card. Keep all SIM cards out of the reach of small children.
Calls Making a Call 1 Key in the number using the keypad. To delete a digit, press CLR. 2 Press to initiate the call. . 3 To end the call, press TIP! To enter + when making an international call, press and hold 0. Making a Call from Your Contacts 1 Select Names from the Standby screen. 2 Using the keypad, enter the first letter of the contact you want to call. For example, for Office, press “6” three times to select the first character, “O” 3 Select Call or press to initiate the call.
Viewing your Call History You can only check the log of missed, received and dialed calls if the network supports Calling Line Identification (CLI) within the service area. Changing the call settings You can set call-specific functions. Press Menu, select Settings and choose Call. • Call divert - Choose whether to divert your calls. • Call barring - Select when you would like calls to be barred. • Fixed dial numbers - Choose a list of numbers that can be called from your phone.
• Save new number - Choose Yes or No. • Slide close setting - Choose End call or Continue call. Contacts Searching for a Contact 1 Select Names from the standby screen. 2 Using the keypad, enter the first letter of the contact you want to call. 3 To scroll through the contacts, use the up and down arrows. Adding a New Contact 1 Press Menu, then select Contacts and choose Names. Then press Options - Add new contact. 2 Enter all the information you have in the fields provided and select Options-Done.
Sending a Message Setting up Your E-mail 1 Press Menu, select Messaging and choose Create message. 2 A new message editor will open. The message editor combines Text message and Multimedia messages into one intuitive and easyto-switch-between editor. The default setting for the message editor is text messages. 3 Enter your message. 4 Choose Options - Insert to add an Image, Video clip, Sound clip, Schedule, Business card, Note, Text field, To-do or Text template. 5 Press Options - Send.
Sending an E-mail Using your New Account To send/receive an email, you should set up an email account. 1 Select Menu, select Messaging and choose Create message. 2 Choose E-mail and a new email will open. 3 Enter a subject. 4 Enter your message. 5 Press Options and select Insert to add an Image, Video Clip, Sound Clip, Business card, Schedule or Note. 6 Press Send to and enter the recipient’s address, or press Options and select Insert - Contact Details to open your contacts list.
ABC Manual Mode This mode allows you to enter letters by pressing the key labeled with the required letter once, twice, three or four times until the letter is displayed. 123 Mode Type numbers using one keystroke per number. You can also add numbers while remaining in letter modes by pressing and holding the desired key. Message Folders Press Menu and select Messaging. The folder structure used on your GU230 is fairly self-explanatory. Create message - Allows you to create new messages.
Media Music Your GU230 has a built-in Music player so you can play all your favorite music. Playing a Song 1 Press Menu and select Media, then choose Music. 2 Choose All tracks then select the song you want to play. 3 Select to pause the song. to skip to the 4 Select next song. 5 Select to skip to the previous song. 6 Select Back to stop the music and return to the music player menu. Creating a Playlist You can create your own playlists by choosing a selection of songs from the All songs folder.
Camera Taking a Quick Photo 5 ”Rec” will appear in the bottom-left corner of the viewfinder and a timer will show the length of your video. 6 Select Stop to stop recording. 1 Select Menu and select Media. Select Camera to open the viewfinder. 2 Holding the phone, point the lens toward the subject of the photo. 3 Position the phone so you can see the subject of your photo. 4 Press the Center key to take a photo.
Recording the Radio Voice Recorder 1 Press the center key while listening to the radio. 2 The recording time is displayed on your phone. If you want to stop the recording, press the . When a recording has been made, the recorded contents will be saved in the Gallery as an mp3 file. 3 When the recording is done, select Option and then choose from Play, Delete, Sound edit, File, Use as or Send via. Use your Voice recorder to record voice memos or other sounds.
My Memory Card My Videos If you have inserted a memory card, it will be displayed as a folder in the Gallery. The Videos folder shows the list of downloaded videos and videos you have recorded on your phone. My Images The Images folder contains a folder of default images on your phone, images downloaded by you, and images taken on your phone’s camera. Others My Sounds Your GU230 comes with preloaded games to keep you amused in your spare time.
Organiser Using the Stopwatch Setting your Alarm This option allows you to use stopwatch functions. You can set up to five alarms to go off at a specified time Converting Units Using the Calendar This can convert many measurements into the unit you want. When you enter this menu, a calendar appears. A square cursor is located on the current date. You can move the cursor to another date using the navigation keys. Adding an Item to Your To-Do List You can view, edit and add tasks to do..
Credit Transfer The credit transfer application is activated for certain countries. This application offers a simple and secure way to transfer call credit to a new contact or a contact from your phonebook. Some of the options for this application are described below. • Contacts This option allows the user to select the contact from the handset phonebook to whom the call credit will be transferred. • Security code on/off User can protect the use of the credit transfer application with this option.
2 PC Suite: Select PC Suite and connect the handset to your computer in PCSync mode. 3 Always ask: Selecting this option will allow you to choose which method to use every time you connect your handset to your computer. Note: To use the USB mass storage function, you will need to insert an external memory card in your phone. Changing Your Bluetooth Settings 1 Press Menu and select Settings - Connectivity. Choose Bluetooth.
4 Choose the device you want to pair with, select Add, enter the passcode and then press the Center key. When you have chosen a device you want to pair with, the handset will then create a password by default every time you connect. 5 Your phone will then connect to the other device. The same passcode will need to be entered on this device. When you have chosen a device you want to pair with, the handset will then create a password by default every time you connect.
Settings Changing Your Profiles You can personalize each profile setting. 1 Choose the Profiles you want and select Edit from Options. 2 If you activate Silent mode, the phone will vibrate only. Using Flight Mode When Flight mode is activated, you will not be able to make calls, connect to the Internet or send messages. Changing Your Date & Time You can set functions relating to the date and time. Changing Your Display Settings You can change the settings for the phone display.
• Anti-theft mobile tracker - When the handset is stolen, handset sends the SMS to the numbers configured by real owner. To activate the ATMT feature, you will need to set ATMT on, and configure the ATMT settings with name, primary number and secondary number. Default ATMT code is “0000.” ATMT SMS will contain information about the stolen phone IMEI, current location (captured as per Cell Broadcast message) & number of the person who is using that handset.
Guidelines for Safe and Efficient Use Exposure to Radio Frequency Energy Radio Wave Exposure and Specific Absorption Rate (SAR) Information This GU230 mobile phone model has been designed to comply with the applicable safety requirements for exposure to radio waves. These requirements are based on scientific guidelines that include safety margins designed to ensure the safety of all users, regardless of age and health.
Guidelines for Safe and Efficient Use (Continued) • The highest SAR value for this phone model tested by DASY4 for use close to the ear is 0.716 W/kg (10 g), and when worn on the body is 1.06 W/kg (10 g). • SAR data information for residents in countries/ regions that have adopted the SAR limit recommended by the Institute of Electrical and Electronics Engineers (IEEE), which is 1.6 W/kg averaged over 1 g of tissue.
• Do not drop. • Do not subject this unit to mechanical vibration or shock. • Switch off the phone in any area where you are required by special regulations. For example, do not use your phone in hospitals as it may affect sensitive medical equipment. • Do not handle the phone with wet hands while it is being charged. It may cause an electric shock and can seriously damage your phone. • Do not charge a handset near flammable material as the handset can become hot and create a fire hazard.
Guidelines for Safe and Efficient Use (Continued) Efficient Phone Operation Electronic Devices • Do not use your mobile phone near medical equipment without requesting permission. Avoid placing the phone over pacemakers, i.e. in your breast pocket. • Some hearing aids might experience disturbance due to mobile phones. • Minor interference may affect TVs, radios, PCs etc. Road Safety Check the laws and regulations on the use of mobile phones in the areas where you drive.
Avoid Damage to Your Hearing Potentially Explosive Atmospheres Damage to your hearing can occur if you are exposed to loud sounds for long periods of time. We therefore recommend that you do not turn the handset on or off when it is close to your ear. We also recommend that music and call volumes are set to a reasonable level. • Do not use the phone at a refueling point. • Do not use near fuel or chemicals.
Guidelines for Safe and Efficient Use (Continued) Children Keep the phone in a safe place out of the reach of small children. It includes small parts which may cause a choking hazard if detached. Emergency Calls Emergency calls may not be available under all mobile networks. You should therefore never depend solely on the phone for emergency calls. Check with your local service provider. 26 Battery Information and Care • You do not need to completely discharge the battery before recharging.
• Recharge the battery if it has not been used for a long time to maximize usability. • Do not expose the battery charger to direct sunlight or use it in places with high humidity, such as in the bathroom. • Do not leave the battery in hot or cold places, as this may deteriorate the battery performance. • There is a risk of explosion if the battery is replaced by an incorrect type. • Dispose of used batteries according to the manufacturer’s instructions. Please recycle when possible.
Accessories Various accessories are available for your mobile phone. These are detailed below. Charger Battery • Stereo headset • Data cable • User Guide NOTE • Always use genuine LG accessories. Failure to do so may invalidate your warranty. • Accessories may be different in different regions. Please check with our regional service company or agent for further enquires.
Technical Data General Product Name: GU230 System: GSM 850 / E-GSM 900 / DCS 1800 / PCS 1900 Ambient Temperatures Max.: +55°C (discharging) +45°C (charging) Min.
LG Electronics Inc. LG Twin Towers 20, Yeouido-dong, Yeongdeungpo-gu, Seoul, Korea 150-721 GSM 850 / E-GSM 900 / DCS 1800 / PCS 1900 Quad band Terminal Equipment GU230 R&TTE Directive 1999/5/EC EN 301 489-01 V1.6.1, EN 301 489-07 V1.3.1, EN 301 489-17 V1.2.1 EN 301 511 V9.0.2 EN 50360:2001, EN62209-1:2006 EN 60950-1:2001 EN300328 V1.7.