LAC-M9600R_ENG ENGLISH CAR CD/MP3/WMA Receiver OWNER'S MANUAL MODEL : LAC-M9600R Please read this instruction booklet before connecting, operating or carefully and completely adjusting this product.
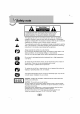
Safety note CAUTION RISK OF ELECTRIC SHOCK DO NOT OPEN TO REDUCE THE RISK OF ELECTRIC SHOCK DO NOT SPLIT COVER(OR BACK) NO USER SERVICEABLE PARTS INSIDE. REFER SERVICING TO QUALIFIED SERVICE PERSONNEL. The lightning flash with the arrowhead symbol, within an equilateral triangle is intended to alert the user about the presence of uninsulated dangerous voltage within the product's enclosure that may be of sufficient magnitude to constitute a risk of electric shock to persons.
note Safety ? A defective or soiled disc inserted into the unit during playback. the disc by holding ? Handle ? Do not touch the surface of the unlabeled side of the disc. Do not stick paper or tape, its inner and outer etc. This unit cannot If use 8cm disc edges. the surface. on Do not expose the disc to direct 8cm the sound to can cause out drop sunlight (use or excessive heat. 12cm discs only).
Safety note / Table of contents Safetynotes...........................................2-4 Tableofcontents.........................................4 Beforeuse.............................................5 Frontpanel.............................................6 Remotecontrol..........................................7 Installation..............................................8 Connectiondiagram.......................................9 Connection.............................................
Before Detaching The front the front panel can 1 Press the 2 Hold the left 3 Pull the front 4 Place the front use panel be detached to (RELEASE) prevent theft. to open the front 2 panel. part of the front panel. panel. panel in the supplied protective case. Notes 3 ? The front panel is a precision piece of equipment and can be damaged by shocks or jolts. For that reason, keep the front panel in its protective case while detached.
Front Panel 12 3 13 4 12 1 POWER 2 ? VOLUME ? ? 6 7 11 10 REMOTE SENSOR 6 EQUALIZER SELECT 7 DISPLAY WINDOW MENU 8 ?EJECTZ MUTE] [VOL./MULTI] (UP/DOWN/LEFT/RIGHT) ?SKIP?mM?/SEARCHmM ? SEEK/ TUNE ? MP3 TRACK +10/-10 ? FOLDER UP/DOWN ? 8 5 [PWR / 5 Driver UP/DOWN MP3 (When connecting 3 MICROPHONE 4 SOURCE MP3 MP3 ? WMA WMA WMA this unit to Multi reader.
Remote control 1 POWER 2 SELECTION / MUTE 3 SOURCE 4 PLAY / PAUSE B/X [PWR] 1 [MENU/SEL] [SRC] 5 INTRO SCAN 6 SHUFFLE 7 ? 2 [SCAN] 11 4 [SHF] MP3 TRACK +10 ? FOLDER UP ? MOVE UP U MP3 MP3 12 5 WMA 6 WMA 13 7 ?CDSKIP/SEARCH?mm 8 10 3 8 14 9 15 ?SEEK/TUNE?mm ? 9? MOVE LEFT 16 [ BAND] ? DRIVER ? ENTER [DRV] 10 VOLUME UP 11 NUMBER / DOWN 12 REPEAT 13 NUMBER 14 ?CDSKIP/SEARCHMM? [#] [RPT] [0 -9] ?SEEK/TUNEMM? ? MOVE RIGHT 15 DISPLAY 16 ? M
Installation Basic Installation Before Bend the claws according to the thickness of the dashboard Front make installing, OFF and remove sure that the the terminal of the ignition switch is set battery to avoid to car short-circuiting. 1 Remove the 2 3 Make the necessary connections. Install the installation sleeve. 4 Install the unit into the installation sleeve. existing receiver unit. panel Removing If there is A A the already the dashboard, it existing must be removed.
Connection Before connecting, make sure that the ignition switch is set to diagram OFF, and remove the battery # terminal to avoid short circuits. A B PHONE (ORANGE) : DIMMER (PINK) IGNITION To cellular phone system. DIMMER SWITCH (RED) IGNITION SWITCH Fuse 20A TO BATTERY(+) (YELLOW) GROUND(-) (BLACK) Filter Box POWER ANTENNA (BLUE) AMPLLIFIER BATTERY (Optional) REMOTE ON C (BLUE/WHITE) POWER ANT CONTROL RELAY 1. WHITE FL+ 2. WHITE/BLACK STRIPE FL3. GRAY FR+ 4.
Connection A B From antenna To the wiring of the vehicle colors of leads. ? BLACK : This lead is for the ? ORANGE : This lead is for the ? PINK : This lead is for the dimmer line connection. ? RED : This lead is for connection to the power switch is set to ACC. ? YELLOW : ground phone connection. line connection. This lead is for connection to the power is supply battery (back-up) BLUE : This lead is for the power antenna connection.
Basic Turning the unit Press PWR/MUTE operation on (POWER/MUTE on the remote control) or any other button. Note When you insert Turning a CD in the CD a turns (POWER/MUTE on on. the unit off Press and hold PWR/MUTE. Insert slot, the unit the remote control.) disc Press Z/OPEN/TILT to open the front panel. The disc is drawn in and playback starts automatically. 1 2 Eject a disc Press Z/OPEN/TILT to open the front loading slot. When the disc is ejected by pressing panel.
Basic Adjusting operation the sound level Press VOL./MULTI 1 (MENU/SEL on the remote control) repeatedly to select the desired mode. Each press changes the modes as follow. USER EQ t BALANCE t FADER t SUB-W t VOL Rotate VOL./MULTI 2 (Press VOLUME the remote on to control) adjust the sound quality. USER EQ ? Adjust the 7-band graphic equalizer and store your own adjustments or right to move to next stage. m/M M? on the remote control.) in the memory. Push VOL.
Basic XDSS/XDSS+ (Extreme Dynamic Sound Press and hold EQ/XDSS/SRS to select XDSS XDSS t XDSS+ XDSS/XDSS+ SRS 1 2 : (Sound t SRS Improve (Focus the Retrieval t or TruBass operation System) XDSS+ t 3D-Stereo WOW) t t By pass treble, bass sound. System) Press and hold EQ/XDSS/SRS to select SRS. Press EQ/XDSS/SRS Focus : ? TruBass : ? 3D-Stereo : ? WOW : ? repeatedly to select sub SRS. Electronically repositions the audio image. Psychoacoustic bass enhancement.
Setup operation Menu Selecting Setup Press and hold VOL./MULTI to enter 1 The menu screen AUDIO DISP y (Display) Push VOL./MULTI left 2 Setup right or HF y (Hands-Free) to scroll ?m m/M M? on the remote (Press menu. (MENU/SEL on remote y through the control.) RDS main menus. 3 Select the desired 4 Push VOL./MULTI up 5 Select the desired function from the sub-menu and press VOL./MULTI to functions details. (Press BAND/DRV on remote control.) 6 Push VOL.
Setup operation AUX In It is possible to use auxiliary equipment with this unit. using auxiliary equipment connected to this unit. Enable : When using a auxiliary equipment. Disable : When not using a auxiliary equipment. Activate the auxiliary setting when ? ? AUX In Att. (Auxiliary In Attenuate) adjust the volume level of each source to prevent radical changes in volume when switching between sources.
Setup operation HF (Hands-Free) MIC Vol (Microphone Volume) microphone volume. Low:T1/2/3/4/5t:High You set the can E.C.M (Echo Cancellation Mode) This decreases any echo phenomena of voice coming from the Bluetooth phone of the other party when working Bluetooth. Set the mode(1-3) to the appropriate condition when talking over the phone. Mode1 / Mode2 / Mode3 Last Call Your unit keeps To make a records of your recently received and dialed calls. call from the last call, press VOL.
Bluetooth Bluetooth wireless connection Using a Your unit supports Bluetooth wireless connections. You wireless link with Starting Your To operation a Bluetooth Bluetooth on can set up a phone. your phone Bluetooth feature may be set to off by default. your car Bluetooth feature, Bluetooth must be turned phone's use on in phone. your Refer to your phone's Pairing your user guide.
Bluetooth Connecting After 1 a operation Bluetooth phone it is necessary to connect your Bluetooth being registered, phone from this unit. Push VOL./MULTI up or down to select the device you want. Uu on the remote control.) (Press You will 2 see a list containing all the Press VOL./MULTI to connect (Press While the BAND/DRV connecting, If you want to operation is connected devices. Bluetooth a the remote phone control.) the "CONNECTING" pop-up is to this unit. displayed.
Bluetooth Answering calls When you receive 1. 2 a call, your phone rings and displays The "CALL FROM" pop-up is displayed. Push VOL./MULTI left or right to select "ACCEPT" (Press operation ?m m/M M? on the remote If you want to receive If you want to reject a an or incoming call message. "REJECT". control.) call, select the "ACCEPT". call, select the "REJECT". a 3 Press VOL./MULTI. 4 The "TALKING" pop-up is displayed. Press "HANG UP" to end the call.
Bluetooth Storing You can a operation call number Store : easily store up to 6 internal entries for later recall at the touch of Push VOL./MULTI up or down to select the Store U u on the remote control.) 1 : incoming a button. call number. (Press Press VOL./MULTI. 2 the BAND/DRV (Press the remote on control.) number you want to save in the memory. When you want to save an international call, press and hold B.T MENU to add "+". To cancel, press and hold again.
Bluetooth operation Bluetooth Profiles In order to Bluetooth technology, devices must be able compatible with following profiles. GAP (Generic Access Profile) HSP (Hands Set Profile) HFP (Hands Free Profile) GAVDP (Generic Audio/Video Distribution Profile) A2DP (Advanced Audio Distribution Profile) AVDTP (Audio/Video Distribution Transport Profile) AVRCP (Audio/Video Distribution Remote Control Profile) use to interpret certain profiles. This unit is GAP GAP is short for Generic Access Profile.
Radio Listening operation to radio stations 1 Press SRC to select the radio. 2 Press BAND Each press repeatedly changes Auto Search 3 control.) : When a as band. follows. FM1 Push VOL./MULTI left station is a Manual Search then to select the modes : FM2 t right. (Press received, searching stops. or Push and hold VOL./MULTI left or Storing can FM3 t MW(AM) right until "MANUAL" appears, and it push repeatedly.
RDS RDS operation Display options In normal RDS enables you to operation the display will indicate the station name.
CD/MP3/WMA Playing The unit an operation Audio CD and MP3/WMA Disc play MP3/WMA formatted recordings on CD-ROM, CD-R or CD-RW discs. playing MP3/WMA recordings, read the notes on MP3/WMA Recordings on page 30. If you change the source, CD play also stops (without ejecting the CD). Next time you select "CD" as a source, CD play starts from where playback was stopped previously. can Before To directly play a file, press NUMBER (#) the remote control and then press the track on number 0-9.
CD/MP3/WMA Random CD Press SHF 1 The (The MP3 operation WMA during playback. appears in the display window. current selected folder on the disc is MP3 WMA played randomly.) The A (All appears in the display window. CD of the music on the disc is played randomly.) Press and hold SHF for about 1 second during playback. The A (All WMA appears in the display window. MP3 of the music on the disc is played randomly.) Press SHF 2 (The random again. playback is cancelled.
USB operation If the plug length of the USB device is under 10mm, the USB device may inserted Playing or a not be correctly connection failure may occur. USB device a 1 Connect 2 your unit's USB port. After "USB CHECKING" appears, one end to the USB port on your USB device and then playback starts plug the other end into automatically. Note The method of files recorded in Moving When driver. a USB memory device is the same as when using a DISC.
USB Downloading still image (PPS) operation files Before 1 starting the following produce, prepare a USB device Press and hold VOL./MULTI to enter Setup menu. 2 Select the DISP menu. 3 Select the PPS Upload. 4 Press VOL./MULTI to confirm. 5 Push VOL./MULTI left MENU/SEL (Press the remote or right Press VOL./MULTI to confirm. Installation is still image. control.
Troubleshooting Cause Symptom Correction Power doesn't Leads and connectors turn properly on. The unit doesn't are not connected. Confirm once more connections The fuse has blown. Rectify the it. Be very are which caused blow, and then replace sure to install the correct fuse of the Noise and other factors that all correct. problem the fuse to operate. are same Turn the unit off and then rating. on. causing the built-in microprocessor to operate incorrectly.
phone compatibility list Bluetooth Bluetooth Phone list and manufacturing company applicable Company List Nokia 8910i LG LG KG800 Nokia 6021 LG LG KU730 Nokia 3230 LG U8210 Nokia 3650 LG KP-4000 Nokia 6210i Motorola E1000 Nokia 6310i Motorola V600 Nokia 6230 Motorola V3 Nokia 6230i Motorola L6 Nokia 6260 Motorola E1 Nokia 6600 Motorola A1000 Nokia 9500 6630 Nokia 6680 Nokia 6681 Nokia N70-1 Nokia 8800 Nokia 8801 Samsung Samsung Samsung Samsung Sams
Specifications MP3/WMA Disc 1. with this unit is limited compatibility / 8 48kHz 22.05 as follows: 48kHz 2. Sampling Frequency (MP3) Bit rate / within 8 320kbps (include VBR) (MP3) 3. CD-R/CD-RW file 4. If you record MP3/WMA files using software which cannot create a FILE SYSTEM, for example "Direct-CD" etc., it will be impossible to playback MP3/WMA files.
Specifications AUX SELECTION FrequencyResponse............................................20Hz-20kHz S/NRatio...........................................................90dB Distortion..........................................................0.02% ChannelSeparation(1kHz).............................................80dB MaxInputLevel(1kHz)..........................................1.4V(35KΩ) BLUETOOTH SELECTION TXPOWER.........................................................4dBm FrequencyRange.............
P/NO : MFL34184902