OWNER’S MANUAL AIR CONDITIONER Read this owner’s manual thoroughly before operating the appliance and keep it handy for reference at all times. TYPE: WALL MOUNTED ENGLISH FRANÇAIS ESPAÑOL If Indoor unit are connected with multi split type, It is not Energy Star certified products MFL69491102 Rev.12_020521 www.lg.com Copyright © 2017 - 2021 LG Electronics Inc.
TABLE OF CONTENTS 2 TABLE OF CONTENTS 3 SAFETY INSTRUCTIONS 3 IMPORTANT SAFETY INSTRUCTIONS 7 OPERATION 7 7 8 13 13 15 16 16 17 18 18 19 19 19 20 20 21 Notes for Operation Parts and Functions Wireless Remote Control Restarting the Air Conditioner Automatically Using the Mode Function Using the Jet Mode Function Using the Fan Speed Function Using the Air Flow Direction Function Setting the On/Off Timer Using the Sleep Function (Optional) Using the Simple Timer Function (Optional) Using the Energy Di
SAFETY INSTRUCTIONS 3 SAFETY INSTRUCTIONS READ ALL INSTRUCTIONS BEFORE USE We have provided many important safety messages in this manual and on your appliance. Always read and follow all safety messages. WARNING CAUTION If you do not follow instructions, it could result in minor or moderate injury or damage to the product. All safety messages will tell you what the potential hazard is, tell you how to reduce the chance of injury, and tell you what may happen if the instructions are not followed.
SAFETY INSTRUCTIONS Installation •• Do not install the air conditioner on an unstable surface or in a place where there is danger of it falling. •• Contact an authorized service center when installing or relocating the air conditioner. •• Install the panel and the cover of the control box safely. •• Do not install the air conditioner in a place where flammable liquids or gases such as gasoline, propane, paint thinner, etc., are stored.
SAFETY INSTRUCTIONS CAUTION To reduce the risk of minor injury to persons, malfunction, or damage to the product or property when using this product, follow basic precautions, including the following: Installation •• Do not install the air conditioner in an area where it is directly exposed to sea wind (salt spray). •• Install the drain hose properly for the smooth drainage of water condensation. •• Exercise caution when unpacking or installing the air conditioner.
SAFETY INSTRUCTIONS Operation •• Remove the batteries if the remote control is not to be used for an extended period of time. •• Make sure that the filter is installed before operating the air conditioner. •• Be sure to check if there is a refrigerant leak after installing or repairing the air conditioner. •• Follow the standards of the corresponding region or country for handling the refrigerant and the air conditioner and for disassembling the air conditioner.
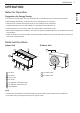
OPERATION 7 OPERATION Notes for Operation •• Do not over-cool the space. This may be harmful for your health and may consume more electricity. •• Block sunlight with blinds or curtains while you are operating the air conditioner. •• Adjust the direction of the air flow vertically or horizontally to circulate indoor air. •• Speed up the fan to cool or warm indoor air quickly, within a short period of time. •• Open windows regularly for ventilation.
OPERATION Wireless Remote Control Inserting Batteries Operating Method Point the remote control towards the signal receiver at the right side of the air conditioner to operate it. If the display screen of the remote control begins to fade, replace the batteries. Insert AAA (1.5 V) batteries before using the remote control. 1 2 Remove the battery cover. NOTE Insert the new batteries and make sure that the + and - terminals of the batteries are installed correctly.
OPERATION Setting the Current Time 1 9 •• The icon below blinks at the bottom of the display screen. You can use the ON/OFF button of the indoor unit to operate the air conditioner when the remote control is unavailable. Press 3 Press SET/CANCEL button to finish. or button to select the minutes. Open the front cover (Type2) or horizontal vane (Type1). 2 Press the ON/OFF button. FRANÇAIS 2 1 Type1 ESPAÑOL NOTE •• The On/Off Timer is available after setting the current time.
OPERATION Using Wireless Remote Control You can operate the air conditioner more conveniently with the remote control. Available Function To turn on/off the air conditioner. O O To adjust the desired room temperature in cooling, heating or auto changeover mode. O O To select the cooling mode. O O To select the heating mode. O O To select the dehumidification mode. O O To select the fan mode. O O To select the auto changeover/auto operation mode.
OPERATION 11 Available Function Display Screen O * - To set/cancel the special functions and timer. O O - To cancel the timer settings. O O - To adjust time. O O - To set the brightness of the display on the indoor unit. O O ROOM TEMP To display the room temperature. O O °C↔°F [5 s] To change unit between °C and °F O O *ENERGY SAVING To minimize power consumption. O O To adjust the air flow to deflect wind. O O To set whether or not to display information regarding energy.
OPERATION Available Function Button Display Screen 2 * * FAN SPEED MODE TEMP * JET MODE 1 kW [3 s] SWING ℃↔℉ [5 s] FUNC. TIMER SWING SET UP ROOM TEMP DIAGNOSIS [5 s] Single Split Multi The Ion generator uses millions of ions to help improve indoor air quality. X X To reduce noise from outdoor units. X X To keep your skin moisturized by generating ion clusters. X X To lower indoor humidity quickly. X X O (Optional) X To scare away a mosquito.
OPERATION 13 Restarting the Air Conditioner Automatically This function allows you to select the desired function. Cooling Mode Disabling Auto Restart Auto Changeover Mode / Auto Operation(AI) Mode 2 Press the ON/OFF button and hold it for 6 seconds, then the unit will beep twice and the lamp will blink twice 4 times. Dehumidification Mode •• To re-enable the function, press the ON/OFF button and hold it for 6 seconds. The unit will beep twice and the lamp will blink 4 times.
OPERATION Auto Operation (Artificial Intelligence) Auto Changeover Mode Multi Model This mode changes the mode automatically to maintain the set temperature at ±2 °C In this operation mode, the system is automatically operated by the electronic controls. 1 Turn the appliance on. 2 Press MODE button repeatedly to select the Auto Operation. •• 3 4 Single Split Model 1 Turn the appliance on. 2 Press MODE button repeatedly to select the Auto Changeover Mode.
OPERATION 15 Using the Jet Mode Function Heating Mode Turn the appliance on. 2 Press MODE button repeatedly to select the Heating Mode. •• Press or temperature. button to set the desired NOTE will be displayed on the indoor unit when defrosting is operating. •• Furthermore, this indication will be displayed on the indoor unit: −− When preheating is operating. −− When the room temperature has been reached to the set temperature.
OPERATION Using the Fan Speed Function Using the Air Flow Direction Function Adjusting the Fan Speed This function adjusts the direction of the air flow vertically (horizontally). •• Press FAN SPEED button repeatedly to adjust the fan speed. Display Screen Speed High Medium - High Medium Medium - Low •• Press SWING ( SWING ) button repeatedly and select the desired direction. −− Select ( ) to adjust the direction of the air flow automatically.
OPERATION 17 Setting the On/Off Timer This function sets the air conditioner to turn on/off automatically at desired time. Setting the Off Timer 1 Press TIMER button repeatedly. Setting the On Timer Press TIMER button repeatedly. •• The icon below blinks at the bottom of the display screen. Press 3 Press SET/CANCEL button to finish. or Canceling the On Timer Press TIMER 3 Press SET/CANCEL button to finish. •• This function is disabled when you set Simple Timer.
OPERATION Using the Sleep Function (Optional) Using the Simple Timer Function (Optional) This function turns off the air conditioner automatically when you go to sleep. This function turns off the air conditioner automatically when you go to sleep. 1 Turn the appliance on. 1 Turn the appliance on. 2 Press 2 Press TIMER button repeatedly. •• The icon below blinks at the bottom of the display screen. 3 4 Press or 7 hours).
OPERATION 19 This function displays the amount of electricity generated on the indoor display as the product operates. Display Screen Brightness Display the Current Energy Usage •• Press LIGHT OFF button. 1 Turn the appliance on. NOTE 2 Press kW [3 s] button and hold it about 3 seconds. •• Turn on/off the Display screen. Using the Comfort Air Function (Optional) Comfort Vane Operation NOTE •• It is not displayed on the wireless remote control. •• The unit of the displayed value is kW.
OPERATION Using the Energy Saving Function (Optional) Using the Energy Control Function (Optional) This function minimizes power consumption during Cooling and increases the set temperature to the optimal level for a more comfortable environment. The temperature automatically settles at 22 °C if desired temperature is below 22 °C The temperature remains constant if it is above 22 °C 1 Turn the appliance on. 2 Press ENERGY CTRL button. 1 Turn the appliance on.
OPERATION 21 Using Special Functions Turn the appliance on. 2 Press FUNC button repeatedly to select the desired function. 3 Press SET/CANCEL button to finish. Display Screen Description The Ion generator uses millions of ions to help improve indoor air quality. X X To reduce noise from outdoor units. X X To keep your skin moisturized by generating ion clusters. X X To lower indoor humidity quickly. X X To maintain a minimum room temperature and prevent objects in the room from freezing.
OPERATION Canceling Special Functions Using the Silent Function (Optional) 1 Press FUNC button repeatedly to select the desired function. This function prevents potential claims by neighbors, reducing noise from outdoor units. 2 Press SET/CANCEL button to cancel the function. •• is displayed on the display screen. NOTE •• This function is disabled when you press MODE or ENERGY CTRL or JET MODE button.
OPERATION 23 Using the Low Heating Function (Optional) •• , are displayed on the display screen. •• This function is available with Heating Mode. •• During LH operation, when you press buttons such as , , MODE, FAN SPEED, and then return to Heating Mode. •• In case an error occurred, operation can be interrupted for the protection of the product. •• COMFORT AIR and SWING button cannot be used while the LH function is in operation.
SMART FUNCTIONS SMART FUNCTIONS LG ThinQ Application 2 Turn off the Mobile data or Cellular Data on your smartphone. 3 Connect your smartphone to the wireless router. This feature is only available on models with the or ThinQ logo. The LG ThinQ application allows you to communicate with the appliance using a smartphone. LG ThinQ Application Features Communicate with the appliance from a smartphone using the convenient smart features.
SMART FUNCTIONS 25 •• The appliance cannot be registered due to problems with the wireless signal transmission. Unplug the appliance and wait about a minute before trying again. •• The wireless network name (SSID) should be a combination of English letters and numbers. (Do not use special characters.) Installing the LG ThinQ Application Search for the LG ThinQ application from the Google Play Store or Apple App Store on a smartphone. Follow instructions to download and install the application.
SMART FUNCTIONS Smart DiagnosisTM This feature is only available on models with the or logo. Use this feature to help you diagnose and solve problems with your appliance. NOTE •• For reasons not attributable to LGE’s negligence, the service may not operate due to external factors such as, but not limited to, Wi-Fi unavailability, Wi-Fi disconnection, local app store policy, or app unavailability.
MAINTENANCE 27 MAINTENANCE WARNING •• Dry the air conditioner in Fan mode for 3 to 4 hours and disconnect the power. There may be internal damage if moisture is left in its components. Air Filter •• The feature may be changed according to the type of model. ESPAÑOL •• Before using the air conditioner again, dry the inner components of the air conditioner in Fan mode for 3 to 4 hours. This will help to remove the odor generated from moisture.
MAINTENANCE Type Air filter Description Clean with a vacuum or hand wash. Interval 2 weeks Triple filter Clean with a vacuum or brush. Every 3 months Micro dust filter Clean with a vacuum or brush. Once a month Ionizer (Optional) Use dry cotton bud to remove any dust. Clean the Indoor unit surface by using a soft, dry cloth. Indoor unit Outdoor unit Every 6 months Regularly Have a professional clean the condensate drain pan. Once a year Have a professional clean the condensate drain pipe.
MAINTENANCE 29 Clean the Air Filter Clean the air filters once every 2 weeks, or more, if necessary. Push down hooks to assemble the air filter. 8 Check the side of the front cover for correct assembly of the air filter. ENGLISH 7 NOTE •• The air filter can be broken when it is bent. •• When the air filter is not assembled correctly, dust and other substances can enter into the indoor unit. If you look at the indoor unit from above it, can assemble the top filter easily.
MAINTENANCE Clean the Micro Dust and Triple Filter (Optional) 1 Turn off the power to the unit. 2 Remove the air filters from the indoor unit. 3 Remove the Micro dust and Triple filter from the indoor unit. 5 Insert the Micro dust and Triple filter. Type1 Type1 Type2 Type2 4 Clean the filter with a vacuum cleaner. 6 Assemble the air filters. 7 Check the side of the front cover for correct assembly of the air filters.
TROUBLESHOOTING 31 TROUBLESHOOTING Self-diagnosis Function Before Calling for Service Symptoms Possible Causes & Solution Burning smell and strange sounds are coming from the unit. Water leaks from the indoor unit even when the humidity level is low. •• Turn off the air conditioner, switch OFF, or disconnect the power supply, and contact the service center. The air conditioner does not work normally. The power cable is damaged or it is generating excessive heat.
TROUBLESHOOTING Symptoms Possible Causes & Solution Air is not circulating properly. •• Make sure that there are no curtains, blinds, or pieces of furniture blocking the front of the air conditioner. The air filter is dirty. •• Clean the air filter once every 2 weeks. •• See “Clean the Air Filter” for more information. The room temperature is too high. •• In summer, cooling the indoor air fully may take some time. In this case, select the Jet Mode to cool the indoor air quickly.
TROUBLESHOOTING 33 Symptoms Possible Causes & Solution The Auto Clean function is being operated. The air outlet on the indoor unit is discharging mist. The cooled air from the air conditioner makes mist. In the heating operations, condensed water drops from the heat exchanger. •• This symptom requires installing a drain hose under the base pan. Contact the installer. A clicking sound can be heard when the unit starts or stops due to movement of the reversing valve.
TROUBLESHOOTING Symptoms Possible Causes & Solution The password for the Wi-Fi that you are trying to connect to is incorrect. •• Find the Wi-Fi network connected to your smartphone and remove it, then register your appliance on LG ThinQ. Mobile data for your smartphone is turned on. •• Turn off the Mobile data of your smartphone and register the appliance using the Wi-Fi network. Your home appliance and smartphone is not connected to the Wi-Fi network.
WARRANTY (USA) 35 WARRANTY (USA) PROCEDURE FOR RESOLVING DISPUTES: Notice of Dispute. In the event you intend to commence an arbitration proceeding, you must first notify LG in writing at least 30 days in advance of initiating the arbitration by sending a letter to LG at LG Electronics, USA, Inc. Attn: Legal Department- Arbitration 111 Sylvan Avenue, Englewood Cliffs, NJ 07632. You and LG agree to engage in good faith discussions in an attempt to amicably resolve your claim.
WARRANTY (USA) Governing Law. The law of the state of your residence shall govern this Limited Warranty and any disputes between us except to the extent that such law is preempted by or inconsistent with applicable federal law. Fees/Costs. You do not need to pay any fee to begin an arbitration.
WARRANTY (CANADA) 37 WARRANTY (CANADA) PROCEDURE FOR RESOLVING DISPUTES: ENGLISH ARBITRATION NOTICE: THIS LIMITED WARRANTY CONTAINS AN ARBITRATION PROVISION THAT REQUIRES YOU AND LG TO RESOLVE DISPUTES BY BINDING ARBITRATION INSTEAD OF IN COURT, UNLESS THE LAWS OF YOUR PROVINCE OR TERRITORY DO NOT PERMIT THAT, OR, IN OTHER JURISDICTIONS, IF YOU CHOOSE TO OPT OUT. IN ARBITRATION, CLASS ACTIONS AND JURY TRIALS ARE NOT PERMITTED. PLEASE SEE THE SECTION TITLED “PROCEDURE FOR RESOLVING DISPUTES” BELOW.
WARRANTY (CANADA) Governing Law. The law of the province or territory of your purchase shall govern this Limited Warranty and any disputes between you and LG except to the extent that such law is preempted by or inconsistent with applicable federal or provincial/territorial law.