
Multi F Engineering Manual

Installation and Best Layout Practices
Preparing the Indoor Unit for
Installation
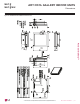
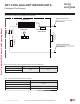
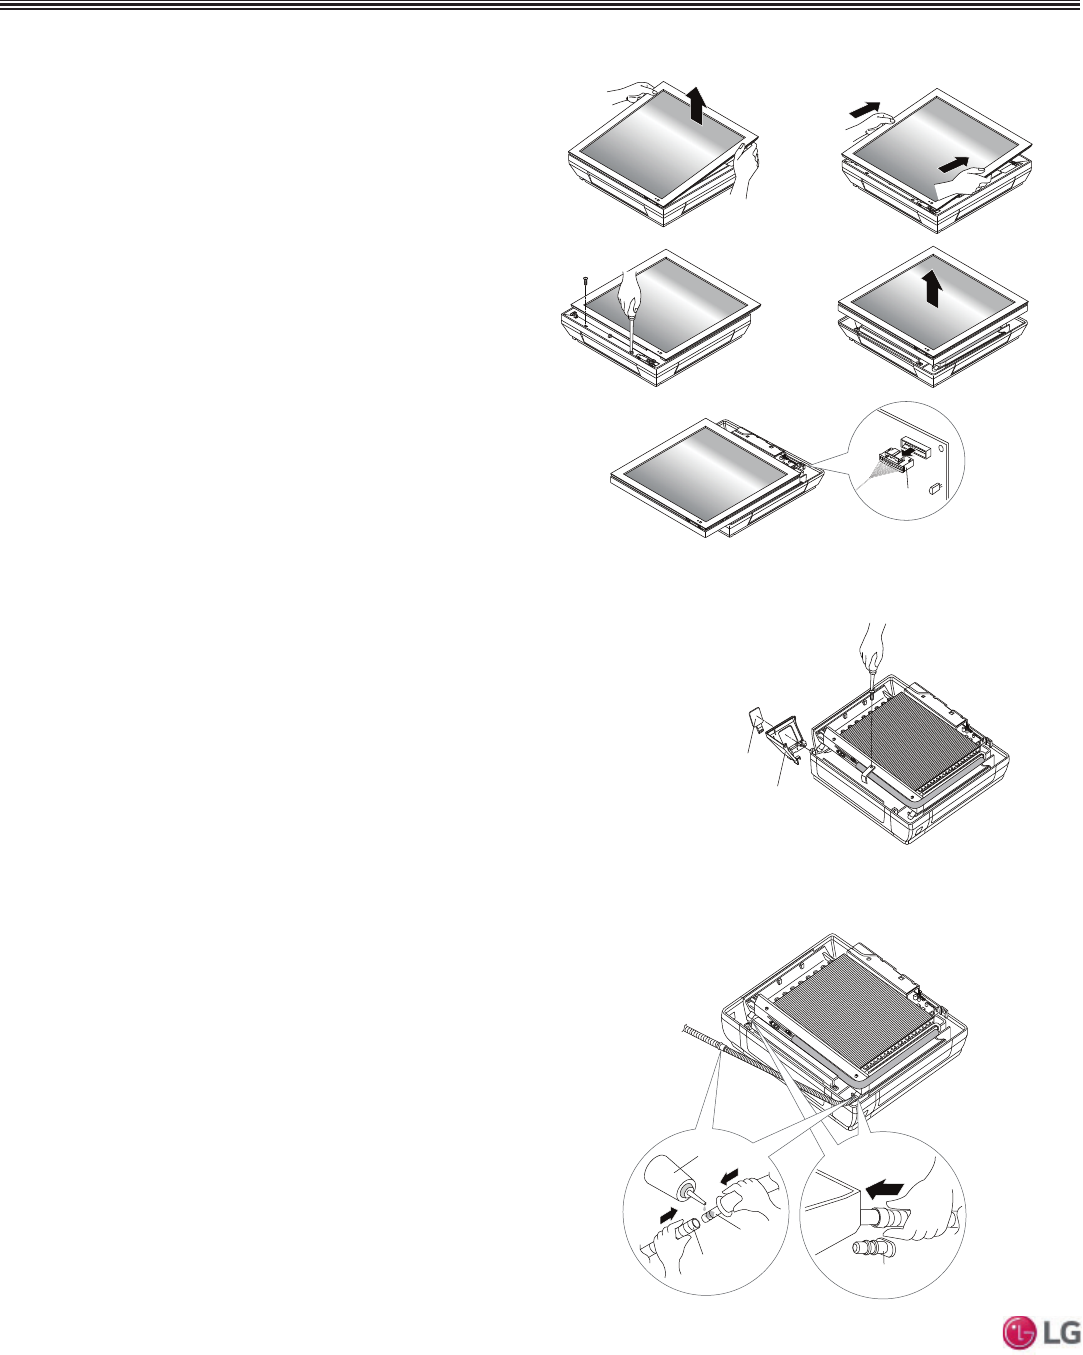
Removing the Front Panel
1. First pull the top of the front panel up (1A) and then out (1B).
2. Remove the two (2) screws at the bottom (2A), then lift off the front
panel (2B).
3. To completely detach the front panel, disconnect the panel connector
found at the top of the indoor unit (3).
ART COOL GALLERY INDOOR UNITS
Panel Connector
1A 1B
2A 2B
3
)LJXUHPreparing for Installation.
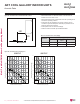
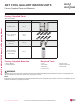
Removing the Piping and Side Covers
1. Unscrew the center cover.
2. Remove the cover from the side of the indoor unit chosen for the piping connections,
and then knock out the piping access hole. If the refrigerant piping will be connected
through the back of the unit, the access hole does not need to be knocked out.
3. Remove any burrs that will have been made.
Side cover
Access Hole
for Piping
)LJXUHRemoving the Piping and Side Covers.
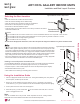
Preparing the Drain Hose
1. Remove the rubber stopper from the chosen side of the indoor unit.
2. Insert the drain hose into the handle of the drain pan.
3. Connect the drain hose to the field-installed drain piping.
Rubber Stopper
Choose a Side
for the Drain
Connections
Field-Installed
Drain Piping
Adhesive
Drain
Hose
)LJXUHPreparing the Drain Hose.
'XHWRRXUSROLF\RIFRQWLQXRXVSURGXFWLQQRYDWLRQVRPHVSHFL¿FDWLRQVPD\FKDQJHZLWKRXWQRWL¿FDWLRQ
©/*(OHFWURQLFV86$,QF(QJOHZRRG&OLIIV1-$OOULJKWVUHVHUYHG³/*´LVDUHJLVWHUHGWUDGHPDUNRI/*&RUS
40 | ART COOL GALLERY™
Multi F and Multi F MAX Indoor Unit Engineering Manual
MULTI
F
MAX
MULTI
F