Scan to see the online manual. OWNER'S MANUAL DISHWASHER Read this owner’s manual thoroughly before operating the appliance and keep it handy for reference at all times. This abridged owner's manual addresses user safety, precautions, and installation information. To view the complete owner's manual, you may: 1. Online manual: Visit the LG website at: http://gscs-manual.lge.com/ Total/HQ/GatewayPage/main.html or scan the QR code above; or 2. Printable PDF manual: Visit lg.
TABLE OF CONTENTS 3 IMPORTANT SAFETY INSTRUCTIONS 3 3 6 READ ALL INSTRUCTIONS BEFORE USE WARNING STATEMENTS CAUTION STATEMENTS 8 PRODUCT OVERVIEW 8 Product Features 10 INSTALLATION 10 12 13 14 15 16 18 20 21 22 Before Installing Preparing Cabinet Opening Preparing Water and Electrical Connections Preparing Dishwasher Sliding Dishwasher into Cabinet Opening Connecting Water Supply Line and Power Connecting the Drain Hose Leveling Dishwasher Securing Dishwasher in Cabinet Opening Final Installatio
IMPORTANT SAFETY INSTRUCTIONS 3 IMPORTANT SAFETY INSTRUCTIONS Safety Messages Your safety and the safety of others are very important. We have provided many important safety messages in this manual and on your appliance. Always read and follow all safety messages. This is the safety alert symbol. This symbol alerts you to potential hazards that can kill or injure you and others. All safety messages will follow the safety alert symbol and either the word WARNING or CAUTION.
IMPORTANT SAFETY INSTRUCTIONS • When installing or moving the appliance, be careful not to pinch, crush, or damage the power supply line. • Do not install the appliance in humid spaces. • Destroy the carton, plastic bag, and other packing materials after the appliance is unpacked. Children might use them for play. Cartons covered with rugs, bedspreads, or plastic sheets can become airtight chambers.
IMPORTANT SAFETY INSTRUCTIONS 5 • Fix the drain hose securely in place. • Use only detergents or wetting agents recommended for use in a dishwasher and keep them out of the reach of children. • When loading items to be washed: - Locate sharp items so that they are not likely to damage the door seal. - Load sharp knives with the handles up to reduce the risk of cuts or other injuries. • Do not wash plastic items unless they are marked "dishwasher safe" or the equivalent.
IMPORTANT SAFETY INSTRUCTIONS • For a cord connected dishwasher: This appliance must be grounded. In the event of a malfunction or breakdown, grounding will reduce the risk of electric shock by providing a path of least resistance for electric current. • This appliance is equipped with a cord having an equipment-grounding conductor and a grounding plug. • The plug must be plugged into an appropriate outlet that is installed and grounded in accordance with all local codes and ordinances.
IMPORTANT SAFETY INSTRUCTIONS 7 Operation • Do not place objects on top of the appliance. • Do not store or spill liquid detergents, cleaners, or bleaches (chlorine bleach, oxygen bleach) on the appliance. Doing so may result in corrosion, discoloration or damage to the surface of the appliance. • Do not touch draining water which may be hot. • If the drain hose and the water supply hose are frozen in winter, defrost before using the appliance.
PRODUCT OVERVIEW PRODUCT OVERVIEW Product Features The images in this guide may be different from the actual components and accessories, which are subject to change by the manufacturer without prior notice for product improvement purposes. NOTE • For your safety and for extended product life, use only authorized components. The manufacturer is not responsible for product malfunction or accidents caused by the use of separately purchased unauthorized components or parts.
PRODUCT OVERVIEW Product Specifications NOTE The appearance and specifications listed in this manual may vary due to constant product improvements. • The silverware basket ships installed at the back of the bottom rack. For best performance, install it along the right side. • Remove all packing materials from the exterior and interior of the dishwasher before installing the appliance. • Press the tab to remove the cable tie by hand.
INSTALLATION INSTALLATION Before Installing Online Installation Guide This QR code is for reference only. For complete installation instructions, see the owner's manual supplied with each dishwasher. English d e f g h i a Electrical Cable • 16 AWG, with 2 conductors and 1 ground b Water Supply Tube https://www.lg.com/us/support/video-tutorials/lgdishwasher-installation-CT100000091366643457088 • Minimum 3/8″ O.D.
INSTALLATION 11 c Preparing Dishwasher d Sliding Dishwasher into Cabinet Opening h i e Connecting Water Supply Line and Power f Connecting the Drain Hose g Leveling Dishwasher j k l h Securing Dishwasher in Cabinet Opening i Final Installation Check m n o Product Dimensions Back View 23 3/4" (603 mm) p a Flat-Blade Screwdriver b Phillips Screwdriver c Hole Saw min.
INSTALLATION dishwasher. Water supply hose, drain hose and electric cable should be passed through this area. 26 5/8 - 26 13 /16" (676 - 681 mm) Choosing the Proper Location 1 Select a location as close to the sink as possible for easy connections to water supply line, drain hose and electrical connection.
INSTALLATION 13 Preparing Water and Electrical Connections - Do not reuse an old hose. Use only a new hose when installing the dishwasher. The old hose could leak or burst causing flooding and property damage. Contact an LG Customer Information Center for assistance in buying a new hose. There are 2 channels in the bottom of the dishwasher for routing the water and electrical connections.
INSTALLATION Preparing Dishwasher WARNING • Do not remove safety cover a. Removal can result in fire, electric shock or death. 2 Remove the lower cover. 3 If there is insulation padding behind the lower cover, remove it. 4 Set the parts aside until the installation is complete. Releasing Drain Hose Remove the twist tie holding the drain hose to the back of the shipping brace.
INSTALLATION 15 • Do not push the door of the dishwasher with knees when sliding the dishwasher into position. Doing so can damage the front cover. ENGLISH 2 Bend the tabs on the brackets to secure them to the frame using a pair of needle nose pliers. Sliding Dishwasher into Cabinet Opening How to Slide Dishwasher CAUTION • Do not push the top of the dishwasher. Doing so can damage the interior of the dishwasher.
INSTALLATION 2 Smooth out or pad the edges of the hole drilled for the water supply to avoid damaging the drain hose. 3 Make sure the drain hose is straight before feeding the end of it through the hole for the water supply. As you slide the dishwasher into the opening, you will want to slowly pull on the drain hose from inside the cabinet to take up some slack. Be careful not to kink, pinch, crush or stress the drain hose during installation to avoid leaking and water damage.
INSTALLATION 17 ENGLISH 3 Slide the water supply line back through the channel, pulling gently from inside the cabinet to make sure the line is not kinked, pinched, stressed or crushed. 3 Use a Phillips screwdriver to remove 2 screws a. 4 Remove the junction box from the appliance. 5 Insert a 3/8” strain relief b through the hole in the junction box. Tighten the ring nut c to secure it in place. 6 Insert the electrical cable through the hole in the strain relief.
INSTALLATION 10 Fold the connected wires back into the junction box and screw on the junction box cover. WARNING • Verify that the black wire is hot (120 V). If not, or if you are unsure of the power supply, have it checked by a licensed electrician. 7 Pull the existing wires through the openings in the junction box. Tighten 2 screws d to reassemble the junction box in the appliance. CAUTION • Do not leave stripped wire exposed. Trim stripped wire to fit completely inside wire nuts.
INSTALLATION 19 Height of the Drain Hose ENGLISH The height of the drain hose end must be at least 12" (305 mm) and within 40" (1016 mm) from the base of the dishwasher to avoid water being siphoned from the tub. Connecting Waste Tee without Air Gap Connecting to Disposal without Air Gap 1 The height of the drain hose end must be at least 12” (305 mm) and within 40” (1016 mm) from the base of the dishwasher to avoid water being siphoned from the tub.
INSTALLATION 2 Connect the end of the drain hose a to the air gap b with the hose clamp provided. Move the clamp into position and tighten it with a flat-blade screwdriver. • This avoids water being siphoned from the tub. 3 If it is not connected, attach the rubber hose connector to the disposal or waste tee with a hose clamp (not provided). With the lower rack removed, place a level on the inside wall of the tub to check that the dishwasher is level from side to side.
INSTALLATION 21 drive wrench b with 1/2" socket c to turn the front leveling feet and adjust the front of the tub. NOTE • Use a magnetic screwdriver. • Cover the filter hole with towels to prevent screws from falling down into the pump. Securing Dishwasher to Countertop Adjusting Rear Leveling Foot Use the bracket screws provided to secure the brackets at the top of the dishwasher to the underside of the wood countertop.
INSTALLATION Final Installation Check 7 Replace the lower cover. Testing the Dishwasher Check if the dishwasher is properly installed. 1 Turn on the circuit breaker. 2 Turn on the house water supply. 3 Make sure that the door opens and closes smoothly. CAUTION • Only install the lower cover provided with the dishwasher. Do not install cabinet baseboard a as it may cause noise and leakage. • If necessary, level the dishwasher again. • If the door will not close, make sure the rack is level.
INSTALLATION 23 Error Code IE Possible Cause and Solution • Feed the drain and water supply hoses through the hole under the sink. Then gradually slide the dishwasher into the cabinet while pulling on the hoses under the sink to take up any slack. This helps avoid kinking the hoses or trapping them beneath the dishwasher. House water supply is not turned on. • Turn the water faucet on. ENGLISH Water supply line is kinked under dishwasher.
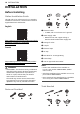
OPERATION OPERATION Before Using WARNING • To reduce the risk of fire, electric shock, or injury to persons, read the SAFETY INSTRUCTIONS before operating this appliance. NOTE • Connect to the hot water supply only. The water supply temperature should be a minimum of 120 °F (49 °C) for better washing performance and shorter cycle time. • Follow the instructions for loading the dishwasher to ensure effective cleaning.
OPERATION 25 Control Panel Control Panel Features Front view a Power On/Off Button • Press this button to turn the washer on or off. • After the cycle is complete, the power automatically turns off for purposes of safety and economy. • If there is a power surge, power outage, or disruption of any kind, power is automatically turned off for safety. • When power is connected again, the dishwasher will turn on automatically and resume the cycle.
OPERATION NOTE • If Delay Start is selected, the display shows the delay time in hours. • Cycle time may vary depending on the soil level of your load. • CL : Control Lock - The Control Lock feature helps prevent settings from being changed during a cycle. Selecting this feature locks all of the buttons, except for the Power button, on the control panel. This feature does not lock the door.
OPERATION 27 Turbo This cycle will clean lightly soiled dishes in 1 hour. Refresh This cycle freshens up and warms dishes that have been unused for a long time. • Do not use detergent when using this cycle. • Night Care (P7) Quietly washes dishes overnight. Sleep soundly knowing dishes will be clean in the morning. Options and Extra Functions Select the desired cycle and then select the options for that cycle. • The steam option cannot be turned off on this cycle.
OPERATION Mode Description Various conditions • Place heavily soiled dishes like plates and bowls in the lower rack and lightly soiled dishes like cups and small plates in the upper rack to get the best results. operation so you know how much time is left in the cycle. Once this function is enabled, you can start a cycle from the smartphone application. If the door is not closed within 4 seconds after pressing Remote Start, Remote Start is canceled.
OPERATION 29 NOTE • Machine Clean Reminder • Rinse Aid Level - You can adjust the level of rinse aid from L0 to L4. - For more information, refer to the Rinse Aid Dispenser Adjustment section. • Clean Light - The default ON setting keeps the green light on (on some models) and ENd display until the door is opened. If the setting is changed to OFF, the lights turn off after 90 seconds. • Chime Sound - You can turn on/off the volume of the button sound or notification sound.
OPERATION Loading 12 Place Settings 5 4 3 4 4 1 5 5 1 5 4 4 6 2 2 2 3 2 2 2 2 6 Loading 12 Place Settings 4 6 5 4 4 5 5 1 2 4 4 5 1 3 Lower Rack Loading Tips: Silverware Loading Tips: For details, refer to the online owner's manual. • For best cleaning results, use the top separators in the basket when loading silverware. The separators will prevent nesting of silverware. Folding Down the Lower Tines • Load sharp items, such as knives, pointing down.
OPERATION 31 Loading 12 Place Settings WARNING Removing the Snap-In Gliding Upper Rack This feature is only available on some models. The instructions in the online owner's manual are for models with snap-in rack supports rather than wheeled rack supports. Upper Rack Loading Tips: For details, refer to the online owner's manual. Loading the Cup Rack This feature is only available on some models.
OPERATION Loading 10 Place Settings Adding Cleaning Products Adding Detergent to the Dispenser • Remove the label on the dispenser prior to running the dishwasher for the first time. • The amount of detergent needed depends on the cycle, load size, and soil level of dishes. • Put detergent into the detergent compartment before starting any cycle, except the Rinse (Download Cycle: P3) cycle. WARNING • Dishwasher detergent and rinse aid contain chemical components, like all other household detergent.
OPERATION 33 Rinse Aid Dispenser Adjustment NOTE • Adjust the setting higher if you have hard water and notice calcium buildup on your dishes. • Setting the rinse aid control too low will contribute to spotting and streaking on dishes and poor drying performance. • Setting the control too high can cause foaming, which will cause poor wash performance. 1 Ensure the appliance is off. 2 Press Power and Remote Start simultaneously to enter the Option Setting Mode.
SMART FUNCTIONS SMART FUNCTIONS LG ThinQ Application The LG ThinQ application allows you to communicate with the appliance using a smartphone. LG ThinQ Application Features • Feature Update - Experience new features by updating the features of the product through the LG ThinQ application. When a new feature is available for update, the outer segments of the digital display light up in rotation when the product is powered on.
SMART FUNCTIONS 35 connected appliance from the LG ThinQ application and connect it again. Installing LG ThinQ Application and Connecting an LG Appliance Models with QR Code Scan the QR code attached to the product using the camera or a QR code reader application on your smartphone. • If the distance between the appliance and the wireless router is too far, the signal becomes weak. It may take a long time to connect or fail to install the application.
SMART FUNCTIONS 4 5 Press the Remote Start button and close the dishwasher door to enable the Remote Start function. Start a cycle from the LG ThinQ application on your smartphone. NOTE • Once the Remote Start mode is enabled, you can start a cycle from the LG ThinQ application, but the cycle and option keys on the appliance are deactivated. To activate the keys, disable Remote Start. • The door must be closed in order to activate the Remote Start mode.
SMART FUNCTIONS 37 This equipment should be installed and operated with a minimum distance of 20 cm (7.8 inches) between the antenna and your body. • THE MANUFACTURER IS NOT RESPONSIBLE FOR ANY RADIO OR TV INTERFERENCE CAUSED BY UNAUTHORIZED MODIFICATIONS TO THIS EQUIPMENT. SUCH MODIFICATIONS COULD VOID THE USER’S AUTHORITY TO OPERATE THE EQUIPMENT.
MAINTENANCE MAINTENANCE To maintain performance and prevent trouble, it is important to check the outside and inside of the dishwasher, including filters and spray arms, at regular intervals. WARNING • When cleaning the outside and inside of the dishwasher, do not use benzene or thinner. Otherwise, it may cause fire or explosion. • To prevent injury during care and maintenance or cleaning, wear gloves and/or protective clothing.
MAINTENANCE 39 • The warranty provided with the dishwasher does not cover service costs directly associated with the cleaning or repair of the external drain air gap and disposal. NOTE Cleaning the Air Gap • In areas with hard water, clean the filter at least once a month with a soft brush. 1 Turn off the dishwasher. • Clean the filters using non-abrasive materials and warm running water. 2 Remove the air gap cover and the plastic cap underneath it.
MAINTENANCE Cleaning the Spray Arm If the spray arm holes are blocked by any food residue, dishes may not be cleaned well due to improper water spray. It is recommended that the spray arms be cleaned once every two weeks. Cleaning the Lower Spray Arm NOTE • Make sure the filter is assembled correctly before starting a cycle. When assembling, rotate the filter firmly until it clicks. 1 Make sure that the water jet holes are not blocked by food particles.
MAINTENANCE 41 Remove food particles by rinsing or shaking the spray arm. 4 If any food residue blocks the spray arm holes, remove it with a pin or any sharp tool. 5 After removing the food residue, clean the spray arms under running water. 6 After cleaning the upper spray arm, press it up into place. Turn the nut 1/8 turn clockwise to make sure that the nut locks back into place. 7 After assembly, make sure that the spray arms rotate freely.
TROUBLESHOOTING TROUBLESHOOTING The washer is equipped with an automatic error-monitoring system to detect and diagnose problems at an early stage. If the washer does not function properly or does not function at all, check the following before you call for service. Before Calling for Service For more troubleshooting, refer to the online owner's manual. User Support Videos For further assistance, there are videos and tutorials available through the LG.com website. 1 On the www.lg.
TROUBLESHOOTING 43 Problem bE Possible Cause & Solution Oversudsing caused by improper detergent, such as liquid dish soap. • A bE error can appear if dishes soiled with a lot of foamy food, such as whipped cream, are loaded in the appliance. To clear the error, turn the appliance off and start a new cycle. • To remove detergent residue in the tub, pour approximately 4 oz ~ 8 oz (100 ml ~ 200 ml) of milk into a shallow bowl, place it in the upper rack and then run the appliance on the Auto cycle.
TROUBLESHOOTING Wi-Fi Problem Trouble connecting appliance and smartphone to Wi-Fi network Possible Cause & Solution The password for the Wi-Fi network was entered incorrectly. • Delete your home Wi-Fi network and begin the connection process again. Mobile data for your smartphone is turned on. • Turn off the Mobile data on your smartphone before connecting the appliance. The wireless network name (SSID) is set incorrectly.
LIMITED WARRANTY 45 LIMITED WARRANTY TERMS AND CONDITIONS ARBITRATION NOTICE: THIS LIMITED WARRANTY CONTAINS AN ARBITRATION PROVISION THAT REQUIRES YOU AND LG ELECTRONICS (“LG”) TO RESOLVE DISPUTES BY BINDING ARBITRATION INSTEAD OF IN COURT, UNLESS YOU CHOOSE TO OPT OUT. IN ARBITRATION, CLASS ACTIONS AND JURY TRIALS ARE NOT PERMITTED. PLEASE SEE THE SECTION TITLED “PROCEDURE FOR RESOLVING DISPUTES” BELOW.
LIMITED WARRANTY THIS LIMITED WARRANTY DOES NOT COVER: • Service trips to deliver, pick up, or install, educate how to operate, correct wiring, or correct unauthorized repairs. • Damage or failure of the Product to perform during power failures and interrupted or inadequate electrical service. • Damage or failure of the Product caused by leaky or broken water pipes, frozen water pipes, restricted drain lines, inadequate or interrupted water supply or inadequate supply of air.
LIMITED WARRANTY 47 predecessors in interest, successors, assigns and suppliers; references to “dispute” or “claim” shall include any dispute, claim or controversy of any kind whatsoever (whether based in contract, tort, statute, regulation, ordinance, fraud, misrepresentation or any other legal or equitable theory) arising out of or relating in any way to the sale, condition or performance of the product or this Limited Warranty. Agreement to Binding Arbitration and Class Action Waiver.
LIMITED WARRANTY Opt Out. You may opt out of this dispute resolution procedure. If you opt out, neither you nor LG can require the other to participate in an arbitration proceeding. To opt out, you must send notice to LG no later than 30 calendar days from the date of the first consumer purchaser’s purchase of the product by either: (i) sending an e-mail to optout@lge.com, with the subject line: “Arbitration Opt Out” or (ii) calling 1800-980-2973.
LIMITED WARRANTY 49 CANADA TERMS AND CONDITIONS Should your LG Dishwasher ("Product") fail due to a defect in materials or workmanship under normal and proper use, during the warranty period set forth below, LG Electronics Canada, Inc. ("LGECI") will, at its option, repair, replace or pro rate the Product upon receipt of proof of the original retail purchase.
LIMITED WARRANTY THIS LIMITED WARRANTY DOES NOT COVER: • Service trips to i) deliver, pick up, or install or; educate on how to operate the Product; ii) correct wiring or plumbing; or iii) correct unauthorized repairs or installations of the Product; • Damage or failure of the Product to perform during power failures and interrupted or inadequate electrical service; • Damage or failure caused by leaky or broken water pipes, frozen water pipes, restricted drain lines, inadequate or interrupted water supp
LIMITED WARRANTY 51 PROCEDURE FOR RESOLVING DISPUTES: Definitions. For the purposes of this section, references to “LG” mean LG Electronics Canada, Inc.
LIMITED WARRANTY considering factors including, but not limited to, the purchase amount and claim amount. Notwithstanding the foregoing, if applicable law allows for an award of reasonable attorneys’ fees and expenses, an arbitrator can award them to the same extent that a court would.
LIMITED WARRANTY 53 Make certain that no dishes or utensils are in the path of the spray arms. Do not place one dish on top of another. Poor drying results caused by lack of rinse aid. Use rinse aid or combination detergent. Water is not supplied because the water tap is not turned on. IE error Check and turn on the water tap. Water is not supplied because the inlet hose is kinked. IE error Reinstall the inlet hose. Not draining because drain hose is kinked. OE error Reinstall the drain hose.
Memo
Memo 55
LG Customer Information Center For inquiries or comments, visit www.lg.com or call: 1-800-243-0000 1-888-542-2623 U.S.A. CANADA Register your product Online! www.lg.