INSTALLATION 11 INSTALLATION ENGLISH Installation Parts and Tools Parts not Provided Electrical cable Water supply tube Fittings for tube Coupler Electrical tape Air gap Wire nuts for 16-gauge wiring Hose clamp UL approved strain relief Flat-blade screwdriver Phillips screwdriver Hole saw min.
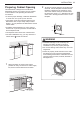
12 INSTALLATION Installation Overview Preparing Cabinet Opening Leveling the Dishwasher Preparing Electrical Wiring Securing the Dishwasher to Countertop Preparing Water Supply Connection Connecting the Drain Hose Preparing the Dishwasher Connecting Water Supply Removing Lower Cover Connecting Power Sliding the Dishwasher into Cabinet Final Check Product Dimensions Back view Side view 26 5/8 - 26 13 /16" (676 - 681 mm) 23 3/4" (603 mm) 24 5/8" (625 mm) 33 5 /16" (846 mm) 4 1/2" (115 mm) 33
INSTALLATION 13 Preparing Cabinet Opening ••To ensure proper drainage, install the dishwasher no more than 12 ft. (3.65 m) from the sink. To allow for proper clearance of plumbing and electrical, use the template included with the literature to determine the clearance on the side of the cabinet where the cabinet meets the back wall. Using a 2 1/2” diameter hole saw, drill a hole in the target area as shown on the template.
14 INSTALLATION Preparing Water and Electrical Connections WARNING There are 2 channels in the bottom of the dishwasher for routing the water and electrical connections. As shown in the bottom view below, channel is for the water supply line, and channel is for the electrical cable. Water Connection ••Do not reuse an old hose. Use only a new hose when installing the dishwasher. The old hose could leak or burst causing flooding and property damage.
INSTALLATION 15 Preparing Dishwasher WARNING Removable Shipping Brace ••Do not remove safety cover . Removal can result in fire, electric shock or death. Releasing Drain Hose Remove the twist tie holding the drain hose to the back of the shipping brace. Removing Lower Cover 1 Remove the screws at either side which attach the lower cover to the dishwasher. 2 Remove the lower cover. 3 If there is insulation padding behind the lower cover, remove it.
16 INSTALLATION Removing Packing Materials from the Interior Remove all packing materials from the interior of the dishwasher before installing the appliance. 3 2 Attaching Installation Brackets For countertops made of wood or other material that will not be damaged by drilling, use the metal installation brackets provided. For countertops made of granite, marble, or other materials that could be damaged by drilling, use the wood screws to attach the dishwasher to the cabinet.
INSTALLATION 17 Sliding Dishwasher into Cabinet Opening NOTE ••Open the door and grab the body frame and the top front opening of the tub to move or lift the dishwasher. ENGLISH CAUTION ••Do not pull or lift the dishwasher using the handle . Doing so can damage the door and hinges. 1 Align the dishwasher with the opening. Make sure the water supply line and electrical cable are in the correct positions to slide into their channels properly.
18 INSTALLATION 3 Make sure the drain hose is straight before feeding the end of it through the hole for the water supply. As you slide the dishwasher into the opening, you will want to slowly pull on the drain hose from inside the cabinet to take up some slack. Be careful not to kink, pinch, crush or stress the drain hose during installation to avoid leaking and water damage.
INSTALLATION 19 Connecting Water Supply Line and Power 1 With the home water supply turned off, connect the water supply line to the inlet valve on the left front of the dishwasher. CAUTION 1 Turn off electrical power to the unit at the circuit breaker. 2 Use a Phillips screwdriver to remove the screw from the junction box cover and remove the cover. 3 Use a Phillips screwdriver to remove 2 screws . 4 Remove the junction box from the appliance.
20 INSTALLATION 5 Insert a strain relief through the hole in the junction box. Tighten the ring nut to secure it in place. 6 Insert the electrical cable through the hole in the strain relief. Tighten 2 screws to secure the cable. 7 Pull the existing wires through the openings in the junction box. Tighten 2 screws to reassemble the junction box in the appliance. 8 Pair the white, black, and green wires to the matching colored wires from the dishwasher.
INSTALLATION 21 Connecting Drain Hose ••Cut the adapter so the end matches the size of the drain connection. The height of the drain hose end must be at least 12” (305 mm) and within 40” (1016 mm) from the base of the dishwasher to avoid water being siphoned from the tub. 1 Remove the knockout plug on the disposal with a hammer and screwdriver. 2 Remove the knockout plug NOTE ••For drain hose installation, use the screw style hose clamp provided with this dishwasher in the silverware basket.
22 INSTALLATION 3 Attach the drain hose to the disposal with the hose clamp provided. Move the hose clamp into position and tighten it with a flat-blade screwdriver. 2 Attach the drain hose to the waste tee with the hose clamp provided. Move the clamp into position and tighten it with a flat-blade screwdriver.
INSTALLATION 23 Leveling Dishwasher Check that the dishwasher is level and adjust the leveling feet if necessary. With the lower rack removed, place a level on the inside wall of the tub to check that the dishwasher is level from side to side. CAUTION ••Failure to level the dishwasher may result in leakage, problems closing the door, or noise.
24 INSTALLATION Adjusting Leveling Feet Adjust as needed until the dishwasher is completely leveled. Adjusting Front Leveling Feet Adjusting Rear Leveling Foot ••Use a Phillips screwdriver to adjust the rear leveling foot and the rear of the tub using the center screw at the base of the appliance in the front. ••Turn the center screw clockwise to raise the rear of the tub and counterclockwise to lower it. ••Use a flat-blade screwdriver to turn the front leveling feet and adjust the front of the tub.
INSTALLATION 25 Securing Dishwasher to Cabinet Opening 1 Remove the 2 plastic caps from the mounting bracket access holes. 2 Drive a wood screw through the mounting bracket and into the cabinet frame. 3 Reinstall the plastic caps. ENGLISH There are 2 options for securing the dishwasher. If the countertop is made of wood or a material that can safely be drilled into, secure the dishwasher to the countertop with the provided brackets.
26 INSTALLATION Final Installation Check Check if the dishwasher is properly installed. 1 2 Turn on the circuit breaker. 3 Make sure that the door opens and closes smoothly. Turn on the house water supply. CAUTION ••Only install the lower cover provided with the dishwasher. Do not install cabinet baseboard as it may cause noise and leakage. • If necessary, level the dishwasher again. • If the door will not close, make sure the rack is level.