OWNER’S MANUAL FREE STANDING GAS COOKER Please read this manual carefully before operating your set and retain it for future reference. LF98105SS LF98100SS LF98110SS P/No.: MFL62060310 www.lg.
Contents Introduction ................................................................................. 3 1. Instructions for safe and proper use........................................3 Instructions for the installer ....................................................... 6 2. Installation of the appliance.....................................................6 3. Adaptation to different types of gas....................................... 11 4. Final operations................................................
Introduction 1. Instructions for safe and proper use This manual is an integral part of the appliance and therefore must be kept in its entirety and in an accessible place for the whole working life of the cooker. We advise reading this manual and all the instructions therein before using the cooker. Also keep the series of nozzles supplied. Installation must be carried out by qualified personnel in accordance with the regulations in force.
Introduction DO NOT MODIFY THIS APPLIANCE When not in use, make sure that the control knobs are in the correct (OFF) position . Never put inflammable objects in the oven: They could be accidentally catch fire and burn. The I.D plate with technical date, serial number and brand name is positioned visibly in the storage compartment. The plate must not be removed. Do not put pans without perfectly smooth and flat bottoms on the hob grids. During use the appliance becomes very hot.
Do not apply decorative panels to the lower part of the cooker as they may prevent correct air circulation and cause overheating. Before the appliance is put into operation, all the labels and protective films applied inside or outside must be removed. Lower the glass cover slowly and by hand. Warning: The glass cover may shatter if it overheats. Switch off all rings and wait for them to cool down before closing the cover.
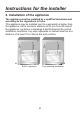
Instructions for the installer 2. Installation of the appliance The appliance must be installed by a qualified technician and according to the regulations in force. This appliance may be installed next to a wall which is higher than the appliance, with a minimum distance of 50 mm from the side of the appliance, as shown in drawings A and B showing the correct installation conditions. Any wall cupboards or shelves must be at a B distance of atAleast 75 cm above the work surface.
2.1 Electrical connection Make sure that the power line voltage matches the specifications indicated on the rating plate located inside the storage compartment. This rating plate must never be removed. If the appliance is hooked-up to the supply by means of a fixed connection, install a multipolar cut-out device on the line, with contact opening distance equal to or greater than 3 mm, located near the appliance and in an easily reachable position. Hook-up to the supply may be fixed or with plug and socket.
Instructions for the installer 2.2 Ventilation requirements 2.2.1 Room ventilation The room containing the appliance should have an air supply in accordance with the standards in force. The room where the appliance is installed must have enough air flow as required for the regular combustion of gas and by the necessary air exchange of the same room. The air vent, protected by grills, must be suitably dimensioned in compliance with the current regulations and positioned so that no part of it is obstructed.
• no part of the hose is in contact with the hot walls (max. 50 °C); • the hose is not under traction or tension and has no tight curves or twists; • the hose is not in contact with sharp objects or sharp corners; • if the hose is not perfectly airtight and leaks gas, do not try and repair it: replace it with a new hose; • verify that the hose is not beyond its life cycle (serigraphed on the hose itself).
Instructions for the installer 2.3.3 Connection to liquid gas Use a standards-compliant pressure regulator and carry out the connection to the gas cylinder in accordance with the regulations in force. Make sure that the supply pressure complies with the values indicated in the paragraph “3.2/3.3 Burner and nozzle characteristics table”.
3. Adaptation to different types of gas Before performing any cleaning or maintenance work, detach the appliance from the electrical socket. The cooker hob is set for LPG G30/G31 at a pressure of 28-30/37 mbar for cookers with maxi oven In the case of functioning with other types of gas the burner nozzles must be changed and the minimum flame adjusted on the gas taps. To change the nozzles, proceed as described below. 3.1 Replacement of nozzles on the hob This operation requires no primary air regulation.
Instructions for the installer 3.2 Burner and nozzle characteristics table Burner Auxiliary Semi-rapid Rapid Triple crown Maxi oven Grand grill Burner Auxiliary Semi-rapid Rapid Triple crown Maxi oven Grand Grill Rated heating capacity (kW) 1 1.75 3 3.2 5.2 4.0 LPG – G30/G31 28-30/37 mbar Nozzle diameter 1/100 mm 50 65 85 91 110 100 Rated heating capacity (kW) 1 1.75 3 3.5 5.2 4.
3.3 Arrangement of the burners on the hob BURNERS 1. Auxiliary 2. Semi rapid 3. Rapid 4. Triple crown 3.4 Adjustment of the oven burner To adjust the oven burners follow the procedure described below from inside the oven: • Open the oven door; • Remove the oven dish and shelf. • Lift up the oven floor and remove. 3.4.1 Replacement of the oven and grill burner nozzles • Loosen the fixing screws A on the oven burner. • Push the burner B towards the right to get to the nozzle.
Instructions for the installer 4. Final operations After replacing the nozzles, reposition the flame-spreader crowns, the burner caps and the grids. Following adjustment to a gas other than the preset one, replace the gas adjustment label fixed to the appliance with the one corresponding to the new gas. This label is in the packet together with the nozzles. 4.1 Regulation of the hob burner minimum level for natural gas Light the burner and turn it to the minimum position .
2. For LPG turn the by-pass screw clockwise as far as it will go. 3. F or natural gas, regulate the by-pass so that turning the thermostat knob from minimum to maximum the flame remains stable and constant. Once the regulation has been completed, replace the seal on the by-pass using paint or similar materials. Close the oven door and make sure that the burner stays on minimum. 4.
Instructions for the user 5. Description of controls 5.1 Front control panel All the cooker controls and commands are on the front panel. DESCRIPTION OF SYMBOLS Front right burner central burner Back right burner Gas oven thermostat knob Back lefte burner Oven light / Rotisserie / Grill switch Front lefte burner Oven light switch HOB BURNER COMMAND KNOB The flame is lit by pressing the knob and turning it anticlockwise to minimum flame .
OVEN LIGHT / ROTISSERIE / GRILL SELECTOR KNOB This knob allows the user to activate the Grill / Rotisserie function or to switch on the light inside the oven to check the point reached in cooking the food. CAUTION: IT IS NOT POSSIBLE TO OPERATE THE GAS OVEN AND THE GRILL / ROTISSERIE SIMULTANEOUSLY. MINUTE COUNTER KNOB (CERTAIN MODELS ONLY) Turn clockwise to wind up the alarm and set to the desired time. Time is expressed in minutes (maximum 55 minutes).
Instructions for the user 6. Use of the hob 6.1 Lighting of the hob burners Before lighting the hob burners check that the flame caps are in the correct position and that their burner caps are in place, making sure that the holes A in the flame caps correspond to the spark plugs and thermocouples. The optional grid B is for use with “woks” (Chinese pans). To prevent deterioration of the hob we have equipped the cooker with a raised pan stand C to be placed underneath pans more than 26 cm in diameter.
6.2 Practical advice for using the hob burners For better use of the burners and lower gas consumption, use covered vessel that are proportional in size to the burner to prevent the flame from heating the sides (see paragraph “6.3 Diameter of the vessels to be used on each burner”). When water reaches the boiling point, lower the flame so that it doesn’t overflow. To avoid burns or damage to the hob, all vessels or griddle plates must be placed within the perimeter of the hob.
Instructions for the user 7. Use of the oven 7.1 Warnings and general advice Using the oven and the grill for the first time, heat them to the maximum temperature for as long as it takes to burn off any production oil residues which could give a nasty flavour to the food. After a power cut, the oven display will flash intermittently and show 0:00 . To adjust refer to paragraph "8 ELECTRONIC PROGRAMMER(ONLY ON EQUIPPED MODELS)”.
7.2 Use of the gas oven 7.2.1 Electronic spark lighting Open the oven door completely, press the thermostat knob and turn it clockwise to max. temperature. The electronic spark lighting device will be enabled automatically. Once the oven is lit, hold the knob down for a few seconds to allow the thermocouple to heat up. This device should not be enabled for more than 15 seconds; if after this time the burner has not come on, stop, fully open the oven door and try again after one minute.
Instructions for the user 7.3 Use of the gas grill 7.3.1 Manual lighting of the gas grill burner Having opened the oven door, press the knob and turn it clockwise position, placing a lit match to the burner on the roof to the grill of the oven. Once the burner is lit, hold the knob down for about 10 seconds. If the burner does not stay lit after this time, release the knob and wait for at least one minute before trying again.
7.4 Use of the rotisserie 7.4.1 Using the rotisserie in cookers with maxi oven Fit the supporting frame onto the second runner up from the bottom so that the seat to take the rod projects outside the oven. Place the rod as shown in the diagram (1) and push the frame into the oven until the end of the rod reaches the hole in the rotisserie motor. Now push the rotisserie rod to the left until it reaches the position shown in the diagram (2). To activate this function, turn the switch to ( ).
Instructions for the user FOOD Flat or thin meat Rolled roast joints Poultry GRILLE ON THE SHELF 3 2–3 2–3 • Cooking procedures in this mode must never last more than 60 minutes. • In models with gas oven, the door must be half-open on the first catch during grilling and grill-rotisserie cooking. • In models with gas grill, the door must be close during grilling cooking. • To avoid dangerous overheating when the oven or the grill is used, the glass cover must always be up.
8. Digital timer (certain models only) This component allows an on-off beeper to be set to indicate the end of the cooking time. It is therefore just a timer, with no programming functions. LIST OF FUNCTIONS TIME-SETTING BUTTON VALUE DECREASE BUTTON VALUE INCREASE BUTTON 8.1 Setting the time When the oven is used for the first time, or after a power blackout, the display flashes on and off at regular intervals showing 0:00 . or key and use the keys to set the current Press the time. 8.
Instructions for the user 8.3 Deactivating the acoustic device The acoustic device stops sounding automatically after seven minutes. It can be deactivated in manual mode by pressing the key. 8.4 Adjusting the volume of the acoustic device The volume can be adjusted (3 settings) while it is in operation by key. pressing the 8.5 Modifying the data set The timer data set can be modified at any moment by pressing the or keys. 9.
10. Available accessories The oven has 4 support for positioning plates and racks at various heights. Oven grill: for cooking food on plates, small cakes, roasts or food requiring light grilling. Plate grill: for placing above plate for cooking foods that might drip. Oven plate: useful for catching fat from foods on the grill above. Spit support (certain models only): to be inserted in the 2nd guides of the oven before using the spit.
Instructions for the user 11. Cleaning and maintenance 11.1 Cleaning stainless steel and enamelled versions To maintain stainless steel in good condition clean it regularly after each use, once it has cooled down. 11.1.1 Ordinary daily cleaning To clean and preserve the stainless steel surfaces, always use only specific products that do not contain abrasives or chlorine-based acids. How to use: pour the product on a damp cloth and wipe the surface, rinse thoroughly and dry with a soft cloth or deerskin. 11.
11.2.2 Grids Remove the grids and clean them in warm water with a nonabrasive detergent, taking care to remove any incrustations. Replace them on the cooking hob. Continuous contact of the grids with the flame can cause the paint near the hot areas to be altered. This is completely natural and does not compromise the functionality of the component. 11.2.3 Burner caps and flame cap crowns The caps and flame-spreader crowns are extractable to facilitate cleaning.
Instructions for the user 11.3 Cleaning of oven For best oven upkeep clean regularly after having allowed to cool. Take out all removable parts. • Clean the oven grill with hot water and non-abrasive detergent. Rinse and dry. • Do not allow residues of sugary foods (such as jam) to set inside the oven. If left to set for too long, they might damage the enamel lining of the oven. 11.4 Door glass The door glass should always be kept clean. Use absorbent kitchen paper to clean.
12. Extraordinary maintenance The oven may require extraordinary maintenance or replacement of parts subject to wear such as seals, bulbs, and so on. The following instructions describe how to carry out these minor maintenance operations. Before any intervention, disconnect the power supply of the device. 12.1 Replacement of light bulb Remove cover A by twisting anticlockwise, replace bulb B with another similar bulb (25 W). Refit the cover A. Only use oven bulbs (T 300°C). 12.