ENGLISH USER GUIDE LG-X240YK MFL69963201 (1.0) www.lg.
ENGLISH About this user guide Thank you for choosing this LG product. Please carefully read this user guide before using the device for the first time to ensure safe and proper use. • Always use genuine LG accessories. The supplied items are designed only for this device and may not be compatible with other devices. • This device is not suitable for people who have a visual impairment due to the touchscreen keyboard. • Descriptions are based on the device default settings.
Instructional notices WARNING: Situations that could cause injury to the user and third parties. CAUTION: Situations that may cause minor injury or damage to the device. NOTE: Notices or additional information.
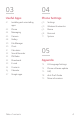
Table of contents 5 Guidelines for safe and efficient use 01 02 Custom-designed Features Basic Functions 14 KnockON 15 Gesture shot 17 Product components and accessories 18 Parts overview 20 Turning on or off the power 21 Installing the SIM card and battery 24 Charging the battery 25 Optimizing battery life 26 Inserting the memory card 27 Removing the memory card 27 Touch screen 31 Home screen 36 Screen lock 37 Device encryption 37 Taking screenshots 38 Entering text 3
03 04 Useful Apps Phone Settings 41 Installing and uninstalling apps 60 Settings 60 Wireless & networks 42 Phone 65 Device 44 Messaging 68 Personal 45 Camera 71 System 48 Gallery 50 File Manager 50 Clock 51 Calculator 52 Sound Recorder 52 FM Radio 52 Downloads Appendix 53 E-mail 74 LG Language Settings 54 Contacts 74 Phone software update 56 Calendar 75 FAQ 57 Google apps 78 Anti-Theft Guide 79 More information Table of contents 05 4
Guidelines for safe and efficient use Please read these simple guidelines. Not following these guidelines may be dangerous or illegal. Should a fault occur, a software tool is built into your device that will gather a fault log. This tool gathers only data specific to the fault, such as signal strength, cell ID position in sudden call drop and applications loaded. The log is used only to help determine the cause of the fault.
Exposure to radio frequency energy Radio wave exposure and Specific Absorption Rate (SAR) information. This device has been designed to comply with applicable safety requirements for exposure to radio waves. These requirements are based on scientific guidelines that include safety margins designed to assure the safety of all persons, regardless of age and health. • The radio wave exposure guidelines employ a unit of measurement known as the Specific Absorption Rate, or SAR.
• Repairs under warranty, at LG’s discretion, may include replacement parts or boards that are either new or reconditioned, provided that they have functionality equal to that of the parts being replaced. • Keep away from electrical appliances such as TVs, radios and personal computers. • The unit should be kept away from heat sources such as radiators or cookers. • Do not drop. • Do not subject this unit to mechanical vibration or shock.
• If your device gets wet, immediately unplug it to dry off completely. Do not attempt to accelerate the drying process with an external heating source, such as an oven, microwave or hair dryer. • The liquid in your wet device, changes the colour of the product label inside your device. Damage to your device as a result of exposure to liquid is not covered under your warranty. Efficient device operation Electronics devices All devices may receive interference, which could affect performance.
• If you are listening to music whilst out and about, please ensure that the volume is at a reasonable level so that you are aware of your surroundings. This is of particular importance when near roads. Avoid damage to your hearing To prevent possible hearing damage, do not listen at high volume levels for long periods. Damage to your hearing can occur if you are exposed to loud sound for long periods of time. Make sure that you do not turn on or off the handset close to your ear.
In aircraft Wireless devices can cause interference in aircraft. • Turn your device off before boarding any aircraft. • Do not use it on the ground without permission from the crew. Children Keep the device in a safe place out of the reach of small children. It includes small parts which may cause a choking hazard if detached. Emergency calls Emergency calls may not be available on all mobile networks. Therefore you should never depend solely on your phone for emergency calls.
• Do not expose the battery charger to direct sunlight or use it in high humidity, such as in the bathroom. • Do not leave the battery in hot or cold places, as this may deteriorate battery performance. • Risk of explosion if battery is replaced by an incorrect type. Dispose of used batteries according to the instructions. • If you need to replace the battery, take it to the nearest authorised LG Electronics service point or dealer for assistance.
accident, crime in progress or other serious emergency where lives are in danger, call the emergency number, as you would want others to do for you. • If you see a broken down vehicle posing no serious hazard, a broken traffic signal, a minor traffic accident where no one appears injured, or a vehicle you know to be stolen, call roadside assistance, local traffic authority or police station. Precautions when using SIM cards • Do not insert the SIM card into the device with the label or seal attached.
01 Custom-designed Features
KnockON You can turn the screen on or off by double-tapping the screen. • This option is available only on the Home screen provided by LG. It may not function properly on a custom launcher or on the Home screen installed by the user. • When tapping the screen, use your fingertip. Do not use a fingernail. • To use the KnockON feature, make sure that the proximity/light sensor is not blocked by a sticker or any other foreign substance. Turning on the screen Double-tap the middle of the screen.
Gesture shot You can take selfies by using gestures. Show your palm to the front camera and then clench your fist. • In three seconds, a photo is taken. • An alternative way to take gesture shots is to clench your fist and then open it towards the front camera. • Make sure that your palm and fist are within the reference line so that the camera can detect them.
02 Basic Functions
Product components and accessories Make sure that none of the following items are missing: • Device • Battery • Stereo headset • USB cable • Charger • Quick Start Guide • The items described above may be optional. • The items supplied with the device and any available accessories may vary depending on the area and service provider. • Always use genuine LG Electronics accessories. Using accessories made by other manufacturers may affect your device's call performance or cause malfunctions.
Parts overview Headset Jack Front Camera Lens Proximity/Ambient Light Sensor Earpiece Volume Keys Charger/USB Port Microphone Rear Camera Lens Flash Power/Lock Key Speaker Microphone Basic Functions 18
• Proximity/Ambient Light Sensor - Proximity sensor: The proximity sensor turns off the screen and disables touch functionality when the device is in close proximity to the human body. It turns the screen back on and enables touch functionality when the device is outside a specific range. - Ambient light sensor: The ambient light sensor analyses the ambient light intensity when the auto-brightness control mode is turned on. • Volume Keys - Adjust the Volume for ringtones, calls or notifications.
Turning on or off the power Turning on the power When the power is turned off, press and hold the Power/Lock Key. • When the device is turned on for the first time, initial configuration takes place. The first booting time for the smart phone may be longer than usual. Turning off the power Press and hold the Power/Lock Key, then select Power off. Power control options Tap and hold the Power/Lock Key, then select an option. • Power off: Turn off the device. • Restart: Restart the device.
Installing the SIM card and battery Insert the SIM card provided by your service provider, and the included battery. • Do not insert a memory card into the SIM card slot. If a memory card happens to be lodged in the SIM card slot, take the device to a LG Service Centre to remove the memory card. • Only the Nano SIM cards work with the device. 1 To remove the back cover, hold the device firmly in one hand. With your other hand, lift off the back cover with your thumbnail as shown in the figure.
2 Slide the SIM card into the SIM card slot as shown in the figure. Make sure the gold contact area on the card is facing downward. • To remove the SIM Card from Slot 1, slide the pin at the left to the down.
3 Insert the battery. 4 To replace the cover onto the device, align the back cover over the battery compartment and press it down until it clicks into place.
Charging the battery Charge the battery before using it for first time. Use a charger to charge the battery. A computer can also be used to charge the battery by connecting the device to it using a USB cable. • Make sure to use an LG-approved charger and charging cable. Charging the battery with a third-party charger may cause the battery to explode or may damage the device. The charger connector is located at the bottom of the device.
Optimizing battery life Extend your battery’s power by turning off features that you do not need to run constantly in the background. You can monitor how applications and system resources consume battery power. Extending your device battery life • Turn off radio communications when you are not using. If you are not using Wi-Fi, Bluetooth® or GPS, turn them off. • Reduce screen brightness and set a shorter screen timeout. • Turn off automatic syncing for Gmail, Calendar, Contacts and other applications.
Inserting the memory card The device supports up to a 32GB microSD. Some memory cards may not be compatible with your device, depending on the memory card manufacturer and type. • Some memory cards may not be fully compatible with the device. If you use an incompatible card, it may damage the device or the memory card, or corrupt the data stored in it. • If you write and erase data too frequently, it will shorten the lifespan of memory cards. 1 Remove the back cover.
Removing the memory card Before removing the memory card, first unmount it for safe removal. Settings Storage . 1 Tap 2 Remove the back cover and pull out the memory card. • Do not remove the memory card while the device is transferring or accessing information. This may cause data to be lost or corrupted, or may damage the memory card or the device. LG is not responsible for losses that result from the abuse or improper use of memory cards, including the loss of data.
Tapping and holding Tap and hold for several seconds to run a hidden function. Double-tapping Tap twice quickly to zoom in or out on a photo or map. Swiping Tap and hold an item, such as an app or widget, then swipe it to another location. You can use this gesture to move an item.
Flicking Gently tap and hold on the screen, then flick left or right to quickly move to another panel. Pinching and spreading Pinch two fingers to zoom out such as on a photo or map. To zoom in, spread your fingers apart. • Do not expose the touch screen to excessive physical shock. You might damage the touch sensor.
• A touch screen failure may occur if you use the device near a magnetic, metallic or conductive material. • If you use the device under bright lights, such as direct sunlight, the screen may not be visible, depending on your position. Use the device in a shady location or a location with an ambient light that is not too bright and bright enough to read books. • Do not press the screen with excessive force. • Gently tap with your fingertip on the option you want.
Home screen Home screen overview The Home screen is the starting point for accessing various functions and apps on your device. Tap on any screen to directly go to the Home screen. You can manage all apps and widgets on the Home screen. Swipe the screen left or right to view all installed apps at a glance. To search for an app, use Google search. Home screen layout You can view all apps and organise widgets and folders on the Home screen.
• Folder: Create folders to group apps by your preferences. • Page icon: View the total number of Home screen canvases and the currently displayed canvas which is highlighted. • Quick access area: Fix main apps at the bottom of the screen so that they can be accessed from any Home screen canvas. • Home touch buttons : Return to the previous screen. Close the keypad or pop-up windows. : Tap to go to the Home screen. To launch Google, press and hold.
• Some of these icons may appear differently or may not appear at all, depending on the device's status. Refer to the icons according to the actual environment in which you are using the device. • Displayed icons may vary, depending on the area or service providers. Notifications panel You can open the notifications panel by dragging the status bar downwards. Use quick access icons in the notifications panel to easily and quickly turn a function on or off. Access the Settings app. Adjust the brightness.
Switching the screen orientation You can set the screen orientation to automatically switch, according to the device's orientation. On the notification panel, tap Auto-rotate from the quick access icon list. Settings Display When device is Alternatively, tap rotated and select Rotate the contents of the screen. Editing the Home screen On the Home screen, tap and hold on an empty space, then start the desired function.
Moving apps on the Home screen On the Home screen, tap and hold an app, then drag it to another location. • To keep frequently used apps at the bottom of the Home screen, tap and hold an app, then drag it to the quick access area at the bottom. • To remove an icon from the quick access area, drag the icon to the Home screen. Using folders from the Home screen Creating folders On the Home screen, tap and hold an app, then drag it over another app.
Screen lock Screen lock overview Your device's screen turns off and locks itself if you press the Power/ Lock Key. This also happens after the device is left idle for a specified period of time. If you press the Power/Lock Key when a screen lock is not set, the Home screen appears immediately. To ensure security and prevent unwanted access to your device, set a screen lock. • Screen lock prevents unnecessary touch input on the device screen and reduces battery consumption.
Device encryption Encrypting your device Data is encrypted before saving on the device to protect the data. It is possible to read, write and copy data even when device encryption is set. It is also possible to display a user confirmation prompt when the power is turned on by using lock settings while in lock screen mode. Precautions for device encryption You can use Secure start-up to increase your device’s protection level.
Entering text Using Smart keyboard You can use Smart keyboard to enter and edit text. With Smart keyboard, you can view text as you type without bothering to alternate between the screen and a conventional keyboard. This allows you to easily find and correct errors when typing. Suggesting words Smart keyboard automatically analyses your usage patterns to suggest frequently used words as you type. The longer you use your device, the more precise the suggestions are.
Changing the keyboard You can change the input language and the keyboard type for each language. Settings Language & input. 1 Tap Select a language and customise the keyboard type. 2 Copy and Paste You can cut or copy text from an app, and then paste the text into the same app. Or, you can run other apps and paste the text into them. 1 Tap and hold around the text you want to copy or cut. 2 Drag / to specify the area to copy or cut. 3 Select either CUT or COPY.
03 Useful Apps
Installing and uninstalling apps Installing apps Access an app store to search and download apps. • You can use Play Store or the app store provided by your service provider. • Some app stores may require you to create an account and sign in. • Some apps may charge fees. • If you use mobile data, you may be charged for data usage, depending on your pricing plan. Uninstalling apps Uninstall apps that you no longer use from your device. • Some apps cannot be uninstalled by users.
Phone Voice call Make a phone call by using one of the available methods, such as manually entering a phone number or making a call from the contact list or the list of recent calls. Making a call from the keypad . 1 Tap 2 Make a call by using a method of your choice: • Enter a phone number and tap . • Search for a contact by tapping the initial letter of a contact name in the contact list. • To enter "+" when making an international call, tap and hold number 0.
Rejecting a call To reject an incoming call, swipe to left to decline an incoming call. to up to send a rejection • To send a rejection message, swipe message. Settings Quick • To add or edit a rejection message, tap responses. • When a call is coming in, you can press the Power/Lock Key or the volume key to switch to mute mode. Viewing missed calls If there is a missed call, the status bar at the top of the screen displays . To view missed call details, drag the status bar downwards. Alternatively, .
Messaging Sending a message You can create and send messages to your selected contacts or all of your contacts using the Messaging app. • Sending messages abroad may incur additional charges. Consult with your service provider for more information. . 1 Tap 2 Tap . 3 Specify a recipient and create a message. • To attach files, tap . • To access optional menu items, tap . 4 Tap to send the message. Reading a message You can view exchanged messages organised by contact. .
Camera Starting the camera You can take a photo or record a video to keep the memorable moments. . Tap • Before taking a photo, wipe the camera lens with a microfibre cloth. If your finger touches the camera lens, you may get blurry photos. • If the battery level is lower than 5%, charge the battery before using the camera. • Images included in this user guide may be different from the actual device. • Photos and videos can be viewed or edited from Gallery. See Gallery overview for details.
Switching between cameras You can switch between the front and rear cameras to suit your shooting environment. to switch between the front and rear On the camera screen, tap cameras. • Use the front camera to take selfies. See Taking selfies for details. Zoom in or out You can use zoom in or out on the camera screen while taking a picture or recording a video. On the camera screen, pinch or spread two fingers to zoom in or out.
Panorama You can create a panoramic photo by moving the camera in one direction to photograph and stitch continuous shots of for a wide view. 1 In the Normal mode, tap . 2 Tap and then slowly move the camera in one direction. • Move the device by following the direction of the arrow in the guideline. 3 Tap to end shooting. Burst shot You can take continuous shots of photos to create moving pictures. In the Normal mode, tap and hold . • Continuous shots are taken at a fast speed while is held down.
Taking selfies You can use the front camera to view your face on the screen and take selfies. • When using the front camera, you can change in camera options how selfies are taken. Gallery Gallery overview You can view and manage photos and videos saved on your device. 1 Tap . • Saved photos and videos are displayed by the folder. 2 Tap a folder and select a file. • View the selected file in full-screen mode. • Swipe left or right on the displayed photo or video screen to view the previous or next file.
Viewing photos Back to the previous screen Access additional options Share images via Message Share images Edit images Editing photos 1 While viewing a photo, tap . 2 Use a variety of effects and tools to edit the photo. 3 Tap SAVE to save changes. • The changes are overwritten to the original file.
Sharing files You can share files by using one of the following options: • While viewing a photo or video, tap to share the file by using the method you want. • Tap from the file list to select files and share them using the method you want. File Manager You can view and manage files saved on your device or cloud. File Manager. 1 Tap 2 Select the desired storage location. Clock Alarm You can set an alarm to trigger it at a specified time. Clock . 1 Tap 2 Tap to add a new alarm.
Timer You can set the timer to trigger an alarm after a specified period of time. Clock . 1 Tap 2 Set the time and tap . • To suspend the timer, tap . To resume the timer, tap • To reset the timer settings, tap . 3 Tap . to reset the timer alarm. Stopwatch You can use the stopwatch to record a lap time. 1 Tap 2 Tap Clock . to initiate the stopwatch. • To record a lap time, tap . 3 Tap to suspend the stopwatch. • To resume the stopwatch, tap . • To delete all the stopwatch records, tap .
Sound Recorder You can record and save your voice or others' voices from important events. Recorded voice files can be played back or shared. 1 Tap 2 Tap . Sound Recorder. • To pause recording, tap . 3 Tap to end recording. • The file is saved automatically and the pre-listen screen appears. 4 Tap to play the recorded voice. FM Radio You can listen to FM radio. FM Radio. Tap • To use this app, first connect a headset to the device. The headset becomes the radio antenna.
E-mail E-mail overview You can register an email account to your device and then you can check and send emails from your device. • If you use mobile data, you may be charged for data usage fee depending on your pricing plan. Consult with your service provider for more information. Registering email accounts When you use the email app for the first time, register your email account. E-mail. 1 Tap 2 Select an email service provider.
Checking email 1 Tap and select a mail box. 2 Select an email from the email list. • The email message appears. Sending email 1 Tap . 2 Enter the email address of a recipient. 3 Enter a subject and message. . • To attach files, tap • To access optional menu items, tap . 4 Tap to send the email. Contacts Contacts overview You can save and manage contacts. Contacts. Tap Adding contacts Adding new contacts 1 On the contact list screen, tap . 2 Enter contact details and tap .
Importing contacts You can import contacts from another storage device. 1 On the contact list screen, tap Import/Export. 2 Select the source and target locations of the contact you want to import, and then tap NEXT. 3 Select contacts and tap OK. Searching for contacts You can search for contacts by using one of the following options: • On the contact list screen, enter a contact name in the search box. • Scroll the contact list up or down.
Creating groups 1 On the contact list screen, tap Groups 2 Enter a new group name. 3 Tap , select contacts, then tap OK. 4 Tap to save the new group. . Calendar Calendar overview You can use the calendar to manage events and tasks. Adding events Calendar. 1 Tap 2 Select a date and then tap . 3 Enter event details and tap SAVE. • If you tap a date from the calendar and the date contains events, a pop-up window appears showing a list of the events.
Google apps You can use Google apps by setting a Google account. The Google account registration window appears automatically when you use a Google app for the first time. If you do not have a Google account, create one from your device. For details on how to use an app, see the Help in the app. • Some apps may not work depending on the area or service provider. Google Use search function provided by Google to search web sites and files stored on your device by entering keywords or via voice.
Google Play Movies & TV Use your Google account to rent or purchase movies. Purchase content and play it anywhere. Photos View or share photos or albums saved on your device.
04 Phone Settings
Settings You can customise the device settings in accordance with your preferences. Settings. Tap • Tap and enter a keyword in the search box to access a setting item. Wireless & networks Wi-Fi You can connect to nearby devices over a Wi-Fi network. Connecting to a Wi-Fi network 1 On the settings screen, tap Wi-Fi. to activate it. 2 Drag • Available Wi-Fi networks appear automatically. 3 Select a network. • You may need to enter the network's Wi-Fi password.
Wi-Fi Direct You can connect your device to other devices that support Wi-Fi Direct to share data directly with them. You do not need an access point. You can connect with more than two devices by using Wi-Fi Direct. 1 On the settings screen, tap Wi-Fi Advanced Wi-Fi Direct. • Nearby devices that support Wi-Fi Direct automatically appear. 2 Select a device. • Connection occurs when the device accepts the connection request. • The battery may drain faster when using Wi-Fi Direct.
Sending data via Bluetooth 1 Select a file. • You can send multimedia files or contacts. Bluetooth. • 2 Select a target device for the file. • The file is sent as soon as the target device accepts it. • File sharing processes may differ depending on the file. Data usage Displays the data usage and device data usage limit. On the Settings screen, tap Data usage. to toggle your device data connection On or Off. This • Tap allows you to manage your device data usage.
4 Enter the network password. • This option uses mobile data and may incur data usage fees, depending on your pricing plan. Consult with your service provider for more information. • More information is available at this web site: http://www.android.com/tether#wifi USB tethering You can connect the device to another device via USB and share mobile data. 1 Connect your device and other devices via USB cable.
Bluetooth tethering A Bluetooth-connected device can connect to the internet by using your device's mobile data. 1 On the settings screen, tap More Tethering & portable hotspot Bluetooth tethering and then drag to activate it. 2 Turn on Bluetooth on both devices, and pair them. • This option uses mobile data and may incur data usage fees, depending on your pricing plan. Consult with your service provider for more information. • More information is available at this web site: http://www.android.
Mobile networks You can customise mobile data settings. 1 On the settings screen, tap More Mobile networks. 2 Customise the following settings: • Data roaming: Connect to data services when roaming. • Preferred network type: Select a network type. • Access Point Names: View or change the access point for using mobile data services. To change the access point, select a choice from the access point list. • Network operators: Search for network operators and connect automatically to a network.
• When device is rotated: Automatically rotate the screen according to the device’s orientation. • More KnockON: Turn on or off the screen by tapping the screen twice. Sound & notification You can customise sound, vibrate and notification settings. On the settings screen, tap Sound & notification and customise the following settings: • Sound: Adjust the sound volume for various items. • Also vibrate for calls: Set the device to vibrate and play a ringtone simultaneously.
Apps You can view a list of installed apps. Shut down or delete apps, if necessary. 1 On the settings screen, tap Apps. 2 Select an app and perform actions. Storage You can view and manage internal storage on the device or storage space of the memory card. 1 On the settings screen, tap Storage. 2 Customise the following settings: • Device storage : View the total storage space and free space in the device’s internal storage. View a list of apps in use and the storage capacity for each app.
Memory You can view the average amount of memory usage over a certain period of time and the memory occupied by an app. 1 On the settings screen, tap Memory. 2 Tap to set a time slot to retrieve data. Personal Location You can customise how your location information is used by particular apps. 1 On the settings screen, tap Location. 2 Customise the following settings: • Mode: Select a method to provide your location information.
• Smart Lock: Select trusted items so that if one of them occurs, the device is automatically unlocked. • Encrypt phone: Set the device password for privacy. Create a PIN or password to enter each time the device is turned on. • Set up SIM card lock: Lock or unlock the SIM card, or change the password (PIN). • Make passwords visible: Display a password as you enter it. • Device administrators: Allow privileges to restrict the control or use of the device to particular apps.
Google You can use Google settings to manage your Google apps and account settings. On the settings screen, tap Google. Language & input You can customise language and keyboard settings for your device. 1 On the settings screen, tap Language & input. 2 Customise the following settings: • Language: Select a language to apply for the device. • Spell checker: Correct the spelling by using Google Spell Checker. • Personal dictionary: Manage some words in the Personal dictionary.
• Automatic restore: Automatically restore backup settings and data when reinstalling an app. • Network settings reset: Reset Wi-Fi, Bluetooth and other network settings. • Factory data reset: Reset all settings for the device and delete data. • Resetting your device deletes all data on it. Enter your device name, Google account and other initial information again. System Date & time You can customise date and time settings for your device. 1 On the settings screen, tap Date & time.
• High contrast text: Set the text to a darker contrast. • Power button ends call: End a call by pressing the Power/Lock Key. • Auto-rotate screen: Automatically change the screen orientation according to the physical position of the device. • Speak passwords: Enable to allow voice confirmations of characters when entering passwords. • Accessibility shortcut: Quickly access a frequently used function. • Text-to-speech output: Set the preferred speech engine and speech rate.
05 Appendix
LG Language Settings Select a language to use on your device. Settings Language & input Language, and select a • Tap language. Phone software update LG Mobile Phone software update via Over-the-Air (OTA) This feature allows you to conveniently update your phone’s software to a newer version via OTA, without connecting using a USB cable. This feature will only be available if and when LG makes a newer firmware version available for your device.
FAQ This chapter lists some problems you might encounter when using your phone. Some problems require you to call your service provider, but most are easy to fix yourself. Message Possible causes Possible corrective measures SIM card error There is no SIM card in the phone or it is inserted incorrectly. Make sure the SIM card is correctly inserted. Signal is weak or you are outside the carrier network. Move toward a window or into an open area. Check the network operator coverage map.
Message Calls not available Phone cannot be turned on Possible causes Possible corrective measures Dialling error New network not authorised. New SIM card inserted. Check for new restrictions. Pre-paid charge limit reached. Contact service provider or reset limit with PIN2. On/Off key pressed too briefly. Press the On/Off key for at least two seconds. Battery is not charged. Charge battery. Check the charging indicator on the display. Battery is not charged. Charge battery.
Message Possible causes Possible corrective measures Files do not open Unsupported file format Check the supported file formats. The screen does not turn on when I receive a call. Proximity sensor problem If you use a protection tape or case, make sure it has not covered the area around the proximity sensor. Make sure that the area around the proximity sensor is clean. No sound Vibration mode Check the settings status in the sound menu to make sure you are not in vibration or Do not disturb mode.
Anti-Theft Guide Set up your device to prevent other people from using it if it’s been reset to factory settings without your permission. For example, if your device is lost, stolen, or wiped, only someone with your Google account or screen lock information can use the device. All you need to make sure your device is protected is: • Set a screen lock: If your device is lost or stolen but you have a screen lock set, the device can’t be erased using the Settings menu unless your screen is unlocked.
More information Open Source Software Notice Information To obtain the source code under GPL, LGPL, MPL, and other open source licenses, that is contained in this product, please visit http://opensource.lge.com. In addition to the source code, all referred license terms, warranty disclaimers and copyright notices are available for download.
Declaration of conformity Hereby, LG Electronics declares that this LG-X240YK product is in compliance with the essential requirements and other relevant provisions of Directive 2014/53/EU. A copy of the Declaration of Conformity can be found at http://www.lg.com/global/declaration This handset is not suitable for people who have a visual impairment due to the touch screen keyboard.