To contact LG Electronics, 24 hours a day, 7 days a week: 1-800-243-0000(US) 1-888-542-2623(Canada) Or visit us on the Web at: us.lge.com PORTAbLE AIR CONDITIONER USER’ S GUIDE & INSTALLATION INSTRUCTIONS Please retain this owner’s manual for future reference. Read and follow all safety rules and instructions before using this product.
I N T RO D U C T I O N IMPORTANT SAFETY INSTRUCTIONS Basic Safety Precautions . . . . . . . . . . . . . . . . . . . 3, 4 Electrical Safety. . . . . . . . . . . . . . . . . . . . . . . . . . . 4, 5 PARTS AND FEATURES Key Parts and Components . . . . . . . . . . . . . . . . . . . 6 Control Panel and Remote . . . . . . . . . . . . . . . . . . . . 7 THANK YOU! Congratulations on your purchase and welcome to the LG family. HOW TO USE Before Using Your Air Conditioner . . . . . . . . . . . .
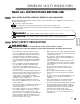
I m P O RTA N T S A F E T Y I N S T RU C T I O N S READ ALL INSTRUCTIONS BEFORE USE Your safety and the safety of others is very important. WARNING This symbol indicates the possibility of death or serious injury. CAUTION This symbol indicates the possibility of injury or damage to property. English We have provided many important safety messages in this manual and on your appliance. Always read and obey all safety messages. This is the safety alert symbol.
I m P O RTA N T S A F E T Y I N S T RU C T I O N S READ ALL INSTRUCTIONS BEFORE USE BASIC SAFETY PRECAUTIONS CAUTION Toreducetheriskoffire,electricshock,orinjurytopersonswhen usingthisappliance,followbasicprecautions,includingthefollowing: • To avoid possible cuts, avoid contacting the metal parts of the air conditioner when removing or reinstalling the filter. It can result in the risk of personal injury. • Do not block the air inlet or outlet of the air conditioner.
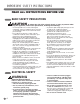
I m P O RTA N T S A F E T Y I N S T RU C T I O N S READ ALL INSTRUCTIONS BEFORE USE ELECTRICAL SAFETY INTEGRATED CIRCUIT BREAKER RESET RESET PREFERRED GROUNDING METHOD TEST RESET TEST TEST English Ensure proper ground exists before use. For additional safety, the power cord features an integrated circuit breaker. Test and reset buttons are provided on the plug case. The circuit breaker should be tested periodically by pressing the TEST button then the RESET button.
PA RT S A N D F E AT U R E S KEY PARTS AND COMPONENTS 1 CONTROL PANEL AND DISPLAY 1 Easy-to-read digital display shows the set temperature and indicator lights show the operating mode. Simple push buttons make changing settings quick and easy. 2 2 MOTORIZED AIR DISCHARGE The adjustable louvered air discharge opens automatically when the air conditioner is turned on, and closes when it is turned off. It can also be set to oscillate to distribute air more evenly through the room.
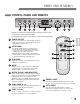
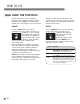
PA RT S A N D F E AT U R E S CONTROL PANEL AND REMOTE 1 2 3 4 5 7 6 8 1 Power POWER ON/OFF 1 Turns the air conditioner on and off. When turning on, a rising tone will sound to confirm. When turning off, a descending tone will sound. 2 6 AUTO CLEAN • The AUTO CLEAN function is used to remove moisture from the heat exchangers and helps prevent odor from forming. This function can be activated from the control panel only.
H O W TO U S E BEFORE USING YOUR AIR CONDITIONER PREPARING FOR OPERATION UNPACKING THE AIR CONDITIONER Refer to the Installation Instructions included in this manual before using the air conditioner. Once the air conditioner has been properly assembled and installed: Remove and store packing materials for reuse. Remove any shipping tape before using the air conditioner. If the tape leaves behind any adhesive, rub a small amount of liquid dish soap onto it and wipe with a damp cloth.
H O W TO U S E BEFORE USING YOUR AIR CONDITIONER INSERTING BATTERIES IN THE REMOTE Before using your remote, install the provided AAA batteries: 1 Press in the locking tab on the battery cover on the back of the remote and remove the cover. 2 Insert two new alkaline AAA batteries into - Be sure to note proper polarity! + + - the battery compartment, being sure to note the proper polarity. 3 Reattach the battery cover, making sure the English locking tab clicks into place.
H O W TO U S E USING THE CONTROLS Control panel buttons shown. Operation using the remote control is the same, unless specifically noted. NOTE: The remote sensor is located next to the display on the control panel. Always point the remote at the sensor. The remote may not work if the sensor is in bright light or if there is not a clear path between the remote and the sensor. POWER MODE Press the POWER button to turn the air conditioner ON or OFF.
H O W TO U S E FAN SPEED TIMER 1-24 Hr Pressing the FAN SPEED button cycles the circulation fan speed from low (F1) to medium (F2) to high (F3). The selected fan speed will be shown in the display. The function can be used in either COOL or FAN modes. When changing fan speeds, there is a brief delay before the fan motor changes speed. When the TIMER function is selected, you can set the air conditioner to either automatically turn OFF or turn ON after a delay of up to 24 hours. The display will show 0.
H O W TO U S E USING THE CONTROLS ENERGY SAVER Under normal operation, the exhaust fan cycles on and off with the compressor, and the circulation fan runs at the set speed. The ENERGY SAVER mode helps reduce power consumption by automatically turning off the circulation fan as well as the exhaust fan when the compressor is off. The air conditioner will automatically cycle both fans on and off with the compressor as needed for cooling.
I N S TA L L AT I O N I N S T RU C T I O N S PREPARING FOR INSTALLATION WARNING Theairconditionerisheavy!Usetwoormorepeopleto liftandinstalltheunit!Failuretodosocouldresultinbackinjuryorotherinjuries. EXHAUST COMPONENTS English The following components are used for window venting. Not all components are used for every installation.
I N S TA L L AT I O N I N S T RU C T I O N S ATTACHING THE HOSE AND DIFFUSER NOTE: The air conditioner is shipped with the hose installed. The hose may be removed for cleaning and storage, if necessary. Simply reverse the steps below to remove. 1 Insert the large adapter end of the hose into the hole on the back of the air conditioner. Align the pins on the connector with the slots in the hole. Twist slightly clockwise until it locks into place.
I N S TA L L AT I O N I N S T RU C T I O N S WINDOW VENT PANEL AND EXTENSIONS The window installation kit allows you to install the air conditioner in most vertical-sliding windows 18" to 48" wide, or casement-style windows from 18" to 48" high. Small extension panel 181⁄4" − 24" 18" Vent Panel Vent Panel Vent Panel Vent Panel 18" 181⁄4" − 24" For an 18" window opening, use the window vent panel by itself.
I N S TA L L AT I O N I N S T RU C T I O N S INSTALLATION IN VERTICAL SLIDING WINDOWS NOTE: The window installation kit can be used with vertical sliding windows between 18" and 48" wide.
I N S TA L L AT I O N I N S T RU C T I O N S INSTALLATION IN VERTICAL SLIDING WINDOWS Security Bracket 5 Install the security bracket with a type B screw, as shown. Type A screws 6 Insert the oval end of the diffuser into the window installation kit until the locking tabs engage. Secure in place with four Type A screws.
I N S TA L L AT I O N I N S T RU C T I O N S INSTALLATION IN CASEMENT STYLE WINDOWS NOTE: The window installation kit can be used with casement windows between 18ʺ and 48ʺ tall. Foam seal C (Adhesive type-shorter) Extension panel (if required) Vent Panel Foam seal A (Adhesive type) 1 Cut the foam seal A(adhesive type) & C(adhesive type-shorter) to the proper length, and attach it to the window sash and frame.
I N S TA L L AT I O N I N S T RU C T I O N S INSTALLATION IN CASEMENT STYLE WINDOWS Type A screws Type B screw 5 Install the window security bracket with a type B screw, as shown. 6 Insert the oval end of the diffuser into the window installation kit until the locking tabs engage. Secure in place with four of the included screws.
CARE AND CLEANING Your air conditioner is designed for year-round operation with only minimal cleaning and maintenance. For maximum efficiency, it is recommended that you have the cooling coils inspected and cleaned annually. Your local LG Authorized Service Center can provide this inspection and cleaning service for a nominal fee. WARNING • Unplugtheairconditionerbeforecleaningorperforminganymaintenanceorservicing.
CARE AND CLEANING EMPTYING THE WATER COLLECTION TANK Using the bottom drain port When the internal water collection tank is full, FL will appear in the display and the air conditioner will turn off until the tank is emptied. 1 Unplug the air conditioner, disconnect the exhaust hose from the back, and move the air conditioner to a suitable drain location or outdoors. You may also place a pan under the drain that will hold up to 1 quart of water. 2 Remove the drain cap from the drain outlet.
CARE AND CLEANING STORING THE AIR CONDITIONER If the air conditioner will not be used for an extended period of time: 1 Drain the water collection tank completely and leave the bottom drain cap off long enough to allow any residual water to drain out. Once the tank is completely drained and no more water flows out, reinstall the cap. 2 Remove and clean the filter, allow it to dry completely, then reinstall it. 3 Remove the batteries from the remote.
T RO U b L E S H O OT I N G BEFORE CALLING FOR SERVICE Problem PossibleCauses Solutions Air conditioner will not start • The air conditioner plug is not completely inserted in the electrical outlet. • Make sure electrical plug is plugged completely into a live, properly grounded outlet. • The house fuse is blown or the circuit breaker has tripped. • Replace the fuse or reset the circuit breaker. Make sure that there are no other appliances on the same circuit. • Power failure.
T RO U b L E S H O OT I N G BEFORE CALLING FOR SERVICE Problem PossibleCauses Solutions F1, F2, or F3 • Air conditioner is in FAN mode and the number shown is the set fan speed. • This is normal. The air conditioner is working properly. FL • The water collection tank is full. • Empty the water collection tank. See the Care and Cleaning section. CH01 • Short or open circuit in the indoor air thermostat. • Unplug the air conditioner and contact your authorized LG service center.
LGELECTRONICS,INC. PORTABLEAIRCONDITIONERLIMITEDWARRANTY—USA Should your LG Portable Air Conditioner prove to be defective in material or workmanship under normal use during the warranty period listed below, effective from the date of original consumer purchase of the product, LG Electronics will replace the defective part(s). Replacement parts will meet intended fit and function of the original part. Replacement parts are warranted for the unexpired portion of the original warranty period.
P/No.