To contact LG Electronics, 24 hours a day, 7 days a week: 1-800-243-0000 (USA) Or visit us on the Web at: us.lge.com (USA) ELECTRIC RANGE USER’S GUIDE Please read this guide thoroughly before operating and keep it handy for reference at all times. Models LRE3091ST LRE3091SB LRE3091SW Printed in Mexico P/No.
I N T RO D U C T I O N IMPORTANT SAFETY INFORMATION ......3-9 SURFACE CONTROLS COOKING Power Outage Message ...............................................10 Hot Surface Indicator ....................................................10 Locations Of the Radiant Surface Elements And Controls ........................................................................10 Setting Surface Controls ..............................................11 Tips To Protect the Glass Cooktop Surface .................
I M P O RTA N T S A F E T Y I N F O R M AT I O N Read and follow all instructions before using your oven to prevent the risk of fire, electric shock, personal injury, or damage when using the range. This guide do not cover all possible conditions that may occur. Always contact your service agent or manufacturer about problems that you do not understand. This is the safety alert symbol. This symbol alerts you to potential hazards that can kill or hurt you and others.
I M P O RTA N T S A F E T Y I N F O R M AT I O N READ ALL INSTRUCTIONS BEFORE USE SAFETY PRECAUTIONS (cont.) • DO NOT TOUCH HEATING ELEMENTS OR INTERIOR SURFACES OF OVEN. Heating elements may be hot even though they are dark in color. Interior surfaces of an oven become hot enough to cause burns. During and after use, do not touch or let clothing or other flammable materials contact heating elements or interior surfaces of oven until they have had sufficient time to cool.
I M P O RTA N T S A F E T Y I N F O R M AT I O N ELECTRICAL SAFETY • Protective Liners. Do not use aluminum foil or any other material to line the oven bottoms. Improper installation of these liners may result in a risk of electric shock or fire. • Do Not allow aluminum foil or meat probe to contact heating elements. WARNING • Before replacing your oven light bulb, switch off the electrical power to the oven at the main fuse or circuit breaker panel.
I M P O RTA N T S A F E T Y I N F O R M AT I O N READ ALL INSTRUCTIONS BEFORE USE SURFACE COOKING UNITS • Use Proper Pan Sizes. This appliance is equipped with one or more surface units of different size. Select utensils having flat bottoms large enough to cover the surface unit heating element. The use of undersized utensils will expose a portion of the heating element to direct contact and may result in ignition of clothing. Proper relationship of utensil to burner will also improve efficiency.
I M P O RTA N T S A F E T Y I N F O R M AT I O N ENGLISH READ ALL INSTRUCTIONS BEFORE USE CHILD SAFETY WARNING • Children should be kept away from the oven. • Accessory parts will become hot when the broiler is in use. CAUTION • DO NOT leave small children unattended near the appliance. During the self-cleaning cycle, the outside of the oven can become very hot to the touch. CAUTION • NEVER leave children alone or unsupervised near the appliance when it is in use or is still hot.
I M P O RTA N T S A F E T Y I N F O R M AT I O N READ ALL INSTRUCTIONS BEFORE USE GLASS/CERAMIC COOKING SURFACES (cont.) • DO NOT place aluminum foil or plastic items such as salt and pepper shakers, spoon holders, or plastic wrappings or any other material on the range when it is in use. - The hot air from the vent could melt plastics or ignite flammable items.
I M P O RTA N T S A F E T Y I N F O R M AT I O N SAFETY WHEN CLEANING • Do Not Clean Door Gasket. The door gasket is essential for a good seal. Care should be taken not to rub, damage, or move the gasket. • Do Not Use Oven Cleaners. No commercial oven cleaner or oven liner protective coating of any kind should be used in or around any part of the oven. • Before self cleaning the oven. Remove broiler pan, all oven racks, meat probe and any other utensils from the oven cavity.
S U R FAC E C O N T RO L S C O O K I N G POWER OUTAGE MESSAGE If your oven was set for a timed oven operation and a power outage occurred, the clock and all programmed functions must be reset. The time of day will flash in the display when there has been a power outage. Press the Clear/Off pad. Reset the clock with the correct time of day. HOT SURFACE INDICATOR WILL • Come on when the unit is hot to touch after. • Stay on even after the unit is turned off. • Come on during self-cleaning cycle.
S U R FAC E C O N T RO L S C O O K I N G Use to turn on the surface elements. An infinite choice of heat settings is available from Low to High. The knobs can be set on or between any of the settings. To turn on a single surface unit (Left Front, Left Rear, Right Rear) To turn on a dual surface unit (Right Front) Place pan on surface element.
S U R FAC E C O N T RO L S C O O K I N G TIPS TO PROTECT THE GLASS COOKTOP SURFACE Cleaning To Prevent Marks and Scratches (See pages 32~33 for more information) Before first use, clean the cooktop. Clean your cooktop daily or after each use. This will keep your cooktop looking good and can prevent damage. If a spillover occurs while cooking, immediately clean the spill from the cooking area while it is hot to prevent a tough cleaning chore later.
S U R FAC E C O N T RO L S C O O K I N G The cooking areas on your range are identified by permanent circles on the glass cooktop surface. For the most efficient cooking, fit the pan size to the element size. Pans should not extend more than 1/2 to 1-inch beyond the cooking area. When a control is turned on, a glow can be seen through the glass cooktop surface. The element will cycle on and off to maintain the preset heat setting, even on Hi.
S U R FAC E C O N T RO L S C O O K I N G HOME CANNING TIPS Be sure the canner is centered over the surface unit. Make sure the canner is flat on the bottom. The base must not be more than 1 inch larger than the element. Use of water bath canners with rippled bottoms may extend the time required to bring the water to a boil and cooktops may be damaged. Some canners are designed with smaller bases for use on smooth top surfaces.
PA RT S A N D F E AT U R E S ENGLISH PARTS AND FEATURES Single element Dual element Ceramic glass Automatic oven light switch Self clean latch Broiler pan and Grid (Not included in this model) Oven racks (2 ea) Gasket Oven door Anti-tip bracket Model and serial number plate Storage drawer Oven racks (2 ea) Template Screws (6 ea) Anti-tip Anchors (6 ea) 15
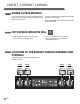
PA RT S A N D F E AT U R E S CONTROL PANEL FEATURES READ THE INSTRUCTIONS CAREFULLY BEFORE USING THE OVEN. For satisfactory use of your oven, become familiar with the various features and functions of the oven as described below. Detailed instructions for each feature and function follow later in this Owner's Manual. 1 2 3 4 7 8 9 10 11 1 CLOCK Pad: Press before setting the time of day. 2 COOK TIME Pad: Press and then use the number pads to set the amount of time you want your food to cook.
O P E R AT I N G I N S T RU C T I O N S SETTING THE CLOCK To set the clock: ENGLISH The CLOCK pad is used to set the clock. The clock has been preset at the factory for 12 hours operation. When the range is first plugged in, or when the power supply to the range has been interrupted, the time of day in the display will flash. You can make a choice between 12-hour clock and 24-hour clock (refer to page 19): Press CLEAR/OFF. Press CLOCK. Press the + or – pad to set the time of day. Press START.
O P E R AT I N G I N S T RU C T I O N S SETTING THE TIMER ON/OFF The TIMER ON/OFF serves as an extra timer in the kitchen that will beep when the set time has run out. It does not start or stop cooking. The TIMER ON/OFF feature can be used during any of the other oven control functions. To set the Timer (example for 5 minutes): Press TIMER ON/OFF twice. 0:00 and HR inside O will appear and TIMER will flash in the display. Press the + or - pad until the correct time appears in the display.
O P E R AT I N G I N S T RU C T I O N S Your control is set to use a 12-hour clock. If you would prefer to have a 24-hour clock, follow the steps below. Changing between 12 and 24 hour clock: Press and hold the CLOCK pad for 3 seconds. Press the CLOCK pad to switch between the 12 and 24 hour clock. Press START to accept the desired change. SETTING TEMPERATURE UNIT — FAHRENHEIT OR CELSIUS TIMER ON/OFF pad control the Fahrenheit or Celsius temperature display modes.
O P E R AT I N G I N S T RU C T I O N S SETTING PREHEATING ALARM LIGHT ON/OFF The interior oven light automatically turn on when the oven door is opened. When oven reaches set-temperature after preheat, the oven notifies preheat-end by flashing oven lamp until door is opened. You can activate or deactivate smart oven light feature. Default Setting is on. To set smart oven light on/off: Press and hold TIMER ON/OFF for 3 seconds. The display will show Opt. Press OVEN LIGHT to switch between On and OFF.
O P E R AT I N G I N S T RU C T I O N S SETTING BAKE To set the Bake: Press BAKE. 350° will appear in the display and bake will flash. Select the oven temperature. Press or press and hold the + or pads. • Press the + pad to increase the temperature. • Press the - pad to decrease the temperature. Press START to accept the temperature change • BAKE will stop flashing and light in the display. • 100° or the actual oven temperature will display.
O P E R AT I N G I N S T RU C T I O N S BAKING LAYER CAKES Baking results will be better if baking pans are centered in the oven as much as possible. If baking with more than one pan, place the pans so each has at least 1” to 11/2” of air space around it. If cooking on multiple racks, place the oven racks in positions B and D (for 2 racks). Place the cookware as shown in Figure 1, 2. Figure 1 Figure 2 • The oven has 7 rack positions.
O P E R AT I N G I N S T RU C T I O N S The oven will turn on immediately and cook for a selected length of time. At the end of the cooking time, the oven will turn off automatically. To program the oven to begin baking immediately and to shut off automatically (example below to bake at 300°F for 30 minutes): Be sure the clock is set for the correct time of day. Press BAKE. 350° will appear in the display and bake will flash. Select the oven temperature. Press or press and hold the + or pads.
O P E R AT I N G I N S T RU C T I O N S SETTING DELAYED TIMED BAKE The BAKE, COOK TIME and START TIME pads control the Delayed Timed Bake feature. The automatic timer of the Delayed Timed Bake will turn the oven ON and OFF at the time you select in advance. To program the oven for a Delay Start and to shut off automatically: Be sure that the clock is set with the correct time of day. Arrange interior oven rack(s) and place the food in the oven. Press BAKE.
O P E R AT I N G I N S T RU C T I O N S SETTING BROIL To set the oven to broil at the Hi or Lo setting: ENGLISH Leave the door open to the broil stop position. The door will stay open by itself, yet the proper temperature is maintained in the oven. Broil Stop Position Place the meat or fish on the broiler Broil on one side until food is grid in the broiler pan. browned; turn and cook on the other side.
O P E R AT I N G I N S T RU C T I O N S RECOMMENDED BROILING GUIDE (cont.) Food Ground Beef Well Done Beef Steaks Rare Medium Well Done Rare Medium Well Done Chicken Lobster Tails Fish Fillets Ham Slices (precooked) Pork Chops Well Done Lamb Chops Medium Well Done Medium Well Done Salmon Steaks Quantity and/ or Thickness Shelf Position First Side Time (min.) Second Side Time (min.) 1 lb. (4 patties) 1/2 to 3/4” thick F or G 4–7 3–5 1” thick 1 to 11/2 lbs.
O P E R AT I N G I N S T RU C T I O N S The self-clean cycle uses above normal cooking temperatures to clean the oven’s interior automatically. It is normal for flare-ups, smoking, or flaming to occur during cleaning if the oven is heavily soiled. It is better to clean the oven regularly rather than to wait until there is a heavy build-up of soil in the oven. During the cleaning process, the kitchen should be well ventilated to get rid of normal odors associated with cleaning.
O P E R AT I N G I N S T RU C T I O N S SELF-CLEAN (cont.) The SELF-CLEAN pad is used to start a Self-Clean cycle. When used with START TIME pad, a delayed Self-Clean cycle may also be programmed. The SelfClean function has cycle times of 2, 3, or 4 hours. To start an immediate Self-Clean cycle and shut off automatically Be sure the clock is set with the correct time of day, the oven is empty and the oven door is closed.
O P E R AT I N G I N S T RU C T I O N S If it becomes necessary to stop or interrupt a selfcleaning cycle due to excessive smoke or fire in the oven: Touch CLEAR/OFF. After the oven has cooled down, the DOOR LOCK will automatically release allowing you to open the oven door. NOTE: When using the Self-Clean feature: • A Self-Clean cycle cannot be started if Oven Lockout feature is active. • Once the SELF CLEAN is set, the oven door will lock automatically.
O P E R AT I N G I N S T RU C T I O N S REMOVING & REPLACING THE STORAGE DRAWER To Remove Storage Drawer: CAUTION - Turn power OFF before removing the storage drawer. Pull the drawer out until it stops. Lift the front of the drawer until the stops clear the guides. Pull the drawer Remove the drawer. WARNING • Turn POWER OFF before removing the Warming Drawer. - Failure to do so can result in severe personal injury, death, or electrical shock.
MAINTENANCE Changing the Oven Light The oven light is a standard 40-watt appliance bulb. It will come on when the oven door is open. When the oven door is closed, press Oven LIGHT to turn it on or off. It will not work during the Self-Clean cycle. To replace: • Make sure oven and bulb are cool. 1. Unplug range or disconnect power. 2. Turn the glass bulb cover in the back of the oven counterclockwise to remove. 3. Turn bulb counterclockwise to remove from socket. 4.
MAINTENANCE CARE & CLEANING (cont.) Oven Racks Remove the oven racks before operating the selfclean cycle. Leaving the racks in place could cause discoloration, and, if food is spilled into the tracks, could causes the racks to become stuck. If left, clean by using a mild, abrasive cleaner. Rinse with clean water and dry. If the racks are cleaned in the self-clean cycle, their color will turn slightly blue and the finish will be dull.
MAINTENANCE Burned-On Residue To clean the glass-ceramic Step. 1 First remove any burnt-on deposits or spilled food from your glass-ceramic cooking surface with a suitable metal razor scraper (similar to scraping paint off of your windowpanes in your home - it will not damage the decorated cooking surface). Hold the scraper at approximately a 30˚ angle to the cooktop. NOTE: Do not use a dull or nicked blade. For your safety, please wear an oven mitt potholder while using the metal scraper. Step.
MAINTENANCE REMOVING & REPLACING THE LIFT-OFF OVEN DOOR To replace the door: CAUTION • Be careful when removing and lifting the door. • DO NOT lift the door by the handle. - The door is very heavy. To remove the door: Step. 1 Open the door fully. Step. 2 Pull the hinge locks down toward the door frame to the unlocked position. Lock Unlock Slot Hinge lock Step. 3 Firmly grasp both sides of the door at the top. Step. 4 Close door to the door removal position, which is approximately 5 degrees.
T RO U B L E S H O OT I N G Before you call for service, review this list. It may save you time and expense. The list includes common occurrences that are not the result of defective workmanship or materials in this appliance. Problem Possible Causes / Solutions Range is not level. • Poor installation. Place oven rack in center of oven. Place a level on the oven rack. Adjust leveling legs at base of range until the oven rack is level.
T RO U B L E S H O OT I N G BEFORE CALLING FOR SERVICE (cont.) Problem 36 Possible Causes / Solutions Oven will not work • Plug on range is not completely inserted in the electrical outlet. - Make sure electrical plug is plugged into a live, properly grounded outlet. • A fuse in your home may be blown or the circuit breaker tripped. - Replace the fuse or reset the circuit breaker. • Oven controls improperly set. - See the Using the oven section. • Oven too hot.
T RO U B L E S H O OT I N G Problem Possible Causes / Solutions Food does not broil properly • Aluminum foil used on the the broiling pan and grid has not been fitted properly and slit as recommended. - See the using the oven section. • In some areas the power (voltage) may be low. - Preheat the broil element for 10 minutes. - See the Broiling Guide, page 26. Scratches or abrasions on cooktop surface • Coarse particles such as salt or sand between cooktop and utensils can cause scratches.
T RO U B L E S H O OT I N G BEFORE CALLING FOR SERVICE (cont.) Problem 38 Possible Causes / Solutions CLEAN and door flash in the display • The self-clean cycle has been selected but the door is not closed. - Close the oven door. LOCKED is on in the display when you want to cook • The oven door is locked because the temperature inside the oven has not dropped below the locking temperature. - Press the CLEAR/OFF pad. Allow the oven to cool.
LG Electronics Inc. will repair or replace your product, at LG’s option, if it proves to be defective in material or workmanship under normal use, during the warranty period set forth below, effective from the date of original consumer purchase of the product. This limited warranty is good only to the original purchaser of the product and effective only when used in U.S.A.
Memo 40