To contact LG Electronics, 24 hours a day, 7 days a week: 1-800-243-0000 Or visit us on the Web at: us.lge.com Para comunicarse con LG Electronics, 24 horas al día, 7 días a la semana: GAS RANGE USER’S GUIDE Please read this guide thoroughly before operating and keep it handy for reference at all times. COCINA DE GAZ GUÍA PARA EL USO Lea detenidamente estas instrucciones antes utilizar y guárdelas como referencia para el futuro. Models/Modelos LRG30855ST LRG30355ST LRG30355SW LRG30355SB P/No.
I N T RO D U C T I O N IMPORTANT SAFETY INFORMATION What to Do if You Smell Gas. . . . . . . . . . . . . . . . . . . 3 Anti-Tip Device . . . . . . . . . . . . . . . . . . . . . . . . . . . . . 3 Basic Safety Precautions . . . . . . . . . . . . . . . . . . . 4-8 OPERATING INSTRUCTIONS Using the Surface Burners . . . . . . . . . . . . . . . . . 9, 10 Control Panel—Convection Models . . . . . . . . . . . . 11 Control Panel—Non-Convection Models . . . . . . . . 12 Using the Oven . . . . . . . . . . . . . . . .
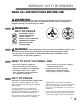
I M P O RTA N T S A F E T Y I N F O R M AT I O N READ ALL INSTRUCTIONS BEFORE USE WARNING For your safety, the information in this manual must be followed to minimize the risk of fire or explosion, electric shock, or to prevent property damage, personal injury, or death.
I M P O RTA N T S A F E T Y I N F O R M AT I O N READ ALL INSTRUCTIONS BEFORE USE IMPORTANT SAFETY NOTICE The California Safe Drinking Water and Toxic Enforcement Act requires the Governor of California to publish a list of substances known to the state to cause birth defects or other reproductive harm, and requires businesses to warn customers of potential exposure to such substances.
I M P O RTA N T S A F E T Y I N F O R M AT I O N READ ALL INSTRUCTIONS BEFORE USE SAFETY PRECAUTIONS WARNING: NEVER use this appliance as a space heater to heat or warm the room. Doing so may result in carbon monoxide poisoning and overheating of the oven. • Never wear loose fitting or hanging garments while using the appliance. Be careful when reaching for items stored in cabinets over the range.
I M P O RTA N T S A F E T Y I N F O R M AT I O N READ ALL INSTRUCTIONS BEFORE USE SURFACE BURNERS (continued) • Use only dry pot holders—moist or damp pot holders on hot surfaces may result in burns from steam. Do not let pot holders come near open flames when lifting cookware. Do not use a towel or other bulky cloth in place of a pot holder. • When using glass cookware, make sure it is designed for top-of-range cooking.
I M P O RTA N T S A F E T Y I N F O R M AT I O N READ ALL INSTRUCTIONS BEFORE USE ELECTRIC WARMING DRAWER • The purpose of the warming drawer is to hold hot cooked foods at serving temperature. Always start with hot food; cold food cannot be heated or cooked in the warming drawer. • Do not use the drawer to dry newspapers. If overheated, they can catch on fire. • Do not leave paper products, plastics, canned food, or combustible materials in the drawer.
I M P O RTA N T S A F E T Y I N F O R M AT I O N READ ALL INSTRUCTIONS BEFORE USE OVEN Stand away from the range when opening the door of a hot oven. The hot air and steam that escape can cause burns to hands, face and eyes. • Do not use the oven for a storage area. Items stored in the oven can ignite. • Keep the oven free from grease buildup. • Place the oven shelves in the desired position while the oven is cool. • Pulling out the shelf to the stop-lock is a convenience in lifting heavy foods.
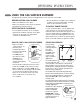
O P E R AT I N G I N S T RU C T I O N S USING THE GAS SURFACE BURNERS Throughout this manual, features and appearance may vary from your model. BEFORE LIGHTING A GAS BURNER • Make sure all burners are in place. • Make sure all grates on the range are properly placed before using any burner. • Be sure the burners and grates are cool before you place your hand, a pot holder, cleaning cloths or other materials on them.
O P E R AT I N G I N S T RU C T I O N S USING THE GAS SURFACE BURNERS HOW TO SELECT FLAME SIZE For safe handling of cookware, never let the flames extend up the sides of the cookware. Watch the flame, not the knob, as you reduce heat. When fast heating is desired, the flame size on a gas burner should match the cookware you are using. Flames larger than the bottom of the cookware will not result in faster heating of the cookware and could be hazardous.
O P E R AT I N G I N S T RU C T I O N S CONTROL PANEL—CONVECTION MODELS Throughout this manual, features and appearance may vary from your model. 1 2 3 4 5 6 7 9 12 8 13 11 10 14 15 16 OVEN CONTROL, CLOCK, AND TIMER FEATURES 1 2 3 4 5 PROBE PAD: Touch this pad to select the probe function. BAKE PAD: Touch this pad to select the bake function. BROIL HI/LO PAD: Touch this pad to select the broil function.
O P E R AT I N G I N S T RU C T I O N S CONTROL PANEL—NON-CONVECTION MODELS Throughout this manual, features and appearance may vary from your model. 1 2 3 4 5 6 7 9 10 8 11 12 13 OVEN CONTROL, CLOCK, AND TIMER FEATURES 1 2 3 4 5 12 SELF CLEAN PAD: Touch this pad to select self-cleaning function. See the Using the Self-Cleaning Oven section. BAKE PAD: Touch this pad to select the bake function. BROIL HI/LO PAD: Touch this pad to select the broil function.
O P E R AT I N G I N S T RU C T I O N S USING THE OVEN BEFORE YOU BEGIN The shelves have stop-locks, so that when placed correctly on the E shelf supports (A through D E), they will stop before C coming completely out, and will not tilt. B When placing and A removing cookware, R pull the shelf out to the bump on the shelf support.
O P E R AT I N G I N S T RU C T I O N S USING THE OVEN To avoid possible burns, place the shelves in the desired position before you turn the oven on. HOW TO SET THE OVEN FOR BAKING OR ROASTING Your oven is not designed for open-door cooking. 1 Touch the BAKE pad. 2 Touch the number pads to set the desired temperature. 3 Touch the START pad. The word ON and 100° will be displayed. As the oven heats up, the display will show the changing temperature.
O P E R AT I N G I N S T RU C T I O N S USING THE OVEN HOW TO SET THE OVEN FOR BROILING Your oven is not designed for open-door cooking. 1 Place the meat or fish on the 2 3 4 5 broiler grid in the broiler pan. Follow suggested shelf positions in the Broiling Guide. The oven door must be closed during broiling. Touch the BROIL HI/LO pad once for HI Broil. To change to LO Broil, touch the BROIL HI/LO pad again. Touch the START pad.
O P E R AT I N G I N S T RU C T I O N S USING THE OVEN BROILING GUIDE The size, weight, thickness, starting temperature and your preference of doneness will affect broiling times. This guide is based on meats at refrigerator temperature. E D C B A The oven has 6 shelf positions.
O P E R AT I N G I N S T RU C T I O N S USING THE CLOCK AND TIMER HOW TO SET THE CLOCK The clock must be set to the correct time of day for the automatic oven timing functions to work properly. The time of day cannot be changed during a timed baking or self-cleaning cycle. 1 Touch the CLOCK pad once to set. 2 Touch the number pads to enter the time. Touch the number pads the same way you read them. For example, to set 12:34, touch the number pads 1, 2, 3, and 4 in that order.
O P E R AT I N G I N S T RU C T I O N S USING THE TIMED BAKING & ROASTING FEATURES NOTE: Foods that spoil easily—such as milk, eggs, fish, stuffings, poultry and pork—should not be allowed to sit for more than 1 hour before or after cooking. Room temperature promotes the growth of harmful bacteria. Be sure that the oven light is off because heat from the bulb will speed harmful bacteria growth.
O P E R AT I N G I N S T RU C T I O N S USING THE TIMED BAKING & ROASTING FEATURES HOW TO SET A DELAYED START AND AUTOMATIC STOP (CONTINUED) The oven will continue to cook for the set amount of time, then turn off automatically, unless the Cook and Hold feature was set. See the Special Features of Your Oven Control section. After the oven turns off, the end-of-cycle tone will sound. USING THE PROBE 8 Touch the CLEAR/OFF pad to clear the display if necessary. Remove the food from the oven.
O P E R AT I N G I N S T RU C T I O N S USING THE PROBE (on convection models) HOW TO SET THE OVEN FOR COOKING WHEN USING THE PROBE 1 Insert the probe into the food. 2 Plug the probe into the outlet in the oven. Make sure it’s pushed all the way in. Close the oven door. 3 Touch the PROBE pad. 4 Touch the number pads to set the desired internal food or meat temperature between 100°F and 200°F. 5 Touch the BAKE pad. 6 Touch the number pads to set the desired oven temperature. 7 Touch the START pad.
O P E R AT I N G I N S T RU C T I O N S USING THE CONVECTION OVEN The convection oven fan shuts off when the oven door is opened. DO NOT leave the door open for long periods of time while using convection cooking. To help you understand the difference between convection bake and roast and traditional bake and roast, here are some general guidelines. (on some models) In a convection oven, a fan circulates hot air over, under and around the food.
O P E R AT I N G I N S T RU C T I O N S USING THE CONVECTION OVEN (on some models) AUTOMATIC RECIPE CONVERSION You can use your favorite recipes in the convection oven. When using CONVECTION BAKE, the oven will automatically convert the oven temperature from regular baking to Convection Bake temperatures. 1 Using the number pads, enter the temperature recommended in the recipe. 2 Touch the START pad. The display will show the temperature you entered from your recipe.
O P E R AT I N G I N S T RU C T I O N S USING THE CONVECTION OVEN (on some models) MULTI-SHELF BAKING Because heated air is circulated evenly throughout the oven, foods can be baked with excellent results using multiple shelves. Multi-shelf baking may increase cook times slightly for some foods but the overall result is time saved. Cookies, muffins, biscuits and other quick breads give very good results with multi-shelf baking.
O P E R AT I N G I N S T RU C T I O N S USING THE CONVECTION OVEN (on some models) CONVECTION ROASTNG CHART Meats Beef Pork Ham Lamb Seafood Poultry Rib (3 to 5 lbs.) Rare † Medium Well Boneless Rib, Top Sirloin Rare † Medium Well Beef Tenderloin Rare † Medium Pot Roast (21⁄2 to 3 lbs.) chuck, rump Bone-in (3 to 5 lbs.) Boneless (3 to 5 lbs.) Pork Chops (1⁄2 to 1” thick) 2 chops 4 chops 6 chops Canned (3 lbs. fully cooked) Butt (5 lbs. fully cooked) Shank (5 lbs. fully cooked) Bone-in (3 to 5 lbs.
O P E R AT I N G I N S T RU C T I O N S USING THE TIMED CONVECTION BAKING AND ROASTING FEATURES (on some models) You will hear a fan while cooking with this feature. The fan will stop when the door is opened, but the heat will not turn off. NOTE: Foods that spoil easily—such as milk, eggs, fish, stuffings, poultry and pork—should not be allowed to sit for more than 1 hour before or after cooking. Room temperature promotes the growth of harmful bacteria.
O P E R AT I N G I N S T RU C T I O N S USING THE TIMED CONVECTION BAKING AND ROASTING FEATURES (on some models) HOW TO SET A DELAYED START AND AUTOMATIC STOP (continued) NOTE: If you would like to check the times you have set, touch the DELAY START pad to check the start time you have set or touch the COOK TIME pad to check the length of cooking time you have set.
O P E R AT I N G I N S T RU C T I O N S SPECIAL FEATURES OF YOUR OVEN CONTROL TONES AT THE END OF A TIMED CYCLE At the end of a timed cycle, 3 short beeps will sound followed by one beep every 6 seconds until the CLEAR/OFF pad is touched. This continual 6-second beep may be cancelled. To cancel the 6-second beep: 1 Touch the BAKE and BROIL HI/LO pads at the same time for and 3 seconds until the display shows SF. 2 Touch the TIMER ON/OFF pad. The display shows CON BEEP (continual beep) and BEEP.
O P E R AT I N G I N S T RU C T I O N S USING THE SABBATH FEATURE (DESIGNED FOR USE ON THE JEWISH SABBATH AND HOLIDAYS) The Sabbath feature can be used for baking/roasting in the oven only. It cannot be used for convection, broiling, self-cleaning or Delay Start cooking. HOW TO SET FOR REGULAR BAKING/ROASTING (in Sabbath Mode) Make sure the clock shows the correct time of day and the oven is off. 1 Press and hold both the BAKE and BROIL HI/LO pads, at the and same time, until the display shows SF.
O P E R AT I N G I N S T RU C T I O N S USING THE SABBATH FEATURE HOW TO SET FOR TIMED BAKING/ ROASTING WITH IMMEDIATE START AND AUTOMATIC STOP (continued) NOTE: When the display shows ⊃ the oven is set in Sabbath. When the display shows ⊃ ⊃ the oven is baking/roasting. To adjust the oven temperature, touch the BAKE pad, enter the new temperature using the number pads, and touch the START pad.
O P E R AT I N G I N S T RU C T I O N S HOW TO ADJUST THE OVEN THERMOSTAT ADJUSTING THE OVEN THERMOSTAT You may find that your new oven cooks differently than the one it replaced. Use your new oven for a few weeks to become more familiar with it. If you still think your new oven is too hot or too cold, you can adjust the thermostat yourself. Do not use thermometers, such as those found in grocery stores, to check the temperature setting of your oven. These thermometers may vary 20–40 degrees.
O P E R AT I N G I N S T RU C T I O N S USING THE ELECTRIC WARMING DRAWER The warming drawer will keep hot, cooked foods at serving temperature. Always start with hot food. Do not use to heat cold food other than crisping crackers, chips or dry cereal. TO USE THE WARMING DRAWER WHEN USING THE WARMING DRAWER 1 Touch the WARMING DRAWER pad. “Hot” and “1” are lit on the display and “Set” begins to blink. 2 On the number pad, press 1 for Low, 2 for Medium or 3 for High.
O P E R AT I N G I N S T RU C T I O N S USING THE ELECTRIC WARMING DRAWER TEMPERATURE SELECTION CHART TO CRISP STALE ITEMS To keep several different foods hot, set the control to the food needing the highest setting. • The temperature, type and amount of food, and the time held will affect the quality of the food. • Food in heat-safe glass and glass-ceramic utensils may need a higher control setting as compared to food in metal utensils.
O P E R AT I N G I N S T RU C T I O N S USING THE SELF-CLEANING OVEN BEFORE A CLEAN CYCLE For the first self-clean cycle, we recommend venting your kitchen with an open window or using a ventilation fan Wipe up heavy soil on the or hood. oven bottom. Remove the broiler pan, broiler grid, all cookware, probe and any aluminum foil from the oven—they cannot withstand the high cleaning temperatures. NOTE: If your oven is equipped with nickel oven shelves, remove them before you begin the self-clean cycle.
O P E R AT I N G I N S T RU C T I O N S USING THE SELF-CLEANING OVEN The oven door must be closed and all controls set correctly for the cycle to work properly. HOW TO DELAY THE START OF CLEANING Make sure the clock shows the correct time of day. 1 Touch the SELF CLEAN pad. 2 Using the number pads, enter the desired clean time. 3 Touch the DELAY START pad. The earliest start time you can set will appear in the display. 4 Using the number pads, enter the time of day you want the clean cycle to start.
CARE AND CLEANING OF THE RANGE CARE AND CLEANING Be sure electrical power is off and all surfaces are cool before cleaning any part of the range. If your range is removed for cleaning, servicing or any reason, be sure the anti-tip device is re-engaged properly when the range is replaced. Failure to take this precaution could result in tipping of the range and cause injury. CAUTION: Do not operate the cooktop without all burner parts and grates in place.
CARE AND CLEANING OF THE RANGE BURNER CAPS AND HEADS BURNER CAPS Lift off when cool. Wash burner caps in hot, soapy water and rinse with clean water. You may scour with a plastic scouring pad to remove burned-on food particles. AFTER CLEANING Burner cap is properly seated. Burner cap is NOT properly seated. BURNER HEADS For proper ignition, make sure the small hole in the section that fits over the electrode is kept open. A sewing needle or wire twist-tie works well to unclog it.
CARE AND CLEANING OF THE RANGE BURNER GRATES Your range has three professional-style grates. These grates are position-specific. For maximum stability, these grates should only be used in their proper position; they cannot be interchanged left to right or front to back. Make sure the front portion of both grates is in front. The middle grate has a bow in front. Make sure the bowed portion is toward the front of the range. CLEANING Lift out when cool.
CARE AND CLEANING OF THE RANGE STAINLESS STEEL SURFACES Do not use a steel wool pad; it will scratch the surface. To clean the stainless steel surface, use warm sudsy water or a stainless steel cleaner or polish. Always wipe the surface in the direction of the grain. Follow the cleaner instructions for cleaning the stainless steel surface.
CARE AND CLEANING OF THE RANGE OVEN DOOR The oven door is removable, but it is heavy. You may need help removing and replacing the door. TO REMOVE THE DOOR To remove the door, open it a few inches to the special stop position that will hold the door open. Grasp firmly on each side and lift the door straight up and off the hinges. NOTE: Be careful not Lift the door straight up to place hands and off the hinges. between the hinge and the oven door frame as the hinge could snap back and pinch fingers.
CARE AND CLEANING OF THE RANGE BROILER PAN AND GRID After broiling, remove the broiler pan from the oven. Remove the grid from the pan. Carefully pour out grease from the pan into a proper container. Wash and rinse the broiler pan and grid in hot water with a soap-filled or plastic scouring pad. If food has burned on, sprinkle the grid with detergent while hot and cover with wet paper towels or a dishcloth. Soaking the pan will remove burned-on foods.
CARE AND CLEANING OF THE RANGE REMOVABLE WARMING DRAWER NOTE: Before performing any adjustments, cleaning or service, disconnect the range electrical power supply at the household distribution panel by removing the fuse or switching off the circuit breaker. Make sure the warming drawer heating element is cool. Most cleaning can be done with the drawer in place. However, the drawer may be removed if further cleaning is needed. Use soap and warm water to thoroughly clean.
T RO U B L E S H O OT I N G BEFORE CALLING FOR SERVICE Before you call for service, review this list. It may save you time and expense. This list includes common occurrences that are not the result of a defect in workmanship or materials. Problem Possible Causes Solutions • Plug on range is not completely inserted in the electrical outlet. • Make sure electrical plug is plugged into a live, properly grounded outlet. • Burner slits on the side of the burner may be clogged.
T RO U B L E S H O OT I N G BEFORE CALLING FOR SERVICE Problem Possible Causes Solutions Food does not broil properly in the oven • Oven controls improperly set. • Make sure you touch the BROIL HI/LO pad. • Oven door not closed. • See the Using the Oven section. • Improper shelf position being used. • See the Broiling Guide. • Food being cooked in a hot pan. • Use the broiling pan and grid that came with your range. Make sure it is cool. • Cookware not suited for broiling.
T RO U B L E S H O OT I N G BEFORE CALLING FOR SERVICE Problem Possible Causes Solutions Oven door will not open after a clean cycle • Oven too hot. • Allow the oven to cool below locking temperature. Oven not clean after a clean cycle • Oven controls not properly set. • See the Using the Self-Cleaning Oven section. • Oven was heavily soiled. • Clean up heavy spillovers before starting the clean cycle. Heavily soiled ovens may need to self-clean again or for a longer period of time.
T RO U B L E S H O OT I N G BEFORE CALLING FOR SERVICE Problem Possible Causes Solutions “Burning” or “oily” odor emitting from the vent • This is normal in a new oven and will disappear in time. • To speed the process, set a self-clean cycle for a minimum of 3 hours. See the Using the Self-Cleaning Oven section. Strong odor • An odor from the insulation around the inside of the oven is normal for the first few times the oven is used. • This is temporary.
N OT E S 46
LG ELECTRONICS, INC. LG GAS RANGE LIMITED WARRANTY — USA LG Electronics Inc. will repair or replace your product, at LG’s option, if it proves to be defective in material or workmanship under normal use, during the warranty period set forth below, effective from the date of original consumer purchase of the product. This limited warranty is good only to the original purchaser of the product and effective only when used in U.S.A.
I N T RODUCCIÓN INFORMACIÓN IMPORTANTE DE SEGURIDAD Que Hacer Si Detecta Olor a Gas. . . . . . . . . . . . . . . . . . . 49 Dispositivo Anti-Volcaduras . . . . . . . . . . . . . . . . . . . . . . . 49 Precauciones de Seguridad . . . . . . . . . . . . . . . . . . . . 50–54 CÓMO UTILIZAR Cómo Utilizar los Quemadores de Superficie. . . . . . . 55, 56 Panel de Control—Modelos por Convección . . . . . . . . . . 57 Panel de Control—Modelos sin Convección . . . . . . . . . . 58 Cómo Utilizar el Horno . . . . . .
I N F O R M ACIÓN IMPORTA N T E D E S E G U R I DA D LEA ESTAS INSTRUCCIONES ANTES DE USAR ADVERTENCIA Si usted no sigue con exactitud la información de esta guía, pudiera causar un incendio o una explosión que resultaría en daños a la propiedad, lesiones personales o muerte.
I N F O R M ACIÓN IMPORTA N T E D E S E G U R I DA D LEA ESTAS INSTRUCCIONES ANTES DE USAR AVISO IMPORTANTE DE SEGURIDAD El California Safe Drinking Water and Toxic Enforcement Act (Ley sobre los productos tóxicos y de agua potable de California) requiere que el gobernador de California publique una lista de sustancias que el estado sabe causan cáncer, defectos de nacimiento u otros daños de reproducción, y requiere que los negocios les avisen a los clientes contra la exposición potencial a tales sustancias
I N F O R M ACIÓN IMPORTA N T E D E S E G U R I DA D LEA ESTAS INSTRUCCIONES ANTES DE USAR PRECAUCIONES DE SEGURIDAD ADVERTENCIA: Por su seguridad, NUNCA use su aparato para calentar la habitación. Doing so may result in carbon monoxide poisoning and overheating of the oven. • No lleve nunca vestidos desabrochados o caídos al usar el aparato. Tenga cuidado al tomar los artículos guardados en los armarios sobre la superficie de cocción.
I N F O R M ACIÓN IMPORTA N T E D E S E G U R I DA D LEA ESTAS INSTRUCCIONES ANTES DE USAR COCINANDO EN LA SUPERFICIE • Use sólo agarraderas secas—las agarraderas húmedas o mojadas sobre superficies calientes pueden resultar en quemaduras por el vapor. No deje que las agarraderas se acerquena las llamas al levantar una cacerola. No use una toalla u otro trapo abultado en vez de usar una agarradera • Al usar recipientes de vidrio, asegúrese de que estén diseñados para la cocción sobre la cocina.
I N F O R M ACIÓN IMPORTA N T E D E S E G U R I DA D LEA ESTAS INSTRUCCIONES ANTES DE USAR CAJÓN CALENTADOR ELÉCTRICO • El objeto del cajón calentador consiste en mantener alimentos cocinados calientes a la temperatura a la que se servirán. Siempre empiece con alimentos calientes; ya que los alimentos fríos no pueden calentarse o cocinarse en el cajón calentador. • Nunca seque periódicos mojados en el cajón calentador. Si se calientan demasiado pudieran incendiarse.
I N F O R M ACIÓN IMPORTA N T E D E S E G U R I DA D LEA ESTAS INSTRUCCIONES ANTES DE USAR COCINANDO EN EL HORNO Permanezca lejos de la cocina al abrir la puerta de un horno caliente. El aire caliente y el vapor que escapan pueden causar quemaduras en las manos, la cara y los ojos. • No use el horno para guardar cosas. Los artículos guardados en el horno se pueden quemar. • Mantenga el horno limpio de la grasa que se acumula.
CÓMO UTILIZAR CÓMO UTILIZAR LOS QUEMADORES DE SUPERFICIE A lo largo de este manual, las características y apariencia pueden ser diferentes a las de su modelo. ANTES DE ENCENDER UN QUEMADOR DE SUPERFICIE • Asegúrese de que todas los quemadores de la cocina estén en su lugar. • Asegúrese de que todas las parrillas de los quemadores de la cocina estén en su lugar antes de usar cualquier quemador.
CÓMO UTILIZAR COMO UTILIZAR LOS QUEMADORES DE SUPERFICIE CÓMO SELECCIONAR EL TAMAÑO DE LA LLAMA Para usar con seguridad los utensilos de cocción, nunca deje que la llama se extienda por fuera de los bordes de los mismos. Observe la llama, no el botón de control, al reducir el calor. Calentar rápido, el tamaño de la llama de un quemador de gas deberá equipararse con el utensilio que esté usando.
CÓMO UTILIZAR PANEL DE CONTROL (MODELOS POR CONVECCIÓN) A lo largo de este manual, las características y apariencia pueden ser diferentes a las de su modelo. 1 2 3 4 5 6 7 9 12 8 13 11 10 14 15 16 CARACTERÍSTICAS DE CONTROL DEL HORNO, RELOJ Y TEMPORIZADOR 1 2 3 4 5 6 BOTÓN PROBE (sonda): Presione este botón para seleccionar la función probe (sonda). BOTÓN BAKE (hornear): Presione este botón para seleccionar la función bake (hornear).
CÓMO UTILIZAR PANEL DE CONTROL (MODELOS SIN CONVECCIÓN) A lo largo de este manual, las características y apariencia pueden ser diferentes a las de su modelo. 1 2 3 4 5 6 7 9 10 8 11 12 13 CARACTERÍSTICAS DE CONTROL DEL HORNO, RELOJ Y TEMPORIZADOR 1 2 3 4 5 58 BOTÓN SELF CLEAN (auto-limpieza): Presione este botón para seleccionar la función self-cleaning (auto-limpieza). Ver la sección Cómo utilizar el horno auto-limpieza.
CÓMO UTILIZAR COMO UTILIZAR EL HORNO ANTES DE COMENZAR LOS RESPIRADEROS DEL HORNO Las parrillas tienen frenos de manera que cuando se coloquen correctamente en E los soportes de las parrillas D (desde A hasta E), frenarán antes de salirse C completamente; no se B inclinarán. Al colocar y retirar el recipiente de A cocina, saque la parrilla hasta la protuberancia en R el soporte de la parrilla.
CÓMO UTILIZAR COMO UTILIZAR EL HORNO Para evitar posibles quemaduras, coloque las parrillas en la posición correcta antes de encender el horno. CÓMO PREPARAR SU COCINA PARA HORNEAR El horno no está diseñado para cocción con la puerta abierta. 1 Presione el botón BAKE. 2 Presione los botónes numéricas para fijar a temperatura que se desee. 3 Presione el botón START. La palabra “ON” (encendido) y “100°” (38°C.) se mostrarán.
CÓMO UTILIZAR COMO UTILIZAR EL HORNO PAPEL DE ALUMINIO No se debe jamás cubrir la superficie inferior del horno con papel de aluminio. Usted puede usar papel de aluminio para recubrir la Corte las ranuras de la bandeja y la rejilla del misma manera que las asador. Sin embargo, tiene tiene la rejilla que moldear el aluminio apretándolo a la rejilla y cortar las ranuras de la misma manera que las tiene la rejilla.
CÓMO UTILIZAR COMO UTILIZAR EL HORNO GUÍA PARA ASAR AL FUEGO DIRECTO El tamaño, peso, espesor, la temperatura inicial y su preferencia de cocción afectarán el tiempo de asado. Esta guía está basada en carnes a temperatura del refrigerador. E D C B A El horno tiene 6 posiciones de parrilla. R Posición de 1er lado parrillas* minutos 2o lado minutos Alimento Cantidad y/o espesor Tocino 1/2 libra (227 g) (aprox.
CÓMO UTILIZAR COMO UTILIZAR EL RELOJ Y CONTADOR PARA CONFIGURAR EL RELOJ El reloj se debe configurar a la hora correcta del día para que las funciones automáticas de tiempo del horno funcionen correctamente. La hora del día no se puede cambiar durante un ciclo de cocción retrasado o de autolimpieza retrasado. 1 Presione el botón CLOCK una vez para configurar. 2 Presione los botónes numéricas a ingresar la hora del día. Presione los botónes numéricas en mañera que lealos.
CÓMO UTILIZAR HORNEAR Y ASAR POR TIEMPO NOTA: Los alimentos que se deterioran con facilidad—como leche, huevos, pescado, rellenos, carne de ave y cerdo—no deben dejarse reposar por más de 1 hora antes y después de la cocción. La temperatura ambiente promueve el crecimiento de bacterias nocivas. Verifique que la luz del horno esté apagada porque el calor proveniente de la bombilla puede acelerar el crecimiento de bacterias.
CÓMO UTILIZAR HORNEAR Y ASAR POR TIEMPO CÓMO FIJAR EL INICIO RETARDO Y UN APAGADO AUTOMÁTICO (continuación) 8 Si fuera necesario, presione el botón CLEAR/OFF para borrar la pantalla. Quite los alimentos del horno. Recuerde, aunque el horno se apaga automáticamente, los alimentos que se dejen en el horno seguirán cocinándose después de apagado el mismo.
CÓMO UTILIZAR COMO UTILIZAR LA SONDA (en modelos por convección) CÓMO CONFIGURAR EL HORNO PARA COCCIÓN CUANDO SE USA LA SONDA 1 Introduzca la sonda en los alimentos. 2 Enchufe la sonda dentro de la salida del horno. Verifique que esté introducida hasta el fondo. Cierre la puerta del horno. 3 Presione el botón PROBE. 4 Presione los botones numéricas para configurar la temperatura interna deseada de los alimentos o de la carne entre 100°F / 38°C and 200°F / 76°C. 5 Presione el botón BAKE.
CÓMO UTILIZAR COMO UTILIZAR EL HORNO POR CONVECCIÓN (en algunos modelos) El ventilador del horno por convección se apaga cuando se abre la puerta de horno. NO DEJE la puerta abierta durante largos períodos mientras utiliza la cocción por convección. Para ayudarlo a comprender la diferencia entre horneado y asado por convección y horneado y asado tradicional, le brindamos algunas pautas generales.
CÓMO UTILIZAR COMO UTILIZAR EL HORNO POR CONVECCIÓN (en algunos modelos) CONVERSIÓN AUTORECIPE™ Usted puede utilizar sus recetas favoritas en el horno por convección. Al usar CONVECTION BAKE, el horno convertirá automáticamente la temperatura del horno de horneado común a temperaturas de horneado por convección. 1 Utilizando los botones numéricas, ingrese la temperatura recomendada en la receta. Presione el botón START. 2 En la pantalla se verá la temperatura que ingresó en su receta.
CÓMO UTILIZAR COMO UTILIZAR EL HORNO POR CONVECCIÓN (en algunos modelos) HORNEAR CON ESTANTES MÚLTIPLES Debido a que el aire caliente circula en forma pareja en todo el horno, los alimentos pueden hornearse con excelentes resultados usando estante múltiples. El horneado con estantes múltiples puede incrementar un poco los tiempos de cocción de algunos alimentos, pero el resultado total es el ahorro de tiempo.
CÓMO UTILIZAR COMO UTILIZAR EL HORNO POR CONVECCIÓN (en algunos modelos) GUÍA DE ASADO POR CONVECCIÓN Minutos/Lb. (450 g) Carnes Vaca Cerdo Jaó mn orC der Fruost de arC ne o dem ave Costilla (3 a 5 lbs. / 1.4 a 2.3 kg) Jugoso† A punto Coccido Costilla sin hueso, lomo Jugoso† A punto Coccido Solomillo de carne vacuna Jugoso† A punto Estofado (2 1 ⁄2 a 3 lbs. / 1.1 a 1.4 kg) Con hueso (3 to 5 lbs./ 1.4 kg a 2.3 kg) Sin hueso (3 to 5 lbs./ 1.4 kg a 2.
CÓMO UTILIZAR COMO UTILIZAR LAS CARACTERÍSTICAS DE HORNEADO Y ASADO POR CONVECCIÓN TEMPORIZADOS (en algunos modelos) Mientras cocine con esta característica se escuchará un ventilador. El ventilador se detendrá cuando se abra la puerta pero el calor no lo hará. NOTA: Los alimentos que se deterioran con facilidad—como leche, huevos, pescado, rellenos, carne de ave y cerdo—no deben dejarse reposar por más de 1 hora antes y después de la cocción.
CÓMO UTILIZAR COMO UTILIZAR LAS CARACTERÍSTICAS DE HORNEADO Y ASADO POR CONVECCIÓN TEMPORIZADOS (en algunos modelos) CÓMO CONFIGURAR UN INICIO RETARDADO Y UN APAGADO AUTOMÁTICO (cont.) NOTA: Si desea verificar los horarios que ha configurado, presione el botón DELAY START para controlar la hora de inicio configurada o presione el botón COOK TIME para verificar la extensión de cocción que ha configurado.
CÓMO UTILIZAR FUNCIONES ESPECIALES DE SU CONTROL DEL HORNO TONOS AL FINALIZAR UN CICLO TEMPORIZADO 12 HORAS, 24 HORAS O BLOQUEO DEL RELOJ Al finalizar un ciclo con control de tiempo, sonarán tres tonos “biiip” de corta duración seguidos por un tono “biiip” cada seis segundos hasta que se presione el botón CLEAR/OFF. Usted puede cancelar este tono “biiip” que se escucha continuamente cada 6 segundos, si lo desea.
CÓMO UTILIZAR CÓMO UTILIZAR LA FUNCIÓN SABBATH (DISEÑADA PARA USO EN EL SABBATH Y LOS DÍAS DE FIESTA JUDÍOS) La función Sabbath se puede usar para horneado/ asado únicamente. No se puede usar para convección, asado a la parrilla, auto limpieza o cocción de retrasar inicio (Delay Start). CÓMO CONFIGURAR LAS FUNCIONES HORNEADO/ASADO NORMAL (con la funçión Sabbath) Cerciórese de que el reloj muestre la hora del día correcta y el horno esté apagado.
CÓMO UTILIZAR CÓMO UTILIZAR LA FUNCIÓN SABBATH CÓMO CONFIGURAR LA FUNCIÓN HORNEADO/ASADO PROGRAMADO— INICIO INMEDIATO Y APAGADO AUTOMÁTICO (continuación) NOTA: Cuando la pantalla se muestra ⊃ el horno está en la función Sabbath. Cuando la pantalla se muestra ⊃ ⊃ el horno está horneando/asando. Para ajustar la temperatura del horno, presione el botón BAKE, presione los botones numéricas para ingresar la temperatura nueva, y presione el botón START.
CÓMO UTILIZAR CÓMO AJUSTAR EL TERMOSTATO DEL HORNO CÓMO AJUSTAR EL TERMOSTATO DEL HORNO Usted pudiera sentir que su nuevo horno cocina de manera diferente al otro que tenía. Le recomendamos que use su horno durante varias semanas para que se familiarice con éste. Si cree que su nuevo horno es cocinando muy caliente o muy frío, usted mismo puede ajustar el termostato.
CÓMO UTILIZAR CÓMO UTILIZAR EL CAJÓN CALENTADOR ELÉCTRICO El cajón calentador conservará alimentos cocinados a la temperatura a la que se servirán. Siempre empiece con alimentos calientes. Nunca la utilice para calentar alimentos fríos excepto masa de levadura que esté subiendo, galletas crujientes, hojuelas fritas o cereales secos. OPERACIÓN DEL CAJÓN CALENTADOR DURANTE EL USO DEL CAJÓN CALENTADOR 1 Presione el botón WARMING DRAWER.
CÓMO UTILIZAR COMO UTILIZAR EL CAJÓN CALENTADOR ELÉCTRICO CUADRO DE SELECCIÓN DE TEMPERATURA Para mantener varios alimentos calientes, fije la temperatura según el alimento que necesita la temperatura más alta. • La temperatura, el tipo y cantidad de alimento y el tiempo que se lo mantenga afectará la calidad del alimento. • El alimento en vidrio térmico y recipientes de vidriocerámica puede necesitar un valor de termostato más alto en comparación con el alimento en recipientes de metal.
CÓMO UTILIZAR OPERACIÓN DEL HORNO DE AUTO LIMPIEZA ANTES DE UN CICLO DE LIMPIEZA Recomendamos que deje una ventana abierta para ventilar o que utilice una campana de ventilador durante el Limpie las manchas más primer ciclo de grandes de la solera del horno. auto limpieza. Remueva las parrillas del horno, la bandeja del asador, la parrilla del asador, todos los instrumentos de cocción y cualquier papel de aluminio del horno que haya quedado pues no podrán resistir las altas temperaturas de limpieza.
CÓMO UTILIZAR OPERACIÓN DEL HORNO DE AUTO LIMPIEZA CÓMO DEMORAR EL INICIO DE LA LIMPIEZA Antes de comenzar, asegúrese de que el reloj muestre la hora correcta del día. 1 Presione el botón SELF CLEAN. 2 Presione los botones numéricas para ingresar el tiempo de limpieza deseado. 3 Touch the DELAY START pad. The earliest start time you can set will appear in the display. 4 Presione los botones numéricas para ingresar la hora del dia deseado para iniciar el ciclo de auto limpieza. Presione el botón START pad.
C U I DA D O Y L I M P I E Z A D E L A C O C I N A CUIDADO Y LIMPIEZA Cerciorese de que la energia eléctrica esta desconectada y toda superficie estan fría antes de limpiar cuaqluier parte de su cocina. Si se quita la cocina para efectuar una limpieza, reparaciones o cualquier otra razón, verifique que el dispositivo anti-volcaduras se coloque de manera adecuada cuando vuelva a instalarse la cocina. Si no toma esta precaución, la cocina puede volcarse y provocar daños.
C U I DA D O Y L I M P I E Z A D E L A C O C I N A TAPAS Y CABEZALES DE LOS QUEMADORES TAPAS DE LOS QUEMADORES DESPUÉS DE LIMPIEZA Levántelas cuando Tapa es en su lugar correcto estén frías. Lave las tapas de los quemadores con agua jabonosa caliente y enjuáguelas con Tapa NO en su lugar correcto. agua limpia. Las puede restregar con un estropajo de plástico para quitarle las partículas de alimentos requemadas.
C U I DA D O Y L I M P I E Z A D E L A C O C I N A LAS PARRILLAS DE LOS QUEMADORES Su cocina cuenta con tres parrillas de estilo profesional. Estas parrillas tienen posiciones específicas. Para mayor estabilidad, estas parrillas sólo deben usarse en su posición correcta; no pueden intercambiarse de izquierda a derecha o de frontal a trasera. Verifique que la sección frontal de ambas parrillas se encuentre en el frente. La parrilla frontal cuenta con un arco en el frente.
C U I DA D O Y L I M P I E Z A D E L A C O C I N A SUPERFICIES DE ACERO INOXIDABLE No utilice almohadillas de acero ya que rayan la superficie. Para limpiar la superficie de acero inoxidable, utilice agua tibia jabonosa o un limpiador o lustrador de acero inoxidable. Siempre limpie la superficie en dirección de la veta. Siga las instrucciones del producto para limpiar la superficie de acero inoxidable.
C U I DA D O Y L I M P I E Z A D E L A C O C I N A PUERTA DEL HORNO La puerta del horno es desmontable, pero es pesada. Usted probablemente necesite ayuda para quitarla y volver a colocarla. PARA QUITAR LA PUERTA Para quitar la puerta, ábrala unas cuantas pulgadas hasta la posición especial de parada que la mantendrá abierta. Sujétela firmemente por cada lado y levántela hacia arriba sacándola de las bisagras.
C U I DA D O Y L I M P I E Z A D E L A C O C I N A LA BANDEJA Y LA REJILLA DEL ASADOR Después de asar al fuego Rejilla directo, saque la bandeja del horno. Retire la rejilla de la bandeja. Vierta con cuidado la grasa de la bandeja en un recipiente apropiado. Lave y enjuague la Bandeja bandeja y la rejilla del asador con agua caliente usando un estropajo de plástico o un estropajo que contenga jabón.
C U I DA D O Y L I M P I E Z A D E L A C O C I N A CAJÓN CALENTADOR DESMONTABLE NOTA: Antes de hacer cualquier ajuste, limpieza o servicio, desconecte la fuente de alimentación eléctrica de la cocina en el panel de distribución doméstico quitando el fusible o apagando el disyuntor. Asegúrese de que el elemento de calentamiento del cajón esté frío. La mayor parte de la limpieza puede hacerse con el cajón en su lugar. Sin embargo, puede retirarse el cajón si fuera necesaria una limpieza más a fondo.
DETECCIÓN DE PRO B L E M A S ANTES DE LLAMAR AL SERVICIO TÉCNICO Antes de llamar al servicio técnico, examine esta lista. Puede ahorrarle tiempo y dinero. La lista incluye situaciones comunes que no son el resultado de mano de obra o materiales defectuosos del artefacto. Problema Causa Posible Soluciones • El enchufe eléctrico no esté conectado completemente en una toma de corriente. • Cerciórese de que el enchufe eléctrico esté conectado en una toma de corriente activa.
DETECCIÓN DE PRO B L E M A S ANTES DE LLAMAR AL SERVICIO TÉCNICO Problema Causa Posible Soluciones Los alimentos no se asan al fuego directo como es se debido • Los controles del horno no están • Cerciórese que presione el botón BROIL HI/LO. fijados bien. • La puerta del horno no está cerrada. • Vea la sección Como Utilizar el Horno. • Se está usando la parrilla en una • Vea la Guía para Asar al Fuego Directo. posición incorrecta. • Los alimentos se están cocinando en una cazuela caliente.
DETECCIÓN DE PRO B L E M A S ANTES DE LLAMAR AL SERVICIO TÉCNICO Problema Causa Posible Soluciones Humo excesivo • Quedó suciedad excesivo en el horno. • Presione el botón CLEAR/OFF. Abra las ventanas para que el humo salga de la cocina. Espere hasta que la luz LOCKED DOOR se apague. Limpie el exceso de suciedad y reinicialice el ciclo de limpieza. • Esto es normal en un horno nuevo ay desaparece con el tiempo.
DETECCIÓN DE PRO B L E M A S ANTES DE LLAMAR AL SERVICIO TÉCNICO Problema Causa Posible Soluciones No puedre lograr que la pantalla muestra “SF” • No se presionaron correctamente los botones de control. • Los botones BAKE y BROIL HI/LO se deben presionar al mismo tiempo y sostenerse por 3 segundos. Pantalla intemitente • Hubo una interrupción en el suministro eléctrico. • Reinicialice el reloj.
N OTA S 92
N OTA S 93
N OTA S 94
LG ELECTRONICS, INC. COCINA A GAS LG GARANTÍA LIMITADA – EE.UU. LG Electronics Inc. reparará o reemplazará su producto, a criterio de LG, si llegara a tener defectos en los materiales o en la mano de obra con un uso normal, durante el período de garantía establecido a continuación, vigente desde la fecha original de compra del producto por parte del consumidor. Esta garantía limitada solamente cubre al comprador original del producto y tiene vigencia sólo en los EE.UU.
P/No.