INSTALLATION 21 Anti-Tip Device c must enter wood or concrete. ENGLISH Installing the Anti-Tip Device Tip Hazard WARNING a Anti-tip bracket b Wall plate Engaging the Anti-tip Device to the structure and/or the range. Verify the anti-tip device has been properly installed and engaged by following the guide on the anti-tip bracket template. following the guide on the anti-tip bracket template.
2 INSTALLATION red and radiate heat, and they should cycle on and off periodically even when the knob is in the Hi position. This cycling prevents the glass-ceramic from being cracked by thermal shock. NOTE power to glow red. 4 After checking all the surface heating elements, check the locking system by pressing Control Lock for three seconds. The oven controller should lock and the cooktop should not operate while the Control Lock function is turned on.
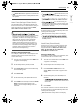
OPERATION 23 OPERATION ENGLISH Control Panel Control Panel Features Model: LSEL6337* Model: LSEL6335* a Smart DiagnosisTM Use during the Smart Diagnosis feature. b Control Lock Press and hold the button for 3 seconds to lock the control panel. c Cook Time Press the button to set the desired amount of time for food to cook. The oven shuts off when the set cooking time runs out. d Start Time Press the button to set the delayed timed cook. The oven starts at the set time. e Temp.
24 OPERATION h Settings Press button to select and adjust oven settings. i Clock Press button to set the time of day. j Light Press the button to turn oven light on or off. k START Press the button to start all oven features. l Oven Mode Knob Turn the knob to select oven operating mode. NOTE Flashing Clock - If the colon in the clock display flashes, press Clock and reset the time, or press any key to stop the flashing. NOTE panel to activate the display.
OPERATION 25 Knob Positions After cleaning the oven knobs, make sure to replace each knob in the correct position. Failure to do so can result in improper operation of the burners. ENGLISH a Dual (Mark A) b Single (Mark C) c Mode d Triple (Mark B) NOTE s, refer to the marks for the correct orientation. Knob Lighting This feature is only available on some models. Knob lighting illuminates the edge of the knob when you turn the knob to operate the heating elements (excluding Mode Knob).
26 OPERATION a LED Lighting b Mode Knob NOTE problem with the product. atch the actual operation of the heating elements, it may indicate a Changing Oven Settings Clock Light to manually turn the oven light on. NOTE The clock must be set to the correct time of day in order for the automatic oven timing functions to work properly. Clean function is active. seconds. turned on if the Self f automatically after 90 1 Press Clock 2 Press the numbers to enter the time.
OPERATION 27 NOTE 4 When the set time runs out, End shows in the display. The indicator tones sound every 15 seconds until Timer On/Off is pressed. Press the Settings key repeatedly to toggle through and change oven settings. The Settings key allows you to: NOTE tion auto conversion the remaining time by pressing Timer On/Off. Timer On/Off twice to set the time in minutes and seconds. Timer On/Off once to set the time in hours and minutes. Canceling the Timer 1 Press Timer On/Off once.
28 OPERATION become more familiar with it before changing the temperature settings. If after familiarizing yourself with the new oven, you still think that it is too hot or too cold, you can adjust the oven thermostat yourself. or lower the thermostat 15 °F (8 °C). Try the oven with the new setting. If the oven still needs adjustment, raise or lower the thermostat again, using the first adjustment as a gauge. For example, if the adjustment was too much, raise or lower the thermostat 10 °F (5 °C).
OPERATION 29 NOTE med Cook function, turn the oven mode knob to the OFF position at any time. press START. as a 12-hour clock, you can delay the cook time for 12 hours. If the oven clock is set as a 24-hour clock, you can delay the cook time for 24 hours. Start Time (Delayed Timed Cook) The automatic timer of the Delayed Timed Cook function turns the oven on and off at the time you select. This feature can be used with the Bake, Conv. Bake and Conv. Roast modes. CAUTION features.
30 OPERATION seconds until the oven mode knob is turned to the OFF position. Min. Temp. / Temp. / Default Conv. Bake 300 °F / (*275 °F) 550 °F / 285 °C 350 °F (*325 °F) / 12 Hr. 300 °F / (*275 °F) 550 °F / 285 °C 350 °F (*325 °F) / 12 Hr. Feature Time Changing the Cook Time during Cooking For example, to change the cook time to 1 hour and 30 minutes during cooking: 1 Press Cook Time. Max. Time 2 Change the baking time: press 1, 3, 0. Conv. Roast 3 Press START to accept the change.
OPERATION 31 Cooktop on the cooking area to prevent a tough cleaning chore later. Before Using the Cooktop cookware. surface that could fall and damage it. is broken, cleaning solutions and spillovers may penetrate the broken cooktop and create a risk of electric shock. Contact a qualified technician immediately. as salt and pepper shakers, spoon holders, or plastic wrappings or any other material on the range when it is in use. catch fire on the glass cooktop, even when it is not being used.
32 OPERATION Using the Cooktop Elements CAUTION oven and cooktop use. the cooktop and oven. Heating element shes that are safe for OFF tainers on the cooktop. to cover food while on the cooktop. Plastic may melt onto the surface and be very difficult to remove. Spillovers can cause smoke. Greasy spillovers may catch on fire. after it has been turned off. The element may still be hot and touching the element before it has cooled sufficiently can cause burns. of the cookware in use.
OPERATION 33 2 Turn the knob to use it as a single, dual or triple element. element, turn the knob ENGLISH counterclockwise. clockwise to the dual position. clockwise to the triple position. NOTE on the warmer should be kept in its container or covered with a lid or aluminum foil to maintain food quality. cooking elements. a The Recommended Surface Cooking Setting b Dual c Setting Single Dual Triple Recommended Use 8.5-Hi 5.5-8.0 fry B Turning on the Warm Zone CAUTION 3.5-5.0 2.2-3.
34 OPERATION element. Check for flatness by placing a ruler across the bottom of the cookware. The ruler should touch the cookware across the entire bottom, with no gaps. Cookware Recommendations amount of food to be prepared and the size of the surface element balanced Choosing Cookware The cookware material determines how evenly and quickly heat is transferred from the surface element to the pan bottom. The most popular materials available are: Aluminum - Excellent heat conductor.
OPERATION 35 Oven The racks have a turned-up back edge that prevents them from being pulled out of the oven cavity. NOTE CAUTION ature cycles, an oven thermometer placed in the oven cavity may not show the same temperature that is set on the oven. to prevent burns. re turning the oven on any other material, or place anything on the bottom of the oven. Doing so will result in poor baking and may damage the oven bottom. preheating during a regular bake cycle. during a regular bake cycle. baking.
36 OPERATION NOTE NOTE nvection fan to operate periodically throughout a normal bake cycle in the oven. This is to ensure even baking results. interior light on or off. seconds. tomatically after 90 is disabled when the oven door is opened and for one second after closing the door. Baking Tips rature will vary depending on the characteristics, size, and shape of the baking pan used. Clean, Control Lock, and initial power input (on some models only). time.
OPERATION 37 display shows the auto converted oven temperature, 350 °F and the fan icon. When cooking has finished or to cancel, turn the oven mode knob to the OFF position. NOTE ENGLISH 4 Grid (sold separately) Broiler pan (sold separately) CAUTION fan stops when the door is open. In some cases, the fan may shut off during a convection bake cycle. Tips for Convection Baking multiple-rack cooking of pastries, cookies, muffins, biscuits, and breads of all kinds.
38 OPERATION Broil Baking Rack Guide Rack position Food Cakes Layer cakes Bundt cakes Angel food cake 5 3 3 Cookies Sugar cookies Chocolate chips Brownies 4 4 4 Pizza Fresh Frozen 4 4 Pastry Crust From scratch Refrigerated 4 4 Breads Biscuit, canned Biscuit, from scratch Muffins 5 5 5 Desserts Fruit crisps and cobblers, from scratch Pies, from scratch, 2crust fruit 4 4 Custards Cheesecake, crème brulée 2 Soufflés Sweet or savory 2 Casserole Frozen lasagna 5 Poultry CAUTION cau
OPERATION 39 4 Turn the oven mode knob to the OFF position to cancel at any time or when cooking is complete. or regular baking sheets for safety reasons. cleaned and at room temperature at the beginning of cooking. vent hood during broiling. possible. Leftover debris from prior meals can burn or catch fire. these will increase the amount of smoke you experience. If you would like to use a glaze, apply it at the very end of cooking. any food item, consider: - Lowering the broiler to the Lo setting.
40 OPERATION Recommended Broiling Guide The size, weight, thickness, starting temperature, and your preference of doneness will affect broiling times. This guide is based on meats at refrigerator temperature. For best results when broiling, use a pan designed for broiling. a Grid (sold separately) b Broiler pan (sold separately) Hamburgers Rack Position First Side (min.) Second Side (min.) Comments 7 3-6 2-4 Space evenly. Up to 9 patties may be broiled at once.
OPERATION 41 First Side (min.) Second Side (min.) Pork Chops Well done 2 (1/2" thick) 6 3-6 4-7 2 (1" thick) about 1lb. 5 5-8 5-8 Lamb Chops Salmon Steaks 2 (1" thick) about 10 to 12 oz. Medium 6 3-5 2-5 Well Done 6 5-7 4-7 2 (1 1/2" thick) about 1lb. Medium 6 7-9 7-9 Well done 6 9-11 7-9 2 (1" thick) 5 8-10 3-5 4 (1" thick) about 1 lb. 5 9-11 4-6 Comments ENGLISH Rack Position Quantity and/or Thickness Food Grease pan. Brush steaks with melted butter.
42 OPERATION Proof This feature maintains a warm oven for rising yeast leavened products before baking. (Set temperature: 92 °F) Setting the Proof Function 1 Use rack position 2 or 3 for proofing. Setting the Warm Function 1 Turn the oven mode knob to select Proof/ Warm until Proof appears in the display. 2 Press 2 to set Warm. 3 Press START. 4 To cancel the Warm function, turn the oven mode knob to the OFF position. NOTE warm. Do not use it to cool food down.
OPERATION 43 NOTE fry tray, place food on a wire rack inside a foil-lined cookie pan. ENGLISH while operating some cook modes. b Heavy Duty Rack to 3 hours unless you turn the oven mode knob to the OFF position. Air Fry This feature automatically increases the entered temperature by 50°F for optimal performance when using Air Fry. The function is specially designed for oilfree frying. Setting the Air Fry Function 1 Turn the oven mode knob to select Air Fry. 400°F appears in the display.
44 OPERATION CAUTION bottom or cover entire racks with materials such as aluminum foil. Doing so blocks airflow through the oven and can result in carbon monoxide poisoning. Aluminum foil can also trap heat, causing a fire hazard or poor oven performance. before you start Air Fry and leave it on for 15 minutes after you're done. down the interior of the oven before and after air frying (once the oven has cooled). SelfClean) regularly, depending on how often and what types of food you Air Fry.
OPERATION 45 Quantity (oz) Temp. (°F) Rack Position Time Frozen Chicken Strips 35 425 4 30-40 Frozen Hot Wings, Bonein 50 425 4 30-40 Fresh Chicken Wings 40 450 4 30-35 Fresh Chicken Drumsticks 70 450 4 35-45 Thighs 40 450 4 30-35 Breasts 40 450 4 30-35 Frozen Onion Rings, Breaded 20 425 4 20-30 Frozen Spring Rolls (0.7 oz each) 45 425 4 25-35 Thin Sausage (2.5 oz each, diameter 0.
46 OPERATION ice bath and stored in the freezer or refrigerator after cooking. - The fine temperature control of Air Sous-Vide cooking is an excellent way to achieve the perfect texture when cooking meat and poultry. The low temperatures used retain more of the moisture in food than conventional cooking methods. After cooking, a final sear in a frying pan adds the perfect crisp finish. 2 Turn the oven mode knob to select Air SousVide mode. 3 Set the desired oven temperature.
OPERATION 47 Setting the Slow Cook Function 1 2 NOTE the Remote Start run time. situations: Select the desired option by pressing either 1 or 2. - Remote Start is never set up in the smartphone app. 1: Hi (275 °F) - The Remote Start status is OFF or door. 2: Lo (220 °F) 3 Press START. 4 When cooking is complete, turn the oven mode knob to the OFF position. NOTE mode knob to the OFF position at any time. 2.
48 OPERATION Method move probe. Hold the probe head, not the wire, when inserting or removing probe. 1 Select cook mode. Turn the oven mode knob to select Conv. Roast. 2 Set the oven temperature: touch 3, 7 and 5 until 375 °F appears in the display. 3 Press Start. Recommended Probe Temperature 4 Set the probe temperature: touch 1, 6 and 0 until 160 °F appears in the display. Rare: 130 °F (54 °C) 5 Press Start.
OPERATION 49 NOTE automatically turn off. on in Sabbath mode, but the oven will be off. oven door first before engaging Sabbath Mode. ENGLISH t, the oven turns off automatically at the end of the cook time, without chiming. The oven remains in Sabbath mode, but is turned off.
50 SMART FUNCTIONS SMART FUNCTIONS LG ThinQ Application This feature is only available on models with Wi-Fi. NOTE running. Cancel the timer operation to use Scan to Cook. The LG ThinQ application allows you to communicate with the appliance using a smartphone. LG ThinQ Application Features Smart Diagnosis - This function provides useful information for diagnosing and solving issues with the appliance based on the pattern of use.
SMART FUNCTIONS 51 depending on the Internet service provider. problems with the wireless signal transmission, unplug the appliance and wait about a minute before trying again. disable the firewall or add an exception to it. combination of English letters and numbers. (Do not use special characters.) depending on the mobile operating system (OS) and the manufacturer. of the router is set to WEP, network setup may fail. Change the security protocol (WPA2 is recommended), and register the product again.
52 SMART FUNCTIONS This equipment should be installed and operated with a minimum distance of 20 cm (7.8 inches) between the antenna and your body. Users must follow the specific operating instructions for satisfying RF exposure compliance. Open Source Software Notice Information To obtain the source code under GPL, LGPL, MPL, and other open source licenses, that is contained in this product, please visit http:// opensource.lge.com.
MAINTENANCE 53 MAINTENANCE the OFF position and pull them straight off the stems. CAUTION the OFF position centered at the top, and slide the knob directly onto the stem. cooled down before touching any of its parts. cleaning the cooktop. NOTE General Cleaning Tips scrape off any chunks or debris before and during oven cleaning. pad may help to take off burnt-on stains better than a soft sponge or towel. those made of melamine foam, available at your local stores, can also help improve cleaning.
54 MAINTENANCE Oven Door with a commercial oven cleaner or in the dishwasher. CAUTION cleaning materials on the outside of the oven door. Doing so can cause damage. oughly clean the oven door. Rinse well. Do not immerse the door in water. ner on the outside glass of the oven door. Do not spray water or glass cleaner on the door vents. harsh abrasive cleaning materials on the outside of the oven door. door gasket is made of a woven material that is essential for a good seal.
MAINTENANCE 55 Cooktop Surface Glass-Ceramic Cooktop c or foil melts on the cooktop, remove the material IMMEDIATELY with a metal razor scraper while the cooking surface is still hot to avoid the risk of damage to the glass-ceramic surface. When used correctly, the scraper will not damage the cooktop surface. For your safety, please use an oven mitt or pot holder while scraping the hot cooking surface. pads. They may damage your cooktop surface. er while using a scraper on the hot cooking surface.
56 MAINTENANCE NOTE the markings on the cooking surface. 2 When the cooking surface has completely cooled, apply a few dime-sized dabs of a ceramic glass cooktop cleaner in each burner area. Work the cleaning cream over the cooktop surface with a damp paper towel. Leave the cleaner on for 10 minutes before rinsing it off. 3 Rinse with clean water and wipe the cooktop surface with a clean, dry paper towel. Maintaining the Cooktop CAUTION ceramic cooktops. surface cool off before cleaning.
MAINTENANCE 57 Metal Marks and Scratches CAUTION across the cooktop surface. dirt build-up on the bottom. on the cooktop surface. Always clean the cooktop surface before cooking. NOTE LIMITED WARRANTY. from the items below may not be covered under the - Be careful not to slide pots and pans across the cooktop. Doing so will leave metal markings on the cooktop surface. To help remove these marks, use a ceramic cooktop cleaner with a cleaning pad for ceramic cooktops.
58 MAINTENANCE When to Use EasyClean - Hard plastic spatula - Plastic pan scraper - Plastic paint scraper - Old credit card Case 1 - Soil pattern: Small drops or spots - Types of soils: Cheese or other ingredients 3 Fill a spray bottle (10 oz or 300 ml) with water and use the spray bottle to thoroughly spray the inside surfaces of the oven. Case 2 4 Use at least 1/5 (2 oz or 60 ml) of the water in the bottle to completely saturate the soil on both the walls and in the corners of the oven.
MAINTENANCE 59 while cleaning the oven cavity. 7 A tone will sound at the end of the 10 minute cycle. Turn the oven mode knob to the OFF position to clear the display and end the tone. 8 After the cleaning cycle and during handcleaning, enough water should remain on the oven bottom to completely submerge all soils. Add water if necessary. Place a towel on the floor in front of the oven to capture any water that may spill out during hand-cleaning.
60 MAINTENANCE WARNING oven before using the oven again. The oil could cause a fire. turn the oven off and wait for the fire to go out. Do not force the door open. Introduction of fresh air at self-clean temperatures may lead to a burst of flame from the oven. Failure to follow this instruction may result in severe burns. CAUTION cleaner or oven liner protective coating of any kind should not be used in or around any part of the oven.
MAINTENANCE 61 2 When to Use Self Clean 1 : 3 hours 2 : 4 hours 3 : 5 hours Case 1 to heavy splatter 3 Press START. 4 Once the Self Clean cycle is set, the oven door locks automatically and the lock icon k displays. You will not be able to open the oven door until the oven has cooled. The lock releases automatically when the oven has cooled. Meat roasted at high temperatures Case 2 CAUTION icon is displayed. The oven door remains locked until the oven temperature has cooled.
62 MAINTENANCE closed. If the position is correct, the hinge arms will move freely. NOTE Self Clean cycle due to excessive smoke or fire in the oven. To cancel the Self Clean function, turn the oven mode knob to the OFF position. Removing/Assembling Lift-Off Oven Doors Door Care Instructions Most oven doors contain glass that can break. CAUTION racks are fully in place. object.
MAINTENANCE 63 Assembling Drawers Pull the bearing glides to the front of the chassis glide. 2 Align the glide on each side of the drawer with the glide slots on the range. 3 Push the drawer into the range until levers click (approximately 2 inches). 4 Pull the drawer open again to seat the bearing glides into position. b Hinge lock 5 Close the oven door. Removing/Assembling Drawers Removing Drawers CAUTION the main fuse or circuit breaker panel.
64 MAINTENANCE 6 Assembling the Vent Trim Assemble the vent trim in the reverse sequence of its removal. Replacing Changing the Oven Light The oven light is a standard 40-watt appliance halogen. It turns on when the oven door is open. When the oven door is closed, press Light to turn it on or off. WARNING the main fuse or circuit breaker panel. Failure to do so can result in severe personal injury, death, or electrical shock. 1 Unplug the range or disconnect power.
TROUBLESHOOTING 65 TROUBLESHOOTING ENGLISH FAQs Frequently Asked Questions Q: What types of cookware are recommended for use with the cooktop? A: element. ount of food to be prepared and the size of the surface Q: Why do the heating elements appear to be turning ON and OFF during use of the cooktop or oven? A: Depending on your cooktop element setting or the temperature selected in your oven it is NORMAL for the cooking elements to cycle on and off.
66 TROUBLESHOOTING Q: Can I leave my racks in the oven when running a Self Clean cycle? (On some models) A: No. Although it will not damage the racks, it will discolor them and may make them hard to slide in and out during use. Remove all items from the oven before starting a Self Clean cycle. Q: What should I do if my racks are sticky and have become hard to slide in and out? A: Over time, the racks may become hard to slide in and out. Apply a small amount of olive oil to the sides of the racks.