OWNER’S MANUAL AIR CONDITIONER Please read this manual carefully before operating your set and retain it for future reference. TYPE : CASSETTE P/NO : 3828A32001G www.lge.
Cassette-Type Air Conditioner Ownerʼs Manual TABLE OF CONTENTS Safety Precautions.........................3 FOR YOUR RECORDS Write the model and serial numbers here: Model # Prior to Operation ..........................7 Serial # You can find them on a label on the side of each unit. Dealer's Name Introduction ....................................8 Electrical Safety .............................9 Operating Instructions.................10 Maintenance and Service ............
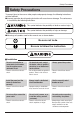
Safety Precautions Safety Precautions To prevent injury to the user or other people and property damage, the following instructions must be followed. ■ Incorrect operation due to ignoring instruction will cause harm or damage. The seriousness is classified by the following indications. This symbol indicates the possibility of death or serious injury. This symbol indicates the possibility of injury or damage. ■ Meanings of symbols used in this manual are as shown below. Be sure not to do.
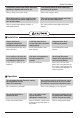
Safety Precautions Do not install the product on a defective installation stand. For installation, always contact the dealer or an Authorized Service Center. • There is risk of fire, electric shock, explosion, or injury. • It may cause injury, accident, or damage to the product. Be sure the installation area does not deteriorate with age. • If the base collapses, the air conditioner could fall with it, causing property damage, product failure, and personal injury.
Safety Precautions Ventilate the product from time to time when operating it together with a stove, etc. • There is risk of fire or electric shock. Turn the main power off when cleaning or maintaining the product. • There is risk of electric shock. When the product is not be used for a long time, disconnect the power supply plug or turn off the breaker. • There is risk of product damage or failure, or unintended operation. Take care to ensure that nobody could step on or fall onto the outdoor unit.
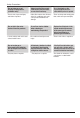
Safety Precautions Do not step on or put anyting on the product. (outdoor units) Always insert the filter securely. Clean the filter every two weeks or more often if necessary. Do not insert hands or other objects through the air inlet or outlet while the product is operated. • There is risk of personal injury and failure of product. • A dirty filter reduces the efficiency of the air conditioner and could cause product malfunction or damage.
Prior to Operation Prior to Operation Preparing for operation 1. Contact an installation specialist for installation. 2. Plug in the power plug properly. 3. Use a dedicated circuit. 4. Do not use an extension cord. 5. Do not start/stop operation by plugging/unplugging the power cord. 6. If the cord/plug is damaged, replace it with only an authorized replacement part. Usage 1. Being exposed to direct airflow for an extended period of time could be hazardous to your health.
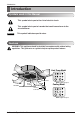
Introduction Introduction Symbols used in this Manual This symbol alerts you to the risk of electric shock. This symbol alerts you to hazards that could cause harm to the air conditioner. NOTICE This symbol indicates special notes. Features WARNING: This appliance should be installed in accordance with national wiring regulations. This guide acts as a guide to help to explain product features.
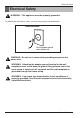
Electrical Safety Electrical Safety WARNING: This appliance must be properly grounded. To minimize the risk of electric shock, you must alway plug into a grounded oulet. Preferred method Ensure proper ground exists before use WARNING: Do not cut or remove the grounding prong from the power wire.
Operating Instructions Operating Instructions Indoor Unit, Outdoor Unit Indoor Unit Heat Pump Model Anti-bacteria Signal Receptor Air Intake Cooling Model Air Outlet Remote Controller Signal Receptor Receives the signals from the remote control. (Signal receiving sound: two short beeps or one long beep.) Signal Receptor Operation Indication Lamps On/Off : Lights up during the system operation. Filter Sign : Lights up after 2400 hours from the time of first operating unit. (Refer to page 23.
Operating Instructions Name and Function of Remote Controller Remote Controller AUTO SWING OPERATION SET TEMP Room Temp HI MED LO Timer Operation unit 03 SUB FUNCTION AUTO Heater Defrost Filter ZONE 1 2 Time On Off Set no. Time 01 FAN SPEED JET Preheat Humidify Out door 3 4 Program set 05 07 09 11 13 15 17 19 21 23 6 3 17 10 11 12 13 14 15 Heat Pump Model 1 2 Timer Cancel Program Week 5 Holiday Plasma Set/Clr Hour Min RESET 16 18 1.
Operating Instructions Wireless Remote Controller (optional) This air-conditioner is equipped with wired remote controller basically. But if you want to be available with wireless remote controller, you pay for it. Signal transmitter (Transmits the signals to the signal receptor) 1 3 7 12 2 13 4 5 6 Heat Pump 14 Model ON OFF SET CANCEL 8 9 PLASMA 10 15 11 Cooling Model Flip-up door (opened) 1. OPERATION DISPLAY Displays the operation conditions. 2.
Operating Instructions Set the Current Time and a day of the Week 1 Press the ' Hour ' button. Each time the button is pressed, the number is changed from 00 to 23. You can set the number of the current hour. AUTO SWING OPERATION SET TEMP FAN SPEED Room Temp AUTO Heater Preheat JET Defrost Humidify Filter Out door ZONE 1 2 3 4 Hour Time Timer Operation unit On Off Set no. Time 01 2 Press the ' 03 SUB FUNCTION HI MED LO Program set 05 07 09 11 13 15 17 19 21 23 ' button.
Operating Instructions Weekly Program Setting 1 Press the Program button. The remote controller is displayed like below. Then ' Program set AUTO SWING Program ', ' ' and '01' is blinked. OPERATION SET TEMP FAN SPEED Room Temp AUTO Heater Preheat JET Defrost Humidify Filter Out door ZONE 1 2 3 4 Time Timer Operation unit SUB FUNCTION HI MED LO Program set On Off Set no. Time 01 03 AUTO SWING OPERATION 05 07 09 11 13 15 17 19 21 23 Week 2 Press the ' ' button.
Operating Instructions Holiday Setting If Tuesday is a holiday in this week, you may set a holiday. AUTO SWING OPERATION SET TEMP Room Temp Press the Program button. Week Operation unit Program set On Off Set no. Time 01 03 AUTO SWING OPERATION 05 07 Press the Week button. Select the Tuesday.
Operating Instructions Operation Mode Cooling Mode Cooling Mode Soft Dry Mode Soft Dry Mode Heating Mode Auto Mode (Cooling Model) Auto Mode (Heat Pump Model) Operation Procedure 1st On/Off Button AUTO SWING OPERATION SET TEMP Room Temp 2nd Operation unit Operation Mode Selection Button 03 SUB FUNCTION AUTO Heater Defrost Filter ZONE 1 2 HI MED LO Time Timer On Off Set no.
Operating Instructions Cooling Operation Mode 1 Press the On/Off Button. 2 Select Cooling Operation. Press the Operation Mode Selection Button. Each time the button is pressed, the operation mode is shifted in the arrow direction. HEAT PUMP MODEL Operation Display AUTO SWING OPERATION SET TEMP FAN SPEED Room Temp 03 07 09 11 SET TEMP 13 15 17 Cooling Operation 03 SUB FUNCTION AUTO SWING 07 09 11 SET TEMP 15 17 On Off 21Set no.
Operating Instructions Soft Dry Operation Mode This mode dehumidifies without overcooling. 1 2 Press the On/Off Button. Select Soft Dry Operation. Press the operation Mode Selection Button. Each time the button is pressed, the operation mode is shifted in the arrow direction.
Operating Instructions Heating Operation Mode (Heat pump model only) 1 2 Press the On/Off Button. Select Heating Operation. Press the Operation Mode Selection Button. Each time the button is pressed, the operation mode is shifted in the arrow direction.
Operating Instructions Auto Operation Mode (Cooling model) 1 Press the On/Off Button. 2 To select Auto Operation, press the Operation Mode Selection button. Each time the button is pressed, the operation mode is shifted in the direction of the arrow. COOLING MODEL Operation Display AUTO SWING OPERATION SET TEMP FAN SPEED Room Temp Operation unit 03 AUTO SWING 07 09 11 15 17 19 21 FAN SPEED Operation unit On Off Set no.
Operating Instructions Auto Operation Mode (Heat pump model) 1 Press the On/Off Button. 2 To select Auto Operation, press the Operation Mode Selection button. Each time the button is pressed, the operation mode is shifted in the direction of the arrow.
Operating Instructions FAN Operation Mode • Used to circulate room air without cooling or heating. 1 2 Press the On/Off Button. Press FAN Operation Button. AUTO SWING OPERATION SET TEMP FAN SPEED Room Temp AUTO Heater Preheat JET Defrost Humidify Filter Out door ZONE 1 2 3 4 Time Operation unit Timer On Off Set no.
Operating Instructions Comfort Operation with Swirl • It is the function for comfort cooling/heating operation. • The diagonal two louvers are opened the more larger than the other louvers. After one minute, it is opposite.
Operating Instructions Vane Control You can change the open angle to the install situation. 1 Press the On/Off Button. 2 Press the right arrow and auto swing button simultaneously for three seconds. Then the display will be toggled like before. Detach your finger from buttons at the moment that it is displayed "P0" in the operation display. AUTO SWING OPERATION SET TEMP FAN SPEED Room Temp Time Operation unit Timer On Off Set no.
Operating Instructions Jet Cool Operation Mode 1 Press the On/Off button. The unit will respond with a beep. Select Cooling Operation. AUTO SWING OPERATION SET TEMP Room Temp Operation unit 03 SUB FUNCTION AUTO Heater Defrost Filter ZONE 1 2 HI MED LO Time Timer On Off Set no. Time 01 FAN SPEED JET Preheat Humidify Out door 3 4 2 Press the Fan speed button.
Operating Instructions Auto Swing Mode Ca nc el Pr og ram We ek 3 19 4 21 23 Ho lid ay Ho ur Min SE T/C LR Pla sm a RE SE T 1 Press the On/Off button. (Confirm the unit on operation.) 2 3 Press the Auto Swing button then the horizontal louvers swing up and down automatically. Press again the Auto Swing button to cancel the Auto Swing mode. Child Lock Function This is the function that any children cannot used to the air-conditioner.
Operating Instructions PLASMA Purification Operation (Optional) AUTO SWING OPERATION SET TEMP Room Temp Operation unit 03 Timer Cancel Program Week SUB FUNCTION AUTO Heater Preheat JET Defrost Humidify Filter Out door ZONE 1 2 3 4 HI MED LO Time Timer On Off Set no. Time 01 FAN SPEED 1 Press the On/Off button. The unit will respond with a beep. 2 Open the door on the remote control. Press the PLASMA air purifying Plasma operation ON/OFF button.
Operating Instructions Forced Operation Operation procedures when the remote control can't be used. Press the tact switch (Forced operation) for 2 seconds. If you want to stop operation, press again the tact switch. In case the power comes on again after power failure on the Forced Operation mode, the operating conditions are automatically set as follows: During Forced Operation, the initial mode continues.
Maintenance and Service Maintenance and Service CAUTION Before performing any maintenance, turn off the main power to the system. Indoor Unit Grille, Case and Remote Control ❐ Turn the system off before cleanining, To clean, wipe with a soft, dry cloth. Do not use bleach or abrasives. NOTICE Anti-biofilter Supply power must be disconnected before cleaning the indoor unit. Air Intake Air Outlet Remote Controller Air Filters 1 Remove the Air filters.
Maintenance and Service When the air conditioner is not going to be used for a long time. When air conditioner is not going to be used for a long time. 1. Operate the air conditioner at the following settings for 2 to 3 hours. • Type of operation: Fan operation mode.(Refer to page 23.) • This will dry out the internal mechanisms. 2. Turn off the breaker. CAUTION Turn off the circuit breaker when the air conditioner is not going to be used for a long time. Dirt may collect and may cause a fire.
Maintenance and Service Troubleshooting Tips! Save time and money! Check the following points before requesting repairs or service.... If the fault persists, please contact your dealer or service center. Case Explanation See page The air conditioner does not operate. • Have you made a mistake in timer operation? 16 • Has the fuse blown or has the circuit breaker been tripped? - The room has a peculiar odor.
Details of LG serial No. 1 2 3 4 5 6 7 8 9 10 Main Service Part List Code Detail Code of Model Meaning NO PART NAME 1 Year 0~9 (Digit) The last digit of year ex) 1997 → 7, 2000 → 0 1 COMPRESSOR 2,3 Month 01~12 (Digit) Month ex) March → 03, August → 08 2 MOTOR 4 Nation A~Z (Alphabet) Where manufactured ex) K → Korea, C → China 3 MAIN PCB ASSY 4 REMOCON 5 Product A~Z (Alphabet) ex) A → Airconditioner 5 TRANSFORMER 6~10 Serial No. 0~9 (Digit) Production Quantity H.