
Installation Manual


AV
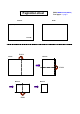
Each time you press the Input button it will change to AV > Component > RGB > HDMI/DVI.
If nothing is inputted for several seconds the screen will automatically move to the selected menu.
AV
„INPUT" (Eingang) drücken, wird sie geändert zu
AV > Component > RGB > HDMI/DVI
Wenn für mehrere Sekunden keine Eingabe erfolgt, wechselt die Anzeige automatisch zum ausgewählten Menü.
AV
touche INPUT(Mode), le signal change selon la séquence suivante : AV
>
Component
>
RGB
>
HDMI/DVI.
Si vous ne saisissez rien pendant plusieurs secondes, l’écran passe automatiquement au menu sélectionné.
AV
Ogni volt ache si preme il pulsante della sorgente d'ingresso, questa passerà da AV > Component > RGB > HDMI/DVI.
Se non viene digitato nulla per diversi secondi, la schermata passa automaticamente al menu selezionato.
AV
(Entrada), la señal cambiará según la siguiente secuencia AV > Component > RGB > HDMI/DVI
Si, transcurridos unos segundos, no se ha introducido ningún dato, la pantalla accederá automáticamente al menú seleccionado.
AV
Sempre que premir o botão INPUT (Entrada), irá comutar entre AV > Component > RGB > HDMI/DVI.
Se não forem introduzidos dados durante diversos segundos, o ecrã muda automaticamente para o menu seleccionado.
AV
∫¿ı ÊÔÚ¿ Ô˘ ·Ù¿Ù ÙÔ ÎÔ˘Ì› INPUT (∂›ÛÔ‰Ô˜) ı· ·ÏÏ¿˙ÂÈ Û AV > Component > RGB > HDMI/DVI.
ª‹Ó˘Ì· Ô˘ ÂÌÊ·Ó›˙ÂÙ·È ÛÙËÓ ÔıfiÓË ¢È·ÌfiÚʈÛË Û‹Ì·ÙÔ˜ ÂÈÛfi‰Ô˘
AV
Kade kolejne nacinicie przycisku Input powoduje zmian trybu:
AV > Component> RGB > HDMI/DVI
Przy braku akcji przez kilka sekund, odbiornik automatycznie przejdzie do wybranego menu.
Connect the power cord.
Schließen Sie das Stromkabel an.
Raccordez le cordon d’alimentation.
Collegare il cavo d’alimentazione.
Conecte el cable de alimentación.
Conecte o cabo de força.
™˘Ó‰¤ÛÙ ÙÔ Î·ÏÒ‰ÈÔ ÙÚÔÊÔ‰ÔÛ›·˜.
Podłcz przewód zasilajcy.
1
2
3
Turn on product by pressing the power button on the product.
Schalten Sie das Gerät ein, indem Sie die Taste „Power" (Ein/Aus) am Produkt drücken.
Mettez l’appareil sous tension à l'aide de la touche de mise sous tension.
Attivare il prodotto premendo il pulsante dell'alimentazione presente sul prodotto.
Encienda el producto pulsando el botón de encendido del producto.
Ligue o produto premindo o botão de alimentação no produto.
£¤ÛÙ ÙË Û˘Û΢‹ Û ÏÂÈÙÔ˘ÚÁ›·, ·ÙÒÓÙ·˜ ÙÔ ÎÔ˘Ì› ÂÓÂÚÁÔÔ›ËÛ˘/·ÂÓÂÚÁÔÔ›ËÛ˘.
Włcz urzdzenie, naciskajc przycisk zasilania.
Turn on the PC or video equipment.
Schalten Sie den PC oder Videorekorder ein.
Mettez votre ordinateur ou votre équipement vidéo sous tension.
Accendere il PC o l'apparecchiatura video.
Encienda el PC o el equipo de vídeo.
Ligue o PC ou o equipamento de vídeo.
£¤ÛÙ ÙÔÓ ˘ÔÏÔÁÈÛÙ‹ ‹ ÙÔ ‚›ÓÙÂÔ Û ÏÂÈÙÔ˘ÚÁ›·.
Włcz komputer PC lub urzdzenie wideo.
Power button
Ein-/Aus-Taste
Bouton Marche/Arrêt
Pulsante di accensione
Botón de encendido
Botão Power
∫Ô˘Ì› ÂÓÂÚÁÔÔ›ËÛ˘
Przycisk Power (Zasilanie)
2.
3.
Press the INPUT button on the remote control to select the input signal.
Or, press the INPUT button at the front side of the product to select the input signal.
If you press the button once, the following Input Signal Window will appear. Select the sig-
nal type you want using the
DD
,
EE
button.
Name of the Remote Control Buttons
l
Bezeichnung der Tasten auf der Fernbedienung Désignation
l
des touches de la télécommande
l
Descrizione dei pulsanti del telecomando
l
Nombre de los botones del mando a distancia
l
Nome dos botões do controle remoto
l
√ÓÔÌ·Û›· ÙˆÓ ÎÔ˘ÌÈÒÓ ÙÔ˘ ÙËϯÂÈÚÈÛÙËÚ›Ô˘
l Nazwa przycisku pilota
AUTO/SET
T
AV
Component
RGB PC
HDMI/DVI
On screen message Cable configuration
S-Video Cable, BNC Cable, Audio Cable
BNC Cable, Audio Cable
D-Sub Analog Signal Cable
HDMI to DVI Signal Cable, HDMI Signal Cable
Step 1
Schritt 1
Étape 1
Punto 1
Paso 1
Passo 1
Krok 1
Step 2
Schritt 2
Étape 2
Punto 2
Paso 2
Passo 2
Krok 2
Weight l
Netto
l
Net
l
Netto
l
Neto
l
Peso líquido
l
∫·ı·Úfi ‚¿ÚÔ˜
l
Ciar
1. Take out the battery cap.
2. Insert the batteries with correct polarity (+/-).
3. Close the battery cap.
• Dispose of used batteries in the recycle bin to prevent environmental pollution.
1. Nehmen Sie die Batterieabdeckung ab.
2. Legen Sie die Batterien richtig ein (+/-).
3. Schließen Sie die Batterieabdeckung.
• Entsorgen Sie leere Batterien in Recyclingbehältern, eine Verschmutzung der Umwelt zu vermeiden.
1. Ouvrez le capot du compartiment à piles.
2. Introduisez les piles en respectant les polarités (+/-).
3. Refermez le compartiment à piles.
• Veillez à ne pas jeter les piles usagées mais à utiliser les moyens de recyclage afin de protéger l'environnement.
1. Estrarre lo sportello della batteria
2. Inserire le batterie con la polarità corretta (+/-).
3. Chiudere lo sportello delle batterie.
• Smaltire le batterie usate utilizzando l'apposito cestino per evitare di inquinare l'ambiente.
1. Quite la tapa del compartimento de las pilas.
2. Inserte las pilas con la orientación de polaridad correcta (+/-).
3. Cierre la tapa del compartimento de las pilas.
• Deshágase de las pilas tirándolas a un contenedor de reciclaje de pilas para evitar la contaminación del medio ambiente.
1. Retire a tampa do compartimento da pilha.
2. Insira as pilhas com a polaridade correta (+/-).
3. Feche a tampa do compartimento da pilha.
• Descarte as pilhas usadas em lixeiras apropriadas para evitar poluição ambiental.
1. ∞Ê·ÈÚ¤ÛÙ ÙÔ Î¿Ï˘ÌÌ· ÙˆÓ Ì·Ù·ÚÈÒÓ.
2. ∆ÔÔıÂÙ‹ÛÙ ÙȘ ̷ٷڛ˜ Ì ÙË ÛˆÛÙ‹ ÔÏÈÎfiÙËÙ· (+/-).
3. ∫Ï›ÛÙ ÙÔ Î¿Ï˘ÌÌ· ÙˆÓ Ì·Ù·ÚÈÒÓ.
• ∞ÔÚÚ›„Ù ÙȘ ¯ÚËÛÈÌÔÔÈË̤Ó˜ ̷ٷڛ˜ Û ο‰Ô ·Ó·Î‡ÎψÛ˘ ÁÈ· ÙËÓ ÚÔÛÙ·Û›· ÙÔ˘ ÂÚÈ‚¿ÏÏÔÓÙÔ˜.
1. Zdejmij pokryw baterii.
2. Włó baterie z zachowaniem odpowiedniej polaryzacji (+/-).
3. Zamknij pokryw baterii.
• Zuyte baterie naley wyrzucić do odpowiedniego pojemnika, aby zapobiec zanieczyszczeniu rodowiska.
Inserting batteries into remote control.
l
Einlegen von Batterien in die Fernbedienung
l
Insertion des piles dans la télécommande.
l
Inserimento delle batterie nel telecomando.
l
Inserción de las pilas en el mando a distancia.
l
Inserindo pilhas no controle remoto.
l
∆ÔÔı¤ÙËÛË Ì·Ù·ÚÈÒÓ ÛÙÔ ÙËϯÂÈÚÈÛÙ‹ÚÈÔ.
l Wkładanie baterii do pilota.
1
2
3
4
5
6
MENU (Menü l Menú l ªÂÓÔ‡ l MENÜ)
Use this button to enter the On Screen Display menu.
Über diese Taste rufen Sie das On Screen Display-Menü auf.
Utilisez cette touche pour accéder au menu OSD (affichage à l’écran).
Premere questo pulsante per accedere al menu OSD (On Screen Display).
Utilice este botón para acceder al menú de visualización en pantalla.
Use este botão para entrar no menu On Screen Display (Exibição na tela).
ÃÚËÛÈÌÔÔÈ‹ÛÙ ·˘Ùfi ÙÔ ÎÔ˘Ì› ÁÈ· Ó· ÂÓÂÚÁÔÔÈ‹ÛÂÙ ÙÔ ÌÂÓÔ‡ Ú˘ıÌ›ÛÂˆÓ Ù˘ ÔıfiÓ˘ (On Screen Display).
Ten przycisk słuy do przejcia do menu OSD (On Screen Display).
POWER (Ein/Aus l MISE SOUS/HORS TENSION l Encendido l
ligar/desligar l ∂ÓÂÚÁÔÔ›ËÛË/·ÂÓÂÚÁÔÔ›ËÛË l
POWER (Zasilanie))
MUTE | MUTE (Lautlos) | MUTE (COUPURE DU SON) | MUTE | MUTE (Silenciamiento) | MUTE (sem áudio) | MUTE (™›Á·ÛË) |
Przycisk Mute
INPUT
If you press the button once, the following Input Signal Window will appear. Select the signal type you want using the
DD EE
button.
INPUT(
Taste zur Auswahl des Eingangs)
Wenn Sie die Taste einmal drücken, wird folgendes Eingangssignalfenster angezeigt. Wählen Sie den gewünschten Signaltyp über die
Taste
D
D EE
.
INPUT
Si vous appuyez une fois sur le bouton, la fenêtre de signal d'entrée suivante apparaît. Sélectionnez le type de signal souhaité à l'aide du bouton
DD EE
.
INPUT
Se si preme il pulsante una volta, viene visualizzata la finestra Selez. ingresso. Selezionare il tipo di segnale desiderato mediante il pulsante
D
D EE
.
INPUT
Si pulsa el botón una vez, aparece la siguiente Input Signal Window (Ventana de la señal de entrada). Seleccione el tipo de señal que
quiere mediante el botón
D
D EE
.
INPUT
Se você pressionar o botão uma vez, a janela Input Signal (Entrada de sinal) a seguir será exibida. Selecione o tipo de sinal desejado utilizando
o botão
DD EE
.
INPUT
∞Ó È¤ÛÂÙ ÙÔ ÎÔ˘Ì› Ì›· ÊÔÚ¿, ı· ÂÌÊ·ÓÈÛÙ› ÙÔ ·ÎfiÏÔ˘ıÔ ·Ú¿ı˘ÚÔ ÂÈÏÔÁ‹˜ Û‹Ì·ÙÔ˜ ÂÈÛfi‰Ô˘. ∂ÈϤÍÙ ÙÔÓ Ù‡Ô Û‹Ì·ÙÔ˜ Ô˘
ÂÈı˘Ì›Ù ¯ÚËÛÈÌÔÔÈÒÓÙ·˜ ÙÔ ÎÔ˘Ì›
D
D EE
.
INPUT
Jeli uytkownik nacinie ten przycisk jeden raz, zostanie wywietlone oknosygnału wejciowego.
Wybierz dany typ sygnału za pomoc przycisków
DD EE
.
NOTE
In case the BNC cable is
connected simultaneously
as S-Video cable is connected,
S-Video cable is first.
Hinweis
Wenn gleichzeitig ein
BNC- und ein S-VIDEO
Kabel angeschlossen
werden soll, erfolgt zuers
der Anschluss des S
VIDEO-Kabels.
AV
Component
RGB PC
HDMI/DVI
Nachricht auf dem Bildschirm Konfiguration des Eingangssignals
S-Video-Kabel, BNC-Kabel, Audiokabel
BNC-Kabel, Audiokabel
D-Sub-Signalkabel
HDMI-DVI Kabel,HDMIKabel
Drücken Sie die INPUT-Taste auf der Fernbedienung, um das Eingangssignalauszuwählen.
Oder drücken Sie die
INPUT
-Taste auf der Vorderseite des Produkt.
Drücken Sie die Taste ein einziges Mal, erscheint das folgende Fenster für das Eingangssignal. Wählen Sie den
Signaltyp mithilfe der
DD EE
-Taste aus.
Remarque
Si le câble BNC et le
câble S-VIDEO sont rac-
cordés simultanément, le
câble S-VIDEO a la prior-
ité.
Appuyez sur le bouton
INPUT
sur la télécommande pour sélectionner le signal d'entrée.
Ou, appuyez sur le bouton INPUT sur la face avant du produit.
Si vous appuyez une fois sur le bouton, la fenêtre de signal d'entrée suivante apparaît. Sélectionnez le type de
signal souhaité à l'aide du bouton
DD EE
.
AV
Component
RGB PC
HDMI/DVI
Message à l’écran Configuration du signal d’entrée
Câble S-Video, Câble BNC, Câble audio
Câble BNC, Câble audio
Câble su signal D-Sub
Câble HDMI-DVI, Câble HDMI
Nota
Se il cavo BNC è collegato ed
allo stesso tempo è collegato
anche il cavo S-VIDEO, il cavo
SVIDEOsarà il primo.
Premere il pulsante INPUT sul telecomando per selezionare il segnale di ingresso.
In alternativa, premere il pulsante
INPUT
sul lato anteriore del prodotto.
Se si preme il pulsante una volta, viene visualizzata la finestra Selez. ingresso. Selezionare il
tipo di segnale desiderato mediante il pulsante
DD EE
.
AV
Component
RGB PC
HDMI/DVI
Messaggio su schermo Configurazione del segnale d'ingresso
Cavo S-Video, Cavo BNC, Cavo audio
Cavo BNC, Cavo audio
Cavo del segnale D-Sub
Cavo del segnale HDMI-DVI, Cavo del segnale HDMI
Nota
Si el cable BNC está
conectado al mismo tiem-
po que el cable S-VIDEO,
el cable S-VIDEO tiene
prioridad
Pulse el botón INPUT (Fuente) del mando a distancia para seleccionar una señal de entrada.
O pulse el botón
INPUT
de la parte frontal del producto .
Si pulsa el botón una vez, aparece la siguiente Input Signal Window (Ventana de la señal de entrada).
Seleccione el tipo de señal que quiere mediante el botón
DD EE
.
AV
Component
RGB PC
HDMI/DVI
Mensaje en pantalla Configuración de señal de entrada
Cable S-Video, Cable BNC, Cable de audio
Cable BNC, Cable de audio
Cable de señal D-sub
Cable de señal HDMI-DVI, Cable de señal HDMI
Nota
Caso o cabo BNC esteja
ligado em simultâneo com
o cabo S-VIDEO, este
último está em primeiro
lugar
Pressione o botão INPUT (
Entrada
) no controle remoto para selecionar o sinal de entrada.
Ou pressione o botão INPUT na parte frontal do produto.
Se você pressionar o botão uma vez, a janela Input Signal (Entrada de sinal) a seguir será exibida. Selecione o tipo de
sinal desejado utilizando o botão
DD EE
.
AV
Component
RGB PC
HDMI/DVI
Mensagem no ecrã Configuração do sinal de entrada
Cabo S-Video, Cabo BNC, Cabo de áudio
Cabo BNC, Cabo de áudio
Cabo de sinal D-Sub
Cabo de sinal HDMI-DVI, Cabo de sinal HDMI
™ËÌ›ˆÛË
™ÙËÓ ÂÚ›ÙˆÛË Ô˘
Û˘Ó‰Âı› ÙÔ Î·ÏÒ‰ÈÔ
BNC ÂÓÒ Â›Ó·È ‹‰Ë
Û˘Ó‰Â‰Â̤ÓÔ ¤Ó·
ηÏÒ‰ÈÔ S-VIDEO, ÙÔ
ηÏÒ‰ÈÔ S-VIDEO ›ӷÈ
ÚÒÙÔ
¶·Ù‹ÛÙ ÙÔ ÎÔ˘Ì› INPUT
(¶ÚԤϢÛË Û‹Ì·ÙÔ˜)
ÛÙÔ ÙËϯÂÈÚÈÛÙ‹ÚÈÔ ÁÈ· Ó· ÂÈϤÍÂÙ ۋ̷ ÂÈÛfi‰Ô˘.
◊ ȤÛÙ ÙÔ ÎÔ˘Ì›
INPUT
ÛÙËÓ ÌÚÔÛÙÈÓ‹ ÏÂ˘Ú¿ ÙÔ˘ ÚÔ˚fiÓÙÔ˜.
∞Ó È¤ÛÂÙ ÙÔ ÎÔ˘Ì› Ì›· ÊÔÚ¿, ı· ÂÌÊ·ÓÈÛÙ› ÙÔ ·ÎfiÏÔ˘ıÔ ·Ú¿ı˘ÚÔ ÂÈÏÔÁ‹˜ Û‹Ì·ÙÔ˜
ÂÈÛfi‰Ô˘. ∂ÈϤÍÙ ÙÔÓ Ù‡Ô Û‹Ì·ÙÔ˜ Ô˘ ÂÈı˘Ì›Ù ¯ÚËÛÈÌÔÔÈÒÓÙ·˜ ÙÔ ÎÔ˘Ì›
DD EE
.
AV
Component
RGB PC
HDMI/DVI
ª‹Ó˘Ì· Ô˘ ÂÌÊ·Ó›˙ÂÙ·È ÛÙËÓ ÔıfiÓË
¢È·ÌfiÚʈÛË Û‹Ì·ÙÔ˜ ÂÈÛfi‰Ô˘
∫·ÏÒ‰ÈÔ S-Video, ∫·ÏÒ‰ÈÔ BNC, ∫·ÏÒ‰ÈÔ ‹¯Ô˘
∫·ÏÒ‰ÈÔ BNC, ∫·ÏÒ‰ÈÔ ‹¯Ô˘
∫·ÏÒ‰ÈÔ Û‹Ì·ÙÔ˜ D-Sub
∫·ÏÒ‰ÈÔ Û‹Ì·ÙÔ˜ HDMI-DVI, ∫·ÏÒ‰ÈÔ Û‹Ì·ÙÔ˜ HDMI
DD
,
EE
Buttons
Bring up and down direction adjustment.
VOL (
FF
,
GG
) Buttons
Able to adjust sound.
SET Button
Use when functional adjustment is completed.
DD
,
EE
Tasten
Nach oben-/unten-Tasten
VOL (
FF
,
GG
) (Lautstärke) Tasten
Über diese Tasten wird die Lautstärke angepasst.
SET Tasten
Diese Taste wird verwendet, wenn Funktionseinstellungen
vorgenommen wurden.
Touches
DD
,
EE
Touches de direction Haut/Bas
Touches VOL (
FF
,
GG
)
Permettent de régler le volume.
Touche SET
Utilisez cette touche lorsque les réglages sont terminés.
Pulsanti
DD
,
EE
Pulsanti up, down [su/giù]
Pulsanti VOL (
FF
,
GG
)
in grado di regolare l'audio.
Pulsante SET
utilizzare una volta completata la rego lazione operative.
Botones
DD
,
EE
Botones arriba, abajo
Botones VOL (
FF
,
GG
)
Permiten ajustar el sonido.
Botón SET
Utilícelo cuando haya terminado de realizar el ajuste.
Botões
DD
,
EE
Botões para cima, para baixo
Botões VOL(
FF
,
GG
)
Permitem o ajuste do som.
Botão SET
Use quando o ajuste de função estiver concluído.
∫Ô˘ÌÈ¿
DD
,
EE
∫Ô˘ÌÈ¿ ¿ӈ Î·È Î¿Ùˆ
∫Ô˘ÌÈ¿ VOL
F
F
,
GG
(ŒÓÙ·ÛË ‹¯Ô˘)
°È· Ó· Ú˘ıÌ›ÛÂÙ ÙËÓ ¤ÓÙ·ÛË ÙÔ˘ ‹¯Ô˘.
∫Ô˘Ì› SET
¶·Ù‹ÛÙÂ ÙÔ fiÙ·Ó ÔÏÔÎÏËÚÒÛÂÙÂ ÙË Ú‡ıÌÈÛË ÙˆÓ ÏÂÈÙÔ˘ÚÁÈÒÓ.
NOTE l HINWEIS l REMARQUE l NOTA l ™∏ª∂πø™∏ l
Uwaga
The specifications shown above may be changed without prior notice for quality improvement.
Diese Angaben können ohne Ankündigung bei Qualitätsverbesserungen geändert werden.
Afin d’améliorer la qualité de ce produit, les spécifications ci-dessus sont sujettes à des modifications sans préavis.
Le specifiche precedentemente indicate possono essere soggette ad eventuali modifiche senza preavviso allo scopo di apportare miglioramenti qualitativi.
Las especificaciones mostradas arriba pueden cambiar sin previo aviso para mejorar la calidad,
As especificações apresentadas anteriormente podem ser alteradas sem aviso prévio para efeitos de melhoria de qualidade.
∆· ·Ú·¿Óˆ ¯·Ú·ÎÙËÚÈÛÙÈο Â›Ó·È Èı·Óó Ó· ·ÏÏ¿ÍÔ˘Ó ¯ˆÚ›˜ ÚÔËÁÔ‡ÌÂÓË ÂȉÔÔ›ËÛË ÁÈ· ÙË ‚ÂÏÙ›ˆÛË Ù˘ ÔÈóÙËÙ·˜.
Powysze parametry mog być zmienione bez wczeniejszego powiadomienia w celu poprawienia jakoci produktu.
Przyciski (
DD
,
EE
)
Umo
liwiaj zmian parametr
ów w gór
i d
ó
ł.
VOL (
FF
,
GG
) (Głonoć)
Przyciski umoliwiajce regulacj dwiku.
Przycisk SET
Jest uywany do potwierdzenia zmian parametr
ów.
UWAGA
Jeli przewód BNC jest
podłczony równoczenie
z przewodem S-Video,
przewód S-Video ma
pierwszestwo.
Wybierz sygnał wejciowy. Nacinij przycisk INPUT (WEJCIE) na pilocie zdalnego sterowania w celu wybrania sygnału wejciowego.
Lub nacinij przycisk INPUT z przodu urzdzenia.
Jeli uytkownik nacinie ten przycisk jeden raz, zostanie wywietlone oknosygnału wejciowego.
Wybierz dany typ sygnału za pomoc przycisków
DD EE
.
AV
Component
RGB PC
HDMI/DVI
Komunikat na ekranie Konfiguracja sygnału wejciowego
Przewód S-Video
, Przewód BNC,
Przewód audio
Przewód BNC,
Przewód audio
Przew
ó
d sygna
ł
owy D-Sub
Przew
ó
d
sygna
ł
owy HDMI-
DVI,
Przewód sygnałowy HDMI
1 2 3
4 5 6
7 8
0
9
*
1
2
3
4
5
6
+
+
AAA Type
Typ AAA
Modello AAA
Tipo AAA
Tipo AAA
∆‡Ô˜
AAA
Typ AAA
16.82 kg (37.08 lbs) 14.38 kg (31.70 lbs) 17.6 kg (38.80 lbs) 15.16 kg (33.42 lbs)
16,82 kg (37,08 lbs) 14,38 kg (31,70 lbs) 17,6 kg (38,80 lbs) 15,16 kg (33,42 lbs)
16,82
kg (
37,08
livres)
14,38
kg (
31,70
livres)
17,6
kg (
38,80
livres)
15,16
kg (
33,42
livres)
16,82 kg (37,08 lbs) 14,38 kg (31,70 lbs) 17,6 kg (38,80 lbs) 15,16 kg (33,42 lbs)
16,82
kg (
37,08
libras)
14,38
kg (
31,70
libras
)
17,6
kg (
38,80
libras
)
15,16
kg (
33,42
libras
)
16,82
kg (
37,08
libras
)
14,38
kg (
31,70
libras
)
17,6
kg (
38,80
libras
)
15,16
kg (
33,42
libras
)
16,82 ÎÈÏ¿
(
37,08 lbs
)
14,38 ÎÈÏ¿
(
31,70 lbs
)
17,6 ÎÈÏ¿
(
38,80 lbs
)
15,16 ÎÈÏ¿
(
33,42 lbs
)
16,82 kg (37,08 funta) 14,38 kg (31,70 funta) 17,6 kg
(
38,80 funta
)
15,16 kg
(
33,42 funta
)
23.98 kg (52.87 lbs) 20.76 kg (45.77 lbs) 24.76 kg (54.59 lbs) 21.54 kg (47.49 lbs)
23,98 kg (52,87 lbs) 20,76 kg (45,77 lbs) 24,76 kg (54,59 lbs) 21,54 kg (47,49 lbs)
23,98
kg (
52,87
livres)
20,76
kg (
45,77
livres)
24,76
kg (
54,59
livres)
21,54
kg (
47,49
livres)
23,98 kg (52,87 lbs) 20,76 kg (45,77 lbs) 24,76 kg (54,59 lbs) 21,54 kg (47,49 lbs)
23,98
kg (
52,87
libras)
20,76
kg (
45,77
libras
)
24,76
kg (
54,59
libras
)
21,54
kg (
47,49
libras
)
23,98
kg (
52,87
libras
)
20,76
kg (
45,77
libras
)
24,76
kg (
54,59
libras
)
21,54
kg (
47,49
libras
)
23,98 ÎÈÏ¿
(
52,87 lbs
)
20,76 ÎÈÏ¿
(
45,77 lbs
)
24,76 ÎÈÏ¿
(
54,59 lbs
)
21,54 ÎÈÏ¿
(
47,49 lbs
)
23,98 kg (52,87 funta) 20,76 kg (45,77 funta) 24,76 kg
(
54,59 funta
)
21,54 kg
(
47,49 funta
)
[M3203C]
[M3703C]