
Owner's Manual


38
Timer
Recording
This recorder
can
be
programmed
to
record
up
to
16
programs
within
a
period
of
1
month.
For
unattended
recording,
the
timer
needs
to
know
the
channels
to
be
recorded,
the
starting
and
ending
time.
Note:
If
you
use
a
completely
blank
disc
for
timer
recording,
you
must
format
the
disc
before
starting
timer
recording.
(Refer
to
"Disc
Format"
on
page
21.)
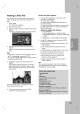
1.
Press
TIMER
REC.
The
Timer
Record
menu
will
appear.
[Media]
Choose
a
media
to
record
(HDD
or
DVD).
[PR]
Choose
a
memorized
program
number,
or
one
of
the
external
inputs
from
which
to
record.
(You
cannot
select
DV
input.)
[Date]
Choose
a
date
up
to
1
month
in
advance.
[Start
Time]
Set
the
start
time.
[End
Time]
Set
the
end
time.
[Repeat]
Choose
a
desired
repeat
(Once,
Daily
(Monday
-
Friday),
or
Weekly).
[VPS/PDC]
The
VPS/PDC
system
automatically
adjusts
the
recording
time
so
that
even
if
a
program
is
not
running
to
schedule,
you
won't
miss
it.
For
VPS/PDC
to
work
properly,
you
must
input
the
correct
announced
time
and
date
of
the
program
you
want
to
record.
Note
that
VPS/PDC
may
not
work
with
every
station.
Notes:
Stations
that
use
VPS/PDC
typically
include
VPS/PDC
information
in
the
teletext
TV
guide
pages.
Please
refer
to
these
pages
when
setting
a
timer
recording.
When
using
VPS/PDC,
there
may
be
instances
where
the
beginning
of
the
program
is
not
recorded.
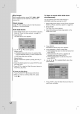
2.
Enter
the
necessary
information
for
your
timer
recording(s).
b
/
B
(left/right)
--
move
the
cursor
left/right
v
/
V
(up/down)
--
change
the
setting
at
the
current
cursor
position
Press
RETURN
(O)
to
exit
the
Timer
Record
menu.
Press
ENTER
after
filling
in
all
the
program
information.
Press
TIMER
REC
to
display
Timer
Record
List.
3.
Set
a
recording
mode
as
necessary
by
pressing
REC
MODE
repeatedly.
(XP,
SP,
LP,
EP)
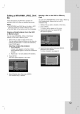
4.
Press
ENTER,
the
program
will
be
memorized
by
the
recorder.
To
check
the
programming,
the
Timer
Record
List
will
appear.
Check
field's
"Rec.
OK"
on
the
Timer
Record
List
indicates
that
the
timer
recording
is
programmed
correctly.
5.
Press
RETURN
(O)
to
exit
the
Timer
Record
List.
6.
Make
sure
that
you
load
a
recordable
disc
for
DVD
recording
and
press
POWER
to
switch
your
unit
to
Standby.
Notes:
The
timer
indicator
lights
in
the
display
window
when
the
recorder
is in
standby
with
the
timer
active.
(Nothing
is
displayed
while
the
[Power
Save
Mode]
is
ON.)
For
TV
recording
with
bilingual,
set
audio
channel
from
the
[TV
Rec
Audio]
in
sub-menu
of
the
Setup
menu
(see
page
21).
You
must
press
STOP
to
stop
the
timer
recording.
If
you
set
a
timer
recording
to
record
to
DVD
but
there
isn't
a
recordable
DVD
loaded
at
the
time
of
the
recording,
the
Recovery
Recording
feature
will
automatically
record
the
program
to
the
HDD
for
you.
MPEG4
recording
is
not
available
with
Timer
recording.
(available
only
in
MPEG2
recording
format)