OWNER'S MANUAL êìäéÇéÑëíÇé èéãúáéÇÄíÖãü VK8710H**** New Type Cyclone Vacuum Cleaner è˚ÎÂÒÓÒ Ò ˆËÍÎÓÌÌ˚Ï ÙËθÚÓÏ ÌÓ‚Ó„Ó ÚËÔ‡ This information contains important instructions for the safe use and maintenance of the vacuum cleaner. Especially, please read all of the information on page 4,5 for your safety. Please keep this manual in an easily accessible place and refer to it anytime. ùÚ‡ ËÌÙÓχˆËfl ÒÓ‰ÂÊËÚ ‚‡ÊÌ˚ ËÌÒÚÛ͈ËË ÔÓ ·ÂÁÓÔ‡ÒÌÓÈ ˝ÍÒÔÎÛ‡Ú‡ˆËË Ë Ó·ÒÎÛÊË‚‡Ì˲ Ô˚ÎÂÒÓÒ‡.
MFL37414303
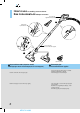
Table of contents ëÓ‰ÂʇÌË Important safety instructions ..............................................................................4~5 LJÊÌ˚ Û͇Á‡ÌËfl ÔÓ ÚÂıÌËÍ ·ÂÁÓÔ‡ÒÌÓÒÚË ..................................................6~7 How to use .................................................................................................................8 ä‡Í ÔÓθÁÓ‚‡Ú¸Òfl Assembling vacuum cleaner.............................................................................................................
IMPORTANT SAFETY INSTRUCTIONS Read and follow all instructions before using your vacuum cleaner to prevent the risk of fire,electric shock, personal injury,or damage when using the vacuum cleaner.This guide do not cover all possible conditions that may occur.Always contact your service agent or manufacturer about problems that you do not understand. This appliance complies with the following EC Directives :-73/23/EEC,93/68/EEC-Low Voltage Directive–89/336EEC –EMC Directive. This is the safety alert symbol.
IMPORTANT SAFETY INSTRUCTIONS CAUTION • Do not put any objects into openings. Failure to do so could result in product damage. • Use accessory nozzles in sofa mode. Failure to do so could result in product damage. • Do not use with any opening blocked: keep free of dust, lint, hair, and anything that may reduce air flow. Failure to do so could result in product damage. • Don ’t grasp the tank handle when you are moving the vacuum cleaner. The vacuum cleaner’s body may fall when separating tank and body.
ÇÄÜçõÖ èêÄÇàãÄ íÖïçàäà ÅÖáéèÄëçéëíà ÑÎfl Ô‰ÓÚ‚‡˘ÂÌËfl ËÒ͇ ‚ÓÁ„Ó‡ÌËfl, ÔÓ‡ÊÂÌËfl ˝ÎÂÍÚ˘ÂÒÍËÏ ÚÓÍÓÏ, ÔÓÎÛ˜ÂÌËfl Ú‡‚Ï ËÎË Ì‡ÌÂÒÂÌËfl Û˘Â·‡ ÔË ÔÓθÁÓ‚‡ÌËË Ô˚ÎÂÒÓÒÓÏ, ÔÓ˜ÚËÚ ‚Ò ËÌÒÚÛ͈ËË Ë ÒÚÓ„Ó Ëı Òӷ≇ÈÚÂ. чÌÌÓ ÛÍÓ‚Ó‰ÒÚ‚Ó Ì ‚Íβ˜‡ÂÚ ‚Ò ‚ÓÁÏÓÊÌ˚ ÛÒÎÓ‚Ëfl, Ò ÍÓÚÓ˚ÏË ÏÓÊÌÓ ÒÚÓÎÍÌÛÚ¸Òfl. èÓ ‚ÓÁÌË͇˛˘ËÏ Û Ç‡Ò ‰ÓÔÓÎÌËÚÂθÌ˚Ï ‚ÓÔÓÒ‡Ï Ó·‡˘‡ÈÚÂÒ¸ ‚ ̇¯Ë Ò‚ËÒÌ˚ ˆÂÌÚ˚.
ÇÄÜçõÖ èêÄÇàãÄ íÖïçàäà ÅÖáéèÄëçéëíà ÇçàåÄçàÖ • ç ‚ÒÚ‡‚ÎflÈÚ ÔÓÒÚÓÓÌÌË Ô‰ÏÂÚ˚ ‚ ÌÂÔ‰̇Á̇˜ÂÌÌ˚ ‰Îfl ˝ÚÓ„Ó ÓÚ‚ÂÒÚËfl çÂÒӷβ‰ÂÌË ˝ÚÓ„Ó Û͇Á‡ÌËfl ÏÓÊÂÚ ÔË‚ÂÒÚË Í ÔÓ‚ÂʉÂÌ˲ ÔË·Ó‡. • ç ÔÓθÁÓ‚‡Ú¸Òfl ÔË·ÓÓÏ Ò ·ÎÓÍËÓ‚‡ÌÌ˚ÏË ÓÚ‚ÂÒÚËflÏË: ‰Âʇڸ ÓÚ‚ÂÒÚËfl Ò‚Ó·Ó‰Ì˚ÏË ÓÚ „flÁË, ÍÓÏÍÓ‚ Ô˚ÎË, ‚ÓÎÓÒ Ë ‚Ò„Ó, ˜ÚÓ ÏÓÊÂÚ ÛÏÂ̸¯ËÚ¸ ÔÓÚÓÍ ‚ÓÁ‰Ûı‡. çÂÒӷβ‰ÂÌË ˝ÚÓ„Ó Û͇Á‡ÌËfl ÏÓÊÂÚ ÔË‚ÂÒÚË Í ÔÓ‚ÂʉÂÌ˲ ÔË·Ó‡. • ç ÔÓθÁÛÈÚÂÒ¸ Ô˚ÎÂÒÓÒÓÏ ·ÂÁ ϯ͇ ‰Îfl Ô˚ÎË Ë/ËÎË ÛÒÚ‡ÌÓ‚ÎÂÌÌ˚ı ÙËθÚÓ‚.
How to use Assembling vacuum cleaner ä‡Í ÔÓθÁÓ‚‡Ú¸Òfl ë·Ó͇ Ô˚ÎÂÒÓÒ‡ Hose Handle èÛÊËÌ̇fl Á‡˘ÂÎ͇ 2 Spring latch ê͇ۘ ¯Î‡Ì„‡ Telescopic pipe íÂÎÂÒÍÓÔ˘ÂÒ͇fl Ú۷͇ 1 (Optional) (éÔˆËfl) Carpet and floor nozzle (depend on model) ç‡Ò‡‰Í‡ ‰Îfl ˜ËÒÚÍË ÔÓ· Ë ÍÓ‚Ó‚ (Ì ‚Ó ‚ÒÂı ÏÓ‰ÂÎflı) Push the nozzle into the telescopic pipe. ÇÒÚ‡‚¸Ú ̇҇‰ÍÛ ‚ ÚÂÎÂÒÍÓÔ˘ÂÒÍÛ˛ ÚÛ·ÍÛ. 8 MFL37414303 Telescopic pipe íÂÎÂÒÍÓÔ˘ÂÒ͇fl Ú۷͇ • Push telescopic pipe firmly into hose handle.
Click! ôÂΘÓÍ ! Fitting pipe ëÓ‰ËÌËÚÂθÌ˚È Ô‡ÚÛ·ÓÍ Flexible Hose ÉË·ÍËÈ ¯Î‡Ì„ Button äÌÓÔ͇ 3 Attachment Point íӘ͇ ÍÂÔÎÂÌËfl Connecting the hose to the vacuum cleaner èÓ‰ÒÓ‰ËÌÂÌË ¯Î‡Ì„‡ Í Ô˚ÎÂÒÓÒÛ Push the fitting pipe on the flexible hose into the attachment point on the vacuum cleaner. To remove the flexible hose from the vacuum cleaner, press the button situated on the fitting pipe, then pull the fitting pipe out of the vacuum cleaner.
How to use Operating vacuum cleaner ä‡Í ÔÓθÁÓ‚‡Ú¸Òfl ùÍÒÔÎÛ‡Ú‡ˆËfl Ô˚ÎÂÒÓÒ‡ 1 2 3 4 Indicator à̉Ë͇ÚÓ Plug òÚÂÔÒÂθ̇fl ‚ËÎ͇ Cord reel button äÌÓÔ͇ ÒχÚ˚‚‡ÌËfl ¯ÌÛ‡ Control knob ê͇ۘ ÛÔ‡‚ÎÂÌËfl POWER CONTROL FLOOR CARPET SOFA MAX CURTAIN OFF MIN How to operate ä‡Í ÔÓθÁÓ‚‡Ú¸Òfl Indicator and alarm sound à̉Ë͇ÚÓ Ë Ò˄̇ΠÚÂ‚Ó„Ë Park mode êÂÊËÏ Ô‡ÍÓ‚ÍË Storage ï‡ÌÂÌË • Pull out the power cord to the desired length and plug into the socket.
How to use Using carpet and floor nozzle ä‡Í ÔÓθÁÓ‚‡Ú¸Òfl àÒÔÓθÁÓ‚‡ÌË ̇҇‰ÍË ‰Îfl ˜ËÒÚÍË ÔÓ· Ë ÍÓ‚Ó‚ 1 Carpet äÓ‚Â Pedal 艇θ • Cleaning carpet and floor nozzle • óËÒÚ͇ Ò ËÒÔÓθÁÓ‚‡ÌËÂÏ Ì‡Ò‡‰ÍË ‰Îfl ÔÓ· Ë ÍÓ‚Ó‚ Floor èÓÎ Carpet and floor nozzle (depend on model) ç‡Ò‡‰Í‡ ‰Îfl ˜ËÒÚÍË ÔÓ· Ë ÍÓ‚Ó‚ (Ì ‚Ó ‚ÒÂı ÏÓ‰ÂÎflı) • The 2 position nozzle This is equipped with a pedal which allows you to alter its position according to the type of floor to be cleaned.
How to use Using All Floor nozzle and mini turbine nozzle ä‡Í ÔÓθÁÓ‚‡Ú¸Òfl àÒÔÓθÁÓ‚‡ÌË ̇҇‰ÍË ‰Îfl ˜ËÒÚÍË ‚ÒÂı ÔÓÎÓ‚ Ë ÏËÌË-ÚÛ·Ó Ì‡Ò‡‰ÍË 2 Carpet äÓ‚Â 3 Pedal 艇θ Floor èÓÎ All Floor nozzle (depend on model) ç‡Ò‡‰Í‡ ‰Îfl ˜ËÒÚÍË ÔÓÎÓ‚ ‚ÒÂı ÚËÔÓ‚ (Ì ‚Ó ‚ÒÂı ÏÓ‰ÂÎflı) • The 2 position nozzle This is equipped with a pedal which allows you to alter its position according to the type of floor to be cleaned.
How to use Using accessory nozzles ä‡Í ÔÓθÁÓ‚‡Ú¸Òfl àÒÔÓθÁÓ‚‡ÌË ‰ÓÔÓÎÌËÚÂθÌ˚ı ̇҇‰ÓÍ Upholstery nozzle ç‡Ò‡‰Í‡ ‰Îfl ˜ËÒÚÍË Ó·Ë‚ÍË 4 Dusting brush ç‡Ò‡‰Í‡ ‰Îfl Û·ÓÍË Ô˚ÎË Crevice tool ç‡Ò‡‰Í‡ ‰Îfl ˜ËÒÚÍË ‚ ˘ÂÎflı 5 Flexible Crevice tool ÉË·Í ‡ fl ̇҇‰Í‡ ‰Îfl ˜ËÒÚÍË ‚ ˘ÂÎflı 6 Upholstery nozzle ç‡Ò‡‰Í‡ ‰Îfl ˜ËÒÚÍË Ó·Ë‚ÍË Dusting brush ç‡Ò‡‰Í‡ ‰Îfl Û·ÓÍË Ô˚ÎË Crevice tool, Flexible crevice tool (Optional) ç‡Ò‡‰Í‡ ‰Îfl ˜ËÒÚÍË ‚ ˘ÂÎflı, ÉË·Í ‡ fl ̇҇‰Í‡ ‰Îfl ˜ËÒÚÍË ‚ ˘ÂÎflı (Ì ‚Ó ‚ÒÂı ÏÓ‰ÂÎflı) Upholstery n
How to use Emptying dust tank ä‡Í ÔÓθÁÓ‚‡Ú¸Òfl é˜ËÒÚ͇ Ô˚ÎÂÒ·ÓÌË͇ Tank separation lever ê˚˜‡„ ÓÚ‰ÂÎÂÌËfl ·ÛÌ͇ Pull out Ç˚ÌÛÚ¸ Indicator à̉Ë͇ÚÓ Tank handle ê͇ۘ ·ÛÌ͇ Dust tank cap ä˚¯Í‡ ·ÛÌ͇ ‰Îfl Ò·Ó‡ Ô˚ÎË Plate opening lever ê˚˜‡„ ‰Îfl ÓÚÍ˚ÚËfl Ô·ÒÚËÌ˚ The dust tank needs emptying when indicator light is on. • Turn off the vacuum cleaner and unplug it. • Grasp the handle of the tank and then press the tank separation lever. • Pull out the dust tank.
How to use Cleaning dust tank ä‡Í ÔÓθÁÓ‚‡Ú¸Òfl óËÒÚ͇ Ô˚ÎÂÒ·ÓÌË͇ Dust tank cap ä˚¯Í‡ ·ÛÌ͇ ‰Îfl Ò·Ó‡ Ô˚ÎË Plate opening lever ê˚˜‡„ ‰Îfl ÓÚÍ˚ÚËfl Ô·ÒÚËÌ˚ Tank separation lever ê˚˜‡„ ÓÚ‰ÂÎÂÌËfl ·ÛÌ͇ Pull out Ç˚ÌÛÚ¸ Tank handle ê͇ۘ ·ÛÌ͇ • Press tank separation lever and pull out dust tank. • Raise dust tank cap • Dry fully in shade so that moisture is entirely removed. NOTICE • ç‡ÊÏËÚ ̇ ˚˜‡„ ‰Îfl ÓÚ‰ÂÎÂÌËfl Ô˚ÎÂÒ·ÓÌË͇ Ë ËÁ‚ÎÂÍËÚ Ô˚ÎÂÒ·ÓÌËÍ.
How to use Cleaning air filter and motor safety filter ä‡Í ÔÓθÁÓ‚‡Ú¸Òfl óËÒÚ͇ ‚ÓÁ‰Û¯ÌÓ„Ó ÙËθڇ Ë Á‡˘ËÚÌÓ„Ó ÙËθڇ ˝ÎÂÍÚÓ‰‚Ë„‡ÚÂÎfl Pre-filter cover lever ê˚˜‡„ ÍÓÊÛı‡ Ô‰‚‡ËÚÂθÌÓ„Ó ÙËθڇ Motor safety filter ᇢËÚÌ˚È ÙËÎ¸Ú ˝ÎÂÍÚÓ‰‚Ë„‡ÚÂÎfl Filter cap ä˚¯Í‡ ÙËθڇ Air filter ÇÓÁ‰Û¯Ì˚È ÙËÎ¸Ú Pre-filter assembly 艂‡ËÚÂθÌ˚È ÙËÎ¸Ú ‚ Ò·Ó Pre-filter cover äÓÊÛı Ô‰‚‡ËÚÂθÌÓ„Ó ÙËθڇ Two "UP" marks must meet Ñ‚Â ÓÚÏÂÚÍË «UP» ‰ÓÎÊÌ˚ ·˚Ú¸ ÒÓ‚Ï¢ÂÌ˚ If suction power is decreased after cl
How to use Cleaning exhaust filter ä‡Í ÔÓθÁÓ‚‡Ú¸Òfl óËÒÚ͇ ‚˚ıÓ‰ÌÓ„Ó ÙËθڇ Exhaust filter cover äÓÊÛı ‚˚ıÓ‰ÌÓ„Ó ÙËθڇ White side up ÅÂÎÓÈ ÒÚÓÓÌÓÈ ‚‚Âı • The exhaust filter is a washable and reusable HEPA filter. • To clean the exhaust filter, remove the exhaust filter cover on the body by rotating it counterclockwise. • Separate the exhaust filter. • Wash the filter cleanly in flowing water. • Remove moisture.
What to do if your vacuum cleaner does not work óÚÓ ‰Â·ڸ, ÂÒÎË ‚‡¯ Ô˚ÎÂÒÓÒ Ì ‡·ÓÚ‡ÂÚ Check that the vacuum cleaner is plugged in correctly and that the electrical socket is working. èӂ¸Ú ԇ‚ËθÌÓÒÚ¸ ‚Íβ˜ÂÌËfl Ô˚ÎÂÒÓÒ‡ ‚ ÒÂÚ¸ Ë ‡·ÓÚÓÒÔÓÒÓ·ÌÓÒÚ¸ ˝ÎÂÍÚ˘ÂÒÍÓÈ ÓÁÂÚÍË. What to do when suction performance decreases óÚÓ ‰Â·ڸ, ÍÓ„‰‡ ÒÌËʇÂÚÒfl ÏÓ˘ÌÓÒÚ¸ ‚Ò‡Ò˚‚‡ÌËfl • Turn off the vacuum cleaner and unplug it. • Check the telescopic pipe, flexible hose and cleaning tool for blockages or obstructions.
Note èËϘ‡ÌË 19 MFL37414303
P/No.