us_main.book.book Page 1 Thursday, November 4, 2021 11:22 AM OWNER'S MANUAL WASHING MACHINE Read this owner’s manual thoroughly before operating the appliance and keep it handy for reference at all times. The complete owner’s manual can be found on the LG website at: http://gscs-manual.lge.com/Total/DFZ/NA/TL/TD/main.html or by scanning the QR code. LG is working to create a sustainable tomorrow by publishing parts of this manual online only.
us_main.book.
us_main.book.book Page 3 Thursday, November 4, 2021 11:22 AM IMPORTANT SAFETY INSTRUCTIONS 3 IMPORTANT SAFETY INSTRUCTIONS Safety Messages Your safety and the safety of others are very important. We have provided many important safety messages in this manual and on your appliance. Always read and follow all safety messages. This is the safety alert symbol. This symbol alerts you to potential hazards that can kill or injure you and others.
us_main.book.book Page 4 Thursday, November 4, 2021 11:22 AM 4 IMPORTANT SAFETY INSTRUCTIONS • Keep packing materials out of the reach of children. Packaging material can be dangerous for children. There is a risk of suffocation. • Destroy the carton, plastic bag, and other packing materials after the appliance is unpacked. Children might use them for play. Cartons covered with rugs, bedspreads, or plastic sheets can become airtight chambers.
us_main.book.book Page 5 Thursday, November 4, 2021 11:22 AM IMPORTANT SAFETY INSTRUCTIONS 5 • Do not modify or extend the power cord. • If the electrical supply cord is damaged, it must only be replaced by the manufacturer or its service agent or a similar qualified person in order to avoid a hazard. • Keep the area underneath and around your appliances free of combustible materials (lint, paper, rags, etc.), gasoline, chemicals and other flammable vapors and liquids.
us_main.book.book Page 6 Thursday, November 4, 2021 11:22 AM 6 IMPORTANT SAFETY INSTRUCTIONS CAUTION STATEMENTS CAUTION • To reduce the risk of minor or moderate injury to persons, malfunction, or damage to the product or property when using this product, follow basic precautions, including the following: Installation • Install the product on a firm and level floor. Operation • Do not place objects on top of the appliance.
us_main.book.book Page 7 Thursday, November 4, 2021 11:22 AM PRODUCT OVERVIEW 7 PRODUCT OVERVIEW The images in this guide may be different from the actual components and accessories, which are subject to change by the manufacturer without prior notice for product improvement purposes. NOTE • For your safety and for extended product life, use only authorized components.
us_main.book.book Page 8 Thursday, November 4, 2021 11:22 AM 8 PRODUCT OVERVIEW Accessories Included Accessories a Tie Strap b Leg Holders† † Use leg holders for models WT7800C*, WT7880H*A, and WT7900H*A only. Refer to the installation guide included with the leg holders. Required Accessories (sold separately) a Hot and Cold Water Hoses Product Specifications The appearance and specifications listed in this manual may vary due to constant product improvements.
us_main.book.book Page 9 Thursday, November 4, 2021 11:22 AM INSTALLATION 9 INSTALLATION WARNING • Moving or installation of the appliance requires two or more people. Failure to follow these instructions may result in injury. • Store and install the appliance where it will not be exposed to temperatures below freezing or exposed to outdoor weather conditions. Failure to follow this warning can cause product or part failure, serious injury, fire, electric shock, or death.
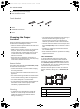
us_main.book.book Page 10 Thursday, November 4, 2021 11:22 AM 10 INSTALLATION f Connecting to the Power Supply g Final Installation Check Tools Needed a Pliers b Flat-Blade Screwdriver c Level Choosing the Proper Location Check the following requirements for the install location before installing the washer. • Allow for sufficient space between the walls and the washer for installation.
us_main.book.book Page 11 Thursday, November 4, 2021 11:22 AM INSTALLATION 11 samples from the tub until the washer is in the final location. Dimensions and Clearances 57 1/4” (145.3 cm) E 26 3/4” (68 cm) F 3 1/2” (9 cm) G 32” (81.1 cm) H 28 3/8” (72.1 cm) Unpacking and Removing Shipping Material Remove all shipping materials from the washer for proper operation and inspect it for shipping damage. ENGLISH D NOTE • Once removed, save the foam insert for future use.
us_main.book.book Page 12 Thursday, November 4, 2021 11:22 AM 12 INSTALLATION • Connect the blue hose to the cold water faucet and the red hose to the hot water faucet. NOTE • Do not stretch the water hoses intentionally, and make sure that they are not pinched, crushed or kinked by other objects. • Water supply pressure must be between 20 psi and 120 psi (138 - 827 kPa). If the water supply pressure is more than 120 psi, a pressure reducing valve must be installed.
us_main.book.book Page 13 Thursday, November 4, 2021 11:22 AM INSTALLATION 13 hose can result in flooding and property damage. • If the drain is large enough for the flange on the hose to fit inside, then do not insert the flange more than 1 - 2 inches into the drain. • The drain must be installed in accordance with any applicable local codes and regulations. • Make sure that the drain hose is not stretched, pinched, crushed, or kinked. • The end of the drain hose should be located a minimum of 29.
us_main.book.book Page 14 Thursday, November 4, 2021 11:22 AM 14 INSTALLATION How to Level the Washer 1 the top of the lid. Using these surfaces will result in the washer being unlevel. Position the washer in its final location. • Take special care not to pinch, strain, or crush the water and drain hoses. If you have a carpenter’s level a, you can use it to check that the washer is level. The slope beneath the washer should not exceed 1 inch, and all 4 leveling feet must rest firmly on the floor.
us_main.book.book Page 15 Thursday, November 4, 2021 11:22 AM INSTALLATION 15 • Connect this appliance to a grounded outlet conforming to the rating prior to use. Failure to do so may result in fire, electric shock, or malfunction. • Improper connection of the equipmentgrounding conductor can result in risk of electric shock. Check with a qualified electrician or service technician if you are in doubt as to whether the appliance is properly grounded.
us_main.book.book Page 16 Thursday, November 4, 2021 11:22 AM 16 OPERATION OPERATION Before Use 5 • Default settings for the selected cycle can be changed, if desired, using the cycle modifier and option buttons. WARNING • To reduce the risk of fire, electric shock, or injury to persons, read the SAFETY INSTRUCTIONS before operating this appliance. Operation Overview 1 Sort laundry and load the washer. • Not all modifiers and options are available on all cycles.
us_main.book.book Page 17 Thursday, November 4, 2021 11:22 AM OPERATION 17 Sorting Laundry • Use the Bedding cycle for buoyant or nonabsorbent items such as pillows or comforters. Failure to follow this caution can result in leakage. Grouping Similar Items Mixing different fabric types and/or soil levels can result in poor wash performance, color transfer, discoloration, fabric damage or linting. Fabrics should be sorted into groups as described below.
us_main.book.book Page 18 Thursday, November 4, 2021 11:22 AM 18 OPERATION Loading the Washer General Tips • Check and empty pockets. Paper clips, coins, matches, and other items can damage clothing and the washer. • Close zippers and hooks, and tie drawstrings to prevent snagging or tangling of clothes. • Pretreat heavily stained areas for best results. • Brush off heavy soil, dust, and hair from items before washing. Excess dirt or sand can abrade other fabrics and lead to poor wash performance.
us_main.book.book Page 19 Thursday, November 4, 2021 11:22 AM OPERATION 19 General Tips for Models with an Agitator Total/DFZ/NA/TL/TD/main.html or by scanning the QR code. ENGLISH If the appliance uses a tall, vertical spindle in the drum, follow these instructions when loading the washer. • For best performance, load clothes as shown.
us_main.book.book Page 20 Thursday, November 4, 2021 11:22 AM 20 SMART FUNCTIONS SMART FUNCTIONS LG ThinQ Application Before Using LG ThinQ Application The LG ThinQ application allows you to communicate with the appliance using a smartphone. 1 • If the appliance is too far from the router, the signal becomes weak. It may take a long time to register or fail to install the application.
us_main.book.book Page 21 Thursday, November 4, 2021 11:22 AM SMART FUNCTIONS 21 unplug the appliance and wait about a minute before trying again. turned off remotely from the application or this function is disabled. • If the door has been opened, you cannot start a cycle remotely. • The wireless network name (SSID) should be a combination of English letters and numbers. (Do not use special characters.
us_main.book.book Page 22 Thursday, November 4, 2021 11:22 AM 22 SMART FUNCTIONS • Reorient or relocate the receiving antenna. • Increase the separation between the equipment and the receiver. • Connect the equipment to an outlet on a circuit different from that to which the receiver is connected. • Consult the dealer or an experienced radio/TV technician for help. This device complies with part 15 of the FCC Rules.
us_main.book.book Page 23 Thursday, November 4, 2021 11:22 AM SMART FUNCTIONS 23 4 NOTE • For best results, do not move the phone while the tones are being transmitted. ENGLISH Keep the phone in place until the tone transmission has finished. The display will count down the time. Once the countdown is over and the tones have stopped, the diagnosis will be displayed in the application.
us_main.book.book Page 24 Thursday, November 4, 2021 11:22 AM 24 MAINTENANCE MAINTENANCE WARNING • To reduce the risk of fire, electric shock, or injury to persons, read this entire owner’s manual, including the SAFETY INSTRUCTIONS, before operating this appliance. • Unplug the appliance before cleaning to avoid the risk of electric shock. Failure to follow this warning can cause serious injury, fire, electric shock, or death.
us_main.book.book Page 25 Thursday, November 4, 2021 11:22 AM MAINTENANCE 25 • For other tub cleaning products, follow the cleaner manufacturer’s instructions and recommendations. After you finish using the washer, leave the lid open overnight to allow air to circulate and dry the tub. This helps prevent odors. Cleaning the Dispenser Drawer Detergent and fabric softener may build up in the dispenser drawer. Remove the drawer and inserts and check for buildup once or twice a month.
us_main.book.book Page 26 Thursday, November 4, 2021 11:22 AM 26 MAINTENANCE 5 Wipe off any moisture with a dry towel or cloth after cleaning. 6 To clean the drawer opening, use a small, non-metal brush to clean the recess. Remove all residue from the upper and lower parts of the recess. 7 Return the inserts to the proper compartments and replace the drawer. • Set the drawer into the opening at an angle, then lower it and slide it into place.
us_main.book.book Page 27 Thursday, November 4, 2021 11:22 AM MAINTENANCE 27 preferably with the faucets wide open for maximum flow. 7 Care in Cold Climates Storing the Washer If the washer will not be used for an extended period of time and is in an area that could be exposed to freezing temperatures,follow these steps to protect the washer from damage. 8 Turn off the washer and unplug the power cord. 9 Dry the tub interior with a soft cloth, and close the lid.
us_main.book.book Page 28 Thursday, November 4, 2021 11:22 AM 28 MAINTENANCE 8 Press and hold the Spin button for 3 seconds to operate Spin Only cycle for draining and spinning. 9 Press the Start/Pause button and check that the water fills properly. When the Drain Hose is Frozen 1 Pour hot water in the washer tub and close the lid. 2 Wait for 1 - 2 hours. 3 Press the Power button to turn on the washer.
us_main.book.book Page 29 Thursday, November 4, 2021 11:22 AM TROUBLESHOOTING 29 TROUBLESHOOTING Before Calling for Service Error Messages Problem Possible Cause & Solution UE The load is too small. UNBALANCE ERROR • Add additional items to allow the washer to balance the load. Heavy articles are mixed with lighter items. • Always try to wash articles of somewhat similar weight to allow the washer to evenly distribute the weight of the load for spinning. The load is out of balance.
us_main.book.book Page 30 Thursday, November 4, 2021 11:22 AM 30 TROUBLESHOOTING Problem CL CONTROL LOCK FUNCTION Possible Cause & Solution The control lock function is on to prevent anyone from changing cycles or operating the washer. • Turn off the control lock function in the control panel. See Control Lock under Options and Extra Functions.
us_main.book.book Page 31 Thursday, November 4, 2021 11:22 AM TROUBLESHOOTING 31 Problem Possible Cause & Solution A motor error has occurred. MOTOR LOCKED ERROR • Allow the washer to stand for 30 minutes and then restart the cycle. Eb Clutch error CLUTCH ERROR • Mechanical failure • If the error code is still displayed, call for service. • Unplug the washer and call for service. Ps Supply voltage is not correct. SUPPLY VOLTAGE ERROR • Please call LG service center.
us_main.book.book Page 32 Thursday, November 4, 2021 11:22 AM 32 LIMITED WARRANTY LIMITED WARRANTY USA TERMS AND CONDITIONS ARBITRATION NOTICE: THIS LIMITED WARRANTY CONTAINS AN ARBITRATION PROVISION THAT REQUIRES YOU AND LG ELECTRONICS (“LG”) TO RESOLVE DISPUTES BY BINDING ARBITRATION INSTEAD OF IN COURT, UNLESS YOU CHOOSE TO OPT OUT. IN ARBITRATION, CLASS ACTIONS AND JURY TRIALS ARE NOT PERMITTED. PLEASE SEE THE SECTION TITLED “PROCEDURE FOR RESOLVING DISPUTES” BELOW.
us_main.book.book Page 33 Thursday, November 4, 2021 11:22 AM LIMITED WARRANTY 33 • Damage or failure of the Product caused by leaky or broken water pipes, frozen water pipes, restricted drain lines, inadequate or interrupted water supply, or inadequate supply of air. • Damage or failure of the Product caused by accidents, pests and vermin, lightning, wind, fire, floods, pandemics, acts of nature, or any other causes beyond the control of LG.
us_main.book.book Page 34 Thursday, November 4, 2021 11:22 AM 34 LIMITED WARRANTY Notice of Dispute. In the event you intend to commence an arbitration proceeding, you must first notify LG in writing at least 30 days in advance of initiating the arbitration by sending a letter to LG at LG Electronics USA, Inc. Attn: Legal Department- Arbitration 111 Sylvan Avenue, Englewood Cliffs, NJ 07632. You and LG agree to engage in good faith discussions in an attempt to amicably resolve your claim.
us_main.book.book Page 35 Thursday, November 4, 2021 11:22 AM LIMITED WARRANTY 35 (b) the date on which the product was purchased; (c) the product model name or model number; and (d) the serial number (the serial number can be found (i) on the product; or (ii) online by accessing https:// www.lg.com/us/support/repair-service/schedule-repair-continued and clicking on “Find My Model & Serial Number”).
us_main.book.
ls_main.book.book Page 1 Thursday, November 4, 2021 11:36 AM MANUAL DEL PROPIETARIO LAVADORA Lea el manual del propietario detenidamente previo a operar el electrodoméstico y mantengalo al alcance para futuras referencias. El manual del propietario completo se puede encontrar en el sitio web de LG en: http://gscs-manual.lge.com/ Total/DFZ/NA/TL/TD/main.html o escaneando el código QR. LG trabaja para crear un futuro sustentable y publica partes de este manual únicamente en línea.
ls_main.book.
ls_main.book.book Page 3 Thursday, November 4, 2021 11:36 AM INSTRUCCIONES IMPORTANTES DE SEGURIDAD 3 INSTRUCCIONES IMPORTANTES DE SEGURIDAD Mensajes de seguridad Su seguridad y la de los demás son muy importantes. Tanto en este manual como en el equipo, hemos proporcionado muchos mensajes de seguridad importantes. Siempre debe leer y respetar todos los mensajes de seguridad. Este es el símbolo de alerta de seguridad.
ls_main.book.book Page 4 Thursday, November 4, 2021 11:36 AM 4 INSTRUCCIONES IMPORTANTES DE SEGURIDAD • Se recomienda encarecidamente no utilizar un depósito de drenaje al instalar este aparato, porque el agua estancada en dicho depósito puede aumentar el riesgo de que se produzcan descargas eléctricas, lesiones o incluso la muerte. • Mantenga los materiales de empaque fuera del alcance de los niños. Los materiales de empaque pueden ser peligrosos para los niños. Corren riesgo de asfixia.
ls_main.book.book Page 5 Thursday, November 4, 2021 11:36 AM INSTRUCCIONES IMPORTANTES DE SEGURIDAD 5 • Mantenga los productos de lavandería lejos del alcance de los niños. Para evitar lesiones a las personas, preste atención a todas las advertencias que figuran en las etiquetas de los productos. • Nunca desconecte el artefacto tirando del cable de alimentación. Sujete siempre con firmeza el enchufe y tire derecho para extraerlo del tomacorriente.
ls_main.book.book Page 6 Thursday, November 4, 2021 11:36 AM 6 INSTRUCCIONES IMPORTANTES DE SEGURIDAD Instrucciones de conexión a tierra • La conexión inadecuada del conductor de conexión a tierra puede resultar en riesgo de choque eléctrico. Pregunte a un electricista calificado o al personal de servicio si no está seguro si el artefacto está adecuadamente conectado a tierra. No modifique el enchufe que viene con el artefacto.
ls_main.book.book Page 7 Thursday, November 4, 2021 11:36 AM INSTRUCCIONES IMPORTANTES DE SEGURIDAD 7 MENSAJES DE PRECAUCIÓN Instalación • Instale el producto sobre un piso firme y nivelado. FUNCIONAMIENTO • No coloque ningún objeto encima del artefacto. • Cierre las llaves de agua y desconecte el artefacto si este no será usado por un periodo de tiempo prolongado, por ejemplo, durante las vacaciones. • SIEMPRE siga las instrucciones para cuidado de los tejidos suministradas por el fabricante.
ls_main.book.book Page 8 Thursday, November 4, 2021 11:36 AM 8 DESCRIPCIÓN GENERAL DEL PRODUCTO DESCRIPCIÓN GENERAL DEL PRODUCTO Características del producto Las ilustraciones en esta guía pueden diferir de los componentes y accesorios reales, los cuales están sujetos a cambios sin previo aviso por parte del fabricante a fin de introducir mejoras en el producto. NOTA • Para su seguridad y para prolongar la vida útil del producto, use solo componentes autorizados.
ls_main.book.book Page 9 Thursday, November 4, 2021 11:36 AM DESCRIPCIÓN GENERAL DEL PRODUCTO 9 Accesorios Accesorios incluidos ESPAÑOL a Correa b Leg holders† † Use los leg holders solamente para los modelos WT7800C*, WT7880H*A, WT7900H*A. Refierase a la guía de instalación incluida con los leg holders.
ls_main.book.book Page 10 Thursday, November 4, 2021 11:36 AM 10 INSTALACIÓN INSTALACIÓN Antes de la instalación ADVERTENCIA • El traslado o la instalación del artefacto requieren de dos o más personas. El incumplimiento de estas instrucciones podría causar lesiones. • Almacene e instale el artefacto donde no esté expuesto a temperaturas bajo cero ni a la intemperie.
ls_main.book.book Page 11 Thursday, November 4, 2021 11:36 AM INSTALACIÓN 11 d Conexión de la manguera de desagüe e Nivelación de la lavadora ESPAÑOL f Conexión al suministro eléctrico g Revisión final de la instalación Herramientas necesarias a Pinzas b Destornillador de hoja plana c Nivel Elección de la ubicación adecuada Revise los siguientes requisitos para la ubicación de instalación antes de instalar la lavadora.
ls_main.book.book Page 12 Thursday, November 4, 2021 11:36 AM 12 INSTALACIÓN El espacio vertical mínimo del piso a los estantes superiores, gabinetes, techos, etc., es de 58 pulgadas (147 cm). G H C A B costado. No apoye la lavadora sobre su parte posterior o frontal. F D A E Dimensiones y espacios A 1” (2.5 cm) B 27” (68.6 cm) C 44 1/2” (113 cm) D 57 1/4” (145.3 cm) E 26 3/4” (68 cm) F 3 1/2” (9 cm) G 32” (81.1 cm) H 28 3/8” (72.1 cm) 2 Quite el inserto de espuma de la tina.
ls_main.book.book Page 13 Thursday, November 4, 2021 11:36 AM INSTALACIÓN 13 Conexión de las mangueras de entrada de agua 1 Verifique los conectores y los sellos. • Inspeccione el conector roscado de cada manguera y asegúrese de que cada una cuente con un sello de goma a colocado en cada extremo para evitar fugas. ADVERTENCIA • No apriete extremadamente ni cruce los conectores de las mangueras.
ls_main.book.book Page 14 Thursday, November 4, 2021 11:36 AM 14 INSTALACIÓN 4 Fije las mangueras de entrada a la parte posterior de la lavadora. • Fije la manguera de entrada de agua caliente a la entrada de agua caliente de la parte posterior de la lavadora. Fije la manguera de entrada de agua fría a la entrada de agua fría de la parte posterior de la lavadora. • Ajuste los conectores para asegurarlos bien.
ls_main.book.book Page 15 Thursday, November 4, 2021 11:36 AM INSTALACIÓN 15 Utilización de un lavabo para el drenaje Cuelgue el extremo de la manguera de desagüe sobre el borde del lavabo. 2 Utilice la correa proporcionada para asegurar la manguera de desagüe en su lugar. ESPAÑOL 1 1 pulg., y los 4 patas de nivelación deben estar firmemente apoyadas en el suelo. 1″ 2 Nivelación de la lavadora La tina de la lavadora gira a velocidades muy altas.
ls_main.book.book Page 16 Thursday, November 4, 2021 11:36 AM 16 INSTALACIÓN 3 Ajuste las patas de nivelación. • Gire las 4 patas de nivelación en una dirección para subir la lavadora y en la otra dirección para bajarla. 4 Vuelva a comprobar la nivelación de la lavadora. • Empuje o mueva suavemente los bordes superiores de la lavadora, para asegurarse de que esta no se balancee. Si la lavadora se balancea, reajuste las patas de nivelación.
ls_main.book.book Page 17 Thursday, November 4, 2021 11:36 AM INSTALACIÓN 17 • 1N sO : El resultado de la prueba anterior fue bueno. • La indicación es diferente para cada modelo. 4 Presione el botón de Inicio/Pausa. • La prueba se ejecutará durante unos 3 minutos. • La prueba revisa automáticamente las mangueras de entrada de agua y la manguera de drenaje. 5 Verifique la pantalla para ver los resultados. 6 Al finalizar el ciclo de prueba, se mostrará ENd o O en pantalla.
ls_main.book.book Page 18 Thursday, November 4, 2021 11:36 AM 18 FUNCIONAMIENTO FUNCIONAMIENTO Antes de utilizarlo • Presionar el botón de Inicio/Pausa sin seleccionar un ciclo inmediatamente inicia el ciclo Normal con las configuraciones predeterminadas. ADVERTENCIA • Para reducir el riesgo de incendios, descargas eléctricas o lesiones a las personas, lea las INSTRUCCIONES DE SEGURIDAD antes de operar este artefacto.
ls_main.book.book Page 19 Thursday, November 4, 2021 11:36 AM FUNCIONAMIENTO 19 8 Fin de ciclo. • Si la lavadora cuenta con filtros de pelusa, recuerde revisarlos cada 2 o 3 cargas. Clasificación de prendas Conjuntos de prendas similares Para obtener los mejores resultados de lavado y para reducir la posibilidad de daños en las prendas, agrupe la ropa en cargas de prendas de características similares.
ls_main.book.book Page 20 Thursday, November 4, 2021 11:36 AM 20 FUNCIONAMIENTO Categoría Etiqu eta Indicaciones Lavado a mano Lavado en lavadora, Ciclo normal Lavado Configuración Planchado permanente/ Resistente a las arrugas (que tiene un rociado fresco o frío antes de un centrifugado más lento) Las prendas grandes no deben representar más de la mitad de la carga total. • Para mejores resultados, cargue solo los artículos secos.
ls_main.book.book Page 21 Thursday, November 4, 2021 11:36 AM FUNCIONAMIENTO 21 Prendas pequeñas • Para un mejor rendimiento, cargue la ropa como se muestra. 3 • No lave prendas pequeñas individualmente. Agregue suficientes prendas similares a la carga para evitar que quede desequilibrada. • Lave artículos pequeños y livianos en una bolsa de malla. Artículos pequeños podrían atorarse en el propulsor al fondo de la tina, y los ganchos de sostenes podrían dañar otros artículos.
ls_main.book.book Page 22 Thursday, November 4, 2021 11:36 AM 22 FUNCIONAMIENTO manual.lge.com/Total/DFZ/NA/TL/TD/ main.html o escaneando el código QR.
ls_main.book.book Page 23 Thursday, November 4, 2021 11:36 AM FUNCIONES INTELIGENTES 23 FUNCIONES INTELIGENTES La aplicación LG ThinQ le permite comunicarse con el electrodoméstico usando un teléfono inteligente. Antes de usar la aplicación LG ThinQ 1 Funciones de la aplicación LG ThinQ • Si el aparato está muy lejos del enrutador, la señal será débil. Puede que le tome más tiempo registrarse o que falle la instalación del aparato.
ls_main.book.book Page 24 Thursday, November 4, 2021 11:36 AM 24 FUNCIONES INTELIGENTES NOTA • Es posible que la conexión Wi-Fi no se conecte o se interrumpa debido al entorno de la red doméstica. • Si el aparato no puede conectarse debido a problemas con la transmisión de la señal inalámbrica, desconéctelo y espere alrededor de un minuto previo a intentarlo de nuevo. • Si el cortafuegos de su enrutador inalámbrico está activado, desactivelo o añada una excepción a éste.
ls_main.book.book Page 25 Thursday, November 4, 2021 11:36 AM FUNCIONES INTELIGENTES 25 Aviso de la FCC El siguiente aviso abarca el módulo del transmisor que contiene este producto. • Reorientar o reubicar la antena receptora. • Aumentar la separación entre el equipo y el receptor. • Conectar el equipo a una toma de corriente en un circuito diferente del utilizado por el receptor. • Consultar al vendedor o a un técnico de radio/TV con experiencia para solicitar ayuda.
ls_main.book.book Page 26 Thursday, November 4, 2021 11:36 AM 26 FUNCIONES INTELIGENTES Uso del diagnóstico audible para diagnosticar problemas Siga las instrucciones a continuación para utilizar el método de diagnóstico audible. • Inicie la aplicación LG ThinQ y seleccione la función Smart DiagnosisTM en el menú. Siga las instrucciones para el diagnóstico audible provistas en la aplicación LG ThinQ. 1 Presione el botón Encendido/Apagado para encender el electrodoméstico.
ls_main.book.book Page 27 Thursday, November 4, 2021 11:36 AM MANTENIMIENTO 27 MANTENIMIENTO • Para reducir el riesgo de incendios, descargas eléctricas o lesiones, lea todo el manual del usuario, incluidas las INSTRUCCIONES DE SEGURIDAD, antes de utilizar este aparato. • Desconecte el aparato antes de limpiarlo para evitar el riesgo de descargas eléctricas. El incumplimiento de esta advertencia puede causar lesiones graves, incendios, descargas eléctricas o incluso la muerte.
ls_main.book.book Page 28 Thursday, November 4, 2021 11:36 AM 28 MANTENIMIENTO 2 Agregado de productos de limpieza. Producto de limpieza Limpiador para la tina Instrucciones Siga las instrucciones del fabricante. Removedor de cal Blanqueador con cloro líquido Añada al dispensador de detergente líquido para lavado principal. Limpiador en polvo Siga las instrucciones del fabricante. Tabletas de limpieza Colóquelas directamente en el tambor de la lavadora.
ls_main.book.book Page 29 Thursday, November 4, 2021 11:36 AM MANTENIMIENTO 29 Dispensador automático de blanqueador 3 Remueva los insertos de los dos compartimientos. Dispensador inmediato de blanqueador La cubierta no puede separarse del dispensador. Límpiela utilizando un cepillo y agua tibia. 4 Limpie los insertos y la bandeja con agua tibia. • Utilice un paño suave o un cepillo para limpiar y remover cualquier residuo. • No utilice jabón al limpiar la bandeja y los insertos.
ls_main.book.book Page 30 Thursday, November 4, 2021 11:36 AM 30 MANTENIMIENTO encuentra obstruido por suciedad. Limpie el filtro de entrada. PRECAUCIÓN • Si usa la lavadora en un área de aguas duras, el filtro de entrada puede obstruirse por la acumulación de cal y requeriría una limpieza más frecuente. 1 Apague la lavadora y desenchufe el cable de alimentación. 2 Cierre las llaves de paso de agua caliente y fría.
ls_main.book.book Page 31 Thursday, November 4, 2021 11:36 AM MANTENIMIENTO 31 7 Presione el botón de Inicio/Pausa para dar arranque a la bomba de desagüe para 1 minutos. Abra las llaves de paso. 7 Presione el botón de Encendido/Apagado para encender la lavadora. 8 Mantenga presionado el botón Spin (Centrifugado) durante 3 segundos a fin de operar el ciclo Spin Only (Centrifugado solamente) para el drenaje y el centrifugado.
ls_main.book.book Page 32 Thursday, November 4, 2021 11:36 AM 32 SOLUCIÓN DE PROBLEMAS SOLUCIÓN DE PROBLEMAS La lavadora está equipada con un sistema automático de detección de errores para detectar y diagnosticar problemas en una etapa temprana. Si la lavadora no funciona correctamente o no funciona en absoluto, compruebe lo siguiente antes de llamar al servicio técnico. Antes de llamar al servicio técnico Mensajes de error Problemas Causas posibles y solución UE La carga es muy pequeña.
ls_main.book.book Page 33 Thursday, November 4, 2021 11:36 AM SOLUCIÓN DE PROBLEMAS 33 Problemas CL La función de Bloqueo Infantil está encendida para prevenir que cualquier persona cambie de ciclo u opere la lavadora. • Desactive la función de Bloqueo Infantil en el panel de control. Consulte Control Lock (Bloqueo Infantil) en Opciones y funciones adicionales.
ls_main.book.book Page 34 Thursday, November 4, 2021 11:36 AM 34 SOLUCIÓN DE PROBLEMAS Problemas Causas posibles y solución LE Ha ocurrido un error del motor. ERROR DE MOTOR BLOQUEADO • Deje la lavadora apagada durante 30 minutos y luego reinicie el ciclo. Eb Error de embrague ERROR DE EMBRAGUE • Fallo mecánico Ps El voltaje de alimentación no es correcto. ERROR DE VOLTAJE DE ALIMENTACIÓN • Llame al centro de servicio de LG.
ls_main.book.book Page 35 Thursday, November 4, 2021 11:36 AM GARANTÍA LIMITADA 35 GARANTÍA LIMITADA TÉRMINOS Y CONDICIONES AVISO DE ARBITRAJE: ESTA GARANTÍA LIMITADA CONTIENE UNA CLÁUSULA DE ARBITRAJE QUE LES DEMANDA A USTED Y A LG ELECTRONICS (“LG”) A RESOLVER CONFLICTOS A TRAVÉS DE UN ARBITRAJE VINCULANTE EN LUGAR DE HACERLO EN LA CORTE, A MENOS QUE USTED DECIDA NO PARTICIPAR. EN EL ARBITRAJE NO ESTÁN PERMITIDAS LAS ACCIONES COLECTIVAS NI LOS JUICIOS CON JURADO.
ls_main.book.book Page 36 Thursday, November 4, 2021 11:36 AM 36 GARANTÍA LIMITADA ESTA GARANTÍA LIMITADA NO CUBRE LO SIGUIENTE: • Viajes de servicio para i) entregar, recoger, o instalar el producto; instruir sobre cómo operar el producto; ii) corregir cableado; o iii) corregir reparaciones o instalaciones no autorizadas. • Daño o fallo del producto al operar durante fallas e interrupciones del suministro eléctrico, o resultado de un servicio eléctrico inadecuado.
ls_main.book.book Page 37 Thursday, November 4, 2021 11:36 AM GARANTÍA LIMITADA 37 PROCEDIMIENTO PARA RESOLVER CONFLICTOS: Definiciones. Para el propósito de esta sección, las referencias a “LG” significan: LG Electronics U.S.A., Inc.
ls_main.book.book Page 38 Thursday, November 4, 2021 11:36 AM 38 GARANTÍA LIMITADA reclamo o la reparación solicitada en la demanda es frívola o se utiliza para un propósito inadecuado (calificado según las normas establecidas en la Norma Federal de Procedimiento Civil 11 (b)), el pago de todos los honorarios de arbitraje se regirá por las Normas de la AAA.
ls_main.book.
ls_main.book.book Page 39 Thursday, November 4, 2021 11:36 AM LG Customer Information Center For inquiries or comments, visit www.lg.com or call: 1-800-243-0000 1-888-542-2623 U.S.A. CANADA Register your product Online! www.lg.