
User's Manual

- 9 -
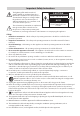
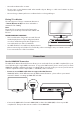
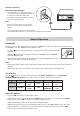
Power Connection
Risk of product damage!
- Ensure that the power supply voltage
corresponds to the voltage printed on the
back or the underside of the unit.
• Connect the power to the AC~ socket on
the unit and a wall outlet.
Note:
- Ensure all connections are connected
before connecting to the mains power
socket.
- Be sure to unplug the power cord from the
outlet when the system is not in use for an extended period of time.
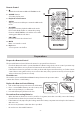
General Operation
Standby/ON
When you connect the unit to wall socket, press the I/O button on the rear of the unit to switch the unit
to STANDBY mode. The POWER indicator lights up red.
• Press the button on the main unit or on the remote control to switch the main
unit ON.
• Press the button again to switch the unit back to STANDBY mode. The POWER
indicator will light up red.
• Disconnect the mains plug from the wall socket or press the I/O button on the rear
of the unit to switch the unit o completely.
Note:
- When turning the system on, the system will continue in the mode it was in when it was turned o
last time.
- If the unit is idle for over 15 minutes, the unit will automatically switch to Standby mode.
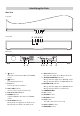
Select Modes
Press the
button repeatedly on the unit or press the AUX1, AUX2, BT (Bluetooth), OPTICAL,
COAXIAL, HDMI ARC, USB buttons on the remote control to select the desired mode.
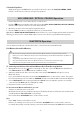
1 2 3 4 5
Indicator Red
Orange /
ash
Blue
Orange /
ash
Orange /
ash
Mode Standby
AUX1 /
AUX2
BT
OPTICAL /
HDMI ARC
COAXIAL /
USB
Adjust the Volume
- Press the VOL +/– buttons to adjust the volume.
- If you wish to turn the sound o, press the MUTE button on the remote control. Press the MUTE
button again or press VOL +/- buttons to resume normal listening.
- While adjusting the volume, the status indicator ashes quickly.
- While the volume level reaches its maximum level, if you press the VOL + button again, the status
indicator ashes once. While the volume level reaches its minimum level, if you press the VOL –
button again, the status indicator ashes once.