
Installation Instructions

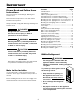


Secure the appliance in place so it does not tip forward
when the fully stocked door is opened.
The anti tipping
bracket is provided with the appliance.
1. Mark the center line of the appliance on the back wall.
Align the anti tipping bracket center to this line.
Be sure that there is no plumbing or
electrical wiring located in this area which
screws or drills could damage.
2. Drill a 3/8" diameter hole in any position as shown in
Figure 7 using a carbide drill bit.
The depth of the holes must exceed the overall length
of the anchors provided.
Clean the holes after drilling.
3. Attach washer and screw on hex nut to the end of
each anchor.
Drive in all 3 anchors.
Align the bracket center to the center line on the back
wall again.
Fasten the anchors by turning the hex nut.
4. Fasten bracket with 3 screws (1/4" x 2-1/8") into the
wall plate (Figure 8).
Figure 8
Wall Plate
Wall
Mounting the anti tipping device
on wooden floors - Figure 9
1. Mark the center line of the appliance on the back wall.
Align the anti tipping bracket center to this line.
Be sure that there is no plumbing or
electrical wiring located in this area which
screws or drills could damage.
2. Fasten bracket to the wooden floor using 5 screws
(1/4" x 2-1/8"). Drill pilot holes if necessary.
3. Fasten bracket with 3 screws (1/4" x 2-1/8") into the
wall plate.
Figure 9
Wall Plate
Wall
Mounting the anti tipping device
on concrete floors - Figure 7 - 8
Figure 7
Wall Plate
Wall
8
BlockIng for Safety