
Instructions / Assembly


63(&,),&$7,21$1'35,&(68%-(&772&+$1*(:,7+287127,&(,0$*(6$5()255()(5(1&(21/<ZZZ/LIHDUW&DELQHWU\FRP
www.LifeArtCabinetry.com
Info1
3
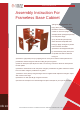
Assembly Instruction For
Frameless Wall Cabinet
1) Begin by opening the box and
laying all the pieces out on a clean,
ÀDWVXUIDFH&KHFNWRPDNHVXUHDOO
content are in the box (hinges and
shelf pins will be packaged separately
in its own plastic bags).
2) Wood glue is to be used on each
dowel and dado.
3) Lay part A on its side with dado and
predrill holes facing up.
4) Attach part E and G by
inserting dowels into the predrilled
holes on part A. Make sure the dowels
are push in all the way. Dado on all
parts should be facing inward and aligned with each other.
6OLGHSDUW%¿QLVKVLGHLQZDUGLQWRWKHGDGR
6) Attach part C to the opposite side of Part E and G. Brad nails are to be used to secure the box
together.
7) Attach the hinge to the door (Part D).
8) Aligned the door to the desired position on the box and use the screws provided to secure the
hinge to the box.
9) Position the shelf pins to the desired height and place shelf (Part F) on top of the shelf pins.
10) Final door adjustment can be made by adjusting the positioning screws on the hinge.
E
A
B
C
D
D
G
F
F