INFRARED HEATER OWNERS INSTALLATION AND USER GUIDE COMBINATION TABLE TOP/WALL MOUNTABLE FIREPLACE HEATER Model: L-EF450-COMBO Safety Notice Please read this entire Installation and Operating Manual BEFORE installing and using your new Infrared Heater. Failure to fully understand and follow instructions may result in property damage, bodily injury, or even death. Unexpected mishaps may occur if the Infrared Heater in not used properly. For everyone’s safety, follow ALL Installation and Operating Directions.
READ AND SAVE THESE INSTRUCTIONS IMPORTANT SAFETY INSTRUCTIONS When using electrical appliances, basic precautions should always be followed to reduce the risk of fire, electric shock and injury to person, including the following: CAUTION- High temperature, keep electrical cords, drapery, and other furnishings at least 3 feet (0.9m) from the front of the heater and away from the side and rear. Read all instructions before using heater. This heater is hot when in use.
Congratulations on the purchase of your new LIFESMART Combination Table Top/Wall Mountable Fireplace Heater. Whether you choose to mount the heater to the wall or use the base to place it on a flat surface, this manual provides directions on how to do both. Before you begin using the heater, please read and understand the entire installation guide, as well as all safety indications, thoroughly. T Thhaannkk Y Yoouu ffoorr C Chhoooossiinngg LLIIF FE ES SM MA AR RT T..
Technical Specifications Voltage Rating Power Consumption Unit Size Unit Weight Lighting/Bulb Type Digital Temp Display: Overheat Safety Shut-off Switch 120 V (60Hz) 1500W Maximum 26 in. (W) x 10.7 in. (D) x 22.4 in. (H) 35 lbs 40W E12 SES Clear Candle Bulb Not currently on this model Installed on this model GENERAL WARNINGS: ALWAYS UNPLUG THE CORD BEFORE MOVING OR SERVICING.
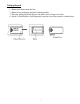
Getting Started 1. 2. 3. 4. Remove the heater from the box. Remove any packaging materials from the product. Place the packaging inside the box and either store or dispose of safely. Install 2 AAA Batteries (Sold Separately) into the rear of the remote as shown below.
This section outlines the mounting of your heater to a wall (if this is how you choose to use it). To prevent any accidents (or setup/assembly) miscues, please read and understand all precautions prior to start. This ensures your safety and that all minimum mounting requirements are met. Wall Mounting Instructions Precautions To Consider Before Wall Mounting: 1. For safety purposes, TWO People will be required to complete the mounting process. 2.
Items/Tools Recommended For Wall Mounting: 2 People Mounting Hardware Pack Power Drill #6 Drill Bit Medium Phillips Screwdriver Small Level Pencil for marking the wall (if you think you may have to erase) or a Fine Tip Marker Gloves Wall Mounting Instructions (Reference Figures 1-4 On Next Page) 1. Select a wall and room location to mount your heater. a.
7. With the heater resting, you can now take the small mounting bracket, and line it up against the heater’s underside and the wall. Mark the 2 remaining wall plug locations accordingly (Ref. Fig. 3A and 3B). 8. With a second person assisting, remove the heater and place to one side, and safely out of the way. 9. Drill the final 2 holes for the remaining plugs at your marked locations, and insert the plugs into the wall as in step #4 above. 10.
This section outlines the mounting of your heater to the base (if you plan on using it freestanding on a flat surface). To prevent any accidents (or setup/assembly) miscues, please read and understand all directions prior to start.
7. Align the base to a centralized position, in relation to the heater’s underside (reference fig. 2). Note that only 4 long screws will be used to attach the base. There are no screw holes missing on the base. 8. Make sure the base is flush to the heater’s underside before securing, to avoid stripping screws. 9. Use four (4) long screws, (out of the 6 included in the wall mounting hardware kit (reference fig. 3) to attach the base to the heater. 10.
Replacing the Lamps/Bulbs (Reference Figures 5-8 Below) The Process 1. 2. 3. 4. 5. Power off and unplug the heater. Allow at least 10 minutes for the bulbs to cool off. Gently remove the glass panel from the heater “face.” Store the glass safely out of the way so that it does not get tripped on or damaged. With assistance from a second person, carefully dismount and lower the heater to the floor, face up.
Instructions For Use The heater can be operated either with the switches located on the top right hand side of the fire place heater or with the supplied remote control. Notes to keep in mind: The switches/Control Panel are located at the top, right hand side of the heater (reference only-below) The Main Power switch must be manually switched to the N ( position (first and foremost) for Either the manual or remote functions to operate properly. This will set the heater into “stand by” mode.
Safety Shut-Off Switch This heater is equipped with an overheat safety shut-off switch that will engage if the heater overheats for any reason. For safety reasons, the heater will NOT automatically reset after the safety cut-off switch has engaged. To reset it, disconnect the heater from the main power outlet for at least 15 minutes to allow for the overheat sensor to reset. Any obstacles that may have caused the “overheat” should be looked into and resolved.
Troubleshooting Basic Issues Problem Plug in but no power or beeps Master Switch ON but no power or beeps Low Heat Mode Does Not work but High does High Heat Mode Does Not work but Low does Was working fine but then shut off for no apparent reason Let it cool down, removed obstacles, unplugged and tried again. Did not restart.
Limited Manufacturer Warranty 1 Year Limited Warranty: LIFESMART warrants this heater against defects in materials and workmanship on functional parts, for a period of 1 year from the original date of purchase. Your sales receipt showing the date of purchase of the product is your proof of purchase. Keep it in a safe place for future reference.
Warranty Limitations This warranty does not apply if the unit has been subject to negligence, fabrication, misuse, abuse, or repairs (unless authorized verbally, or in writing, by an Authorized LIFESMART Representative) alteration by nonLIFESMART authorized personnel, inappropriate installations, or any case beyond the control of LIFESMART.
Customer Service and Support To Obtain Warranty Support or Advice, Please Complete These Two Easy Steps: Contact LIFESMART PRODUCTS Technical Support E-mail: Warranty@ lifesmartproducts.com Phone: 1-866-484-2066 or 1-214-614-2509 Visit us: www.lifesmartproducts.com You will need to provide the unit's model number, serial number (located on the heater’s front panel, rear panel, or on the box), date of purchase, retailer of purchase, a daytime phone number, and possibly a copy of your receipt.