The Global Leader in Welder Rentals And, most importantly, think before you act and be careful. PRECAUTIONS CONTAINED THROUGHOUT. WITHOUT READING THIS MANUAL AND THE SAFETY DO NOT INSTALL, OPERATE OR REPAIR THIS EQUIPMENT ... and thoughtful operation on your part. However, your overall safety can be increased by proper installation This welder is designed and built with safety in mind. Safety Depends on You design specifications by Lincoln Electric.
i i SAFETY WARNING CALIFORNIA PROPOSITION 65 WARNINGS Diesel engine exhaust and some of its constituents are known to the State of California to cause cancer, birth defects, and other reproductive harm. The Above For Diesel Engines The engine exhaust from this product contains chemicals known to the State of California to cause cancer, birth defects, or other reproductive harm. The Above For Gasoline Engines ARC WELDING CAN bE hAzARDOuS.
ii ii SAFETY ELECTRIC SHOCK can kill. 3.a. The electrode and work (or ground) circuits are electrically “hot” when the welder is on. Do not touch these “hot” parts with your bare skin or wet clothing. Wear dry, hole-free gloves to insulate hands. 3.b. Insulate yourself from work and ground using dry insulation. Make certain the insulation is large enough to cover your full area of physical contact with work and ground.
iii iii SAFETY WELDING and CUTTING SPARKS can cause fire or explosion. 6.a. Remove fire hazards from the welding area. If this is not possible, cover them to prevent the welding sparks from starting a fire. Remember that welding sparks and hot materials from welding can easily go through small cracks and openings to adjacent areas. Avoid welding near hydraulic lines. Have a fire extinguisher readily available. 6.b.
iv SAFETY PRÉCAuTIONS DE SÛRETÉ Pour votre propre protection lire et observer toutes les instructions et les précautions de sûreté specifiques qui parraissent dans ce manuel aussi bien que les précautions de sûreté générales suivantes: Sûreté Pour Soudage A L’Arc 1. Protegez-vous contre la secousse électrique: a. Les circuits à l’électrode et à la piéce sont sous tension quand la machine à souder est en marche.
v v Thank You for selecting one of our QUALITY products. We want you to take pride in operating this product ••• as much pride as we have in bringing this product to you! CUSTOMER ASSISTANCE POLICY The business of our company is manufacturing and selling high quality welding equipment. Our challenge is to meet the needs of our customers and to exceed their expectations. On occasion, purchasers may ask us for advice or information about their use of our products.
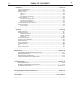
vi vi TAbLE OF CONTENTS Page Installation.......................................................................................................................Section A Technical Specifications .......................................................................................................A-1 Safety Precautions. ..............................................................................................................A-2 Suitable Location ........................................................
A-1 A-1 INSTALLATION Technical Specifications - ES 275i INPuT AT RATED OuTPuT - ThREE PhASE ONLY INPuT VOLTS-hz 208/230/460/575V - 60Hz. 220/380/400/415/440 - 50Hz OuTPuT CONDITIONS INPuT CuRRENT AMPS 200A@28V.100% 250A@30V. 60% 275A@31V. 35% 27/25/13/11 34/33/17/14 38/37/19/16 200A@28V.100% 250A@30V. 35% 25/15/15/14/13 32/20/19/18/17 Idle Power Efficiency @ Rated Output 150W Max 87% INPuT AT RATED OuTPuT - SINGLE PhASE ONLY INPuT VOLTS-hz 208/230/460/575V - 60Hz.
A-2 A-2 INSTALLATION Read this entire installation section before you start installation. SAFETY PRECAuTIONS TILTING Place the machine directly on a secure, level surface. The machine may topple over if this procedure is not followed. hIGh FREQuENCY PROTECTION WARNING Locate the ES 275i away from radio controlled machinery. ELECTRIC ShOCK can kill. • have an electrician install and service this equipment.
A-3 A-3 INSTALLATION INPuT VOLTAGE RECONNECT PROCEDuRE OuTPuT CONNECTIONS When received directly from the factory, units are connected for, 460 VAC. If 460 VAC is the desired input, then the machine may be connected to the power system without any setup required inside the reconnect door. For other voltages refer to the instructions located on the Reconnect Panel Access Door or follow the instructions below. Refer to figure B.1 for the location of the 3-Pin Remote Receptacle and the Output Terminals.
b-1 OPERATION b-1 Read and understand this entire section before operating your machine. GENERAL DESCRIPTION SAFETY PRECAuTIONS The ES 275i is a 275 amp arc welding power source that utilizes single or three phase input power, to produce constant current output. The welding response of this Invertec has been optimized for stick (SMAW) and TIG (GTAW). WARNING ELECTRIC ShOCK can kill. OPERATIONAL FEATuRES • Do not touch electrically live parts such as output terminals or internal wiring.
b-2 b-2 OPERATION CONTROLS AND SETTINGS All operator controls and adjustments are located on the case front of the ES 275i. Refer to Figure B.1 and corresponding explanations. FIGuRE b.1 — CASE FRONT CONTROLS. 2 8 10 3 LOCAL REMOTE 4 CC STICK TIG 9 OUTPUT ARC FORCE -10 +10 HOT START ON 5 OFF 6 REMOTE ON 1 OFF 7 1. POWER SWITCh - Place the lever in the “ON” position to energize the machine.
b-3 OPERATION b-3 7. OuTPuT TERMINALS - These quick disconnect terminals are compatible with TWECO®* connectors. The terminal provide connection points for the electrode and work cables. Refer to Output Connection in the Installation chapter for proper cable sizes. For positive polarity welding connect the electrode cable to the positive terminal and the work cable to the negative terminal. To weld negative polarity reverse the electrode and work cables.
b-4 OPERATION OVERLOAD PROTECTION The machine is electrically protected from producing high output currents. Should the output current exceed 300A, an electronic protection circuit will reduce the current to less than 200A. The machine will continue to produce this low current until the protection circuit is reset. Reset occurs when the output load is removed. Note: When TIG welding with the Output Knob at or above 275 Amps the Arc may go out.
D-1 D-1 MAINTENANCE 4. Obtain a high resistance and high wattage resistor (25-1000 ohms and 25 watts minimum). This resistor is not supplied with machine. NEVER USE A SHORTING STRAP FOR THIS PROCEDURE. WARNING ELECTRIC ShOCK can kill. • Have an electrician install and service this equipment. • Turn the input power off at the fuse box before working on equipment. • Do not touch electrically hot parts.
D-2 MAINTENANCE ROuTINE MAINTENANCE 1. Perform the following preventive maintenance procedures at least once every six months. It is good practice to keep a preventive maintenance record; a record tag attached to the machine works best. 2. Remove the machine wrap-around cover and perform the input filter capacitor discharge procedure (detail at the beginning of this chapter). 3. Keeping the machine clean will result in cooler operation and higher reliability.
D-3 D-3 MAINTENANCE FIGuRE D.2 — LOCATION OF MAINTENANCE COMPONENTS.
E-1 TROubLEShOOTING E-1 hOW TO uSE TROubLEShOOTING GuIDE WARNING Service and Repair should only be performed by Trained Personnel. Unauthorized repairs performed on this equipment may result in danger to the technician and machine operator and will invalidate your factory warranty. For your safety and to avoid Electrical Shock, please observe all safety notes and precautions detailed throughout this manual.
E-2 TROubLEShOOTING & REPAIR PC bOARD TROubLEShOOTING PROCEDuRES - Remove the P.C. Board from the staticshielding bag and place it directly into the equipment. Don’t set the P.C. Board on or near paper, plastic or cloth which could have a static charge. If the P.C. Board can’t be installed immediately, put it back in the staticshielding bag. WARNING ELECTRIC ShOCK can kill. have an electrician install and service this equipment. Turn the input power OFF at the fuse box before working on equipment.
E-3 E-3 TROubLEShOOTING Observe all Safety Guidelines detailed throughout this manual PRObLEMS (SYMPTOMS) POSSIbLE CAuSE RECOMMENDED COuRSE OF ACTION OuTPuT PRObLEMS Major physical or electrical damage is observed when cover wrap-around is removed. The machine is dead - no output. 1. The input power switch must be in the ON position. 2. Make sure the input voltage is correct for the machine. 3.
E-4 E-4 TROubLEShOOTING Observe all Safety Guidelines detailed throughout this manual PRObLEMS (SYMPTOMS) POSSIbLE CAuSE RECOMMENDED COuRSE OF ACTION OuTPuT PRObLEMS Output turns on momentarily, then switches off and repeats cycle. 1. Check the input voltages and reconnection procedures. Make sure the input voltage is correct for the machine. See Input Voltage Reconnect Procedure. 2. Check or replace remote control device. (If used) Remote output control not functioning.
E-5 E-5 TROubLEShOOTING Observe all Safety Guidelines detailed throughout this manual PRObLEMS (SYMPTOMS) POSSIbLE CAuSE RECOMMENDED COuRSE OF ACTION OuTPuT PRObLEMS No output - Main input fuses open, indicating excessive current draw. 1. Inspect input leads for possible shorts or grounds or mis-connections. 2. Install new fuses and reapply power. If fuses open again, consult a Authorized Field Service Facility. The machine operates normally when connected for 200 - 230VAC input.
E-6 E-6 TROubLEShOOTING Observe all Safety Guidelines detailed throughout this manual PRObLEMS (SYMPTOMS) POSSIbLE CAuSE RECOMMENDED COuRSE OF ACTION OuTPuT PRObLEMS The machine will not produce more than 200 amps. 1. This may be normal operation. If the output current exceeds 300 amps, an electronic protection circuit will reduce the current to less than 200 amps. The machine will continue to produce this low current until the protection circuit If all recommended possible areas of is reset.
E-7 E-7 TROubLEShOOTING Observe all Safety Guidelines detailed throughout this manual PRObLEMS (SYMPTOMS) POSSIbLE CAuSE RECOMMENDED COuRSE OF ACTION WELDING PRObLEMS Poor welding, weld settings drift, or output power is low. 1. Make sure the machine settings are correct for the weld process being used. 2. Check machine performance on LOCAL control. If OK then the remote control device may be faulty. Check or replace. 3. Check the input voltages and input voltage reconnect procedures.
317 FAN 209 208 H1D 2 4 H1 CR1 H1A H1C 6 8 H1B C1 205 201 0 205 T3 R I-IN PR UT I-O PR T4 W 205 T1 MAIN TRANSFORMER 201 R W 204 1 383 205 208 CR1 382 201 204 FAN RELAY 206 203A SWITCH PC BOARD SWITCH BOARD CAPACITORS, 2200/500 OUTPUT BY-PASS CAPACITORS, .
317 FAN 209 208 H1D 2 4 H1 CR1 H1A H1C 6 8 H1B C1 205 201 0 205 T3 R I-IN PR UT I-O PR T4 W 205 T1 MAIN TRANSFORMER 201 R W 204 1 383 205 208 CR1 382 201 204 FAN RELAY 206 203A SWITCH PC BOARD SWITCH BOARD CAPACITORS, 2200/500 OUTPUT BY-PASS CAPACITORS, .
NOTE: This diagram is for reference only. It may not be accurate for all machines covered by this manual. The specific diagram for a particular code is pasted inside the machine on one of the enclosure panels. If the diagram is illegible, write to the Service Department for a replacement. Give the equipment code number.
.25 O 1.25 O .93 4.30 MAX RECONNECT DOOR OPEN 9.00 7.00 .88 11.85 3.17 MAX .35 TYP. .79 MIN 2.08 16.84 20.25 1.44 A.02 L11981 15.89 ES 275i .25 O 1.25 O .93 4.30 MAX RECONNECT DOOR OPEN 9.00 7.00 .88 11.85 .35 TYP. .79 MIN 3.17 MAX 2.08 DIMENSION PRINT 16.84 20.25 1.44 A.02 DIAGRAMS L11981 15.
NOTES ES 275i
• Do not touch electrically live parts or WARNING Spanish AVISO DE PRECAUCION French ATTENTION German WARNUNG Portuguese ATENÇÃO • Keep flammable materials away. • Wear eye, ear and body protection. • Mantenga el material combustible • Protéjase los ojos, los oídos y el electrode with skin or wet clothing. • Insulate yourself from work and ground. • No toque las partes o los electrodos bajo carga con la piel o ropa mojada. • Aislese del trabajo y de la tierra.
• Keep your head out of fumes. • Use ventilation or exhaust to • Turn power off before servicing. • Do not operate with panel open or guards off. remove fumes from breathing zone. • Los humos fuera de la zona de res- piración. • Mantenga la cabeza fuera de los humos. Utilice ventilación o aspiración para gases. • Gardez la tête à l’écart des fumées. • Utilisez un ventilateur ou un aspira- • Desconectar el cable de ali- mentación de poder de la máquina antes de iniciar cualquier servicio.
• World's Leader in Welding and Cutting Products • • Sales and Service through Subsidiaries and Distributors Worldwide • Cleveland, Ohio 44117-1199 U.S.A. TEL: 216.481.8100 FAX: 216.486.1751 WEB SITE: www.lincolnelectric.