
Operating Instructions


15
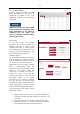
3 Workflow- installation to evaluation
The Linde Fleet Scan is based on:
1. the Activity Tracker, which is installed on vehicles to measure activity.
2. the gateway to transfer the data to the cloud
3. data analysis software.
In this chapter, the components are explained based on the workflow.
3.1 Phase 1: Mounting
Installation of the activity trackers
The installation of the trackers on the vehicle is
designed to be simple. The following points
must be observed:
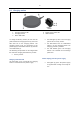
1. make sure that the activity trackers are
fully charged and have a set time. For
details, see chapter 2.1. The status can
be read from the blink code of the LED
on the back of the activity tracker.
2. The devices can be attached by magnet
and do not require an electrical
connection to the vehicle.
3. Make sure that the Activity Tracker is
installed inside the cab when the truck
is used outdoors. Make sure that the
Activity Tracker cannot injure anyone if
it falls. A good position is e.g. behind
the seat or behind a panel.
Collect fleet info
To be able to assign the tracker to the vehicle
later, make a note of the short ID of the Activity
Tracker and the corresponding designation of
the truck. The assignment is important for the
correct allocation of the data.
You can store the data directly in the
PowerApps project system, or you can enter the
data afterwards.
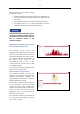
3.2 Phase 2: Perform measurement
The measurement runs automatically after
installation. No interaction is necessary. As the
activity trackers are designed for energy-
efficient operation, no LED is active to indicate a
running measurement.
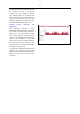
3.3 Phase 3: Presentation
After the measurement period, the activity
trackers are removed. The removal of the
activity trackers does not require any
interaction. It can therefore also be carried out
by the client at the end.
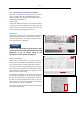
Create a project
After or during installation or after dismounting
the activity trackers, the project must first be
created. The project creation is described in
detail in chapter 2.5.
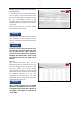
During commissioning, care should be taken
not to include the day of set-up and
dismantling in the analysis.
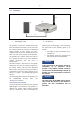
Uploading the data
The data is then uploaded via the gateway next
to the charging station. It is important that the
gateway has been assigned to the project
beforehand. A detailed description can be
found in chapter 2.5.
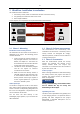
NOTICE
2 weeks
Mount
tracker
Get fleet info
Upload data
Generate the
report
Phase 3: PresentationPhase 1: Setup
Define the
project
Phase 2: Measurement