
Operating Instructions


4
Operation
34
Operating Instructions - X EN - 01/2020
id:
GUID-5C5A263B-1DD4-4BA1-8FF0-8BA-
CA3B3C65E - version: 2 - lang: EN - srclang:
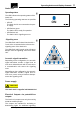
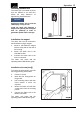
Installing the Zone Marker
The Zone Marker creates a stationary signal-
ing zone and triggers further actions on indus-
trial trucks present in this signaling zone.
Install the Zone Marker between a height of
2m (78inch) but not higher than 7m (275inch)
in order to guarantee optimal radio
coverage.
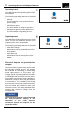
Installation via magnet
The Zone Marker can be mounted to metallic
surfaces using a magnet.
1. Mount a self-adhesive magnet with the
sticky side on the rear of the housing.
2. Attach the Zone Marker in the intended lo-
cation.
3. Connect the Zone Marker to a 12-24-V
DC power supply via the connector plug.
The Zone Marker starts and the operating sta-
tus LED flashes green.
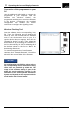
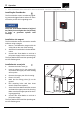
Installation via screw joint
1. Remove the holes cover (1).
2. Insert a release tool in the opening (2)
and release the upper part of the housing
at four points.
3. Remove the upper part of the housing.
4. Ensure it is level
5. Mark the four fixing points (3) on the
ground.
6. Drill mounting holes and then insert
dowels if these are required.
7. Secure the Zone Marker with four screws
and attach the upper part of the housing.
Make sure that the upper part of the hous-
ing engages fully.
8. Connect the Zone Marker to a 12-24-V
DC power supply.
The Zone Marker starts and the operating sta-
tus LED flashes green.
NOTICE
1
2
3