
Owner's Manual


Instant RAID
13
Linksys EtherFast
®
Series
12
Because the Instant RAID doesn’t have an attached keyboard or monitor, you
have been provided access to the RAID’s internal data and processes through
your web browser. The Instant RAID contains an HTTP server which enables
you to connect and configure your RAID using Netscape Navigator (4.7 or
better) or Internet Explorer (4.0 or better). This connection can be made with
a click of the RAID Utility’s Administration Button, or by entering a URL
into any networked PC’s web browser.
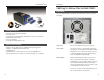
Accessing the Administration Interface with the Instant RAID Utility
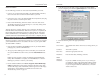
1. Run the Instant RAID Utility. After the Utility searches your network
and locates all of your Instant RAID, click the Utility’s
Administration button (as seen to the left). You will be
prompted for your user name and password. Enter “admin” for
the user name.
2. By default, there is no password. Unless you have already changed the
password for admin in the Instant RAID Utility, leave the Password field
blank and click OK. You will be brought to the Welcome screen.
3. Choose the Instant RAID you wish to access. Choose Connect. Click the
Administration button. The Administrative Menu page will load.
Accessing the Administration Interface With Only Your Web Browser
If you are working on a networked PC without an installed version of the
Instant RAID Utility, you can still access the Administration Interface
through your web browser.
1. Start your web browser. In the Address box, enter the following web
address:
http://ip_address.
Where ip_address is the IP Address of the
Instant RAID, as in the following:
http://192.168.0.2
NNoottee
: You will need
the IP address of the
Instant RAID in order
to gain access to the
Web Interface.
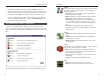
The Web-Based Administrative Interface
Administration
The Instant RAID administrator can control Instant RAID usage by creating
and managing Users, Groups, and Shares.
Users: Each user is identified by his User Name and Password.
The administrator creates users, and can also limit the
amount of disk space available to a user.
Groups: Users are organized into user groups. Groups are created in
order to allocate which users have access to which shares.
Shares: A “share” is a folder (directory) on the Instant RAID
which users can access. Only the Instant RAID administra-
tor can create shares, however, within a share, users who
have access to that share can create other folders (directo-
ries) as well as files.
Access Rights: Access to a share can be “Read Only” or “Read/Write”. To
reduce administration workload, access to a share is granted
to a User Group, rather than an individual user. A share can
be accessed by only one group, but a group can access sev-
eral shares.
The admin user, or any other users added to the administration group, al
ways
have “Read/Write” access to all shares and folders.
The guest user has “Read/Write” access to the “public” share. This can be
changed, and access to additional shares can be granted by changing the
access right for the everyone group.
Users who do not have a User Name on the Instant RAID are automatically
given the guest login.
Overview of Administrative Options