
Owner's Manual


EtherFast 10/100 PrintServers
19
Instant EtherFast
®
Series
18
Installing the Printer Driver for Each Printer
After installing TCP/IP, install the Windows printer driver for each printer(s)
attached to the PrintServer.
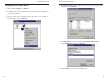
1. Click on Start, Settings, and Printers.
2. If no printers are installed, install the printer driver(s) per the directions
from the printer’s manufacturer, as if the printer is a “local” printer
attached directly to the PC.
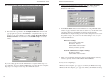
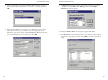
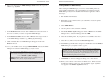
3. After the printer driver has been installed, click on Start, Settings, and
Printers. Locate the printer you want to attach to the PrintServer, which
appears as an icon in the Printers folder, and right-click on it.
4. Click on Properties.
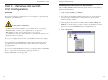
Part II - Windows 98 and 95
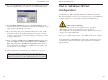
Port Configuration
Overview
This section configures your Windows 98 or 95 computers to give them print-
ing abilities to the PrintServer.
At this point, you must have:
• the PrintServer hardware installed on your network. If not, see page 10.
• TCP/IP installed on each of your computers. If not, see page 58.
• IPX installed on each of your computers. If not, see page 58.
• your PrintServer and each of the computers on your network assigned to an
IP address. If not, see page 58.
If you do not complete the above first, your installation will not be complete.
It is assumed that your CD-ROM drive’s letter name is designated as D. If
your CD drive is named another letter, replace all instances of D with the
appropriate letter.
If you need to install the PrintServer driver on computers without a CD-ROM
drive, you can create a setup disk by copying the contents of
D:\Driver\Win9xNT onto a floppy disk.