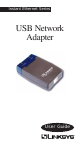
Instant Ethernet Series USB Network Adapter User Guide
COPYRIGHT & TRADEMARKS Copyright © 1999 Linksys, All Rights Reserved. Instant Ethernet is a registered trademark of Linksys. Microsoft, Windows, and the Windows logo are registered trademarks of Microsoft Corporation. All other trademarks and brand names are the property of their respective proprietors. LIMITED WARRANTY Linksys guarantees that every USB Network Adapter is free from physical defects in material and workmanship under normal use for one (1) year from the date of purchase.
Contents Contents Introduction About USB 1 2 Important Disclaimer 4 Hardware Setup 5 Windows 98 Setup File and Priner Sharing in Windows 98 7 13 Troubleshooting 16 Manually Installing Network Components 21 Specifications 23 Customer Support 24 Notes 25
Introduction Introduction Congratulations on your purchase of the USB Network Adapter. Now you can connect to any 10Mbps or 10Mbps/ 100Mbps hub without having to install any internal cards or hardware! The USB Network Adapter from Linksys allows you to connect to a network instantly from a USB-enabled PC, notebook PC, or even a USB hub. The Plug-and-Play compatible device attaches to any Universal Serial Busenabled PC or hub via a USB Type B receptacle.
Introduction Here are some of the features of the USB10T • One B-type USB Port For a Standard USB cable • One RJ-45 10BaseT Port For a Straight-Through Catagory 3 or 5 Cable • Fast 8Mbps Data Throughput with 6Mbps Burst Transfer • Easy-to-Read Link and Activity LED Indicators • No External Power Supply Needed • Low Power Consumption Rate • Auto-Sleep Mode Conserves Power and Notebook PC Battery Life • Compact Design -- Perfect for Use with Laptops and Notebook PCs • Fully Compatible with any USB Hub • Plug
About USB USB is unique because it is Plug-and-Play, which allows a computer to instantly recognize when a device like a keyboard, mouse, or scanner has been connected to it. Once the device has been recognized, it’s ready to go. No special setup is required. Similarly, USB supports hot swapping - the insertion or removal of devices while the computer is turned on. You can swap one device for another without having to power down your system or install any special software -- it really is that easy.
Disclaimer IMPORTANT DISCLAIMER In order to use this device, you must have a copy of Microsoft Windows 98 operating system installed on your PC. Some versions of Windows 95 version B (OSR2) support USB, but the device drivers included in this package are designed specifically for Windows 98. If you do not have Windows 98, this device will not work. Also, the device requires that a USB port is installed and enabled on your PC. Some PCs have a USB port, but it is disabled.
Hardware Setup Hardware Setup Before installing the adapter, make sure you have received all of the following items. If any of the items are damaged or missing, contact your vendor for replacements: • • • • USB Network Adapter USB Cable User Guide and Registration Card Program Disk After unpacking the adapter, follow the steps below to complete the installation. Connecting the USB Network Adapter The USB Network Adapter comes with a USB cable.
Hardware Setup 3. Insert the other end of the USB cable (the Atype connector) into the USB port on your PC. The adapter is now connected to your PC. 4. Connect your adapter to a 10Mbps or 10Mbps/ 100Mbps auto-sensing hub using Category 5 UTP RJ-45 straight-through cabling. The RJ-45 jacks should fit into the RJ-45 port on both the adapter and the hub. Note: Do NOT connect the USB Network Adapter directly to another network card or adapter.
Windows 98 Windows 98 Setup After installing the USB Network Adapter, follow the instructions below to install the adapter’s software. 1. Install the USB Network Adapter if you haven’t already. 2. Start up your computer and Windows 98. 3. At this point, Windows 98 should display a “New Hardware Found” window. If the message is not displayed, and this is the first time that you are using the device, check to make sure that the USB port on your computer is enabled.
Windows 98 6. Select Search for the best driver for your device (Recommended). Click Next. 7. A window will appear asking Where would you like Windows 98 to search for the driver? Make sure that Floppy disk drive is selected and that a:\ is specified in the location window. Click Next to continue. 8. Windows will begin searching your drives for the correct device drivers. If a message appears that reads Windows found the following updated driver for this device, go to step 9.
Windows 98 12. Windows will finish copying all the necessary files to your system. When asked if you want to restart your computer, click No. This window may not appear, depending on your computer’s configuration. If it doesn’t, just move on to the next step. 13. Once you are back at the Windows 98 desktop, click on the Start button. Click on Settings, then Control Panel. 14. Double-click on the Network icon. The Network window will appear. 15. Click on the Configuration tab.
Windows 98 Client for Microsoft Networks Client for Netware Network Linksys USB-Network Adapter IPX/SPX-compatible Protocol NetBEUI There may be other components listed in addition to the ones shown above. However, if any components shown above are missing, you’ll need to install them manually. Follow the instructions on page 20. 16. In the Primary Network Logon box, select Client for Microsoft Networks. 17. Click on the Identification tab.
Windows 98 Type the name of your PC in the Computer name box. Make up a name that is unique from the other computers' names on the network. You can call it anything you’d like, (eg: Tardis, JoePC, etc.). 18. Type the name of your workgroup in the Workgroup box. The name you type should be the same workgroup name in use by all of the other PCs on the network. The Workgroup box is case sensitive -- be sure to use the same case that is in use on your other PCs. 19.
Windows 98 Make sure that Shared-level access control is selected. If the setting is on User-level access control and you can’t change it, skip to problem 5 in the Troubleshooting section. 21. Click on the OK button. Your system may or may not ask you to insert your Windows 98 CDROM or Diskette. If it does, insert your disk into the proper drive and direct Windows to it. 22. Once Windows is done copying the necessary files, the System Settings Change window appears.
Windows 98 network that have enabled file and printer sharing When you’re finished, if you still need to set up file and printer sharing so your PC shows up in Network Neighborhood, proceed to the Enabling File & Printer Sharing section. If you don’t see anything at all, press the F5 key a few times on your keyboard to refresh the screen. If you only see your computer in Network Neighborhood, skip to problem 6 in the Troubleshooting section.
Windows 98 If you’d like others to be able to access the files on your PC’s hard drive, select I want to be able to give others access to my files. If you’d like to share your printer with other users on the network, select I want to be able to allow others to print to my printer. Click on the OK button. File and Printer Sharing for Microsoft networks should now appear in the list of installed components. Click OK. When asked to restart your PC, choose to do so. 2.
Windows 98 want to assign access password(s), type them into the Password box(es). 3. When you're done, click on the Apply button, followed by OK. Your drive(s) or folder(s) can now be accessed from other users whenever they click on their Windows Network Neighborhood icons. If a user tries to access one of your drives that's password-protected, he or she will be asked for the appropriate Read-Only or Full access password. 4. To share your printer(s), double-click on your My Computer icon.
Appendix Troubleshooting Troubleshooting hints for Windows 98 can be found below. The USB10T is not compatible with any other operating system. Please see the disclaimer on page 4. Troubleshooting Hints for Windows 98 Problem 1: Windows 98 doesn’t detect new hardware with the USB Adapter hardware installed, or it continues to detect the adapter each time you restart your PC. Solutions You might not have installed the USB adapter correctly.
Appendix Problem 2: Windows 98 can’t locate the driver for the USB Adapter device. Solutions You may have inserted the wrong diskette into your PC’s drive. The diskette may be defective or files may be missing. Make sure the disk has files called USB10T.INF and USB10T.SYS on it. Problem 3: The Windows Logon screen doesn’t appear after you restart your computer. Solutions Click on Start, Logoff. If this doesn’t solve the problem, your PC’s manufacturer may have disabled 98’s networking.
Appendix you have made sure that it is Unchecked click on the OK button. Problem 5: On the Access Control Tab, User Level Access is selected, but Shared Level Access is grayed out and not accessible. Solutions You previously had your primary network logon set to Client for Netware Networks. On the Configuration Tab of the Network Properties window, make sure that your primary network logon is set to Client for Microsoft Networks.
Appendix Problem 7: In Network Neighborhood, you can see all other computers on the network but not yourself, and all other computers can see each other and not your computer. Solutions You may not have enabled File and Printer Sharing. Please see the File and Printer Sharing section of guide. The USB Adapter might not be setup properly. Try reinstalling the adapter. Problem 8: Network Neighborhood is Empty. Solutions Verify that your Microsoft Client is installed.
Appendix Problem 10: LEDs on the adapter flash back and forth in rhythm. Solutions Driver for the USB network adapter has not been installed properly. You must re-install the drivers. Problem 11: On some notebook PCs, the USB Network Adapter fails to configure correctly after the drivers have been loaded. After loading the software drivers, it may be necessary to do the following: 1. Log off and unplug the device from your PC's USB port 2. Turn off your PC. 3. Plug the device back in and then reboot. 4.
Appendix Manually Installing Network Components There may be times when you might need to manually install missing Windows 98 networking components. 1. Click on Start, Settings, then Control Panel. 2. Double-click the Network icon. The Network window appears. 3. Click on the Configuration tab.
Appendix Client for Netware Networks If you plan on connecting to a Novell NetWare workstation, click on the Add button. Highlight Client and click on Add. In the Network Client window, select Manufacturer and choose Microsoft. Highlight Client for NetWare Networks on the right, then click OK. IPX/SPX-compatible Protocol Click on the Add button. Choose Protocol and click on the Add button. Select Manufacturer and choose Microsoft. Under the Network Protocol box, highlight IPX/SPX-compatible protocol.
Specifications Specifications Standards ISO8802/3, IEEE 802.3 (10BaseT), USB Spec. v 1.0 Transfer Rate 10BaseT Half Duplex 8Mbps LEDs Link, Activity Ports 1 USB Type B port 1 10BaseT RJ-45 port Cabling Network USB UTP/STP Category 3 or 5 100 Meters (328 feet) Max. Standard Shielded USB Cable 5 Meters (16.4 feet) Max. Power 5V Bus Powered from USB Host Controller or Hub Buffer 32Kb Certification FCC Class A & CE Dimensions 3.2” x 2.1” x 1.0” Weight 2.0 oz.
Support Customer Support For help with the installation or operation of your USB Network Adapter, contact Linksys Customer Support at one of the phone numbers or Internet addresses below. Customer Support Fax Bulletin Board 949-261-1288 949-261-8868 949-261-2888 (33.6, 8-N-1) support@linksys.com http://www.linksys.com ftp.linksys.
Notes 25
h t t p : / / w w w. l i n k s y s . c o m © Copyright 1999 Linksys, All Rights Reserved. Printed in the USA.