USER GUIDE Wireless-G ADSL Home Gateway Model No: WAG200G
About This Guide About This Guide Icon Descriptions While reading through the User Guide you may see various icons that call attention to specific items. Below is a description of these icons: NOTE: This check mark indicates that there is a note of interest and is something that you should pay special attention to while using the product. WARNING: This exclamation point indicates that there is a caution or warning and it is something that could damage your property or product.
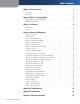
Table of Contents Chapter 1: Product Overview 4 Front Panel . . . . . . . . . . . . . . . . . . . . . . . . . . . . . . . . . . . . . . . . . . . . . . . . . . 4 Back Panel . . . . . . . . . . . . . . . . . . . . . . . . . . . . . . . . . . . . . . . . . . . . . . . . . . . 4 Chapter 2: Wireless Security Checklist 5 General Network Security Guidelines . . . . . . . . . . . . . . . . .
Table of Contents Appendix D: Regulatory Information 31 FCC Statement . . . . . . . . . . . . . . . . . . . . . . . . . . . . . . . . . . . . . . . . . . . . . . . 31 Safety Notices . . . . . . . . . . . . . . . . . . . . . . . . . . . . . . . . . . . . . . . . . . . . . . . 31 Industry Canada Statement . . . . . . . . . . . . . . . . . . . . . . . . . . . . . . . . . . . . .
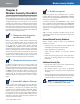
Product Overview Chapter 1 Chapter 1: Product Overview Thank you for choosing the Linksys Wireless-G ADSL Home Gateway. The Gateway lets you access the Internet via a wireless connection or through one of its four switched ports. You can also use the Gateway to share resources, including computers. A variety of security features help to protect your data and your privacy while online. Security features include WPA2 security, a Stateful Packet Inspection (SPI) firewall and NAT technology.
Wireless Security Checklist Chapter 2 Chapter 2: Wireless Security Checklist Wireless networks are convenient and easy to install, so homes with high-speed Internet access are adopting them at a rapid pace. Because wireless networking operates by sending information over radio waves, it can be more vulnerable to intruders than a traditional wired network. Like signals from your cellular or cordless phones, signals from your wireless network can also be intercepted.
Installation Chapter 3 Chapter 3: Installation NOTE: To avoid interference, you may need to place a microfilter or splitter between the phone cable and wall jack. Contact your ISP to determine if one is required. (UK residents need to connect the microfilter to the wall phone jack with ADSL service and then connect one end of the provided phone cable to the DSL port on it.
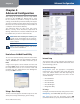
Advanced Configuration Chapter 4 Chapter 4: Advanced Configuration After setting up the Gateway with the Setup Wizard (located on the CD-ROM), the Gateway will be ready for use. However, if you’d like to change its advanced settings, use the Gateway’s web-based utility. This chapter describes each web page of the utility and each page’s key functions. You can access the utility via a web browser on a computer connected to the Gateway.
Advanced Configuration Chapter 4 or data traffic; UBR (Unspecified Bit Rate) for applications that are not time-sensitive, such as e-mail; or VBR (Variable Bit Rate) for bursty traffic and bandwidth-sharing with other applications. NOTE: If the QoS Type setting is CBR, then the SCR Rate is not configurable. If the QoS Type setting is UBR, then the PCR and SCR Rate settings are not configurable.
Advanced Configuration Chapter 4 Internet Connection Type > RFC 2516 PPPoE Internet Connection Type > RFC 1483 Routed PPPoE Settings Username and Password Enter the User Name and Password provided by your ISP. Connect on Demand: Max Idle Time You can configure the Gateway to cut the Internet connection after it has been inactive for a specified period of time (Max Idle Time).
Advanced Configuration Chapter 4 IP Settings Select Obtain an IP Address Automatically if your ISP says you are connecting through a dynamic IP address. If you are required to use a permanent (static) IP address to connect to the Internet, then select Use the following IP Address. Your ISP provides the settings needed for the following fields: Internet IP Address Enter the Gateway’s IP address, as seen from the Internet.
Advanced Configuration Chapter 4 DHCP Server Enter the DHCP server IP address to relay DHCP requests from the local network when the Gateway is in DHCP Relay mode. (This setting is not available for all encapsulation types.) Click Save Settings to apply your changes, or click Cancel Changes to cancel your changes. Starting IP Address Enter a value for the DHCP server to start with when issuing IP addresses. Because the Gateway’s default IP address is 192.168.1.1, the Starting IP Address must be 192.168.
Advanced Configuration Chapter 4 gateway or router exists on your network, select Disabled. TZO.com Dynamic Routing RIP This allows the Gateway to automatically adjust to physical changes in the network’s layout and exchange routing tables with other router(s). The Gateway determines the packets’ route based on the fewest number of hops between source and destination. Select Enabled to use Dynamic Routing. Otherwise, keep the default, Disabled.
Advanced Configuration Chapter 4 Wireless > Wireless Security Advanced Routing > Routing Table Click Save Settings to apply your changes, or click Cancel Changes to cancel your changes. Wireless > Basic Wireless Settings The basic settings for wireless networking are set on this screen. This screen allows you to choose your wireless network mode and wireless security. The Wireless Security screen configures the security of your wireless network(s).
Advanced Configuration Chapter 4 WPA-Personal WEP Security Mode > WPA-Personal Encryption The method is TKIP. Security Mode > WEP Passphrase Enter a key of 8 to 63 characters. Default Transmit Key Select which Transmit Key to use. The default is 1. Group Key Renewal Enter how often the Gateway should change encryption keys. The default is 3600 seconds. WEP Encryption Select a level of WEP encryption, 64-bit or 128-bit. WPA2-Mixed Passphrase Enter a Passphrase to automatically generate WEP keys.
Advanced Configuration Chapter 4 Wireless > Wireless Access Wireless access can be filtered by using the MAC addresses of the wireless devices transmitting within your network’s radius. MAC 01-20 Enter the MAC addresses of the devices whose wireless access you want to block or allow. Wireless Client MAC List Click this to open the Wireless Client List screen.
Advanced Configuration Chapter 4 use a WEP key for authentication. Select Shared Key to only use Shared Key authentication. Control TX Rate The Control TX Rate should be set depending on the speed of your wireless network. Select from a range of transmission speeds, or keep the default, Auto.
Advanced Configuration Chapter 4 tunneled through an IP network. To allow PPTP tunnels to pass through the Gateway, keep the default, Enable. L2TP Passthrough Layer 2 Tunneling Protocol is the method used to enable Point-to-Point sessions via the Internet on the Layer 2 level. To allow L2TP tunnels to pass through the Gateway, keep the default, Enable. Click Save Settings to apply your changes, or click Cancel Changes to cancel your changes.
Advanced Configuration Chapter 4 8. To block websites using keywords, enter each keyword in a separate Website Blocking by Keyword field. 9. You can filter access to various services accessed over the Internet, such as FTP or telnet. From the Blocked Services list, select the service you want to block; the port numbers and protocol for the selected service are automatically displayed. Summary Status Policies are disabled by default.
Chapter 4 Advanced Configuration Applications and Gaming > Port Range Forwarding The Port Range Forwarding screen allows you to set up public services on your network, such as web servers, ftp servers, e-mail servers, or other specialized Internet applications. (Specialized Internet applications are any applications that use Internet access to perform functions such as videoconferencing or online gaming. Some Internet applications may not require any forwarding.
Advanced Configuration Chapter 4 Applications & Gaming > Port Range Triggering secure because it only opens the ports you want to have opened, while DMZ hosting opens all the ports of one computer, exposing the computer to the Internet. The Port Range Triggering screen allows the Gateway to watch outgoing data for specific port numbers.
Advanced Configuration Chapter 4 QoS (Quality of Service) Administration > Management QoS To use QoS, select Enable. Otherwise, keep the default, Disable. This screen allows the network’s administrator to manage specific Gateway functions for access and security. Application-based QoS Application-based QoS manages information as it is transmitted and received.
Advanced Configuration Chapter 4 IP Address fields. Select IP Range if you want to specify a range of IP addresses that can access the Gateway. Then enter the starting and ending IP addresses of the range. NOTE: To manage the Gateway remotely, enter http://:port substituting the Gateway’s Internet IP address for , and the Management Port number for port. Remote Upgrade Remote Upgrade To allow remote upgrades of the Gateway, select Enable.
Advanced Configuration Chapter 4 Ping Interval Enter the number of milliseconds between pings. The default is 1000 milliseconds. Ping Timeout Enter the number of milliseconds before the ping test will time out. The default is 5000 milliseconds. Start Test To run the test, click this button. The Ping Test screen will show if the test was successful. Click Close to return to the Diagnostics screen.
Advanced Configuration Chapter 4 Restore To restore the Gateway’s configuration settings, click this button and follow the on-screen instructions. Administration > Factory Defaults This screen allows you to restore the Gateway’s configuration to its factory default settings. Firmware Upgrade Before upgrading the firmware, download the Gateway’s firmware upgrade file from the Linksys website, www.linksys.com/international. Then extract the file if needed.
Advanced Configuration Chapter 4 Status > Gateway Local Network The Gateway screen displays information about the Gateway and its current settings. MAC Address The MAC address of the Gateway’s local, wired interface is displayed. IP Address The Gateway’s IP address, as it appears on your local network, is displayed. Subnet Mask The Subnet Mask of the Gateway is displayed. DHCP Server DHCP Server The status of the Gateway’s DHCP server function is displayed.
Advanced Configuration Chapter 4 Encryption Function The wireless security method is displayed. Wireless Clients Connected Click this button to view a list of wireless clients connected to the Gateway. ARP/RARP Table ARP/RARP Table An ARP request is a request sent by the Gateway asking local network devices with IP addresses for their MAC addresses, so the Gateway can map IP addresses to MAC addresses. RARP is the reverse of ARP. (This data is stored in temporary memory and changes periodically.
Advanced Configuration Chapter 4 Upstream Rate The upload speed of traffic from the Gateway to the Internet is displayed. For ADSL connection, the Upstream Rate is typically 25% of the Downstream Rate. NOTE: The Downstream and Upstream Rates are affected by distance from and configuration of the DSL central office. Upstream Margin The Upstream Margin is displayed. Downstream Margin The displayed. Downstream Margin is Downstream Line Attenuation The Downstream Line Attenuation is displayed.
Appendix A Appendix A: Troubleshooting Your computer cannot connect to the Internet. Follow the instructions until your computer can connect to the Internet: • Make sure that the Gateway is powered on. The Power LED should be green and not flashing. • If the Power LED is flashing, then power off all of your network devices, including the Gateway and computers. Then power on each device in the following order: • 1. Gateway 2.
Specifications Appendix B Appendix B: Specifications Model Number WAG200G Standards IEEE 802.11g, IEEE 802.11b, IEEE 802.3u, IEEE 802.3, g.992.1 (g.dmt), g.992.2 (g.lite), g.992.3, g.992.5, T1.
Appendix C Appendix C: Warranty Information Linksys warrants to You that, for a period of three years (the “Warranty Period”), your Linksys Product will be substantially free of defects in materials and workmanship under normal use. Your exclusive remedy and Linksys’ entire liability under this warranty will be for Linksys at its option to repair or replace the Product or refund Your purchase price less any rebates. This limited warranty extends only to the original purchaser.
Appendix D Appendix D: Regulatory Information FCC Statement This product has been tested and complies with the specifications for a Class B digital device, pursuant to Part 15 of the FCC Rules. These limits are designed to provide reasonable protection against harmful interference in a residential installation. This equipment generates, uses, and can radiate radio frequency energy and, if not installed and used according to the instructions, may cause harmful interference to radio communications.
Regulatory Information Appendix D Declaration of Conformity with Regard to EU Directive 1999/5/EC (R&TTE Directive) Nederlands [Dutch]: Dit apparaat voldoet aan de essentiele eisen en andere van toepassing zijnde bepalingen van de Richtlijn 1999/5/EC.
Regulatory Information Appendix D The following standards were applied during the assessment of the product against the requirements of the Directive 1999/5/EC: • Radio: EN 300 328 and/or EN 301 893 as applicable • EMC: EN 301 489-1, EN 301 489-17 • Safety: EN 60950 and either EN 50385 or EN 50371 Dynamic Frequency Selection (DFS) and Transmit Power Control (TPC) are required for operation in the 5 GHz band. DFS: The equipment meets the DFS requirements as defined in ETSI EN 301 893.
Regulatory Information Appendix D France Product Usage Restrictions For 2,4 GHz, the product should not be used outdoors in the band 2454 - 2483,5 MHz. There are no restrictions when used in other parts of the 2,4 GHz band when used indoors. Check http://www.arcep.fr/ for more details. This product is designed for indoor usage only. Outdoor usage is not recommended, unless otherwise noted. Pour la bande 2,4 GHz, l’ équipement ne doit pas être utilisé en extérieur dans la bande 2454 - 2483,5 MHz.
Appendix D User Information for Consumer Products Covered by EU Directive 2002/96/EC on Waste Electric and Electronic Equipment (WEEE) This document contains important information for users with regards to the proper disposal and recycling of Linksys products.
Appendix D Regulatory Information Eesti (Estonian) - Keskkonnaalane informatsioon Euroopa Liidus asuvatele klientidele Français (French) - Informations environnementales pour les clients de l’Union européenne Euroopa Liidu direktiivi 2002/96/EÜ nõuete kohaselt on seadmeid, millel on tootel või pakendil käesolev sümbol , keelatud kõrvaldada koos sorteerimata olmejäätmetega. See sümbol näitab, et toode tuleks kõrvaldada eraldi tavalistest olmejäätmevoogudest.
Appendix D Regulatory Information Lietuvškai (Lithuanian) - Aplinkosaugos informacija, skirta Europos Sąjungos vartotojams Nederlands (Dutch) - Milieu-informatie voor klanten in de Europese Unie Europos direktyva 2002/96/EC numato, kad įrangos, kuri ir kurios pakuotė yra pažymėta šiuo simboliu (įveskite simbolį), negalima šalinti kartu su nerūšiuotomis komunalinėmis atliekomis. Šis simbolis rodo, kad gaminį reikia šalinti atskirai nuo bendro buitinių atliekų srauto.
Appendix D Regulatory Information Português (Portuguese) - Informação ambiental para clientes da União Europeia Slovenčina (Slovene) - Okoljske informacije za stranke v Evropski uniji A Directiva Europeia 2002/96/CE exige que o equipamento que exibe este símbolo no produto e/ou na sua embalagem não seja eliminado junto com os resíduos municipais não separados. O símbolo indica que este produto deve ser eliminado separadamente dos resíduos domésticos regulares.