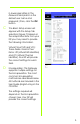
® A Division of Cisco Systems, Inc. Package Contents • • • • • • Wireless-G ADSL Gateway User Guide on CD-ROM Ethernet Network Cable Phone Cable Power Adapter Microfilter or splitter (not supplied with all models) • Quick Installation 2,4GHz Wireless-G 802.11g ADSL Gateway Wireless Model No. WAG54G (EU/LA) Model No.
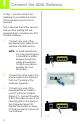
1 Connect the ADSL Gateway In Step 1, you will connect the Gateway to your ADSL line and to the computers in your home or business. First, make sure that all the devices that you’ll be working with are powered down, including your PCs and the Gateway. A Connect one end of the provided phone cable to the wall jack with ADSL service. NOTE: To avoid interference, you may need to place a microfilter or splitter between the phone cable and wall jack. Contact your service provider for more information.
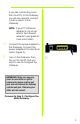
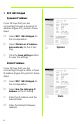
If you are connecting more than four PCs to the Gateway, you will also need to connect a hub or switch to the Gateway. NOTE: If your PC’s Ethernet adapter is not set up, refer to the Ethernet adapter’s user guide for more information. D E Connect the power adapter to the Gateway. Connect the power adapter to the electrical outlet. (Figure D) Turn on the Gateway. Then, turn on the first PC that you want to use to configure the Gateway.
2 Configure the ADSL Gateway In Step 2, you will configure your Linksys Wireless-G ADSL Gateway to be able to gain access to the Internet through your Internet Service Provider (ISP). You will need the setup information provided by your ADSL ISP. If you do not have this information, please contact them before proceeding. The instructions from your ISP tell you how to set up your PC for Internet access.
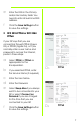
in lowercase letters in the Password field (admin is the default user name and password.) Then, click the OK button. C The Basic Setup screen will appear with the Setup tab selected. (Figure C) Based on the setup instructions from your ISP, you may need to provide the following information. Virtual Circuit (VPI and VCI): These fields consist of two items: VPI (Virtual Path Identifier) and VCI (Virtual Channel Identifier). Your ISP will provide the correct settings for each field.
1 RFC 1483 Bridged Dynamic IP Address If your ISP says that you are connecting through a dynamic IP address (Figure D1), perform these steps: a b c Select RFC 1483 Bridged for the Encapsulation. Select Obtain an IP Address Automatically for the IP Setting. D1 Dynamic Quick Installation Click the Save Settings button to save the settings.
e f Enter the DNS in the Primary and/or Secondary fields. You need to enter at least one DNS address. Click the Save Settings button to save the settings. 2 RFC 2516 PPPoE or RFC 2364 PPPoA If your ISP says that you are connecting through PPPoE (Figure D3) or PPPoA (Figure D4), or if you normally enter a user name and password to access the Internet, perform these steps: a b c d e f Select PPPoE or PPPoA as appropriate for the Encapsulation. If you selected PPPoE, enter the Service Name (if required).
E F G H If you haven’t already done so, click the Save Settings button to save your Setup settings. Close the web browser. For Wireless Configuration: Refer to the User Guide (English only) for detailed instructions on how to configure your Gateway for your wireless network. Linksys recommends changing your wireless settings from the defaults and enabling the appropriate security options. Congratulations! You’ve successfully configured the Gateway.
® A Division of Cisco Systems, Inc. Lieferumfang • • • • • • Wireless-G ADSL-Gateway Benutzerhandbuch auf CD-ROM Ethernet-Netzwerkkabel Telefonkabel Netzstromadapter Mikrofilter (nicht im Lieferumfang aller Modellnummern enthalten) • Kurzanleitung 2,4GHz Wireless-G 802.11g ADSL-Gateway Wireless Model No. WAG54G (DE) Model No.
1 Anschließen des ADSL-Gateways In Schritt 1 schließen Sie das Gateway an Ihre ADSL-Verbindung und die Computer in Ihrer Heim- oder Unternehmensumgebung an. Überprüfen Sie zuerst, ob alle Geräte, mit denen Sie arbeiten (einschließlich PCs und Gateway), ausgeschaltet sind. A Schließen Sie ein Ende des beigelegten Telefonkabels an die Wandbuchse mit dem ADSLDienst an. HINWEIS: Zur Vermeidung von Störungen sollten Sie u. U.
Wenn mehr als vier PCs an das Gateway angeschlossen werden sollen, müssen Sie außerdem einen Hub oder Switch an das Gateway anschließen. HINWEIS: Wenn der EthernetAdapter des Computers nicht eingerichtet ist, finden Sie dazu weitere Informationen im Benutzerhandbuch zum Ethernet-Adapter. D E Schließen Sie den Netzstromadapter an das Gateway an. Stecken Sie den Netzstromadapter in die Steckdose (Abbildung D). Schalten Sie das Gateway ein.
2 Konfigurieren des ADSL-Gateways In Schritt 2 konfigurieren Sie das Linksys Wireless-G ADSL-Gateway für den Zugriff auf das Internet über Ihren ISP. Sie benötigen hierzu die SetupInformationen Ihres ADSL-ISPs. Wenn Sie nicht über diese Informationen verfügen, wenden Sie sich an Ihren ISP, bevor Sie beginnen. Die Anweisungen von Ihrem ISP geben an, wie Sie Ihren Computer für den Internetzugriff einrichten müssen.
C Das Fenster Basic Setup (Grundlegende Einrichtung) wird mit ausgewählter Registerkarte Setup angezeigt (Abbildung C). Je nach den Setup-Informationen von Ihrem ISP müssen Sie unter Umständen die folgenden Informationen eingeben: Virtual Circuit (Virtueller Kreis): Für diese Option sind zwei Einstellungen erforderlich, VPI (Virtual Path Identifier; Virtueller Pfadidentifizierer) und VCI (Virtual Channel Identifier; Virtueller Kanalidentifizierer). Die korrekten Einstellungen erhalten Sie von Ihrem ISP.
1 RFC 1483 Bridged (RFC 1483Überbrückung) Dynamische IP Adresse Wenn Sie laut ISP über eine dynamische IPAdresse verbunden sind (Abbildung D1), führen Sie die folgenden Schritte aus: a b c Wählen Sie als Kapselungsmethode RFC 1483 Bridged (RFC 1483Überbrückung) aus. Wählen Sie Obtain an IP Address Automatically (IP-Adresse automatisch beziehen) als IPEinstellung aus.
e f Geben Sie die DNS-Adressen in die Felder Primary DNS (Primärer DNS) und Secondary DNS (Sekundärer DNS) ein. Sie müssen mindestens eine DNS-Adresse eingeben. Klicken Sie auf die Schaltfläche Save Settings (Einstellungen speichern), um die Einstellungen zu speichern.
speichern), um die Einstellungen zu speichern. E F G H Klicken Sie ggf. auf die Schaltfläche Save Settings (Einstellungen speichern), um die SetupEinstellungen zu speichern. Schließen Sie den Web-Browser. Wenn Sie eine drahtlose Konfiguration durchführen, finden Sie genaue Anweisungen zur Konfiguration des Gateways für Ihr Wireless-Netzwerk im Benutzerhandbuch (nur auf Englisch verfügbar).
® A Division of Cisco Systems, Inc. Pakkens indhold • • • • • • Trådløs-G ADSL-gateway Brugervejledning på cd-rom Ethernet-kabel Telefonledning Strømforsyning Mikrofilter eller fordeler (følger ikke med alle modeller) • Installationsvejledning 2,4GHz Trådløs-G 802.11g ADSL-gateway Trådløs Wireless Modelnr. WAG54G (DK) Modelnr.
1 Tilslutning af ADSL-gatewayen I trin 1 tilslutter du gatewayen til ADSL-linjen og til computerne i dit hjem/din virksomhed. Kontroller først, at alle de involverede enheder er slukket, herunder dine pc'er og gatewayen. A Tilslut den ene ende af den medfølgende telefonledning til ADSL-vægstikket. BEMÆRK: Det kan være nødvendigt at placere et mikrofilter eller en fordeler mellem telefonledningen og vægstikket for at undgå interferens. Kontakt din tjenesteudbyder for at få yderligere oplysninger.
Hvis du tilslutter mere end fire pc'er til gatewayen, skal du også tilslutte en hub eller switch til gatewayen. BEMÆRK: Hvis pc'ens Ethernetadapter ikke er konfigureret, skal du se brugervejledningen til Ethernet-adapteren for at få yderligere oplysninger. D E Tilslut strømforsyningen til gatewayen. Tilslut strømforsyningen til stikkontakten. (Figur D) Tænd gatewayen. Tænd derefter den første pc, som du vil bruge til konfiguration af gatewayen.
2 Konfiguration af ADSL-gatewayen I trin 2 konfigurerer du Linksys Trådløs-G ADSL-gatewayen, så du kan oprette adgang til internettet via din internetudbyder. Du skal have konfigurationsoplysningerne af din ADSL-udbyder. Hvis du ikke har disse oplysninger, skal du kontakte udbyderen, før du fortsætter. I vejledningen fra din internetudbyder kan du læse, hvordan du konfigurerer pc'en til internetadgang.
admin med små bogstaver i feltet Password (Adgangskode) (admin er standardbrugernavnet og -adgangskoden.) Klik derefter på knappen OK. C Skærmbilledet Basic Setup vises med fanen Setup valgt. (Figur C) Afhængigt af konfigurationsvejledningen fra din internetudbyder skal du muligvis angive følgende oplysninger. VPI og VCI (Virtual Circuit): Disse felter består af to punkter: VPI (Virtual Path Identifier) og VCI (Virtual Channel Identifier). Få de korrekte indstillinger til felterne hos din internetudbyder.
1 RFC 1483 Bridged Dynamisk IP-adresse Hvis din internetudbyder har oplyst, at du opretter forbindelse via en dynamisk IP-adresse (Figur D1), skal du følge nedenstående fremgangsmåde: a b c Vælg RFC 1483 Bridged som indkapslingsmetode. Vælg Obtain an IP Address Automatically som IP-indstilling. D1 Dynamisk Hurtig installation Klik på knappen Save Settings for at gemme indstillingerne.
e f Indtast DNS-adressen i feltet Primary og/eller Secondary. Du skal indtaste mindst én DNS-adresse. Klik på knappen Save Settings for at gemme indstillingerne.
E F G H Hvis du ikke allerede har gjort det, skal du klikke på knappen Save Settings for at gemme dine konfigurationsindstillinger. Luk webbrowseren. Trådløs konfiguration: Se brugervejledningen (kun på engelsk) for at få detaljerede oplysninger om, hvordan du konfigurerer gatewayen til dit trådløse netværk. Linksys anbefaler, at du ændrer de trådløse indstillinger, så du ikke bruger standardindstillingerne, og aktiverer de relevante sikkerhedsindstillinger.
® A Division of Cisco Systems, Inc. Contenido del paquete • • • • • • Puerta de enlace ADSL Wireless-G Guía del usuario en CD-ROM Cable de red Ethernet Cable telefónico Adaptador de corriente Microfiltro(s) (no proporcionados con todos los números de modelo) • Instalación rápida 2,4GHz Wireless-G 802.11g Puerta de enlace ADSL Wireless Model WAG54G No. (ES) Model No.
1 Conecte la puerta de enlace ADSL En el paso 1, debe conectar la puerta de enlace a la línea ADSL y a los ordenadores de casa o de la oficina. En primer lugar, asegúrese de que todos los dispositivos con los que va a trabajar están apagados, incluyendo los PC y la puerta de enlace. A Conecte un extremo del cable telefónico proporcionado al jack de pared provisto del servicio ADSL.
Si va a conectar más de cuatro PC a la puerta de enlace, también deberá conectar un concentrador o conmutador a la misma. NOTA: Si el adaptador Ethernet del ordenador no está configurado, consulte la guía del usuario del mismo para obtener más información. D E Conecte el adaptador de corriente a la puerta de enlace. Conecte el adaptador de corriente a la toma de corriente. (Figura D) Encienda la puerta de enlace. A continuación, encienda el primer PC que utilizó para configurar la puerta de enlace.
2 Configure la puerta de enlace ADSL En el paso 2, debe configurar la puerta de enlace ADSL Wireless-G de Linksys para poder acceder a Internet mediante un proveedor de servicios de Internet (ISP). Necesitará la información proporcionada por el ISP de ADSL. Si no la tiene, póngase en contacto con el ISP antes de continuar. Las instrucciones del ISP?le indican cómo configurar el acceso a Internet.
Nombre de usuario y de nuevo en el campo Contraseña (admin es el nombre de usuario y la contraseña predeterminados). A continuación, haga clic en el botón Aceptar. C Aparece la pantalla Basic Setup (Configuración básica) con la ficha Setup (Configurar) seleccionada. (Figura C) Según las instrucciones de configuración del ISP, quizá necesite proporcionar la siguiente información.
1 RFC 1483 Bridged (RFC 1483 con puente) Dynamic IP Address (Dirección IP dinámica) Si el ISP indica que su conexión se realiza mediante una dirección IP dinámica (figura D1), siga estos pasos: a b c En Encapsulation (Encapsulación), seleccione RFC 1483 Bridged (RFC 1483 con puente). En IP Settings (Parámetros IP), seleccione Obtain an IP Address Automatically (Obtener una dirección IP automáticamente). D1 Haga clic en el botón Save Settings (Guardar parámetros) para guardar los parámetros.
d e f Introduzca la dirección de la puerta de enlace predeterminada (Default Gateway). Introduzca la dirección DNS en los campos correspondientes a las direcciones DNS principal (Primary) y secundaria (Secondary). Debe introducir por lo menos una dirección DNS. Haga clic en el botón Save Settings (Guardar parámetros) para guardar los parámetros.
cuando se solicite) si debe pagar todo el tiempo que esté conectado al ISP. f E F G H 8 Haga clic en el botón Save Settings (Guardar parámetros) para guardar los parámetros. Si aún no lo ha hecho, haga clic en el botón Save Settings (Guardar parámetros) para guardar los parámetros. Cierre el explorador Web. Para configuración inalámbrica: consulte la guía del usuario (sólo en inglés) para obtener instrucciones sobre la configuración de la puerta de enlace en una red inalámbrica.
® A Division of Cisco Systems, Inc. Contenu de l'emballage • • • • • • Passerelle ADSL sans fil G Guide de l'utilisateur sur CD-ROM Câble réseau Ethernet Câble téléphonique Adaptateur d'alimentation Microfiltre(s) (ne sont pas livrés avec certains modèles) • Guide d'installation rapide 2,4GHz Sans fil-G 802.11g Passerelle ADSL Wireless Sans fil Model WAG54GNo. (FR) Model No.
1 Connexion de la passerelle ADSL L'étape 1 consiste à connecter la passerelle à votre ligne ADSL ainsi qu'aux ordinateurs installés à domicile ou sur votre lieu de travail. Assurez-vous d'abord de la mise hors tension de tous les périphériques que vous allez utiliser, ordinateurs et passerelle inclus.
Si vous raccordez plus de quatre ordinateurs à la passerelle, vous devrez également raccorder un concentrateur ou un commutateur à la passerelle. REMARQUE : Si la carte Ethernet de votre ordinateur n'est pas configurée, reportez-vous au guide de l'utilisateur de cette carte pour plus d'informations. D E Reliez l'adaptateur électrique à la passerelle. Branchez l'adaptateur électrique sur une prise secteur. (Figure D) Mettez la passerelle sous tension.
2 Configuration de la passerelle ADSL A l'étape 2, vous configurerez votre passerelle ADSL sans fil G Linksys afin qu'elle puisse accéder à l'Internet par l'intermédiaire de votre Fournisseur d'accès Internet (FAI). Vous devrez avoir à votre disposition les informations de configuration fournies par votre FAI. Si vous ne possédez pas ces informations, contactez votre FAI avant de continuer. Les instructions de votre FAI indiquent comment configurer votre ordinateur pour accéder à Internet.
User Name (Nom d'utilisateur), puis admin en minuscules dans le champ Password (Mot de passe) (admin correspond aux nom d'utilisateur et mot de passe par défaut). Cliquez sur le bouton OK. C L'écran Basic Setup (Configuration de base) apparaîtra en affichant son onglet Setup (Configuration). (Figure C) Selon les instructions de configuration de votre FAI, vous devrez peut-être fournir les informations ci-après. Circuit virtuel (VPI et VCI).
1 RFC 1483 Bridged Adresse IP dynamique Si votre FAI vous indique que vous vous connectez par l'intermédiaire d'une adresse IP dynamique (Figure D1), exécutez la procédure ci-après : a b c Sélectionnez RFC 1483 Bridged pour l'encapsulation. Sélectionnez Obtain an IP Address Automatically (Obtenir automatiquement une adresse IP) pour définir l'adresse IP. Cliquez sur le bouton Save Settings (Enregistrer paramètres) pour enregistrer les modifications apportées aux paramètres.
secondaire). Vous devez entrer au moins une adresse DNS. f Cliquez sur le bouton Save Settings (Enregistrer paramètres) pour enregistrer les modifications apportées aux paramètres.
les modifications apportées aux paramètres. E F G H Si ce n'est déjà fait, cliquez sur le bouton Save Settings (Enregistrer paramètres) pour enregistrer vos paramètres de configuration. Fermez le navigateur Web. Configuration sans fil : reportez-vous au Guide de l'utilisateur (en anglais uniquement) pour obtenir des instructions détaillées de configuration de votre passerelle en fonction de votre réseau sans fil.
® A Division of Cisco Systems, Inc. Contenuto della confezione • • • • • • Wireless-G ADSL Gateway User Guide (Guida per l'utente) su CD-ROM Cavo di rete Ethernet Cavo telefonico Adattatore di corrente Microfiltri (non forniti con tutti i numeri di modello) • Guida di installazione rapida 2,4GHz Wireless-G 802.11g ADSL Gateway Wireless Model WAG54GNo. (IT) Model No.
1 Collegamento del gateway ADSL Nella fase 1 il gateway viene collegato alla linea ADSL e ai computer di casa o dell'ufficio. Per prima cosa, verificare che tutti i dispositivi da utilizzare siano spenti, compresi i PC e il gateway. A Collegare un'estremità del cavo telefonico alla presa a muro per il servizio ADSL. NOTA B C Per evitare interferenze, potrebbe essere necessario inserire un microfiltro o un ripartitore tra il cavo telefonico e la presa a muro.
Se si collegano più di quattro PC al gateway, occorre collegare anche un hub o uno switch al gateway. NOTA D E Se l'adattatore Ethernet del PC non è configurato, consultare la relativa documentazione per istruzioni. Collegare l'adattatore di corrente al gateway. Collegare l'adattatore di corrente a una presa elettrica (Figura D). Accendere il gateway. Successivamente, accendere il primo PC che si desidera utilizzare per configurare il gateway.
2 Configurazione del gateway ADSL Nella fase 2 viene configurato il Gateway ADSL Wireless-G di Linksys in modo che sia in grado di accedere a Internet attraverso il provider di servizi in uso. È necessario disporre delle informazioni sulla configurazione fornite dal provider di servizi Internet ADSL. Se non si dispone di tali informazioni, contattarlo prima di continuare. Il provider di servizi fornisce le istruzioni su come configurare il PC per l'accesso a Internet.
Name (Nome utente) e Password (admin È il nome utente e la password predefinita). Quindi, fare clic sul pulsante OK. C Viene visualizzata la schermata Basic Setup (Configurazione di base) in cui è selezionata la scheda Setup (Configurazione) (Figura C). In base alle istruzioni fornite dal provider di servizi Internet, è necessario specificare le seguenti informazioni.
1 RFC 1483 Bridged (Bridging RFC 1483) Indirizzo IP dinamico Se il provider di servizi Internet fornisce una connessione tramite un indirizzo IP dinamico (Figura D1), attenersi alla seguente procedura: a b c Selezionare RFC 1483 Bridged (Bridging RFC 1483) per l'incapsulamento. Selezionare Obtain an IP Address Automatically (Ottieni automaticamente un indirizzo IP) come impostazione IP. D1 Dinamico D2 Statico Fare clic sul pulsante Save Settings (Salva impostazioni) per salvare le impostazioni.
e f Immettere gli indirizzi DNS nei campi Primary DNS (DNS primario) e Secondary DNS (DNS secondario). È necessario specificare almeno un indirizzo DNS. Fare clic sul pulsante Save Settings (Salva impostazioni) per salvare le impostazioni.
base al tempo effettivo di connessione al provider. f E F G H 8 Fare clic sul pulsante Save Settings (Salva impostazioni) per salvare le impostazioni. Se non è stato ancora fatto, fare clic sul pulsante Save Settings (Salva impostazioni) per salvare le impostazioni relative alla configurazione. Chiudere il browser Web. Per la configurazione wireless: consultare la User Guide (Guida per l'utente, solo in inglese) per istruzioni dettagliate su come configurare il gateway per la rete wireless.
® A Division of Cisco Systems, Inc. Conteúdo da embalagem • • • • • • Gateway ADSL sem fios G Manual do Utilizador em CD-ROM Cabo de rede Ethernet Cabo telefónico Transformador Microfiltro(s) (não fornecido(s) com todos os números de modelos) • Manual de Instalação Rápida 2,4GHz Sem fios-G 802.11g Gateway ADSL Wireless Model No. WAG54G (PT) Model No.
1 Ligar o Gateway ADSL No Passo 1, ligará o Gateway à linha ADSL e aos computadores em casa ou na empresa. Primeiro, certifique-se de que todos os dispositivos com que irá trabalhar estão desligados, incluindo os computadores e o Gateway. A Ligue uma das extremidades do cabo telefónico fornecido à ficha com serviço ADSL. NOTA: Para evitar interferências, poderá ser necessário colocar um microfiltro ou divisor entre o cabo telefónico e a ficha.
Se estiver a ligar mais de quatro computadores ao Gateway, também será necessário ligar um concentrador ou comutador ao Gateway. NOTA: Se a placa Ethernet do computador não estiver configurada, consulte o manual do utilizador da placa Ethernet para obter mais informações. D E Ligue o transformador ao Gateway. Ligue o transformador à tomada. (Figura D) Ligue o Gateway. Em seguida, ligue o primeiro computador que pretende utilizar para configurar o Gateway.
2 Configurar o Gateway ADSL No Passo 2, configurará o Gateway ADSL sem fios G da Linksys para conseguir aceder à Internet através do Fornecedor de serviços Internet (ISP). Necessitará das informações de configuração fornecidas pelo ISP do serviço de ADSL. Caso não tenha estas informações, contacte o ISP antes de continuar. As instruções do ISP indicam como configurar o computador para aceder à Internet.
User Name (Nome de utilizador) e introduza admin em minúsculas no campo Password (Palavra-passe) (admin é o nome de utilizador e palavra-passe predefinidos). Em seguida, clique no botão OK. C Será apresentado o ecrã Basic Setup (Configuração básica) com o separador Setup (Configurar) seleccionado. (Figura C) Com base nas instruções de configuração do ISP, poderá necessitar de fornecer as seguintes informações.
1 RFC 1483 Bridged Endereço IP dinâmico Se o ISP indicar que está a estabelecer ligação através de um endereço IP dinâmico (Figura D1), execute os seguintes passos: a b c Seleccione RFC 1483 Bridged como Encapsulation (Encapsulamento). Seleccione Obtain an IP Address Automatically (Obter automaticamente um endereço IP) em IP Setting (Definição de IP). D1 Dinâmico Instalação rápida Clique no botão Save Settings (Guardar definições) para guardar as definições.
d e f Introduza o Default Gateway address (Endereço predefinido do gateway). Introduza o DNS nos campos Primary (Primário) e/ou Secondary (Secundário). É necessário introduzir pelo menos um endereço de DNS. Clique no botão Save Settings (Guardar definições) para guardar as definições.
seleccione Connect on Demand (Ligar mediante pedido) se for cobrado pelo tempo que está ligado ao ISP. f E F G H 8 Clique no botão Save Settings (Guardar definições) para guardar as definições. Caso ainda não o tenha feito, clique no botão Save Settings (Guardar definições) para guardar as definições de configuração. Feche o Web browser.
® A Division of Cisco Systems, Inc. Innehåll i förpackningen • • • • • • Wireless-G ADSL Gateway Användarhandbok på cd-skiva Ethernet-nätverkskabel Telefonkabel Strömadapter Mikrofilter eller signaldelare (medföljer inte alla modeller) • Snabbinstallation 2,4GHz Wireless-G 802.
1 Ansluta ADSL-gatewayen I steg 1 ansluter du gatewayen till ADSL-linjen och till datorerna hemma eller på jobbet. Börja med att kontrollera att alla aktuella enheter är avstängda, inklusive dator och gateway. A Anslut den ena änden av medföljande telefonkabel till det vägguttag där ADSL-tjänsten installerats. OBS! B C 2 Du undviker störningar genom att placera ett mikrofilter eller en signaldelare (splitter) mellan telefonkabeln och vägguttaget.
Om du ansluter fler än fyra datorer måste du också ansluta en hub eller switch till gatewayen. OBS! D E Om datorns Ethernetadapter inte har konfigurerats finns mer information om hur du går tillväga i användarhandboken till Ethernet-adaptern. Anslut strömadaptern till gatewayen. Anslut strömadaptern till eluttaget (bild D). Slå på strömmen till gatewayen. Starta därefter den första datorn som du vill konfigurera gatewayen med.
2 Konfigurera ADSL-gatewayen I steg 2 konfigurerar du Linksys WirelessG ADSL Gateway så att du får åtkomst till Internet genom din Internetleverantör. Du behöver inställningsinformationen från din ADSL-leverantör. Om du inte har tillgång till denna information bör du kontakta leverantören innan du fortsätter. I instruktionerna från Internetleverantören kan du läsa hur du ställer in datorn för Internet-åtkomst.
Lösenord. (admin är det standardinställda användarnamnet och lösenordet.) Klicka på OK. C Skärmen Basic Setup (Grundläggande inställningar) visas med fliken Setup (Inställningar) vald (bild C). Beroende på inställningsanvisningarna från Internet-leverantören kan du behöva uppge följande information: Virtual Circuit (VPI och VCI) (Virtuell krets): Dessa fält består av två delar: VPI (Virtual Path Identifier) och VCI (Virtual Channel Identifier).
1 RFC 1483 Bridged (Bryggkopplad) Dynamisk IP-adress Om Internet-leverantören anger att du ska ansluta till Internet via en dynamisk IP-adress (bild D1) ska du följa dessa steg: a b c Välj RFC 1483 Bridged (Bryggkopplad) vid Encapsulation (Inkapsling). Välj Obtain an IP Address Automatically (Hämta IP-adress automatiskt) vid IP Settings (IP-inställningar). D1 Dynamisk Snabbinstallation Spara inställningarna genom att klicka på Save Settings (Spara inställningar).
e f Skriv DNS-adressen i fältet Primary (Primär) eller Secondary (Sekundär). Du måste ange minst en DNS-adress. Spara inställningarna genom att klicka på Save Settings (Spara inställningar).
E F G H Du sparar dina inställningar, om du inte redan har gjort det, genom att klicka på Save Settings. Stäng webbläsaren. För trådlös konfigurering: Detaljerade anvisningar om hur du konfigurerar gatewayen för trådlösa nätverk finns i användarhandboken (på engelska). Linksys rekommenderar att du ändrar standardinställningarna för trådlös anslutning och anger lämpliga säkerhetsalternativ. Grattis! Du har nu konfigurerat din gateway.
® A Division of Cisco Systems, Inc. 2,4 GHz Wireless-G 802.11g ADSL Gateway WIRELESS Model No.
Wireless-G ADSL Gateway Copyright and Trademarks Specifications are subject to change without notice. Linksys is a registered trademark or trademark of Cisco Systems, Inc. and/or its affiliates in the U.S. and certain other countries. Copyright © 2004 Cisco Systems, Inc. All rights reserved. Other brands and product names are trademarks or registered trademarks of their respective holders.
Wireless-G ADSL Gateway Table of Contents Chapter 1: Introduction 1 Welcome What’s in this Guide? 1 2 Chapter 2: Planning Your Network The Gateway’s Functions IP Addresses Why do I need a VPN? What is a VPN? Chapter 3: Getting to Know the Wireless-G ADSL Gateway The Back Panel The Front Panel Chapter 4: Connecting the Wireless-G Broadband Gateway 4 4 4 5 6 8 8 9 10 Overview Wired Connection to a Computer Wireless Connection to a Computer 10 11 11 Chapter 5: Configuring the Gateway 13 Overview
Wireless-G ADSL Gateway Environment How to Establish a Secure IPSec Tunnel 62 63 Appendix D: Finding the MAC Address and IP Address for Your Ethernet Adapter 73 Windows 98 or Me Instructions Windows 2000 or XP Instructions Appendix E: Upgrading Firmware Appendix F: Glossary Appendix G: Specifications Appendix H: Regulatory Information Appendix I: Warranty Information Appendix J: Contact Information 73 74 75 76 82 84 87 88
Wireless-G ADSL Gateway List of Figures Figure 2-1: Network Figure 2-2: Computer-to-VPN Gateway Figure 2-3: VPN Gateway-to-VPN Gateway Figure 3-1: Back Panel Figure 3-2: Front Panel Figure 4-1: Ethernet Connection Figure 4-2: ADSL Connection Figure 4-3: Power Connection Figure 5-1: Password Screen Figure 5-2: Basic Setup Tab Figure 5-3: Dynamic IP Figure 5-4: Static IP Figure 5-5: RFC 1483 Routed Figure 5-6: RFC 2516 PPPoE Figure 5-7: RFC 2364 PPPoA Figure 5-8: Bridged Mode Only Figure 5-9: Optional Settin
Wireless-G ADSL Gateway Figure 5-23: VPN Settings Summary Figure 5-24: Manual Key Management Figure 5-25: System Log Figure 5-26: Advanced VPN Tunnel Setup Figure 5-27: Internet Access Figure 5-28: Internet Policy Summary Figure 5-29: List of PCs Figure 5-30: Port Services Figure 5-31: Single Port Forwarding Figure 5-32: Port Range Forwarding Figure 5-33: Port Triggering Figure 5-34: DMZ Figure 5-35: Management Figure 5-36: Reporting Figure 5-37: System Log Figure 5-38: Ping Test Figure 5-39: Factory Defau
Wireless-G ADSL Gateway Figure C-9: New Rule Properties Figure C-10: IP Filter List Tab Figure C-11: Filter Acton Tab Figure C-12: Security Methods Tab Figure C-13: Authentication Methods Figure C-14: Preshared Key Figure C-15: New Preshared Key Figure C-16: Tunnel Setting Tab Figure C-17: Connection Type Tab Figure C-18: Properties Screen Figure C-19: IP Filter List Tab Figure C-20: Filter Action Tab Figure C-21: Authentication Methods Tab Figure C-22: Preshared Key Figure C-23: New Preshared Key Figure C
Wireless-G ADSL Gateway Chapter 1: Introduction Welcome The Linksys Wireless-G ADSL Gateway is the all-in-one solution for Internet connectivity in your home. The ADSL Modem function gives you a blazing fast connection to the Internet, far faster than a dial-up, and without tying up your phone line. Connect your computers to the Gateway via the built-in 4-port 10/100 Ethernet Switch to jump start your home network.
Wireless-G ADSL Gateway What’s in this Guide? This user guide covers the steps for setting up and using the Wireless-G ADSL Gateway. • Chapter 1: Introduction This chapter describes the Wireless-G ADSL Gateway Wireless-G ADSL Gateway applications and this User Guide. • Chapter 2: Planning Your Network This chapter describes the basics of networking. • Chapter 3: Getting to Know the Wireless-G ADSL Gateway This chapter describes the physical features of the Gateway.
Wireless-G ADSL Gateway • Appendix G: Specifications This appendix provides the technical specifications for the Gateway. • Appendix H: Warranty Information This appendix supplies the warranty information for the Gateway. • Appendix I: Regulatory Information This appendix supplies the regulatory information regarding the Gateway. • Appendix J: Contact Information This appendix provides contact information for a variety of Linksys resources, including Technical Support.
Wireless-G ADSL Gateway Chapter 2: Planning Your Network The Gateway’s Functions A Gateway is a network device that connects two networks together. In this instance, the Gateway connects your Local Area Network (LAN), or the group of computers in your home or office, to the Internet. The Gateway processes and regulates the data that travels between these two networks. The Gateway’s NAT feature protects your network of computers so users on the public, Internet side cannot “see” your computers.
Wireless-G ADSL Gateway Since you use the Gateway to share your DSL Internet connection, contact your ISP to find out if they have assigned a static IP address to your account. If so, you will need that static IP address when configuring the Gateway. You can get that information from your ISP. Dynamic IP Addresses A dynamic IP address is automatically assigned to a device on the network, such as computers and print servers.
Wireless-G ADSL Gateway telecommuters, and/or professionals on the road (travelers can connect to a VPN Gateway using any computer with VPN client software that supports IPSec, such as SSH Sentinel.) There are two basic ways to create a VPN connection: • VPN Gateway to VPN Gateway • Computer (using VPN client software that supports IPSec) to VPN Gateway The VPN Gateway creates a “tunnel” or channel between two endpoints, so that data transmissions between them are secure.
Wireless-G ADSL Gateway protect data inside of a local network. But what do you do once information is sent outside of your local network, when emails are sent to their destination, or when you have to connect to your company's network when you are out on the road? How is your data protected? That is when a VPN can help. VPNs secure data moving outside of your network as if it were still within that network. When data is sent out across the Internet from your computer, it is always open to attacks.
Wireless-G ADSL Gateway Chapter 3: Getting to Know the Wireless-G ADSL Gateway The Back Panel Figure 3-1: Back Panel The Gateway’s ports, where a network cable is connected, are located on the back panel. The Gateway’s buttons are also located on the back panel. LINE The LINE port connects to the ADSL line. Ethernet (1-4) The Ethernet ports connect to your computer and other network devices. Power The Power port is where you will connect the power adapter.
Wireless-G ADSL Gateway The Front Panel The Gateway's LEDs, where information about network activity is displayed, are located on the front panel. Figure 3-2: Front Panel Power Green. The Power LED lights up when the Gateway is powered on. Ethernet (1-4) Green. The LAN LED serves two purposes. If the LED is continuously lit, the Gateway is successfully connected to a device through the LAN port. If the LED is blinking, it is an indication of any network activity. WLAN Green.
Wireless-G ADSL Gateway Chapter 4: Connecting the Wireless-G ADSL Gateway Overview The Gateway’s setup consists of more than simply plugging hardware together. You will have to configure your networked computers to accept the IP addresses that the Gateway assigns them (if applicable), and you will also have to configure the Gateway with setting(s) provided by your Internet Service Provider (ISP).
Wireless-G ADSL Gateway Wired Connection to a Computer 1. Before you begin, make sure that all of your network’s hardware is powered off, including the Gateway and all computers. 2. Connect one end of an Ethernet network cable to one of the Ethernet ports (labeled 1-4) on the back of the Gateway (see Figure 4-1), and the other end to an Ethernet port on a computer. 3. Repeat this step to connect more computers, a switch, or other network devices to the Gateway.
Wireless-G ADSL Gateway Wireless Connection to a Computer If you want to use a wireless connection to access the Gateway, follow these instructions: 1. Before you begin, make sure that all of your network’s hardware is powered off, including the Gateway and all computers. NOTE: A small device called a microfilter (not included) may be necessary between each phone and wall jack to prevent interference. Contact your ISP if you have any questions.
Wireless-G ADSL Gateway Chapter 5: Configuring the Gateway Overview Follow the steps in this chapter and use the Gateway’s web-based utility to configure the Gateway. This chapter will describe each web page in the Utility and each page’s key functions. The utility can be accessed via your web browser through use of a computer connected to the Gateway.
Wireless-G ADSL Gateway • VPN. To enable or disable IPSec and/or PPTP Pass-through, and set up VPN tunnels, use this screen. Access Restrictions • Internet Access. This screen allows you to prevent or permit only certain users from attaching to your network. Applications & Gaming • Single Port Forwarding. Use this screen to set up common services or applications on your network. • Port Range Forwarding. To set up public services or other specialized Internet applications on your network, click this tab.
Wireless-G ADSL Gateway How to Access the Web-based Utility To access the web-based utility, launch Internet Explorer or Netscape Navigator, and enter the Gateway’s default IP address, 192.168.1.1, in the Address field. Then press Enter. A password request page, shown in Figure 5-1 will appear. (non-Windows XP users will see a similar screen.) Enter admin (the default user name) in the User Name field, and enter admin (the default password) in the Password field. Then click the OK button.
Wireless-G ADSL Gateway • Virtual Circuit: Enter the VPI and VCi ranges in the fields. • Internet Connection Type. The Gateway supports five Encapsulations: RFC 1483 Bridged, RFC 1483 Routed, RFC 2516 PPPoE, RFC 2364 PPPoA, and Bridged Mode Only. Each Basic Setup screen and available features will differ depending on what type of encapsulation you select. RFC 1483 Bridged Dynamic IP IP Settings. Select Obtain an IP Address Automatically if your ISP says you are connecting through a dynamic IP address.
Wireless-G ADSL Gateway RFC 1483 Routed If you are required to use RFC 1483 Routed, then select RFC 1483 Routed. • IP Address. This is the Gateway’s IP address, when seen from the WAN, or the Internet. Your ISP will provide you with the IP Address you need to specify here. • Subnet Mask. This is the Gateway’s Subnet Mask. Your ISP will provide you with the Subnet Mask. • Default Gateway. Your ISP will provide you with the Default Gateway Address, which is the ISP server’s IP address. • Primary DNS.
Wireless-G ADSL Gateway When finished making your changes on this tab, click the Save Settings button to save these changes, or click the Cancel Changes button to undo your changes. RFC 2364 PPPoA Some DSL-based ISPs use PPPoA (Point-to-Point Protocol over ATM) to establish Internet connections. If you are connected to the Internet through a DSL line, check with your ISP to see if they use PPPoA. If they do, you will have to enable PPPoA. • User Name and Password.
Wireless-G ADSL Gateway Optional Settings (Required by some ISPs) • Host Name and Domain Name. These fields allow you to supply a host and domain name for the Gateway. Some ISPs require these names as identification. You may have to check with your ISP to see if your broadband Internet service has been configured with a host and domain name. In most cases, leaving these fields blank will work. • MTU.
Wireless-G ADSL Gateway The DDNS Tab The Gateway offers a Dynamic Domain Name System (DDNS) feature. DDNS lets you assign a fixed host and domain name to a dynamic Internet IP address. It is useful when you are hosting your own website, FTP server, or other server behind the Gateway. Before you can use this feature, you need to sign up for DDNS service at DynDNS.org. DDNS DDNS Service. If your DDNS service is provided by DynDNS.org, then select DynDNS.org in the drop-down menu. (See Figure 5-10.
Wireless-G ADSL Gateway Advanced Routing Tab The Advanced Routing screen allows you to configure the dynamic routing and static routing settings. Advanced Routing • Operating Mode. NAT is a security feature that is enabled by default. It enables the Gateway to translate IP addresses of your local area network to a different IP address for the Internet. To disable NAT, click the Disabled radio button. • Dynamic Routing.
Wireless-G ADSL Gateway • Interface. Select LAN & Wireless or Internet, depending on the location of the static route’s final destination. • Show Routing Table. Click the Show Routing Table button to open a screen displaying how data is routed through your LAN. For each route, the Destination IP address, Subnet Mask, Gateway, and Interface are displayed. Click the Refresh button to update the information. Click the Close button to return to the previous screen.
Wireless-G ADSL Gateway The Wireless Tab Basic Wireless Settings Tab This screen allows you to choose your wireless network mode and wireless security. Wireless Network • Wireless Network Mode. If you have 802.11g and 802.11b devices in your network, then keep the default setting, Mixed. If you have only 802.11g devices, select 802.11g. If you have only 802.11b devices, select 802.11b. If you want to disable wireless networking, select Disabled. • Wireless Network Name (SSID).
Wireless-G ADSL Gateway Wireless Security Tab The Wireless Security settings configure the security of your wireless network. There are three wireless security mode options supported by the Router: WPA Pre-Shared Key, WPA RADIUS, and WEP. (WPA stands for Wi-Fi Protected Access, which is a security standard stronger than WEP encryption. WEP stands for Wired Equivalent Privacy, while RADIUS stands for Remote Authentication Dial-In User Service.) These are briefly discussed here.
Wireless-G ADSL Gateway WEP. WEP is a basic encryption method, which is not as secure as WPA. To use WEP, select a Default Key (choose which Key to use), and a level of WEP encryption, 64 bits 10 hex digits or 128 bits 26 hex digits. Then either generate a WEP key using a Passphrase or enter the WEP key manually. • WEP Encryption. An acronym for Wired Equivalent Privacy, WEP is an encryption method used to protect your wireless data communications.
Wireless-G ADSL Gateway Wireless Access Tab Wireless Network Access Wireless Network Access. If you select Allow All, all computers will be allowed access to the wireless network. To restrict access to the network, select Restrict Access, then select Prevent to prevent access or Permit only to permit access. Click the Edit MAC Address Access List button, and the screen will appear. Select the MAC Address from the list and click Wireless Client MAC List..
Wireless-G ADSL Gateway • Fragmentation Threshold. This value should remain at its default setting of 2346. The range is 256-2346 bytes. It specifies the maximum size for a packet before data is fragmented into multiple packets. If you experience a high packet error rate, you may slightly increase the Fragmentation Threshold. Setting the Fragmentation Threshold too low may result in poor network performance. Only minor modifications of this value are recommended. • RTS Threshold.
Wireless-G ADSL Gateway The Security Tab Firewall When you click the Security tab, you will see the Firewall screen. This screen contains Filters and the option to Block WAN Requests. Filters block specific Internet data types and block anonymous Internet requests. To add Firewall Protection, click Enable. If you do not want Firewall Protection, click Disable. Additional Filters • Filter Proxy. Use of WAN proxy servers may compromise the Gateway's security.
Wireless-G ADSL Gateway VPN Virtual Private Networking (VPN) is a security measure that basically creates a secure connection between two remote locations. The VPN screen allows you to configure your VPN settings to make your network more secure. VPN Passthrough • IPSec Passthrough. Internet Protocol Security (IPSec) is a suite of protocols used to implement secure exchange of packets at the IP layer. To allow IPSec Passthrough, click the Enable button.
Wireless-G ADSL Gateway correctly, or the connection cannot be made. Remember, this is NOT the IP Address of the local VPN Gateway, but the IP Address of the remote VPN Gateway or device with which you wish to communicate. If you enter an IP address, only the specific IP Address will be able to acess the tunnel. If you select Any, any IP Address can access the tunnel. • Encryption. Using Encryption also helps make your connection more secure.
Wireless-G ADSL Gateway When finished making your changes on this tab, click the Save Settings button to save these changes, or click the Cancel Changes button to undo your changes. Advanced VPN Tunnel Setup From the Advanced IPSec VPN Tunnel Setup screen you can adjust the settings for specific VPN tunnels. Phase 1 • Phase 1 is used to create a security association (SA), often called the IKE SA.
Wireless-G ADSL Gateway • Key Life Time. In the Key Lifetime field, you may select to have the key expire at the end of a time period of your choosing. Enter the number of seconds you’d like the key to be used until a re-key negotiation between each endpoint is completed. Other Setting • NetBIOS broadcast. Check the box next to NetBIOS broadcast to enable NetBIOS traffic to pass through the VPN tunnel. • Anti-replay. Check the box next to Anti-replay to enable the Anti-replay protection.
Wireless-G ADSL Gateway The Access Restrictions Tab Internet Access The Access Restrictions tab allows you to block or allow specific kinds of Internet usage. You can set up Internet access policies for specific computers and set up filters by using network port numbers. • Internet Access Policy. Multiple Filters can be saved as Internet Access Policies. When you wish to edit one, select the number of the Policy from the drop-down menu. The tab will change to reflect the settings of this Policy.
Wireless-G ADSL Gateway 3. If you wish to Deny or Allow Internet access for those computers you listed on the List of PCs screen, click the option. 4. You can filter access to various services accessed over the Internet, such as FTP or Telnet, by selecting a service from the drop-down menus next to Blocked Services. If a service isn’t listed, you can click the Add/ Edit Service button to open the Port Services screen and add a service to the list.
Wireless-G ADSL Gateway The Applications and Gaming Tab Single Port Forwarding The Single Port Forwarding screen provides options for customization of port services for common applications. When users send this type of request to your network via the Internet, the Gateway will forward those requests to the appropriate computer.
Wireless-G ADSL Gateway Port Triggering Port Triggering is used for special applications that can request a port to be opened on demand. For this feature, the Gateway will watch outgoing data for specific port numbers. The Gateway will remember the IP address of the computer that sends a transmission requesting data, so that when the requested data returns through the Gateway, the data is pulled back to the proper computer by way of IP address and port mapping rules. • Application.
Wireless-G ADSL Gateway The Administration Tab Management The Management screen allows you to change the Gateway’s access settings as well as configure the SNMP (Simple Network Management Protocol) and UPnP (Universal Plug and Play) features. Gateway Access Local Gateway Access. To ensure the Gateway’s security, you will be asked for your password when you access the Gateway’s Web-based Utility. The default username and password is admin. • Gateway Username. Enter the default admin.
Wireless-G ADSL Gateway UPnp. To enable UPnP, click Enabled. WT-82 (TR-064) WT-82 is a method for configuring your ADSL Gateway through software on your PC inside the LAN. Enable WT-82 to use WT-82 to configure your network. When finished making your changes on this tab, click the Save Settings button to save these changes, or click the Cancel Changes button to undo your changes.
Wireless-G ADSL Gateway Diagnostics Ping Test Ping Test Parameters • Ping Target IP. Enter the IP Address that you want to ping in the field. This can be either a local (LAN) IP or an Internet (WAN) IP address. • Ping Size. Enter the size of the ping packets. • Number of Pings. Enter the number of times that you want to ping. • Ping Interval. Enter the ping interval in milliseconds. • Ping Timeout. Enter the time in milliseconds. • Ping Result. The results of the ping test will be shown here.
Wireless-G ADSL Gateway Firmware Upgrade The ADSL Gateway allows you to upgrade firmware for the WAN (Internet) side of the Gateway and the LAN (network) side of the Gateway. Upgrade from WAN To upgrade the Gateway’s firmware from the WAN : Enter the URL for the firmware in the URL field, then click the Upgrade button, and follow the instructions there. Upgrade from LAN To upgrade the Gateway’s firmware from the LAN: 1.
Wireless-G ADSL Gateway The Status Tab Gateway This screen displays information about your Gateway and its WAN (Internet) Connections. Gateway Information Gateway Information displays the Software Version, MAC Address, and Current Time. Internet Connections The Internet Connections will be displayed after selecting the Internet connection number from the drop-down menu. They are the Login Type, interface, IP Address, Subnet Mask, Default Gateway, and DNS 1 and 2 servers. DHCP Renew.
Wireless-G ADSL Gateway Local Network The Local Network information that is displayed is the local Mac Address, IP Address, Subnet Mask, and DHCP Server, Start IP Address, and End IP Address. To view the DHCP Clients Table, click the DHCP Clients Table button. DHCP Clients Table. Click the DHCP Clients Table button to show the current DHCP Client data. You will see the MAC address, computer name, and IP address of the network clients using the DHCP server.
Wireless-G ADSL Gateway Wireless The Wireless network information that is displayed is the Wireless Firmware Version, MAC Address, Mode, SSID, DHCP Server, Channel, and Encryption Function. Click the Wireless Clients Connected button to view the wireless clients connected to the Gateway. Click the Refresh button if you want to Refresh your screen. Click the Close button to close the screen.
Wireless-G ADSL Gateway DSL Connection The DSL Connection information that is displayed is the Status, Downstream Rate, Upstream Rate, The PVC Connection information that is displayed is Encapsulation, Multiplexing, QoS, Pcr Rate, Scr Rate, Autodetect, VPI, VCI, and PVC Status. Click the Refresh button if you want to Refresh your screen.
Wireless-G ADSL Gateway Appendix A: Troubleshooting This appendix consists of two parts: “Common Problems and Solutions” and “Frequently Asked Questions.” Provided are possible solutions to problems that may occur during the installation and operation of the Gateway. Read the descriptions below to help you solve your problems. If you can’t find an answer here, check the Linksys international website at www.linksys.com/international. Common Problems and Solutions 1.
Wireless-G ADSL Gateway 7. Toward the bottom of the window, select Use the following DNS server addresses, and enter the Preferred DNS server and Alternative DNS server (provided by your ISP). Contact your ISP or go on its website to find the information. 8. Click the OK button in the Internet Protocol (TCP/IP) Properties window, and click the OK button in the Local Area Connection Properties window. 9. Restart the computer if asked.
Wireless-G ADSL Gateway For Windows 98 and Me: • Click Start and Run. In the Open field, type in command. Press the Enter key or click the OK button. For Windows NT, 2000, and XP: • Click Start and Run. In the Open field, type cmd. Press the Enter key or click the OK button. In the command prompt, type ping 192.168.1.1 and press the Enter key. • If you get a reply, the computer is communicating with the Gateway.
Wireless-G ADSL Gateway 3. Refer to “Problem #10: I need to remove the proxy settings or the dial-up pop-up window (for PPPoE users).” 5. I can’t get my Virtual Private Network (VPN) working through the Gateway. Access the Gateway’s web interface by going to http://192.168.1.1 or the IP address of the Gateway, and go to the Security tab. Make sure you have IPsec passthrough and/or PPTP pass-through enabled.
Wireless-G ADSL Gateway field provided. Check “Appendix D: Finding the MAC Address and IP Address for Your Ethernet Adapter” for details on getting an IP address. 6. Check the Enable option for the port services you want to use. Consider the example below: Customized Application Web server FTP server SMTP (outgoing) POP3 (incoming) External Port 80 to 80 21 to 21 25 to 25 110 to 110 TCP X X X X UDP IP Address 192.168.1.100 192.168.1.101 192.168.1.102 192.168.1.
Wireless-G ADSL Gateway 8. I can’t get the Internet game, server, or application to work. If you are having difficulties getting any Internet game, server, or application to function properly, consider exposing one computer to the Internet using DeMilitarized Zone (DMZ) hosting. This option is available when an application requires too many ports or when you are not sure which port services to use.
Wireless-G ADSL Gateway • For Netscape 4.7 or higher: 1. Start Netscape Navigator, and click Edit, Preferences, Advanced, and Proxies. 2. Make sure you have Direct connection to the Internet selected on this screen. 3. Close all the windows to finish. 11. To start over, I need to set the Gateway to factory default. Hold the Reset button for 10 seconds and then release it. This will return the Internet settings, password, forwarding, and other settings on the Gateway to the factory default settings.
Wireless-G ADSL Gateway 1. To connect to the Gateway, go to the web browser, and enter http://192.168.1.1 or the IP address of the Gateway. 2. Enter the username and password, if asked. (The default username and password is admin.) 3. On the Setup screen, select the option Keep Alive, and set the Redial Period option at 20 (seconds). 4. Click the Save Settings button. Click the Status tab, and click the Connect button. 5. You may see the login status display as Connecting.
Wireless-G ADSL Gateway • If the Gateway is configured correctly, check your Internet connection (DSL/cable modem, etc.) to see if it is working correctly. You can remove the Gateway to verify a direct connection. • Manually configure the TCP/IP settings with a DNS address provided by your ISP. • Make sure that your browser is set to connect directly and that any dial-up is disabled. For Internet Explorer, click Tools, Internet Options, and then the Connection tab.
Wireless-G ADSL Gateway Does the Gateway support ICQ send file? Yes, with the following fix: click ICQ menu -> preference -> connections tab->, and check I am behind a firewall or proxy. Then set the firewall time-out to 80 seconds in the firewall setting. The Internet user can then send a file to a user behind the Gateway. I set up an Unreal Tournament Server, but others on the LAN cannot join.
Wireless-G ADSL Gateway Gateway’s web-based utility. If the Gateway’s Internet connection is working well, there is no need to download a newer firmware version, unless that version contains new features that you would like to use. Will the Gateway function in a Macintosh environment? Yes, but the Gateway’s setup pages are accessible only through Internet Explorer 4.0 or Netscape Navigator 4.0 or higher for Macintosh. I am not able to get the web configuration screen for the Gateway.
Wireless-G ADSL Gateway How can I check whether I have static or DHCP IP Addresses? Consult your ISP to obtain this information. How do I get mIRC to work with the Gateway? Under the Port Forwarding tab, set port forwarding to 113 for the computer on which you are using mIRC. Can the Gateway act as my DHCP server? Yes. The Gateway has DHCP server software built-in.
Wireless-G ADSL Gateway To achieve true seamless connectivity, the wireless LAN must incorporate a number of different functions. Each node and access point, for example, must always acknowledge receipt of each message. Each node must maintain contact with the wireless network even when not actually transmitting data. Achieving these functions simultaneously requires a dynamic RF networking technology that links access points and nodes.
Wireless-G ADSL Gateway Will the information be intercepted while it is being transmitted through the air? WLAN features two-fold protection in security. On the hardware side, as with Direct Sequence Spread Spectrum technology, it has the inherent security feature of scrambling. On the software side, WLAN offers the encryption function (WEP) to enhance security and access control.
Wireless-G ADSL Gateway Appendix B: Wireless Security Important Information for Wireless Products Linksys wants to make wireless networking as safe and easy for you as possible. So, please keep the following points in mind whenever setting up or using your wireless network. 1. Performance. The actual performance of your wireless network depends on a number of factors, including: In an Infrastructure environment, your distance from the access point.
Wireless-G ADSL Gateway E. Change the SSID periodically. F. Enable WEP 128-bit Encryption. Please note that this will reduce your network performance. G. Change the WEP encryption keys periodically. For information on implementing these security features, please refer to the User Guide. 4. Security Threats Facing Wireless Networks Wireless networks are easy to find. Hackers know that in order to join a wireless network, wireless networking products first listen for “beacon messages”.
Wireless-G ADSL Gateway MAC Addresses. Enable MAC Address filtering. MAC Address filtering will allow you to provide access to only those wireless nodes with certain MAC Addresses. This makes it harder for a hacker to access your network with a random MAC Address. WEP Encryption. Wired Equivalent Privacy (WEP) is often looked upon as a panacea for wireless security concerns. This is overstating WEP’s ability. Again, this can only provide enough security to make a hacker’s job more difficult.
Wireless-G ADSL Gateway Appendix C: Configuring IPSec between a Windows 2000 or XP Computer and the Gateway Introduction This document demonstrates how to establish a secure IPSec tunnel using preshared keys to join a private network inside the Gateway and a Windows 2000 or XP computer. You can find detailed information on configuring the Windows 2000 server at the Microsoft website: Microsoft KB Q252735 - How to Configure IPSec Tunneling in Windows 2000 http://support.microsoft.
Wireless-G ADSL Gateway How to Establish a Secure IPSec Tunnel Step 1: Create an IPSec Policy 1. Click the Start button, select Run, and type secpol.msc in the Open field. The Local Security Setting screen will appear as shown in Figure C-1. Figure C-1: Local Security Screen 2. Right-click IP Security Policies on Local Computer (Win XP) or IP Security Policies on Local Machine (Win 2000), and click Create IP Security Policy. 3.
Wireless-G ADSL Gateway 3. The Filters Properties screen will appear, as shown in Figure C-5. Select the Addressing tab. In the Source address field, select My IP Address. In the Destination address field, select A specific IP Subnet, and fill in the IP Address: 192.168.1.0 and Subnet mask: 255.255.255.0. (These are the Router’s default settings. If you have changed these settings, enter your new values.) 4.
Wireless-G ADSL Gateway 7. The IP Filter List screen should appear, as shown in Figure C-7. Enter an appropriate name, such as Router>win for the filter list, and de-select the Use Add Wizard check box. Click the Add button. 8. The Filters Properties screen will appear, as shown in Figure C-8. Select the Addressing tab. In the Source address field, select A specific IP Subnet, and enter the IP Address: 192.168.1.0 and Subnet mask: 255.255.255.0.
Wireless-G ADSL Gateway Step 3: Configure Individual Tunnel Rules Tunnel 1: win->Router 1. From the IP Filter List tab, shown in Figure C-10, click the filter list win->Router. 2. Click the Filter Action tab (as in Figure C-11), and click the filter action Require Security radio button. Then, click the Edit button. Figure C-10: IP Filter List Tab 3.
Wireless-G ADSL Gateway 4. Select the Authentication Methods tab, shown in Figure C-13, and click the Edit button. 5. Change the authentication method to Use this string to protect the key exchange (preshared key), as shown in Figure C-14, and enter the preshared key string, such as XYZ12345. Click the OK button. Figure C-13: Authentication Methods 6. This new Preshared key will be displayed in Figure C-15.
Wireless-G ADSL Gateway 7. Select the Tunnel Setting tab, shown in Figure C-16, and click The tunnel endpoint is specified by this IP Address radio button. Then, enter the Router’s WAN IP Address. 8. Select the Connection Type tab, as shown in Figure C-17, and click All network connections. Then, click the OK or Close button to finish this rule. Figure C-16: Tunnel Setting Tab Tunnel 2: Router->win 9.
Wireless-G ADSL Gateway 10. Go to the IP Filter List tab, and click the filter list Router->win, as shown in Figure C-19. 11. Click the Filter Action tab, and select the filter action Require Security, as shown in Figure C-20. Then, click the Edit button. From the Security Methods tab, shown previously in Figure C-12, verify that the Negotiate security option is enabled, and deselect the Accept unsecured communication, but always respond using IPSec check box.
Wireless-G ADSL Gateway 13. Change the authentication method to Use this string to protect the key exchange (preshared key), and enter the preshared key string, such as XYZ12345, as shown in Figure C-22. (This is a sample key string. Yours should be a key that is unique but easy to remember.) Then click the OK button. 14. This new Preshared key will be displayed in Figure C-23. Click the Apply button to continue, if it appears on your screen, otherwise proceed to the next step.
Wireless-G ADSL Gateway 16. Click the Connection Type tab, shown in Figure C-25, and select All network connections. Then click the OK or Close button to finish. 17. From the Rules tab, shown in Figure C-26, click the OK or Close button to return to the secpol screen. Figure C-25: Connection Type Step 4: Assign New IPSec Policy In the IP Security Policies on Local Computer window, shown in Figure C-27, right-click the policy named to_Router, and click Assign. A green arrow appears in the folder icon.
Wireless-G ADSL Gateway Step 5: Create a Tunnel Through the Web-Based Utility 1. Open your web browser, and enter 192.168.1.1 in the Address field. Press the Enter key. 2. When the User name and Password field appears, enter the default user name and password admin. Press the Enter key. 3. From the Setup tab, click the VPN tab. 4. From the VPN tab, shown in Figure C-28, select the tunnel you wish to create in the Select Tunnel Entry dropdown box. Then click Enabled.
Wireless-G ADSL Gateway Appendix D: Finding the MAC Address and IP Address for Your Ethernet Adapter This section describes how to find the MAC address for your computer’s Ethernet adapter so you can use the MAC filtering feature of the Gateway. You can also find the IP address of your computer’s Ethernet adapter. This IP address is used for the Gateway’s filtering, forwarding, and/or DMZ features. Follow the steps in this appendix to find the adapter’s MAC or IP address in Windows 98, Me, 2000, or XP.
Wireless-G ADSL Gateway Windows 2000 or XP Instructions 1. Click Start and Run. In the Open field, enter cmd. Press the Enter key or click the OK button. Note: The MAC address is also called the Physical Address. 2. At the command prompt, enter ipconfig /all. Then press the Enter key. 3. Write down the Physical Address as shown on your computer screen (Figure D-3); it is the MAC address for your Ethernet adapter. This appears as a series of numbers and letters.
Wireless-G ADSL Gateway Appendix E: Upgrading Firmware The ADSL Gateway allows you to upgrade firmware for the WAN (Internet) side of the Gateway and the LAN (network) side of the Gateway through the Web-Utility's Firmware Upgrade tab from the Administration tab. Follow these instructions:. Upgrade from WAN To upgrade the Gateway’s firmware from the WAN : Enter the URL for the firmware in the URL field, then click the Upgrade button, and follow the instructions there.
Wireless-G ADSL Gateway Appendix F: Glossary 802.11a - An IEEE wireless networking standard that specifies a maximum data transfer rate of 54Mbps and an operating frequency of 5GHz. 802.11b - An IEEE wireless networking standard that specifies a maximum data transfer rate of 11Mbps and an operating frequency of 2.4GHz. 802.11g - An IEEE wireless networking standard that specifies a maximum data transfer rate of 54Mbps, an operating frequency of 2.4GHz, and backward compatibility with 802.11b devices.
Wireless-G ADSL Gateway Buffer - A block of memory that temporarily holds data to be worked on later when a device is currently too busy to accept the data. Cable Modem - A device that connects a computer to the cable television network, which in turn connects to the Internet. CSMA/CA (Carrier Sense Multiple Access/Collision Avoidance) - A method of data transfer that is used to prevent data loss in a network. CTS (Clear To Send) - A signal sent by a device to indicate that it is ready to receive data.
Wireless-G ADSL Gateway Dynamic IP Address - A temporary IP address assigned by a DHCP server. Encryption - Encoding data to prevent it from being read by unauthorized people. Ethernet - An IEEE standard network protocol that specifies how data is placed on and retrieved from a common transmission medium. Finger - A program that tells you the name associated with an e-mail address. Firewall - Security measures that protect the resources of a local network from intruders. Firmware - 1.
Wireless-G ADSL Gateway IPCONFIG - A Windows 2000 and XP utility that displays the IP address for a particular networking device. IPSec (Internet Protocol Security) - A VPN protocol used to implement secure exchange of packets at the IP layer. ISM band - Radio band used in wireless networking transmissions. ISP (Internet Service Provider) - A company that provides access to the Internet. LAN (Local Area Network) - The computers and networking products that make up the network in your home or office.
Wireless-G ADSL Gateway PPPoE (Point to Point Protocol over Ethernet) - A type of broadband connection that provides authentication (username and password) in addition to data transport. PPTP (Point-to-Point Tunneling Protocol) - A VPN protocol that allows the Point to Point Protocol (PPP) to be tunneled through an IP network. This protocol is also used as a type of broadband connection in Europe. Preamble - Part of the wireless signal that synchronizes network traffic.
Wireless-G ADSL Gateway TCP/IP (Transmission Control Protocol/Internet Protocol) - A network protocol for transmitting data that requires acknowledgement from the recipient of data sent. Telnet - A user command and TCP/IP protocol used for accessing remote computers. TFTP (Trivial File Transfer Protocol) - A version of the TCP/IP FTP protocol that uses UDP and has no directory or password capability. Throughput - The amount of data moved successfully from one node to another in a given time period.
Wireless-G ADSL Gateway Appendix G: Specifications Standards IEEE 802.11g, IEEE 802.11b, IEEE 802.3u, IEEE 802.3, G.992.1 (G.dmt), G.992.2 (G.lite), ITU G.992.3, ITU G.992.5, ANSI T1.413i2, WAG54G-E1: Annex-B, WAG54G-DE: UR-2 Ports Power, LINE (ADSL), Ethernet (1-4) Buttons One Reset Button, One On/Off Switch Cabling Type UTP CAT 5 or better, Phone Cable (POTS) Data Rate Up to 54Mbps (wireless) Up to 8Mbps downstream ADSL Up to 800kbps upstream ADSL Transmit Power 18 dBm on 802.
Wireless-G ADSL Gateway Storage Temp.
Wireless-G ADSL Gateway Appendix H: Regulatory Information FCC Statement This product has been tested and complies with the specifications for a Class B digital device, pursuant to Part 15 of the FCC Rules. These limits are designed to provide reasonable protection against harmful interference in a residential installation.
Wireless-G ADSL Gateway Compliance Information for 2.
Wireless-G ADSL Gateway NOTE: If you need any technical documentation, see the “How to Access Technical Documents on www.linksys.com/international” section for more information.
Wireless-G ADSL Gateway National Restrictions This product may be used in all EU countries (and other countries following the EU directive 1999/5/EC) without any limitation except for the countries mentioned below: Ce produit peut être utilisé dans tous les pays de l’UE (et dans tous les pays ayant transposés la directive 1999/5/CE) sans aucune limitation, excepté pour les pays mentionnés ci-dessous: Questo prodotto è utilizzabile in tutte i paesi EU (ed in tutti gli altri paesi che seguono le direttive EU
Wireless-G ADSL Gateway Italy This product meets the National Radio Interface and the requirements specified in the National Frequency Allocation Table for Italy. Unless operating within the boundaries of the owner’s property, the use of this 2.4 GHz Wireless LAN product requires a ‘general authorization’. Please check with http://www.comunicazioni.it/it/ for more details.
Wireless-G ADSL Gateway Windows XP 1. Double-click the Wireless icon in your desktop’s system tray. 2. Open the Wireless Network Connection window. 3. Click the Properties button. 4. Select the General tab, and click the Configure button. 5. In the Properties window, click the Advanced tab. 6. Select Power Output. 7. From the pull-down menu on the right, select the wireless adapter’s power output percentage. Windows 2000 1. Open the Control Panel. 2. Double-click Network and Dial-Up Connections. 3.
Wireless-G ADSL Gateway Appendix I: Warranty Information Linksys warrants to You that, for a period of three years (the “Warranty Period”), your Linksys Product will be substantially free of defects in materials and workmanship under normal use. Your exclusive remedy and Linksys' entire liability under this warranty will be for Linksys at its option to repair or replace the Product or refund Your purchase price less any rebates. This limited warranty extends only to the original purchaser.
Wireless-G ADSL Gateway Appendix J: Contact Information Need to contact Linksys? Visit us online for information on the latest products and updates to your existing products at: http://www.linksys.com/international If you experience problems with any Linksys product, you can e-mail us at: In Europe E-mail Address Austria support.at@linksys.com Belgium support.be@linksys.com Denmark support.dk@linksys.com France support.fr@linksys.com Germany support.de@linksys.com Italy support.it@linksys.
® A Division of Cisco Systems, Inc. 2,4 GHz Sans fil G 802.11g SANS FIL Modèle réf.
Passerelle ADSL sans fil G Copyright et marques commerciales Les spécifications peuvent être modifiées sans préavis. Linksys est une marque déposée ou une marque commerciale de Cisco Systems, Inc. et/ou ses filiales aux Etats-Unis et dans certains autres pays. Copyright © 2004 Cisco Systems, Inc. Tous droits réservés. Les autres noms de marque et de produit sont des marques commerciales ou déposées de leur détenteur respectif.
Passerelle ADSL sans fil G Table des matières Chapitre 1 : Introduction Bienvenue Contenu de ce guide Chapitre 2 : Planification de la configuration de votre réseau Fonctions de la passerelle Adresses IP Qu'est ce qu'un VPN ? Pourquoi ai-je besoin d'un VPN ? Chapitre 3 : Présentation de la passerelle ADSL sans fil G Panneau arrière Panneau avant Chapitre 4 : Connexion de la passerelle ADSL sans fil G Présentation Connexion câblée à un ordinateur Connexion sans fil à un ordinateur Chapitre 5 : Configura
Passerelle ADSL sans fil G Annexe C : Configuration de IPSec entre un ordinateur Windows 2000 ou Windows XP et la passerelle Introduction Environnement Comment établir un tunnel IPSec sécurisé ? Annexe D : Recherche des adresses MAC et IP de votre adaptateur Ethernet Instructions pour Windows 98 ou Me Instructions pour Windows 2000 ou Windows XP Annexe E : Mise à niveau du micrologiciel Annexe F : Glossaire Annexe G : Spécifications Annexe H : Réglementation Annexe I : Informations de garantie Annexe J :
Passerelle ADSL sans fil G Liste des figures Figure 2-1 : Réseau Figure 2-2 : Passerelle connectant l'ordinateur et le réseau VPN Figure 2-3 : Passerelle VPN vers passerelle VPN Figure 3-1 : Panneau arrière Figure 3-2 : Panneau avant Figure 4-1 : Connexion Ethernet Figure 4-2 : Connexion de l'ADSL Figure 4-3 : Connexion de l'alimentation Figure 5-1 : Ecran de saisie du mot de passe Figure 5-2 : Onglet Configuration de base Figure 5-3 : Adresse IP dynamique Figure 5-4 : Adresse IP statique Figure 5-5 : RFC
Passerelle ADSL sans fil G Figure 5-23 : Récapitulatif des paramètres VPN Figure 5-24 : Gestion de clé manuelle Figure 5-25 : Fichier journal système Figure 5-26 : Configuration avancée du tunnel VPN IPSec Figure 5-27 : Accès Internet Figure 5-28 : Récapitulatif de la stratégie Internet Figure 5-29 : Liste des ordinateurs Figure 5-30 : Services des ports Figure 5-31 : Transfert de connexion unique Figure 5-32 : Transfert de connexion Figure 5-33 : Déclenchement de connexion Figure 5-34 : DMZ Figure 5-35 :
Passerelle ADSL sans fil G Figure C-7 : Liste de filtres IP Figure C-8 : Propriétés de filtre Figure C-9 : Propriétés de Nouvelle règle Figure C-10 : Onglet Liste de filtres IP Figure C-11 : Onglet Action de filtrage Figure C-12 : Onglet Méthodes de sécurité Figure C-13 : Méthodes d'authentification Figure C-14 : Clé pré-partagée Figure C-15 : Nouvelle clé pré-partagée Figure C-16 : Onglet Paramètres du tunnel Figure C-17 : Onglet Type de connexion Figure C-18 : Ecran Propriétés Figure C-19 : Onglet Liste
Passerelle ADSL sans fil G Chapitre 1 : Introduction Bienvenue La passerelle ADSL sans fil G de Linksys est la solution tout-en-un pour la connectivité Internet à la maison. La fonction modem ADSL vous offre une connexion Internet ultra-rapide, bien plus rapide que par ligne commutée et sans monopoliser votre ligne téléphonique. Connectez vos ordinateurs à la passerelle via le commutateur Ethernet 4 ports 10/100 intégré pour démarrer rapidement votre réseau.
Passerelle ADSL sans fil G Contenu de ce guide Ce guide de l'utilisateur présente les étapes inhérentes à l'installation et à l'utilisation de la passerelle ADSL sans fil G. • Chapitre 1 : Introduction Ce chapitre présente les applications de la passerelle ADSL sans fil G ainsi que le présent Guide de l'utilisateur. • Chapitre 2 : Planification de la configuration de votre réseau Ce chapitre décrit les éléments de base nécessaires à la mise en place d'un réseau.
Passerelle ADSL sans fil G • Annexe F : Glossaire Cette annexe propose un glossaire des termes fréquemment utilisés dans le cadre des réseaux. • Annexe G : Spécifications Cette annexe décrit les spécifications techniques de la passerelle. • Annexe H : Informations de garantie Cette annexe fournit des informations relatives à la garantie de la passerelle. • Annexe I : Réglementation Cette annexe fournit des informations relatives à la réglementation relative à l'utilisation de la passerelle.
Passerelle ADSL sans fil G Chapitre 2 : Planification de la configuration de votre réseau Fonctions de la passerelle Une passerelle est un périphérique réseau qui connecte deux réseaux entre eux. Dans ce cas, la passerelle connecte à Internet votre réseau local (LAN) ou un groupe d'ordinateurs situés à votre bureau ou à votre domicile. La passerelle traite et régule les données transmises entre ces deux réseaux.
Passerelle ADSL sans fil G Etant donné que vous utilisez la passerelle pour partager votre connexion Internet DSL, contactez votre fournisseur d'accès Internet pour savoir si une adresse IP statique à été attribuée à votre compte. Si c'est le cas, vous aurez besoin de cette adresse IP statique lors de la configuration de votre passerelle. Vous pouvez obtenir cette information en contactant votre fournisseur d'accès Internet.
Passerelle ADSL sans fil G Le VPN (réseau privé virtuel) est une solution offrant un excellent rapport coût/efficacité, qui se substitue à la ligne louée, privée et dédiée d'un réseau privé. Grâce à l'utilisation des techniques standard de l'industrie en matière de cryptage et d'authentification, appelées IPSec (abréviation de IP Security), le VPN crée une connexion sécurisée qui fonctionne effectivement comme si vous étiez directement connecté à votre réseau local.
Passerelle ADSL sans fil G Pour obtenir de plus amples informations et des instructions sur la création de votre propre VPN, veuillez consulter le site Web international de Linksys à www.linksys.com/international ou reportez-vous à l'« Annexe C : Configuration de IPSec entre un ordinateur Windows 2000 ou XP et la passerelle VPN ». Pourquoi ai-je besoin d'un VPN ? La mise en réseau d'ordinateurs offre une flexibilité que l'on ne trouve pas sur un système classique d'échange de données (documents papiers).
Passerelle ADSL sans fil G 3) Attaques centralisées (Man in the Middle Attacks) Une fois que le pirate à analysé ou usurpé suffisamment d'informations, il peut entreprendre une attaque centralisée. Ces attaques peuvent se produire lorsque les données sont transmises d'un ordinateur à un autre, en déroutant les données vers une autre destination. Même si les données ne sont pas reçues par le destinataire d'origine, l'expéditeur ne le sait pas.
Passerelle ADSL sans fil G Chapitre 3 : Présentation de la passerelle ADSL sans fil G Panneau arrière Figure 3-1 : Panneau arrière Les ports de la passerelle permettant de connecter les câbles réseau, sont situés sur le panneau arrière de l'appareil. Les boutons de la passerelle sont également situés sur le panneau arrière de l'appareil. LINE (Ligne) Le port LINE permet d'établir la connexion à la ligne ADSL.
Passerelle ADSL sans fil G Panneau avant Les voyants de la passerelle, qui vous informent de l'activité du réseau, se trouvent sur le panneau avant. Figure 3-2 : Panneau avant Power (Alimentation) Vert. Le voyant Power s'allume lorsque l'adaptateur est sous tension. Ethernet (1-4) Vert. Le voyant LAN a deux fonctions. S'il est allumé en permanence, cela signifie que la passerelle est connectée correctement à un périphérique via le port LAN (réseau local). S'il clignote, il indique une activité réseau.
Passerelle ADSL sans fil G Chapitre 4 : Connexion de la passerelle ADSL sans fil G Présentation La configuration de la passerelle ne consiste pas seulement à connecter les appareils entre eux. Vous devez configurer vos ordinateurs du réseau pour qu'ils acceptent les adresses IP que leur attribue la passerelle (le cas échéant). Vous devez également configurer la passerelle à l'aide des paramètres fournis par votre fournisseur d'accès Internet (FAI).
Passerelle ADSL sans fil G Connexion câblée à un ordinateur 1. Avant de commencer, vérifiez que tous les appareils du réseau sont hors tension, y compris la passerelle et tous les ordinateurs. 2. Reliez une extrémité d'un câble réseau Ethernet à l'un des ports Ethernet (numérotés de 1 à 4) situés sur le panneau arrière de la passerelle (voir figure 4-1) et l'autre extrémité au port Ethernet d'un ordinateur. 3.
Passerelle ADSL sans fil G Connexion sans fil à un ordinateur Si vous souhaitez utiliser une connexion sans fil pour accéder à la passerelle, procédez comme suit : 1. Avant de commencer, vérifiez que tous les appareils du réseau sont hors tension, y compris la passerelle et tous les ordinateurs. REMARQUE : Il peut être nécessaire de placer un petit périphérique appelé microfiltre (non fourni) entre chaque téléphone et prise murale pour éliminer les interférences.
Passerelle ADSL sans fil G Chapitre 5 : Configuration de la passerelle Présentation Suivez les étapes contenues dans ce chapitre et configurez la passerelle en utilisant son utilitaire Web. Ce chapitre décrit les pages Web de l'utilitaire ainsi que leurs fonctions clés. Vous pouvez accéder à l'utilitaire à partir de votre navigateur Web par l'intermédiaire d'un ordinateur connecté à la passerelle.
Passerelle ADSL sans fil G Security (Sécurité) • Firewall (Pare feu). Cet écran permet de définir les options Filters (Filtres) et Block WAN Requests (Blocage des requêtes WAN). Les filtres permettent d'empêcher des utilisateurs internes d'accéder à Internet mais aussi de bloquer les requêtes Internet anonymes. • VPN. Cet écran permet d'activer ou de désactiver IPSec et/ou l'intercommunication PPTP mais aussi de configurer des tunnels VPN.
Passerelle ADSL sans fil G Status (Etat) • Gateway (Passerelle). Cet écran contient des informations sur l'état de la passerelle. • Local Network (Réseau local). Cet écran contient des informations sur l'état du réseau local. • Wireless (Sans fil). Cet écran contient des informations sur l'état du réseau sans fil. • DSL Connection (Connexion DSL). Cet écran contient des informations sur l'état de la connexion DSL.
Passerelle ADSL sans fil G • Pcr Rate (Taux cr) : Peak Cell Rate, divise le taux de la ligne DSL par 424 pour définir le PCR afin d'obtenir le taux maximum auquel l'expéditeur peut envoyer les cellules. Entrez le taux dans ce champ (s'il est requis par votre FAI). • Scr Rate (Taux Scr) : Maintient la vitesse de cellule, définit le taux moyen de cellules pouvant être transmises. Normalement, SCR est inférieur à PCR. Entrez le taux dans ce champ (s'il est requis par votre FAI).
Passerelle ADSL sans fil G RFC 1483 Routed Si vous devez utiliser RFC 1483 Routed, sélectionnez RFC 1483 Routed. • IP Address (Adresse IP). Il s'agit de l'adresse IP de la passerelle, vue par le WAN ou Internet. Votre FAI peut vous fournir l'adresse IP que vous devez spécifier dans ce champ. • Subnet Mask (Masque de sous-réseau). Il s'agit du masque de sous-réseau de la passerelle. Votre FAI peut vous fournir le masque de sous-réseau. • Default Gateway (Passerelle par défaut).
Passerelle ADSL sans fil G Pour utiliser un second PPPoE, activez l'option Second PPPoE (Deuxième PPPoE) dans le menu déroulant. Complétez les champs Service Name (Nom du service), User Name (Nom d'utilisateur), Password (Mot de passe), Connect on Demand (Connexion à la demande) et Keep Alive( Activée). Entrez le nom de domaine dans le champ Match Domain Name (Correspondance avec le nom de domaine).
Passerelle ADSL sans fil G Optional Settings (Paramètres facultatifs) (requis par certains FAI) • Host Name (Nom d'hôte) et Domain Name (Nom de domaine). Entrez les noms d'hôte et de domaine de la passerelle dans ces deux champs. Certains FAI requièrent ces noms pour l'authentification. Vous devrez peutêtre contacter votre FAI et vérifier si votre service Internet haut débit a été configuré avec un nom d'hôte et un nom de domaine. Dans la plupart des cas, vous pourrez laisser ces champs vides. • MTU.
Passerelle ADSL sans fil G • Static DNS (DNS statique), 1 à 3. Le système DNS (Domain Name System) est le service adopté par Internet pour convertir des noms de domaine ou de site Web en adresses Internet ou URL. Votre FAI peut vous fournir au moins une adresse IP de serveur DNS. Vous pouvez taper jusqu'à trois adresses IP de serveur DNS. La passerelle utilise alors ces trois adresses IP pour accéder en un clin d'œil aux serveurs DNS en cours d'utilisation. • WINS.
Passerelle ADSL sans fil G • Internet IP Address (Adresse IP Internet). L'adresse IP Internet actuelle de la passerelle est spécifiée dans ce champ. Puisqu'elle est dynamique, cette adresse change. • Status (Etat). L'état de la connexion du service DDNS est spécifié dans ce champ. Une fois que vos modifications sont effectuées dans cet onglet, cliquez sur Save Settings (Enregistrer les paramètres) pour les enregistrer ou cliquez sur le bouton Cancel Changes (Annuler les modifications) pour les annuler.
Passerelle ADSL sans fil G • Destination IP Address (Adresse IP de destination). Cette option identifie l'adresse du réseau distant, ou hôte, auquel vous souhaitez attribuer un itinéraire statique. Entrez l'adresse IP de l'hôte pour lequel vous souhaitez créer un itinéraire statique. Si vous créez un itinéraire pour l'intégralité du réseau, assurezvous que la portion de réseau de l'adresse IP est définie à 0. • Subnet Mask (Masque de sous-réseau).
Passerelle ADSL sans fil G Onglet Wireless (Sans fil) Onglet Basic Wireless Settings (Paramètres sans fil de base) Cet écran vous permet de sélectionner votre mode réseau sans fil ainsi que votre sécurité sans fil. Wireless Network (Réseau sans fil) • Wireless Network Mode (Mode réseau sans fil). Si votre réseau comporte des périphériques 802.11g et 802.11b, conservez le paramètre par défaut, Mixed (Mixte). Si votre réseau ne comporte que des périphériques 802.11g, sélectionnez l'option 802.11g.
Passerelle ADSL sans fil G Onglet Wireless Security (Sécurité sans fil) Les paramètres de cette section permettent de configurer la sécurité de votre réseau sans fil. La passerelle prend en charge trois options de mode de sécurité sans fil : WPA Pre-Shared Key (Clé WPA pré-partagée), WPA RADIUS et WEP. WPA, acronyme de Wi-Fi Protected Access, désigne une norme de sécurité plus puissante que le système de cryptage WEP.
Passerelle ADSL sans fil G WEP. Le système WEP est une méthode de cryptage de base qui n'est pas aussi sûre que le système WPA. Pour utiliser ce système, sélectionnez une clé par défaut (choisissez la clé à utiliser), puis un niveau de cryptage WEP : 64 bits et 10 chiffres hexadécimaux ou 128 bits et 26 chiffres hexadécimaux. Générez ensuite une clé WEP à partir de l'option Passphrase (Phrase mot de passe) ou entrez-la manuellement. • WEP Encryption (Cryptage WEP).
Passerelle ADSL sans fil G Onglet Wireless Access (Accès sans fil) Wireless Network Access (Accès réseau sans fil) Wireless Network Access (Accès réseau sans fil). Si vous sélectionnez Allow All (Tout autoriser), tous les ordinateurs sont autorisés à accéder au réseau sans fil. Pour restreindre l'accès au réseau, sélectionnez Restrict Access (Restreindre l'accès), puis sélectionnez Prevent (Interdire) pour interdire l'accès ou Permit only (Autoriser uniquement) pour autoriser l'accès.
Passerelle ADSL sans fil G Onglet Advanced Wireless Settings (Paramètres sans fil avancés) Advanced Wireless (Paramètres sans fil avancés) Cet écran vous permet d'accéder aux paramètres sans fil avancés dont Authentication Type (Type d'authentification), Basic Data Rates (Débits de données de base), Control Tx Rates (Débits Tx de contrôle), Beacon Interval (Intervalle de transmission de balise), DTIM Interval (Intervalle DTIM), RTS Threshold (Seuil RTS) et Fragmentation Threshold (Seuil de fragmentation).
Passerelle ADSL sans fil G • RTS Threshold (Seuil RTS). Il est préférable de conserver la valeur par défaut de 2347. L'étendue est 0-2347 octets. Si vous faites face à un flux de données incohérent, seule une modification légère de la valeur est recommandée. Si un paquet du réseau apparaît plus petit que la taille pré-définie du seuil RTS, le mécanisme RTS/ CTS n'est pas activé.
Passerelle ADSL sans fil G VPN VPN (Virtual Private Networking) est une mesure de sécurité qui crée une connexion sécurisée entre deux emplacements distants. L'écran VPN vous permet de configurer vos paramètres VPN afin d'améliorer la sécurité de votre réseau VPN Passthrough (Intercommunication VPN) • IPSec Passthrough (Intercommunication IPSec).
Passerelle ADSL sans fil G • Remote Security Gateway (Passerelle de sécurité distante). La passerelle de sécurité distante correspond au périphérique VPN, tel qu'une deuxième passerelle, du côté distant du tunnel VPN. Renseignez les champs IP Address (Adresse IP) et Domain (Domaine) pour le périphérique VPN se trouvant de l'autre côté du tunnel. Le périphérique VPN distant peut être une autre passerelle VPN, un serveur VPN?ou un ordinateur exécutant un logiciel client VPN prenant en charge IPSec.
Passerelle ADSL sans fil G Manual (Manuelle) Sélectionnez Manual (Manuelle), puis l'algorithme de cryptage souhaité dans le menu déroulant. Entrez la clé de cryptage dans le champ Encryption Key (Clé de cryptage). Si vous avez sélectionné DES pour votre algorithme de cryptage, entrez 16 caractères hexadécimaux. Si vous avez sélectionné 3DES, entrez 48 caractères hexadécimaux. Sélectionnez l'algorithme souhaité dans le menu déroulant Authentication Algorithm (Algorithme d'authentification).
Passerelle ADSL sans fil G • Group (Groupe). Vous pouvez choisir entre deux groupes Diffie-Hellman : 768 bits et 1024 bits. Diffie-Hellman se réfère à une technique de cryptographie utilisée par les clés publiques et privées pour le cryptage et le décryptage. • Key Life Time (Durée de validité de la clé). Dans le champ Key Lifetime (Durée de validité de la clé), vous pouvez sélectionner une date d'expiration de la clé (facultatif).
Passerelle ADSL sans fil G Onglet Access Restrictions (Restrictions d'accès) Internet Access (Accès Internet) L'écran Access Restrictions (Restrictions d'accès) vous permet de bloquer ou d'autoriser des modes spécifiques d'exploitation Internet. Vous pouvez définir vos stratégies d'accès à Internet pour des ordinateurs spécifiques et définir des filtres en utilisant les numéros de ports du réseau. • Internet Access Policy (Stratégie d'accès à Internet).
Passerelle ADSL sans fil G 3. Dans la liste de l'écran List of PCs (Liste des ordinateurs), cliquez sur Allow (Autoriser) pour autoriser l'accès Internet à des ordinateurs ou sur Deny (Refuser) pour le refuser. 4. Vous pouvez filtrer l'accès à divers services accessibles par Internet, notamment le service FTP ou Telnet, en choisissant un service dans les menus déroulants en regard de l'option Blocked Services (Services bloqués).
Passerelle ADSL sans fil G Onglet Applications and Gaming (Applications et jeux) Single Port Forwarding (Transfert de connexion unique) Cet écran contient des options de personnalisation de vos services de ports pour les applications fréquemment utilisées. Lorsque des utilisateurs envoient ce type de requête vers votre réseau via Internet, la passerelle transfère ces requêtes vers l'ordinateur approprié.
Passerelle ADSL sans fil G Port Triggering (Déclenchement de connexion) Le déclenchement de connexion est utilisé pour des applications spécifiques qui peuvent nécessiter l'ouverture d'un port à la demande. Pour cette fonction, la passerelle contrôle les données sortantes de certains numéros de ports spécifiques. La passerelle enregistre l'adresse IP de l'ordinateur qui envoie une requête de données.
Passerelle ADSL sans fil G Qualité de serive (QS) La qualité de service (QS) assure un meilleur service aux types de priorité élevée du trafic réseau, pouvant impliquer des applications importantes en temps réel, comme les appels téléphoniques ou la vidéoconférence via Internet. QS basée sur une application La qualité de service basée sur une application gère les informations telles qu'elles sont transmises et reçues.
Passerelle ADSL sans fil G Enable 802.1p P bits scheduling (Activer la planification de bits 802.1p P) VLAN’s VID (VID VLAN). Sélectionnez cette option pour activer la planification de la classification de bits 802.1p P dans le VLAN approprié en fonction de l'identification IEEE 802.1Q VLAN. Entrez le numéro VID VLAN (Identificateur VLAN) dans ce champ.
Passerelle ADSL sans fil G SNMP SNMP est un protocole très répandu de contrôle et de gestion réseau. Identification. Pour activer le SNMP, cliquez sur Activé. Pour désactiver le SNMP, cliquez sur Désactivé. UPnP UPnP permet à Windows XP de configurer automatiquement la passerelle pour diverses applications Internet, telles que des jeux Internet ou un système de vidéoconférence. UPnp. Pour activer la fonctionnalité UPnP, cliquez sur Enabled (Activée).
Passerelle ADSL sans fil G Diagnostics Test Ping Ping Test Parameters (Paramètres de test Ping) • Ping Target IP (IP de cible Ping). Entrez l'adresse IP pour laquelle vous souhaitez effectuer le test Ping. Il peut s'agir d'une adresse IP locale (LAN) ou Internet (WAN). • Ping Size (Taille de Ping). Entrez une taille de paquets Ping. • Number of Pings (Nombre de Pings). Entrez le nombre de fois que vous souhaitez effectuer le Ping. • Ping Interval (Intervalle de Ping).
Passerelle ADSL sans fil G Firmware Upgrade (Mise à niveau du micrologiciel) La passerelle ADSL permet de mettre à niveau le micrologiciel côté LAN (réseau) de la passerelle. Upgrade from LAN (Mise à niveau à partir du réseau LAN) Pour mettre à niveau le micrologiciel de la passerelle à partir du réseau LAN : 1. Cliquez sur le bouton Browse (Parcourir) pour rechercher le fichier de mise à niveau du micrologiciel que vous avez téléchargé à partir du site Web de Linksys puis décompressé. 2.
Passerelle ADSL sans fil G Onglet Status (Etat) Gateway (Passerelle) Cet écran contient des informations sur votre passerelle et ses connexions WAN (Internet). Gateway Information (Informations sur la passerelle) Cette section contient les éléments suivants : Software Version (Version du logiciel), MAC Address (Adresse Mac) et Current Time (Heure actuelle).
Passerelle ADSL sans fil G Local Network (Réseau local) Cette section contient les éléments suivants : Mac Address (Adresse Mac locale), IP Address (Adresse IP), Subnet Mask (Masque de sous-réseau), DHCP Server (Serveur DHCP), Start IP Address (Adresse IP de début) et End IP Address (Adresse IP de fin). Pour afficher le tableau des clients DHCP, cliquez sur le bouton DHCP Clients Table (Tableau des clients DHCP). DHCP Clients Table (Tableau des clients DHCP).
Passerelle ADSL sans fil G Wireless (Sans fil) Cette section contient les éléments suivants : Wireless Firmware Version (Version du micrologiciel), MAC Address (Adresse MAC), Mode, SSID, DHCP Server (Serveur DCP), Channel (Canal) et Encryption Function (Fonction de cryptage). Cliquez sur le bouton Wireless Clients Connected (Clients sans fil connectés) pour afficher les clients sans fil connectés à la passerelle. Cliquez sur le bouton Refresh (Actualiser) si vous souhaitez actualiser l'écran.
Passerelle ADSL sans fil G DSL Connection (Connexion DSL) La section DSL Connection (Connexion DSL) contient les éléments suivants : Status (Etat), Downstream Rate (Débit de réception), Upstream Rate (Débit d'émission). La section PVC Connection (Connexion PVC) contient les éléments suivants Encapsulation, Multiplexing (Multiplexage), QoS (QS), Pcr Rate (Taux Pcr), Scr Rate (Taux Scr), Autodetect (Détection automatique), VPI, VCI et PVC Status (Etat PVC).
Passerelle ADSL sans fil G Annexe A : Dépannage Cette annexe comporte deux parties : « Problèmes courants et solutions » et « Questions fréquemment posées ». Elle contient des solutions envisageables aux problèmes susceptibles de se produire lors de l'installation et de l'exploitation de la passerelle. Lisez les descriptions ci-dessous pour vous aider à résoudre vos problèmes. Si vous n'y trouvez aucune réponse, consultez le site Web international de Linksys à l'adresse suivante : www.linksys.
Passerelle ADSL sans fil G 3. Dans la zone Les composants sélectionnés sont utilisés par cette connexion, mettez l'option Protocole Internet (TCP/IP) en surbrillance, puis sélectionnez l'option Propriétés. Sélectionnez l'option Utiliser l'adresse IP suivante. 4. Entrez une adresse IP unique utilisée par aucun autre ordinateur du réseau connecté à la passerelle. 5. Entrez le masque de sous-réseau 255.255.255.0. 6. Entrez l'adresse IP par défaut de la passerelle : 192.168.1.1. 7.
Passerelle ADSL sans fil G Windows NT 4.0 : • Cliquez sur Démarrer, Paramètres et Panneau de configuration. Cliquez deux fois sur l'icône Réseau. • Cliquez sur l'onglet Protocole, puis double-cliquez sur le protocole TCP/IP. • Dans la fenêtre qui s'affiche, assurez-vous que vous avez sélectionné l'adaptateur approprié et définissez-le à Obtenir une adresse IP à partir d'un serveur DHCP. • Cliquez sur le bouton OK dans la fenêtre Propriétés TCP/IP, puis cliquez sur le bouton Fermer dans la fenêtre Réseau.
Passerelle ADSL sans fil G 3. Je n'obtiens aucune adresse IP sur Internet par le biais de ma connexion Internet. • Reportez-vous au problème n°2 (Je souhaite tester ma connexion Internet) pour vérifier votre connectivité. 1. Assurez-vous que vous utilisez les paramètres de connexion Internet corrects. Contactez votre FAI pour savoir si votre connexion Internet est de type RFC 1483 Bridged, RFC 1483 Routed, RFC 2516 PPPoE ou RFC 2364 PPPoA.
Passerelle ADSL sans fil G informations vers l'emplacement correct. Si vous changez l'adresse IP de la passerelle en 192.168.2.1, le problème devrait être résolu. Changez l'adresse IP de la passerelle dans l'onglet Setup (Configuration) de l'interface Web. • Si vous avez attribué une adresse IP statique à un ordinateur ou périphérique du réseau, vous devez changer son adresse IP en 192.168.2.Y (Y étant n'importe quel nombre entre 1 et 254).
Passerelle ADSL sans fil G 7. Je dois configurer un hébergement pour jeux en ligne ou utiliser d'autres applications Internet. Si vous souhaitez jouer en ligne ou utiliser des applications Internet, la plupart des opérations fonctionnent sans aucun transfert de connexion ou hébergement DMZ. Il se peut, dans certains cas, que vous souhaitiez héberger un jeu en ligne ou une application Internet.
Passerelle ADSL sans fil G • Pour définir l'hébergement DMZ, procédez comme suit : 1. Accédez à l'utilitaire Web de la passerelle en spécifiant http://192.168.1.1 ou l'adresse IP de la passerelle. Cliquez sur Applications and Gaming (Applications et jeux), puis sur DMZ. Cliquez sur Enabled (Activé) et entrez l'adresse IP de l'ordinateur. 2. Contrôlez les pages Port Forwarding (Transfert de connexion) et désactivez les entrées que vous avez spécifiées pour le transfert.
Passerelle ADSL sans fil G 11. Pour recommencer, je dois redéfinir la passerelle aux réglages d'usine. Appuyez pendant 10 secondes sur le bouton Reset (Réinitialisation), puis relâchez-le. Les paramètres Internet, le mot de passe, le transfert ainsi que tous les autres paramètres sont redéfinis aux réglages d'usine. En d'autres termes, la passerelle revient à sa configuration initiale. 12. Je dois mettre le micrologiciel à niveau.
Passerelle ADSL sans fil G 3. Dans l'écran Setup (Configuration), sélectionnez l'option Keep Alive (Activée) et définissez le délai de rappel à 20 (secondes). 4. Cliquez sur le bouton Save Settings (Enregistrer les paramètres). Sélectionnez l'onglet Status (Etat), puis cliquez sur le bouton Connect (Connecter). 5. Il se peut que l'état de la connexion soit défini à Connexion en cours. Appuyez sur la touche F5 pour actualiser l'écran jusqu'à ce que l'état de la connexion soit défini à Connecté. 6.
Passerelle ADSL sans fil G • Si l'ordinateur est configuré correctement, mais ne fonctionne toujours pas, vérifiez la passerelle. Vérifiez qu'elle est connectée et sous tension. Connectez-y vous et vérifiez ses paramètres. Si vous ne parvenez pas à vous connecter à la passerelle, vérifiez le réseau local (LAN) et les connexions d'alimentation. • Si la passerelle est configurée correctement, contrôlez votre connexion Internet (modem DSL/câble, etc.).
Passerelle ADSL sans fil G La passerelle prend-elle en charge d'autres systèmes d'exploitation que Windows 98SE, Windows Millennium, Windows 2000 ou Windows XP ? Oui mais Linksys ne propose à l'heure actuelle aucun service de support technique réservé à l'installation, à la configuration et au dépannage de ces systèmes d'exploitation.
Passerelle ADSL sans fil G Si tout le reste échoue au cours de l'installation, que puis-je faire ? Réinitialisez la passerelle en appuyant sur le bouton Reset (Réinitialisation) jusqu'à ce que le voyant Power (Alimentation) s'éteigne puis s'allume. Réinitialisez votre modem DSL en le mettant hors tension puis sous tension. Téléchargez et installez la dernière version du micrologiciel à partir du site Web international de Linksys, à l'adresse suivante : www.linksys.com/international.
Passerelle ADSL sans fil G Combien de ports peuvent être transférés simultanément ? Théoriquement, la passerelle peut établir 520 sessions simultanément mais vous ne pouvez transférer que 10 étendues de ports. Quelles sont les fonctionnalités avancées de la passerelle ? Les fonctionnalités avancées de la passerelle sont les paramètres sans fil avancés, les filtres, le transfert de connexion, le routage et DDNS.
Passerelle ADSL sans fil G Qu'est-ce que le mode ad hoc ? Lorsqu'un réseau sans fil est défini en mode ad hoc (point à point), les ordinateurs équipés sans fil sont configurés pour communiquer directement entre eux, point à point, sans l'intervention d'un point d'accès. Qu'est-ce que le mode d'infrastructure ? Lorsqu'un réseau sans fil est défini en mode d'infrastructure, le réseau sans fil est configuré pour communiquer avec un réseau via un point d'accès sans fil.
Passerelle ADSL sans fil G Qu'est-ce que DSSS ? Qu'est-ce que FHSS ? Et quelles sont leurs différences ? Le système FHSS (Frequency-Hopping Spread-Spectrum) utilise une porteuse à bande étroite qui modifie la fréquence en un modèle connu à la fois de l'émetteur et du récepteur. S'il est synchronisé correctement, l'effet net est le maintien d'un canal logique unique. Pour un récepteur non concerné, le signal FHSS ressemble à un bruit à impulsions courtes.
Passerelle ADSL sans fil G Mon signal est excellent mais je ne parviens pas à « voir » mon réseau. Le WEP est probablement activé sur la passerelle mais désactivé sur votre adaptateur sans fil (ou inversement). Vérifiez que des clés et des niveaux WEP (64 ou 128) identiques sont utilisés sur tous les nœuds de votre réseau sans fil. Combien de canaux/fréquences sont disponibles avec la passerelle ? Onze canaux sont disponibles, classés de 1 à 11 (pour l'Amérique du Nord).
Passerelle ADSL sans fil G Annexe B : Sécurité sans fil Informations importantes relatives aux produits sans fil Linksys souhaite rendre la mise en réseau sans fil aussi fiable et facile que possible. Aussi, gardez à l'esprit les points suivants, lorsque vous installez ou utilisez votre réseau sans fil. 1. Performances.
Passerelle ADSL sans fil G E. Modifiez régulièrement le nom SSID. F. Activez le cryptage WEP 128 bits. Veuillez noter que ceci réduira les performances de votre réseau. G. Modifiez les clés de cryptage WEP régulièrement. Pour plus d'informations sur la mise en oeuvre de ces fonctions de sécurité, reportez-vous au guide de l'utilisateur. 4. Menaces liées à la sécurité des réseaux sans fil Les réseaux sans fil sont faciles à trouver.
Passerelle ADSL sans fil G Adresses MAC. Activez le filtrage des adresses MAC. La fonctionnalité de filtrage des adresses MAC vous permet de réserver l'accès aux nœuds sans fil dotés de certaines adresses MAC. Le pirate informatique rencontre ainsi plus de difficultés à accéder à votre réseau au moyen d'une adresse MAC choisie au hasard. Cryptage WEP. Le cryptage WEP (Wired Equivalent Privacy) est souvent considéré comme la panacée en matière de protection sans fil, ce qui n'est pas toujours vrai.
Passerelle ADSL sans fil G Annexe C : Configuration de IPSec entre un ordinateur Windows 2000 ou Windows XP et la passerelle Introduction Cette annexe vous explique comment établir un tunnel IPSec sécurisé à l'aide de clés partagées pour connecter un réseau privé via la passerelle VPN et une machine Windows 2000 ou XP.
Passerelle ADSL sans fil G Comment établir un tunnel IPSec sécurisé ? Etape 1 : Etablissement d'une stratégie IPSec 1. Cliquez sur le bouton Démarrer, sélectionnez Exécuter et entrez secpol.msc dans le champ Ouvrir. L'écran Paramètres de sécurité locaux s'affiche (figure C-1). Figure C-1 : Ecran de sécurité locale 2.
Passerelle ADSL sans fil G 3. L'écran Propriétés de filtre apparaît (figure C-5). Sélectionnez l'onglet Adressage. Dans le champ Adresse source, sélectionnez Mon adresse IP. Dans le champ Adresse de destination, sélectionnez Un sous-réseau spécifique, et entrez l'adresse IP 192.168.1.0 et le masque de sous-réseau : 255.255.255.0. (Il s'agit des paramètres par défaut du routeur. Si vous avez modifié ces paramètres, entrez les nouvelles valeurs dans ces champs.) 4.
Passerelle ADSL sans fil G 7. L'écran Liste de filtres IP apparaît (figure C-7). Entrez le nom souhaité pour la liste de filtres (Router->win, par exemple) et décochez la case Utilisez l'Assistant Ajout. Cliquez ensuite sur le bouton Ajouter. 8. L'écran Propriétés de filtre apparaît (figure C-8). Sélectionnez l'onglet Adressage. Dans le champ Adresse source, sélectionnez Un sous-réseau IP spécifique et entrez l'adresse IP : 192.168.1.0 et le masque de sous-réseau : 255.255.255.0.
Passerelle ADSL sans fil G Etape 3 : Configuration des règles de tunnel individuelles Tunnel 1 : win->Router 1. Dans l'onglet Liste de filtres IP (figure C-10), cliquez la liste de filtres win->Router. 2. Cliquez sur l'onglet Action de filtrage (figure C-11) et cliquez sur le bouton radio Sécurité requise. Cliquez ensuite sur le bouton Modifier. Figure C-10 : Onglet Liste de filtres IP 3. Dans l'onglet Méthodes de sécurité (figure C-12), assurez-vous que l'option Négocier la sécurité est activée.
Passerelle ADSL sans fil G 4. Sélectionnez l'onglet Méthodes d'authentification (figure C-13) puis cliquez sur le bouton Modifier. 5. Sélectionnez la méthode d'authentification Utiliser cette chaîne (clé partagée au préalable) (figure C-14) et entrez une chaîne de clé prépartagée, telle que XYZ12345. Cliquez sur le bouton OK. Figure C-13 : Méthodes d'authentification 6. Cette nouvelle clé partagée est présentée à la figure C-15.
Passerelle ADSL sans fil G 7. Sélectionnez l'onglet Paramètres du tunnel (figure C-16) et cliquez sur le bouton radio Le point d'arrêt du tunnel est spécifié par cette adresse IP. Entrez ensuite l'adresse IP WAN du routeur. 8. Sélectionnez l'onglet Type de connexion (figure C-17) et cliquez sur Toutes les connexions réseau. Cliquez ensuite sur OK (Windows XP) ou Fermer (Windows 2000) pour terminer cette règle. Figure C-16 : Onglet Paramètres du tunnel Tunnel 2 : Router->win 9.
Passerelle ADSL sans fil G 10. Sélectionnez l'onglet Liste de filtres IP et cliquez sur la liste de filtres Router ->win (figure C-19). 11. Cliquez sur l'onglet Action de filtrage et sélectionnez l'action de filtrage Sécurité requise (figure C-20). Cliquez ensuite sur le bouton Modifier. Dans l'onglet Méthodes de sécurité (figure C-12), assurez-vous que l'option Négocier la sécurité est activée. Décochez la case Accepter les communications non sécurisées, mais toujours répondre en utilisant IPSec.
Passerelle ADSL sans fil G 13. Sélectionnez la méthode d'authentification Utiliser cette chaîne (clé pré-partagée au préalable) et entrez une chaîne de clé pré-partagée, telle que XYZ12345 (figure C-22). (Il s'agit d'un exemple de chaîne de clé. Votre clé doit être unique et facile à mémoriser.) Cliquez sur le bouton OK. 14. Cette nouvelle clé pré-partagée est présentée à la figure C-23. Cliquez sur le bouton Appliquer pour continuer si elle s'affiche sur votre écran ; sinon passez à l'étape suivante.
Passerelle ADSL sans fil G 16. Sélectionnez l'onglet Type de connexion (figure C-25) et cliquez sur Toutes les connexions réseau. Cliquez ensuite sur OK ou Fermer pour terminer. 17. Dans l'onglet Règles (figure C-26), cliquez sur le bouton OK ou Fermer pour revenir à l'écran secpol.
Passerelle ADSL sans fil G Etape 5 : Création d'un tunnel à l'aide de l'utilitaire Web 1. Ouvrez votre navigateur Web et entrez 192.168.1.1 dans le champ Address (Adresse). Appuyez sur la touche Entrée. 2. Entrez admin dans les champs User name (Nom de l'utilisateur) et Password (Mot de passe). Appuyez sur la touche Entrée. 3. Dans l'onglet Setup (Configuration), cliquez sur l'onglet VPN. 4.
Passerelle ADSL sans fil G Annexe D : Recherche des adresses MAC et IP de votre adaptateur Ethernet Cette section explique comment rechercher l'adresse MAC de l'adaptateur Ethernet de votre ordinateur pour être en mesure d'utiliser la fonctionnalité de filtrage MAC de la passerelle. Vous pouvez également rechercher l'adresse IP de l'adaptateur Ethernet de votre ordinateur. Cette adresse IP est utilisée pour les fonctionnalités de filtrage, de transfert de connexion et/ou DMZ de la passerelle.
Passerelle ADSL sans fil G Instructions pour Windows 2000 ou Windows XP 1. Cliquez sur Démarrer, puis sélectionnez Exécuter. Dans le champ Ouvrir, saisissez cmd. Appuyez ensuite sur Remarque : L'adresse MAC est également appelée Adresse physique. la touche Entrée ou cliquez sur OK. 2. A l'invite de commande, entrez ipconfig /all. Appuyez ensuite sur la touche Entrée. 3. Notez l'adresse physique indiquée à l'écran (figure D-3). Il s'agit de l'adresse MAC de votre adaptateur Ethernet.
Passerelle ADSL sans fil G Annexe E : Mise à niveau du micrologiciel Vous pouvez mettre à niveau le micrologiciel côté WAN (Internet) et côté LAN (réseau) de la passerelle ADSL depuis la section Firmware Upgrade (Mise à niveau du micrologiciel) de l'onglet Administration de l'utilitaire Web. Pour cela, procédez comme suit.
Passerelle ADSL sans fil G Annexe F : Glossaire 802.11a : norme de mise en réseau sans fil IEEE qui spécifie un débit de transfert de données maximum de 54 Mbits/s et une fréquence de 5 GHz. 802.11b : norme de mise en réseau sans fil IEEE qui spécifie un débit de transfert de données maximum de 11 Mbits/s et une fréquence de 2,4 GHz. 802.
Passerelle ADSL sans fil G CSMA/CA (Carrier Sense Multiple Access/Collision Avoidance) : méthode de transfert des données adoptée pour éviter la perte de données sur un réseau. CTS (Clear To Send) : signal émis par un périphérique pour indiquer qu'il est prêt à recevoir des données. DDNS (Dynamic Domain Name System) : système permettant de disposer d'un site Web, d'un site FTP ou d'un serveur de messagerie avec une adresse IP dynamique et un nom de domaine fixe.
Passerelle ADSL sans fil G Full Duplex : aptitude d'un périphérique réseau à recevoir et transmettre simultanément des données. Guirlande : méthode utilisée pour connecter des périphériques en série, l'un après l'autre. Haut débit : connexion Internet rapide et toujours active. HTTP (HyperText Transport Protocol) : protocole de communication utilisé pour la connexion à des serveurs sur le World Wide Web.
Passerelle ADSL sans fil G Mise à niveau : acte de remplacer un logiciel ou micrologiciel existant par une nouvelle version. Mode d'infrastructure : configuration dans laquelle un réseau sans fil est relié à un réseau câblé par l'intermédiaire d'un point d'accès. Modem câble : périphérique qui relie un ordinateur au réseau de télévision câblé, ce réseau permettant à son tour de se connecter à Internet. Multidiffusion : envoi simultané de données à un groupe de destinataires.
Passerelle ADSL sans fil G POP3 (Post Office Protocol 3) : protocole standard utilisé pour extraire des messages électroniques stockés sur un serveur de messagerie. Port : 1. Port de connexion sur un ordinateur ou un périphérique réseau utilisé pour le branchement à un câble ou un adaptateur. 2. Point de connexion virtuelle via lequel un ordinateur exploite une application spécifique sur un serveur.
Passerelle ADSL sans fil G Tampon : bloc de mémoire qui stocke provisoirement des données à manipuler ultérieurement lorsqu'un périphérique trop encombré ne peut accueillir ces données. TCP/IP (Transmission Control Protocol/Internet Protocol) : protocole réseau de transmission de données exigeant la validation de la personne à qui elles sont destinées. Téléchargement : réception d'un fichier transmis sur un réseau. Téléchargement : transmission ou réception d'un fichier sur un réseau.
Passerelle ADSL sans fil G Annexe G : Spécifications Normes IEEE 802.11g, IEEE 802.11b, IEEE 802.3u, IEEE 802.3, G.992.1 (G.dmt), G.992.2 (G.lite), ITU G.992.3, ITU G.992.5, ANSI T1.
Passerelle ADSL sans fil G Alimentation Externe 12 Vcc, 1 A Certifications FCC section 15B Classe B, FCC section 15C Classe B, FCC section 68, UL 1950, CSA, CE Température de fonctionnement 0 à 40º C Température de stockage -20 à 70º C Humidité en fonctionnement 10 à 85 % non condensée Humidité de stockage 5 à 90 % non condensée Annexe G : Spécifications 87
Passerelle ADSL sans fil G Annexe H : Réglementation Déclaration FCC Cet équipement a été testé et déclaré conforme aux normes des équipements numériques de catégorie A, conformément à la section 15 de la réglementation FCC. L'objectif de ces normes est de fournir une protection raisonnable contre toute interférence nuisible dans une installation résidentielle.
Passerelle ADSL sans fil G Informations de conformité pour les produits sans fil 2,4 GHz concernant l'Union européenne et les autres pays suivant la directive européenne 1999/5/EC (R&TTE) Déclaration de conformité concernant la directive européenne 1995/5/EC (R&TTE) 89 Annexe H : Réglementation
Passerelle ADSL sans fil G Remarque : Si vous avez besoin de documentation technique, reportez-vous à la section « Comment accéder aux documents techniques depuis l'adresse www.linksys.com/international » pour plus d'informations.
Passerelle ADSL sans fil G Restrictions nationales This product may be used in all EU countries (and other countries following the EU directive 1999/5/EC) without any limitation except for the countries mentioned below: Ce produit peut être utilisé dans tous les pays de l’UE (et dans tous les pays ayant transposés la directive 1999/5/CE) sans aucune limitation, excepté pour les pays mentionnés ci-dessous: Questo prodotto è utilizzabile in tutte i paesi EU (ed in tutti gli altri paesi che seguono le diretti
Passerelle ADSL sans fil G Italie Ce produit est conforme à National Radio Interface et aux recommandations définies dans la National Frequency Allocation Table de l'Italie. L'utilisation de ce produit LAN 2,4 GHz est soumis à une autorisation générale, sauf s'il est utilisé dans les limites de la propriété de l'utilisateur. Consultez le site http://www.comunicazioni.it/it/ pour de plus amples détails.
Passerelle ADSL sans fil G Windows XP 1. Cliquez deux fois sur l'icône Sans fil dans la barre d'état système de votre bureau. 2. Ouvrez la fenêtre Connexion réseau sans fil. 3. Cliquez sur le bouton Propriétés. 4. Sélectionnez l'onglet Général et cliquez sur le bouton Configurer. 5. Dans la fenêtre Propriétés, cliquez sur l'onglet Avancé. 6. Sélectionnez Sortie. 7. A partir du menu déroulant à droite, sélectionnez le pourcentage de sortie de l'adaptateur sans fil. Windows 2000 1.
Passerelle ADSL sans fil G Annexe I : Informations de garantie Linksys garantit que vos produits Linksys seront, pour l'essentiel, exempts de vices matériels et de fabrication, sous réserve d'une utilisation normale, pendant une période de trois années consécutives (« Période de garantie »). Votre unique recours et l'entière responsabilité de Linksys seront limités, au choix de Linksys, soit à la réparation ou au remplacement du produit, soit au remboursement du prix à l'achat moins les remises effectuées.
Passerelle ADSL sans fil G Annexe J : Contacts Besoin de contacter Linksys ? Consultez-nous en ligne pour obtenir des informations sur les derniers produits et les mises à jour disponibles pour vos produits existants à l'adresse suivante : http://www.linksys.com/international Si vous rencontrez des problèmes avec un produit Linksys, adressez-nous un courrier électronique et envoyez-le au service Support technique du pays où vous résidez : Europe Adresse électronique Allemagne support.de@linksys.
® A Division of Cisco Systems, Inc. 2,4 GHz Wireless-G 802.11g ADSL-Gateway WIRELESS Modell-Nr.
Wireless-G ADSL-Gateway Copyright und Marken Technische Änderungen vorbehalten. Linksys ist eine eingetragene Marke bzw. eine Marke von Cisco Systems, Inc. und/oder deren Zweigunternehmen in den USA und anderen Ländern. Copyright © 2004 Cisco Systems, Inc. Alle Rechte vorbehalten. Andere Handelsmarken und Produktnamen sind Marken bzw. eingetragene Marken der jeweiligen Inhaber.
Wireless-G ADSL-Gateway Inhaltsverzeichnis Kapitel 1: Einführung 1 Willkommen Der Inhalt dieses Handbuchs 1 2 Kapitel 2: Planen Ihres Netzwerks 4 Die Funktionen des Gateways IP-Adressen Was ist ein VPN? Wozu benötige ich ein VPN? Kapitel 3: Beschreibung des Wireless-G ADSL-Gateways Rückseite Vorderseite Kapitel 4: Anschließen des Wireless-G ADSL-Gateways Übersicht Verdrahtete Verbindung mit einem Computer Wireless-Verbindung mit einem Computer Kapitel 5: Konfigurieren des Gateways Übersicht Hinwei
Wireless-G ADSL-Gateway Anhang C: Konfigurieren von IPSec zwischen einem Windows 2000-/XP-Computer und dem Gateway 69 Einführung Umgebung Hinweise zum Einrichten eines sicheren IPSec-Tunnels 69 69 70 Anhang D: Ermitteln der MAC-Adresse und der IP-Adresse des Ethernet-Adapters Anweisungen für Windows 98/ME Anweisung für Windows 2000/XP Anhang E: Aktualisieren der Firmware Anhang F: Glossar Anhang G: Spezifikationen Anhang H: Zulassungsinformationen Anhang I: Garantieinformationen Anhang J: Kontaktinfor
Wireless-G ADSL-Gateway Abbildung Abbildung 2-1: Netzwerk Abbildung 2-2: Computer - VPN-Gateway Abbildung 2-3: VPN-Gateway - VPN-Gateway Abbildung 3-1: Rückseite Abbildung 3-2: Vorderseite Abbildung 4-1: Ethernet-Verbindung Abbildung 4-2: ADSL-Verbindung Abbildung 4-3: Netzstromverbindung Abbildung 5-1: Fenster zur Kennworteingabe Abbildung 5-2: Registerkarte „Grundlegende Einrichtung“ Abbildung 5-3: Dynamische IP-Adresse Abbildung 5-4: Statische IP-Adresse Abbildung 5-5: RFC 1483-Weiterleitung Abbildung 5
Wireless-G ADSL-Gateway Abbildung 5-23: Zusammenfassung der VPN-Einstellungen Abbildung 5-24: Manuelle Schlüsselverwaltung Abbildung 5-25: Systemprotokoll Abbildung 5-26: Erweiterte IPSec VPN-Tunnel-Einrichtung Abbildung 5-27: Internetzugriff Abbildung 5-28: Internet-Richtlinien - Zusammenfassung Abbildung 5-29: PC-Liste Abbildung 5-30: Anschlussdienste Abbildung 5-31: Einfaches Port-Forwarding Abbildung 5-32: Weiterleitung an einen Anschlussbereich Abbildung 5-33: Port-Triggering Abbildung 5-34: DMZ Abbil
Wireless-G ADSL-Gateway Abbildung C-7: Dialogfeld „IP-Filterliste“ Abbildung C-8: Dialogfeld „Eigenschaften von Filter“ Abbildung C-9: Eigenschaften von Neue Regel Abbildung C-10: Registerkarte „IP-Filterliste“ Abbildung C-11: Registerkarte „Filteraktion“ Abbildung C-12: Registerkarte „Sicherheitsmethoden“ Abbildung C-13: Registerkarte „Authentifizierungsmethoden“ Abbildung C-14: Vorinstallierter Schlüssel Abbildung C-15: Neuer vorinstallierter Schlüssel Abbildung C-16: Registerkarte „Tunneleinstellungen“
Wireless-G ADSL-Gateway Kapitel 1: Einführung Willkommen Das Wireless-G ADSL-Gateway von Linksys ist die kompakte Internetverbindungslösung für zu Hause. Die ADSL-Modemfunktion ermöglicht eine extrem schnelle Internetverbindung, die um einiges schneller ist als Einwählverbindungen - ganz ohne Beanspruchen der Telefonleitung. Schließen Sie Ihre Computer über den integrierten 10/100 Ethernet-Switch mit 4 Ports zum schnellen Hochfahren Ihres Netzwerks an das Gateway an.
Wireless-G ADSL-Gateway Der Inhalt dieses Handbuchs In diesem Benutzerhandbuch sind die zur Installation und Verwendung des Wireless-G ADSL-Gateways erforderlichen Schritte aufgeführt. • Kapitel 1: Einführung In diesem Kapitel werden die Anwendungen des Wireless-G ADSL-Gateways sowie dieses Benutzerhandbuch beschrieben. • Kapitel 2: Planen Ihres Netzwerks In diesem Kapitel werden die Grundlagen des Netzwerkbetriebs beschrieben.
Wireless-G ADSL-Gateway • Anhang E: Ermitteln der MAC-Adresse und der IP-Adresse des Ethernet-Adapters In diesem Anhang wird beschrieben, wie Sie die MAC-Adresse für den Ethernet-Adapter Ihres Computers ermitteln, um die MAC-Filterung bzw. die Gateway-Funktion zum Kopieren von MAC-Adressen verwenden zu können. • Anhang F: Glossar In diesem Anhang finden Sie ein kurzes Glossar mit häufig verwendeten Begriffen aus dem Bereich Netzwerkbetrieb.
Wireless-G ADSL-Gateway Kapitel 2: Planen Ihres Netzwerks Die Funktionen des Gateways Ein Gateway ist ein Netzwerkgerät, das zwei Netzwerke miteinander verbindet. In diesem Fall verbindet das Gateway Ihr lokales Netzwerk (LAN) oder die Computer zu Hause oder im Büro mit dem Internet. Das Gateway verarbeitet und lenkt die zwischen diesen beiden Netzwerken übertragenen Daten.
Wireless-G ADSL-Gateway Da Sie das Gateway für den gemeinsamen Zugriff auf Ihre DSL-Internetverbindung verwenden, fragen Sie Ihren ISP, ob Ihrem Konto eine statische IP-Adresse zugewiesen wurde. Ist dies der Fall, benötigen Sie diese statische IP-Adresse für die Konfiguration des Gateways. Sie erhalten diese Informationen von Ihrem ISP. Dynamische IP-Adressen Eine dynamische IP-Adresse wird einem Netzwerkgerät, wie z. B. einem Computer oder Druckserver, automatisch zugewiesen.
Wireless-G ADSL-Gateway VPN wurde als kostengünstige Alternative zu einer privaten, speziellen, gemieteten Leitung für ein privates Netzwerk entwickelt. Mit Verschlüsselungs- und Authentifizierungstechnologie, die den Industriestandards entspricht (IPSec, Kurzform für IP Security, IP-Sicherheit), stellt das VPN eine sichere Verbindung her, die praktisch genauso funktioniert, als ob Sie direkt mit Ihrem lokalen Netzwerk verbunden wären.
Wireless-G ADSL-Gateway Zusätzliche Informationen und Anweisungen zum Erstellen Ihres eigenen VPNs finden Sie auf der internationalen Website von Linksys unter www.linksys.com/international oder in „Anhang C: Konfigurieren von IPSec zwischen einem Windows 2000-/XP-Computer und dem VPN-Gateway“. Wozu benötige ich ein VPN? Ein Computernetzwerk bietet hochgradige Flexibilität, die bei einem auf Papier basierenden Schriftverkehr nicht gegeben ist.
Wireless-G ADSL-Gateway 3) Man-in-the-Middle-Angriffe Sobald der Hacker entweder durch Spoofing oder Sniffing genug Informationen gesammelt hat, kann er einen „Man-in-the-Middle-Angriff“ starten. Dieser Angriff wirkt sich so aus, dass Daten, die von einem Netzwerk an ein anderes Netzwerk übertragen werden, an ein neues Ziel umgeleitet werden. Obwohl die Daten von dem vorgesehenen Empfänger nicht empfangen werden, wird dem Absender genau dies angezeigt.
Wireless-G ADSL-Gateway Kapitel 3: Beschreibung des Wireless-G ADSL-Gateways Rückseite Abbildung 3-1: Rückseite Die Ports des Gateways für den Anschluss eines Netzwerkkabels befinden sich auf der Rückseite des Geräts. Die Tasten des Gateways befinden sich ebenfalls auf der Rückseite. LINE (Verbindung) Der LINE-Port dient zum Anschließen an die ADSL-Verbindung. Ethernet (1-4) Die Ethernet-Ports dienen zum Anschließen an den Computer und andere Netzwerkgeräte.
Wireless-G ADSL-Gateway Vorderseite Die LEDs des Gateways, mit denen Informationen zur Netzwerkaktivität angezeigt werden, befinden sich an der Vorderseite. Abbildung 3-2: Vorderseite Power (Netzstrom) Grün. Die Netzstrom-LED leuchtet auf, wenn das Gateway eingeschaltet wird. Ethernet (1 bis 4) Grün. Die LAN-LED hat zwei Funktionen. Wenn die LED durchgängig leuchtet, ist das Gateway erfolgreich über den LAN-Port mit einem Gerät verbunden. Wenn die LED blinkt, finden Netzwerkaktivitäten statt.
Wireless-G ADSL-Gateway Kapitel 4: Anschließen des Wireless-G ADSL-Gateways Übersicht Die Einrichtung des Gateways umfasst mehr als das bloße Anschließen der Hardware. Sie müssen Ihre vernetzten Computer so konfigurieren, dass sie die vom Gateway zugewiesenen IP-Adressen annehmen (falls zutreffend); darüber hinaus müssen Sie das Gateway mithilfe von Einstellungen konfigurieren, die Sie von Ihrem ISP (Internet Service Provider) erhalten.
Wireless-G ADSL-Gateway Verdrahtete Verbindung mit einem Computer 1. Bevor Sie beginnen, stellen Sie sicher, dass all Ihre Hardwaregeräte, einschließlich des Gateways und der Computer, ausgeschaltet sind. 2. Schließen Sie ein Ende des Ethernet-Netzwerkkabels an einen der Ethernet-Ports (mit 1 bis 4 beschriftet) auf der Rückseite des Gateways (siehe Abb. 4-1) und das andere Ende am Ethernet-Port des Computers an. 3.
Wireless-G ADSL-Gateway Wireless-Verbindung mit einem Computer Befolgen Sie diese Anweisungen, wenn Sie über eine Wireless-Verbindung auf das Gateway zugreifen möchten: 1. Bevor Sie beginnen, stellen Sie sicher, dass all Ihre Hardwaregeräte, einschließlich des Gateways und der Computer, ausgeschaltet sind. HINWEIS: Ein so genannter Mikrofilter muss u. U. zwischen Telefon und Wandbuchse geschaltet werden, um Störungen zu vermeiden. Sollten Sie Fragen hierzu haben, wenden Sie sich an Ihren ISP.
Wireless-G ADSL-Gateway 5. Stellen Sie für den erstmaligen Zugriff auf das Gateway über eine Wireless-Verbindung sicher, dass die SSID des Wireless-Adapters des Computers auf linksys (die Standardeinstellung des Gateways) eingestellt ist und dass die Option zur Sicherheit im Wireless-Netzwerkbetrieb deaktiviert ist. Wenn Sie auf das Gateway zugegriffen haben, können Sie die Einstellungen des Gateways und des Adapters von diesem Computer Ihren üblichen Netzwerkeinstellungen anpassen.
Wireless-G ADSL-Gateway Kapitel 5: Konfigurieren des Gateways Übersicht Folgen Sie zum Konfigurieren des Gateways den in diesem Kapitel aufgeführten Schritten, und verwenden Sie das webbasierte Dienstprogramm des Gateways. In diesem Kapitel werden alle Webseiten des Dienstprogramms und deren Hauptfunktionen beschrieben. Sie können über Ihren Web-Browser mithilfe eines an das Gateway angeschlossenen Computers auf das Dienstprogramm zugreifen.
Wireless-G ADSL-Gateway Sicherheit • Firewall (Firewall): Dieses Fenster enthält Filter und geblockte WAN-Anfragen. Durch die Verwendung von Filtern kann der Internetzugriff bestimmter interner Benutzer und anonyme Internet-Anfragen geblockt werden. • VPN: Verwenden Sie dieses Fenster, um die Option IPSec Passthrough und/oder PPTP Passthrough zu aktivieren oder deaktivieren, und richten Sie VPN-Tunnel ein.
Wireless-G ADSL-Gateway Hinweis für den Zugriff auf das webbasierte Dienstprogramm Um auf das webbasierte Dienstprogramm zuzugreifen, starten Sie Internet Explorer oder Netscape Navigator, und geben Sie im Adressenfeld die Standard-IP-Adresse des Gateways (192.168.1.1) ein. Drücken Sie anschließend die Eingabetaste. Das in Abbildung 5-1 angezeigte Fenster zur Eingabe des Kennworts wird angezeigt. (Unter anderen Betriebssystemen als Windows XP wird ein ähnliches Fenster angezeigt.
Wireless-G ADSL-Gateway • Autodetect (Automatisch erkennen): Wählen Sie Enable (Aktivieren) aus, um die Einstellungen automatisch anzuzeigen bzw. Disable (Deaktivieren), um die Werte manuell einzugeben. • Virtual Circuit (Virtueller Kreis): Geben Sie die Bereiche für VPI und VCi in das jeweilige Feld ein.
Wireless-G ADSL-Gateway RFC 1483-Weiterleitung Wählen Sie zur Verwendung des Modus RFC 1483 Routed (RFC 1483-Weiterleitung) die Option RFC 1483 Routed (RFC 1483-Weiterleitung) aus. • Internet IP Address (Internet-IP-Adresse): Hierbei handelt es sich um die IP-Adresse des Gateways, vom Standpunkt des WAN bzw. des Internets aus gesehen. Sie erhalten die IP-Adresse, die Sie hier angeben müssen, von Ihrem ISP. • Subnet Mask (Subnetzmaske): Hierbei handelt es sich um die Subnetzmaske des Gateways.
Wireless-G ADSL-Gateway Nachdem Sie die Änderungen auf dieser Registerkarte vorgenommen haben, klicken Sie auf die Schaltfläche Save Settings (Einstellungen speichern), um diese Änderungen zu übernehmen. Um Ihre Änderungen rückgängig zu machen, klicken Sie auf die Schaltfläche Cancel Changes (Änderungen verwerfen). RFC 2364 PPPoA Einige ISPs auf DSL-Basis verwenden PPPoA (Point-to-Point Protocol over ATM) zur Herstellung von Internetverbindungen.
Wireless-G ADSL-Gateway Optionale Einstellungen, für einige ISPs erforderlich • Host Name/Domain Name (Hostname/Domänenname): In diese Felder können Sie einen Hostnamen bzw. Domänennamen für das Gateway eingeben. Für einige ISPs sind diese Namen zu Identifikationszwecken erforderlich. Wenden Sie sich an Ihren ISP, um zu ermitteln, ob Ihr Breitband-Internetdienst mit einem Hostund Domänennamen konfiguriert wurde. In den meisten Fällen können diese Felder leer gelassen werden.
Wireless-G ADSL-Gateway • WINS: Mithilfe von WINS (Windows Internet Naming Service) werden NetBIOS-Namen in IP-Adressen umgewandelt. Wenn Sie einen WINS-Server verwenden, geben Sie hier die IP-Adresse des Servers ein. Andernfalls lassen Sie dieses Feld leer. • Time Setting (Zeiteinstellung): Mit dieser Option legen Sie die Zeitzone für Ihr Gateway fest. Wählen Sie Ihre Zeitzone aus dem Dropdown-Menü aus.
Wireless-G ADSL-Gateway Nachdem Sie die Änderungen auf dieser Registerkarte vorgenommen haben, klicken Sie auf die Schaltfläche Save Settings (Einstellungen speichern), um diese Änderungen zu übernehmen. Um Ihre Änderungen rückgängig zu machen, klicken Sie auf die Schaltfläche Cancel Changes (Änderungen verwerfen).
Wireless-G ADSL-Gateway • Subnet Mask (Subnetzmaske): Mithilfe der Subnetzmaske (auch Netzwerkmaske genannt) wird festgelegt, welcher Bereich einer IP-Adresse der Netzwerkbereich und welcher Bereich der Hostbereich ist. • Gateway: Bei dieser IP-Adresse handelt es sich um die IP-Adresse des Gateway-Geräts, das eine Verbindung zwischen dem Gateway und dem entfernten Netzwerk bzw. Host ermöglicht.
Wireless-G ADSL-Gateway Registerkarte „Wireless“ Registerkarte „Basic Wireless Settings“ (Grundlegende Wireless-Einstellungen) Mithilfe dieses Fensters können Sie den Wireless-Netzwerkmodus und die Sicherheit im Wireless-Netzwerkbetrieb festlegen. Wireless-Netzwerk • Wireless Network Mode (Wireless-Netzwerkmodus): Wenn sich sowohl 802.11g- als auch 802.11b-Geräte in Ihrem Netzwerk befinden, behalten Sie die Standardeinstellung Mixed (Gemischt) bei. Wenn ausschließlich 802.
Wireless-G ADSL-Gateway Registerkarte „Wireless Security“ (Sicherheit im Wireless-Netzwerkbetrieb) Mit den Wireless-Sicherheitseinstellungen wird die Sicherheit Ihres Wireless-Netzwerks konfiguriert. Das Gateway unterstützt drei Optionen für den Wireless-Sicherheitsmodus: WPA Pre-Shared Key (WPA Vorläufiger gemeinsamer Schlüssel), WPA RADIUS und WEP. (WPA steht für Wi-Fi Protected Access; dies ist ein höherer Sicherheitsstandard als die WEP-Verschlüsselung.
Wireless-G ADSL-Gateway WEP: WEP ist eine einfache Verschlüsselungsmethode, die nicht so sicher wie WPA ist. Um WEP zu verwenden, wählen Sie einen Wert für Default Key (Standard-Schlüssel) (wählen Sie den gewünschten Schlüssel aus) sowie als WEP-Verschlüsselungsebene 64 bits 10 hex digits (64 Bit 10 Hexadezimalziffern) oder 128 bits 26 hex digits (128 Bit 26 Hexadezimalziffern) aus.
Wireless-G ADSL-Gateway Registerkarte „Wireless Access“ (Wireless-Zugriff) Wireless-Netzwerkzugriff Wireless Network Access (Wireless-Netzwerkzugriff): Wenn Sie die Option Allow All (Alle zulassen) auswählen, haben alle Computer Zugriff auf das Wireless-Netzwerk. Wählen Sie die Option Restrict Access (Zugriff beschränken) aus, um den Zugriff auf das Netzwerk zu beschränken. Wählen Sie anschließend Prevent (Verweigern), um den Zugriff zu verweigern oder Permit only (Nur zulassen), um den Zugriff zuzulassen.
Wireless-G ADSL-Gateway Registerkarte „Advanced Wireless Settings“ (Erweiterte Wireless-Einstellungen) Erweiterte Wireless-Funktionen Sie können über dieses Fenster auf die folgenden erweiterten Wireless-Funktionen zugreifen: Authentication Type (Authentifizierungstyp), Basic Data Rates (Basis-Datenrate), Control Tx Rates (Gesteuerte Übertragungsraten), Beacon Interval (Beacon-Intervall), DTIM Interval (DTIM-Intervall), RTS Threshold (RTS-Schwelle) und Fragmentation Threshold (Fragmentierungsschwelle).
Wireless-G ADSL-Gateway • RTS Threshold (RTS-Schwelle): Dieser Wert sollte bei dem Standardwert von 2347 belassen werden. Der Bereich liegt bei 0 bis 2347 Byte. Bei einem schwankenden Datenfluss wird eine nur geringfügige Senkung empfohlen. Wenn ein Netzwerkpaket kleiner als die voreingestellte RTS-Schwellengröße ist, wird der RTS/CTS-Mechanismus nicht aktiviert. Das Gateway sendet RTS-Blöcke (RTS = Request to Send) an eine bestimmte Empfangsstation und handelt das Senden eines Daten-Blocks aus.
Wireless-G ADSL-Gateway Nachdem Sie die Änderungen auf dieser Registerkarte vorgenommen haben, klicken Sie auf die Schaltfläche Save Settings (Einstellungen speichern), um diese Änderungen zu übernehmen. Um Ihre Änderungen rückgängig zu machen, klicken Sie auf die Schaltfläche Cancel Changes (Änderungen verwerfen). VPN VPN (Virtual Private Networking) ist eine Sicherheitsmaßnahme, durch die eine sichere Verbindung zwischen zwei entfernten Standorten hergestellt wird.
Wireless-G ADSL-Gateway • Local Secure Group (Lokale sichere Gruppe) und Remote Secure Group (Entfernte sichere Gruppe): Local Secure Group (Lokale sichere Gruppe) umfasst die Computer in Ihrem LAN, die auf den Tunnel zugreifen können. Remote Secure Group (Entfernte sichere Gruppe) umfasst die Computer am entfernten Ende des Tunnels, die auf den Tunnel zugreifen können. Diese Computer können durch ein Subnetz, eine spezielle IP-Adresse oder einen Bereich festgelegt werden.
Wireless-G ADSL-Gateway Manual (Manuell) Wählen Sie Manual (Manuell) und anschließend den Verschlüsselungsalgorithmus aus dem Dropdown-Menü aus. Geben Sie den Codierschlüssel in das dafür vorgesehene Feld ein (wenn Sie DES als Verschlüsselungsalgorithmus ausgewählt haben, geben Sie 16 hexadezimale Zeichen ein, wenn Sie 3DES ausgewählt haben, geben Sie 48 hexadezimale Zeichen ein). Wählen Sie den Authentifizierungsalgorithmus aus dem Dropdown-Menü aus.
Wireless-G ADSL-Gateway • Group (Gruppe): Es stehen zwei Diffie-Hellman-Gruppen zur Auswahl: 768 Bit und 1024 Bit. Der Begriff Diffie-Hellman bezeichnet eine kryptografische Verschlüsselungstechnik, bei der sowohl öffentliche als auch private Schlüssel zur Ver- und Entschlüsselung verwendet werden. • Key Life Time (Schlüssel-Verwendungsdauer): Im Feld Key Lifetime (Schlüssel-Verwendungsdauer) können Sie die Gültigkeitsdauer eines Schlüssels festlegen.
Wireless-G ADSL-Gateway Registerkarte „Access Restrictions“ (Zugriffsbeschränkungen) Internetzugriff Mit der Registerkarte Access Restrictions (Zugriffsbeschränkungen) können Sie bestimmte Arten der Internetverwendung blockieren bzw. zulassen. Sie können für bestimmte Computer Sicherheitsrichtlinien für den Internetzugriff und Filter mithilfe von Netzwerk-Anschlussnummern einrichten.
Wireless-G ADSL-Gateway 3. Klicken Sie auf die entsprechende Option [Deny (Verweigern) oder Allow (Zulassen)], um den Internetzugriff für die PCs, die im Fenster List of PCs (PC-Liste) aufgeführt sind, zu blockieren oder zuzulassen. 4. Sie können den Zugang zu verschiedenen Diensten filtern, auf die über das Internet zugegriffen werden kann, wie z. B. FTP oder Telnet, indem Sie diese Dienste in den Dropdown-Menüs neben Blocked Services (Blockierte Dienste) auswählen.
Wireless-G ADSL-Gateway Registerkarte „Applications and Gaming“ (Anwendungen und Spiele) Einfaches Port-Forwarding Das Fenster Single Port Forwarding (Einfaches Port-Forwarding) bietet Optionen zur Anpassung der Anschlussdienste der gängigsten Anwendungen. Wenn Anfragen dieser Art von Benutzern über das Internet an Ihr Netzwerk gesendet werden, leitet das Gateway diese Anfragen an den entsprechenden PC weiter.
Wireless-G ADSL-Gateway Port-Triggering Port-Triggering wird bei speziellen Anwendungen verwendet, über die ein Anschluss auf Anfrage geöffnet werden kann. Bei dieser Funktion überprüft das Gateway ausgehende Daten auf spezielle Anschlussnummern. Das Gateway speichert die IP-Adresse des Computers, der Daten zur Übertragung abruft. Wenn die abgerufenen Daten über das Gateway übertragen werden, werden die Daten über IP-Adresse und Port-Mapping-Regeln dem richtigen Computer weitergeleitet.
Wireless-G ADSL-Gateway QOS QoS (Quality of Service) sorgt bei Netzwerkverkehr mit hoher Priorität, beispielsweise bei anspruchsvollen Echtzeitanwendungen wie Internettelefonie oder Videokonferenzen, für besseren Service. Anwendungsbasierte QoS Über Application-based QoS (Anwendungsbasierte QoS) werden Informationen beim Übertragen und Empfangen verwaltet.
Wireless-G ADSL-Gateway Enable 802.1p P bits scheduling. VLAN’s VID (Planen von 802.1p P-Bits aktivieren. ID des VLAN): Wählen Sie diese Option aus, um das Planen von 802.1p P-Bits-Klassifikationen für das entsprechende VLAN basierend auf der IEEE 802.1Q VLAN-Identifikation zu aktivieren. Geben Sie die VLAN-ID in das Feld ein.
Wireless-G ADSL-Gateway SNMP SNMP ist ein häufig verwendetes Protokoll zur Netzwerküberwachung und -verwaltung. Identification (Identifikation): Um SNMP zu verwenden, klicken Sie auf Enabled (Aktiviert). Um SNMP zu deaktivieren, klicken Sie auf Disabled (Deaktiviert). UPnP Mit UPnP kann unter Windows XP das Gateway automatisch für verschiedene Internet-Anwendungen, wie z. B. Internet-Spiele oder Videokonferenzen, konfiguriert werden.
Wireless-G ADSL-Gateway Diagnose Ping-Test Ping-Test-Parameter • Ping Target IP (Ping-Ziel-IP-Adresse): Geben Sie in dieses Feld die IP-Adresse ein, die Sie für den PingBefehl verwenden möchten. Dies kann eine lokale IP-Adresse (LAN) oder eine Internet-IP-Adresse (WAN) sein. • Ping Size (Ping-Größe): Geben Sie die Größe des Ping-Pakets an. • Number of Pings (Anzahl der Pings): Geben Sie die Anzahl der Pings an, die durchgeführt werden soll.
Wireless-G ADSL-Gateway Firmware aktualisieren Mit dem ADSL Gateway können Sie Firmware für die LAN-Seite (Netzwerkseite) des Gateways aktualisieren. Aktualisieren aus dem LAN So aktualisieren Sie die Gateway-Firmware aus dem LAN: 1. Klicken Sie auf die Schaltfläche Browse (Durchsuchen), um nach der Firmware-Aktualisierungsdatei zu suchen, die Sie von der Linksys Website heruntergeladen und extrahiert haben. 2. Doppelklicken Sie auf die Firmware-Datei, die Sie heruntergeladen und extrahiert haben.
Wireless-G ADSL-Gateway Registerkarte „Status“ Gateway In diesem Fenster werden Informationen zu Ihrem Gateway und den WAN-Internetverbindungen angezeigt. Gateway-Informationen Im Bereich der Gateway-Informationen sind Angaben zur Software-Version, MAC-Adresse und zur derzeitigen Zeit enthalten. Internet-Verbindungen Nachdem Sie die Nummer der Internet-Verbindung aus dem Dropdown-Menü ausgewählt haben, werden die Optionen der Internet-Verbindungen angezeigt.
Wireless-G ADSL-Gateway Lokales Netzwerk Im Bereich der Angaben zum lokalen Netzwerk sind Informationen zur lokalen Mac-Adresse, IP-Adresse, Subnetzmaske, DHCP-Server und zur End-IP-Adresse aufgeführt. Um die DHCP-Client-Tabelle anzuzeigen, klicken Sie auf die Schaltfläche DHCP Clients Table (DHCP-Client-Tabelle). DHCP Client Table (DHCP-Client-Tabelle): Klicken Sie auf die Schaltfläche DHCP Client Table (DHCP-ClientTabelle), um die aktuellen DHCP-Client-Daten aufzurufen.
Wireless-G ADSL-Gateway Wireless Im Bereich der Wireless-Netzwerkinformationen sind Angaben zu Wireless-Firmware-Version, MAC-Adresse, Modus, SSID, DHCP-Server, Kanal sowie zur Verschlüsselungsfunktion aufgeführt. Klicken Sie auf die Schaltfläche Wireless Clients Connected (Wireless-Clients verbunden), um die Wireless-Clients anzuzeigen, die mit dem Gateway verbunden sind. Klicken Sie auf die Schaltfläche Refresh (Aktualisieren), um die Anzeige zu aktualisieren.
Wireless-G ADSL-Gateway DSL-Verbindung Die angezeigten DSL-Verbindungsinformationen beziehen sich auf den Status, die Downstream- und die Upstream-Rate. Im Bereich der PVC-Verbindung sind folgende Informationen aufgeführt: Kapselungsmethode, Multiplexing, QoS (Quality of Service; Dienstqualität), PCR-Rate, SCR-Rate, automatische Erkennungsfunktion, VPI (Virtual Path Identifier; Virtueller Pfadidentifizierer), VCI (Virtual Channel Identifier; Virtueller Kanalidentifizierer) sowie PVC-Status.
Wireless-G ADSL-Gateway Anhang A: Fehlerbehebung Dieser Anhang besteht aus zwei Teilen: „Behebung häufig auftretender Probleme“ und „Häufig gestellte Fragen“. Er enthält Lösungsvorschläge zu Problemen, die während der Installation und des Betriebs des Gateways auftreten können. Lesen Sie sich zur Fehlerbehebung die unten aufgeführten Beschreibungen durch. Wenn hier kein Lösungsvorschlag zu Ihrem Problem aufgeführt ist, finden Sie weitere Informationen auf der Website von Linksys unter www.linksys.
Wireless-G ADSL-Gateway • Für Benutzer von Windows 2000: 1. Klicken Sie auf Start, Einstellungen und Systemsteuerung. Doppelklicken Sie auf Netzwerk- und DFÜ-Verbindungen. 2. Klicken Sie mit der rechten Maustaste auf die LAN-Verbindung, die mit dem von Ihnen verwendeten Ethernet-Adapter verknüpft ist, und wählen Sie die Option Eigenschaften aus. 3.
Wireless-G ADSL-Gateway 2. Ich möchte meine Internetverbindung prüfen. A. Überprüfen Sie Ihre TCP/IP-Einstellungen. Für Benutzer von Windows 98, ME, 2000 und XP: • Weitere Informationen finden Sie in der Windows-Hilfe. Stellen Sie sicher, dass in den Einstellungen die Option IP-Adresse automatisch beziehen aktiviert ist. Für Benutzer von Windows NT 4.0: • Klicken Sie auf Start, Einstellungen und Systemsteuerung. Doppelklicken Sie auf das Symbol Netzwerk.
Wireless-G ADSL-Gateway 3. Mit meiner Internetverbindung erhalte ich keine IP-Adresse im Internet. • Lesen Sie sich den oben aufgeführten Abschnitt „2. Ich möchte meine Internetverbindung prüfen“ durch, und überprüfen Sie anhand dessen Ihre Verbindung. 1. Stellen Sie sicher, dass Sie die korrekten Einstellungen für die Internetverbindung verwenden.
Wireless-G ADSL-Gateway • Ändern Sie die IP-Adresse des Gateways auf ein anderes Subnetz, so dass Konflikte zwischen der IP-Adresse des VPNs und Ihrer lokalen IP-Adresse vermieden werden. Wenn Ihr VPN-Server beispielsweise die IP-Adresse 192.168.1.X zuweist (wobei „X“ für eine Zahl zwischen 1 und 254 steht) und die IP-Adresse Ihres LANs 192.168.1.X lautet (wobei „X“ mit der in der IP-Adresse des VPNs verwendeten Zahl identisch ist), werden Informationen vom Gateway u. U. nicht richtig übertragen.
Wireless-G ADSL-Gateway Benutzerdefinierte Anwendung Webserver FTP-Server SMTP (Ausgang) POP3 (Eingang) Externer Port 80 bis 80 21 bis 21 25 bis 25 110 bis 110 TCP X X X X UDP IP-Adresse 192.168.1.100 192.168.1.101 192.168.1.102 192.168.1.102 Aktivieren X X X X Klicken Sie nach Abschluss der Konfiguration auf die Schaltfläche Save Settings (Einstellungen speichern). 7. Ich möchte das Hosting für Online-Spiele einrichten bzw. weitere Internet-Anwendungen verwenden.
Wireless-G ADSL-Gateway 8. Weder Internetspiele, Internetserver noch Internetanwendungen funktionieren. Falls Sie Schwierigkeiten haben, Internetspiele, -server und -anwendungen zu verwenden, verbinden Sie einen Computer über das DMZ-Hosting (DeMilitarized Zone) mit dem Internet. Diese Option ist verfügbar, wenn für eine Anwendung zu viele Ports erforderlich sind oder Sie nicht sicher sind, welchen Anschlussdienst Sie verwenden sollen.
Wireless-G ADSL-Gateway • Für Microsoft Internet Explorer 5.0 oder höher: 1. Klicken Sie auf Start, Einstellungen und Systemsteuerung. Doppelklicken Sie auf Internetoptionen. 2. Klicken Sie auf die Registerkarte Verbindungen. 3. Klicken Sie auf die Schaltfläche LAN-Einstellungen, und deaktivieren Sie alle aktivierten Optionen. 4. Klicken Sie auf die Schaltfläche OK, um zum vorherigen Fenster zu wechseln. 5. Aktivieren Sie die Option Keine Verbindung wählen.
Wireless-G ADSL-Gateway 13. Die Aktualisierung der Firmware ist fehlgeschlagen bzw. die Netzstrom-LED blinkt. Die Aktualisierung der Firmware kann aus mehreren Gründen fehlschlagen. Führen Sie diese Schritte aus, um die Firmware zu aktualisieren bzw. das Blinken der Netzstrom-LED zu stoppen: • Wenn die Aktualisierung der Firmware fehlgeschlagen ist, verwenden Sie das TFTP-Programm (das Programm wurde zusammen mit der Firmware heruntergeladen).
Wireless-G ADSL-Gateway 15. Ich kann weder auf meine E-Mail noch auf das Internet oder auf das VPN zugreifen, oder ich bekomme nur beschädigte Daten aus dem Internet. Sie müssen den Wert für die MTU-Einstellung (Maximum Transmission Unit, Maximale Übertragungseinheit) anpassen. Die maximale Übertragungseinheit wird standardmäßig automatisch festgelegt. • Wenn Sie Schwierigkeiten haben, führen Sie folgende Schritte aus: 1. Rufen Sie zum Verbinden des Gateways den Web-Browser auf, und geben Sie http://192.
Wireless-G ADSL-Gateway • Konfigurieren Sie die TCP/IP-Einstellung mithilfe einer von Ihrem ISP zur Verfügung gestellten DNS-Adresse manuell. • Vergewissern Sie sich, dass Ihr Browser die Verbindung direkt herstellt und jegliche DFÜ-Verbindung deaktiviert ist. Wenn Sie Internet Explorer verwenden, klicken Sie auf Extras, Internetoptionen und anschließend auf die Registerkarte Verbindungen. Stellen Sie sicher, dass für Internet Explorer die Option Keine Verbindung wählen aktiviert ist.
Wireless-G ADSL-Gateway Unterstützt das Gateway auch andere Betriebssysteme als Windows 98 SE, ME, 2000 oder XP? Ja. Linksys bietet jedoch derzeit keinen technischen Kundendienst hinsichtlich Installation, Konfiguration oder Fehlersuche für andere Betriebssysteme als die Windows-Betriebssysteme an. Unterstützt das Gateway die ICQ-Dateiübertragung? Ja, mithilfe der folgenden Lösung: Klicken Sie auf das Menü ICQ, Preference (Einstellungen) und auf die Registerkarte Connections (Verbindungen).
Wireless-G ADSL-Gateway Die Website reagiert nicht, heruntergeladene Dateien sind beschädigt, oder es werden nur unleserliche Zeichen auf dem Bildschirm angezeigt. Was muss ich tun? Legen Sie für Ihren Ethernet-Adapter 10 MBit/s bzw. den Halbduplex-Modus fest, und deaktivieren Sie als vorübergehende Maßnahme für den Ethernet-Adapter die Funktion zur automatischen Aushandlung. (Rufen Sie über die Netzwerksystemsteuerung die Registerkarte für die erweiterten Eigenschaften des Ethernet-Adapters auf.
Wireless-G ADSL-Gateway Was bedeutet DMZ-Hosting? Mithilfe der DMZ (Demilitarized Zone, Entmilitarisierte Zone) kann über eine IP-Adresse (d. h. über einen Computer) eine Verbindung zum Internet hergestellt werden. Für einige Anwendungen ist es erforderlich, dass mehrere TCP/IP-Ports geöffnet sind. Es ist empfehlenswert, dass Sie zur Verwendung des DMZ-Hostings für Ihren Computer eine statische IP-Adresse festlegen.
Wireless-G ADSL-Gateway Kann ich eine Anwendung von einem standortfernen Computer aus über das Wireless-Netzwerk ausführen? Dies ist abhängig davon, ob die Anwendung zur Verwendung in einem Netzwerk entwickelt wurde. Weitere Informationen dazu, ob die Anwendung in einem Netzwerk verwendet werden kann, finden Sie in der Dokumentation zur Anwendung. Was ist der IEEE 802.11g-Standard? Dies ist ein IEEE-Standard für Wireless-Netzwerke. Mit dem 802.
Wireless-G ADSL-Gateway werden. In solchen Systemen sucht der Endknoten des Benutzers nach dem jeweils besten Zugriff auf das System. Zunächst werden Faktoren wie Signalstärke und -qualität, die aktuelle Nachrichtenmenge, die von jedem Access Point verarbeitet wird, und die Entfernung zwischen jedem Access Point zum verdrahteten Backbone ausgewertet. Anschließend ermittelt der Knoten auf Grundlage dieser Informationen den geeigneten Access Point und registriert dessen Adresse.
Wireless-G ADSL-Gateway Können die Daten bei der Funkübertragung abgefangen werden? WLAN verfügt über zweifachen Schutz im Sicherheitsbereich. Im Hardwarebereich sorgt DSSS-Technologie (Direct Sequence Spread Spectrum; Direkte Bandspreizung) für die integrierte Sicherheitsfunktion der Verschlüsselung. Im Softwarebereich bietet WLAN die WEP-Verschlüsselungsfunktion, um die Sicherheit zu erhöhen und die Zugriffssteuerung zu verbessern. Was ist WEP? WEP ist die Abkürzung für Wired Equivalent Privacy.
Wireless-G ADSL-Gateway Wie viele Kanäle/Frequenzen sind mit dem Gateway verfügbar? Es stehen insgesamt 11 Kanäle, von 1 bis 11 (für Nordamerika), zur Verfügung. Wenn Ihre Fragen hier nicht beantwortet wurden, finden Sie weitere Informationen auf der internationalen Linksys-Website unter www.linksys.
Wireless-G ADSL-Gateway Anhang B: Sicherheit im Wireless-Netzwerkbetrieb Wichtige Informationen für Wireless-Produkte Linksys hat es sich zum Ziel gesetzt, den Wireless-Netzwerkbetrieb für Sie so sicher und einfach wie möglich zu gestalten. Beachten Sie daher Folgendes beim Einrichten bzw. Verwenden Ihres Wireless-Netzwerks. 1. Leistung Die Leistung Ihres Wireless-Netzwerks hängt von einer Reihe von Faktoren ab: Die Entfernung vom Access Point in einer Infrastrukturumgebung.
Wireless-G ADSL-Gateway E. Ändern Sie die SSID regelmäßig. F. Aktivieren Sie die 128-Bit-WEP-Verschlüsselung. Beachten Sie, dass die Netzwerkleistung hierdurch verringert wird. G. Ändern Sie die WEP-Codierschlüssel regelmäßig. Informationen zum Umsetzen dieser Sicherheitsfunktionen finden Sie im Benutzerhandbuch. 4. Sicherheitsrisiken für Wireless-Netzwerke Wireless-Netzwerke sind einfach zu finden.
Wireless-G ADSL-Gateway Ändern Sie Ihre SSID regelmäßig, damit Hacker, die sich Zugriff auf Ihr Wireless-Netzwerk verschafft haben, erneut das Kennwort knacken müssen. MAC-Adressen: Aktivieren Sie die MAC-Adressfilterung. Durch die MAC-Adressfilterung wird nur WirelessKnoten mit bestimmten MAC-Adressen der Zugriff auf das Netzwerk ermöglicht. Dies erschwert es den Hackern, mit einer zufällig gewählten MAC-Adresse auf Ihr Netzwerk zuzugreifen.
Wireless-G ADSL-Gateway Anhang C: Konfigurieren von IPSec zwischen einem Windows 2000-/XP-Computer und dem Gateway Einführung In diesem Dokument finden Sie Anweisungen dazu, wie Sie über vorläufige gemeinsame Schlüssel einen sicheren IPSec-Tunnel einrichten, um ein privates Netzwerk innerhalb des VPN-Gateways mit einem Windows 2000- oder Windows XP-Computer zu verbinden.
Wireless-G ADSL-Gateway Hinweise zum Einrichten eines sicheren IPSec-Tunnels Schritt 1: Erstellen einer IPSec-Richtlinie 1. Klicken Sie auf die Schaltfläche Start, wählen Sie Ausführen aus, und geben Sie in das Feld Öffnen den Eintrag secpol.msc ein. Das in Abbildung C-1 dargestellte Fenster Lokale Sicherheitseinstellungen wird angezeigt. 2. Klicken Sie mit der rechten Maustaste auf IP-Sicherheitsrichtlinien auf Lokaler Computer (Win XP) bzw.
Wireless-G ADSL-Gateway 3. Das Fenster für die Filtereigenschaften wird angezeigt (siehe Abbildung C-5). Wählen Sie die Registerkarte Adressierung. Wählen Sie im Feld Quelladresse die Option Eigene IP-Adresse aus. Wählen Sie im Feld Zieladresse die Option Spezielles IP-Subnetz aus, und geben Sie die IP-Adresse 192.168.1.0 und Subnetzmaske 255.255.255.0 ein. (Dabei handelt es sich um die Standardeinstellungen des Routers.
Wireless-G ADSL-Gateway 7. Das Fenster IP-Filterliste wird angezeigt (siehe Abbildung C-7). Geben Sie für die Filterliste einen geeigneten Namen, z. B. Router->win, ein, und deaktivieren Sie das Kontrollkästchen Assistent verwenden. Klicken Sie anschließend auf die Schaltfläche Hinzufügen. 8. Das Fenster für die Filtereigenschaften wird angezeigt (siehe Abbildung C-8). Wählen Sie die Registerkarte Adressierung.
Wireless-G ADSL-Gateway Schritt 3: Konfigurieren von individuellen Tunnelregeln Tunnel 1: win -> Router 1. Klicken Sie, wie in Abbildung C-10 dargestellt, auf die Registerkarte IP-Filterliste und anschließend auf die Filterliste „win -> Router“. 2. Klicken Sie auf die Registerkarte Filteraktion (siehe Abbildung C-11), und klicken Sie auf die für die Filteraktion erforderliche Optionsschaltfläche Sicherheit erforderlich. Klicken Sie anschließend auf die Schaltfläche Bearbeiten.
Wireless-G ADSL-Gateway 4. Klicken Sie auf die Registerkarte Authentifizierungsmethoden (siehe Abbildung C-13), und klicken Sie auf die Schaltfläche Bearbeiten. 5. Ändern Sie die Authentifizierungsmethode auf Diese Zeichenkette (vorinstallierter Schlüssel) verwenden (siehe Abbildung C-14), und geben Sie die Zeichenkette für den vorinstallierten Schlüssel, z. B. XYZ12345, ein. Klicken Sie auf OK. Abbildung C-13: Registerkarte „Authentifizierungsmethoden“ 6.
Wireless-G ADSL-Gateway 7. Wählen Sie die Registerkarte Tunneleinstellungen (siehe Abbildung C-16), und aktivieren Sie die Optionsschaltfläche Der Tunnelendpunkt wird durch diese IP-Adresse spezifiziert. Geben Sie anschließend die WAN-IP-Adresse des Routers ein. 8. Wählen Sie die Registerkarte Verbindungstyp (siehe Abbildung C-17), und klicken Sie auf Alle Netzwerkverbindungen. Klicken Sie anschließend auf die Schaltfläche OK bzw. auf Schließen, um diese Regel abzuschließen.
Wireless-G ADSL-Gateway 10. Aktivieren Sie in der Registerkarte IP-Filterliste die Optionsschaltfläche für die Filterliste Router -> win (siehe Abbildung C-19). 11. Klicken Sie auf die Registerkarte Filteraktion, und wählen Sie die Filteraktion Sicherheit erforderlich aus (siehe Abbildung C-20). Klicken Sie anschließend auf die Schaltfläche Bearbeiten.
Wireless-G ADSL-Gateway 13. Ändern Sie die Authentifizierungsmethode auf Diese Zeichenkette (vorinstallierter Schlüssel) verwenden (siehe Abbildung C-22), und geben Sie die Zeichenkette für den vorinstallierten Schlüssel, z. B. XYZ12345, ein. (Die hier aufgeführte Schlüsselzeichenkette dient als Beispiel. Ihre Schlüsselzeichenkette sollte eindeutig und leicht zu merken sein.) Klicken Sie anschließend auf die Schaltfläche OK. 14. Dieser neue vorinstallierte Schlüssel ist in Abbildung C-23 aufgeführt.
Wireless-G ADSL-Gateway 16. Klicken Sie auf die Registerkarte Verbindungstyp (siehe Abbildung C-25), und klicken Sie auf Alle Netzwerkverbindungen. Klicken Sie anschließend auf die Schaltfläche OK bzw. auf Schließen, um den Vorgang zu beenden. 17. Klicken Sie in der Registerkarte Regeln (siehe Abbildung C-26) auf die Schaltfläche OK bzw. auf Schließen, um zum secpol-Bildschirm zurückzukehren.
Wireless-G ADSL-Gateway Schritt 5: Erstellen eines Tunnels mithilfe des webbasierten Dienstprogramms 1. Geben Sie im Adressfeld des Browsers 192.168.1.1 ein. Drücken Sie die Eingabetaste. 2. Wenn die Felder Benutzername und Kennwort angezeigt werden, geben Sie den Standard-Benutzernamen und das -Kennwort admin ein. Drücken Sie die Eingabetaste. 3. Klicken Sie in der Registerkarte Setup (Einrichtung) auf die Registerkarte VPN. 4.
Wireless-G ADSL-Gateway Anhang D: Ermitteln der MAC-Adresse und der IP-Adresse des Ethernet-Adapters In diesem Abschnitt wird beschrieben, wie Sie die MAC-Adresse für den Ethernet-Adapter Ihres Computers ermitteln, um die MAC-Filterungsfunktion des Gateways verwenden zu können. Sie können außerdem die IPAdresse für den Ethernet-Adapter Ihres Computers ermitteln. Die IP-Adresse wird für die Filterungs-, Weiterleitungs- und DMZ-Funktionen des Gateways verwendet.
Wireless-G ADSL-Gateway Anweisung für Windows 2000/XP 1. Klicken Sie auf Start und Ausführen. Geben Sie im Feld Öffnen cmd ein. Drücken Sie dann die Eingabetaste, oder klicken Sie auf die Schaltfläche OK. Hinweis: Die MAC-Adresse wird auch als physikalische Adresse bezeichnet. 2. Geben Sie in die Eingabeaufforderung ipconfig /all ein. Drücken Sie die Eingabetaste. 3. Notieren Sie die physikalische Adresse so, wie sie am Computer anzeigt wird (Abbildung D-3).
Wireless-G ADSL-Gateway Anhang E: Aktualisieren der Firmware Mit dem ADSL-Gateway können Sie die Firmware des Gateways für WAN (Internet) und für LAN (Netzwerk) über die Registerkarte Administration (Verwaltung) des webbasierten Dienstprogramms aktualisieren.
Wireless-G ADSL-Gateway Anhang F: Glossar 802.11a: IEEE-Standard für den Wireless-Netzwerkbetrieb, der eine maximale Datenübertragungsrate von 54 MBit/s sowie eine Betriebsfrequenz von 5 GHz festlegt. 802.11b: IEEE-Standard für den Wireless-Netzwerkbetrieb, der eine maximale Datenübertragungsrate von 11 MBit/s sowie eine Betriebsfrequenz von 2,4 GHz festlegt. 802.
Wireless-G ADSL-Gateway CSMA/CA (Carrier Sense Multiple Access/Collision Avoidance): Eine Datenübertragungsmethode, die verwendet wird, um Datenverluste im Netzwerk zu verhindern. CTS (Clear To Send): Ein von einem Gerät gesendetes Signal, das angibt, dass das Gerät für Daten empfangsbereit ist. Daisy Chain (Verkettung): Eine Methode, bei der Geräte in Reihe (in einer Kette) miteinander verbunden werden.
Wireless-G ADSL-Gateway Finger: Ein Programm, das Ihnen den Namen angibt, der einer E-Mail-Adresse zugewiesen ist. Firewall: Sicherheitsmaßnahmen, durch die die Ressourcen in einem lokalen Netzwerk vor dem Zugriff durch nicht autorisierte Dritte geschützt werden. Firmware: 1. Die Programmierung in Netzwerkgeräten, mit der das Gerät gesteuert wird. 2. In den Lesespeicher (ROM) bzw. programmierbaren Lesespeicher (PROM) geladene Programmierung, die von Endbenutzern nicht geändert werden kann.
Wireless-G ADSL-Gateway IPCONFIG: Ein Dienstprogramm für Windows 2000 und Windows XP, das die IP-Adresse eines bestimmten Geräts im Netzwerk anzeigt. IPSec (Internet Protocol Security): VPN-Protokoll, das für den sicheren Austausch von Paketen auf der IP-Ebene verwendet wird. ISM-Band: Bei Übertragungen im Wireless-Netzwerkbetrieb verwendetes Funkband. ISP (Internet Service Provider): Internetdienstanbieter; Anbieter, über den auf das Internet zugegriffen werden kann.
Wireless-G ADSL-Gateway Paket: Eine Dateneinheit, die über ein Netzwerk gesendet wird. Passphrase: Wird wie ein Kennwort verwendet und erleichtert die WEP-Verschlüsselung, indem für Linksys Produkte automatisch WEP-Codierschlüssel erstellt werden. Ping (Packet INternet Groper): Internetdienstprogramm, mit dem bestimmt werden kann, ob eine bestimmte IP-Adresse online ist. POP3 (Post Office Protocol 3): Standardprotokoll, das zum Abrufen von E-Mails verwendet wird, die auf einem Mail-Server gespeichert sind.
Wireless-G ADSL-Gateway SNMP (Simple Network Management Protocol): Ein weit verbreitetes und häufig verwendetes Protokoll zur Netzwerküberwachung und -steuerung. Software: Befehle für den Computer. Ein Satz an Befehlen, mit denen eine bestimmte Aufgabe ausgeführt wird, bezeichnet man als „Programm“. SSID (Service Set IDentifier): Der Name Ihres Wireless-Netzwerks. Standard-Gateway: Ein Gerät, über das der Internetdatenverkehr von Ihrem LAN weitergeleitet wird.
Wireless-G ADSL-Gateway VPN (Virtual Private Network): Sicherheitsmaßnahme zum Schutz von Daten im Internet zwischen dem Verlassen eines Netzwerks und dem Eingehen bei einem anderen. WAN (Wide Area Network): Das Internet. WEP (Wired Equivalent Privacy): Eine hochgradig sichere Methode zum Verschlüsseln von Daten, die in einem Wireless-Netzwerk übertragen werden. WINIPCFG: Dienstprogramm für Windows 98 und Windows ME, das die IP-Adresse für ein bestimmtes Netzwerkbetriebsgerät anzeigt.
Wireless-G ADSL-Gateway Anhang G: Spezifikationen Standards IEEE 802.11g, IEEE 802.11b, IEEE 802.3u, IEEE 802.3, G.992.1 (G.dmt), G.992.2 (G.lite), ITU G.992.3, ITU G.992.5, ANSI T1.
Wireless-G ADSL-Gateway Betriebstemperatur 0 ºC bis 40 ºC Lagertemperatur -20 ºC bis 70 ºC Betriebsfeuchtigkeit 10 % bis 85 %, nicht kondensierend Lagerfeuchtigkeit 5 % bis 90 %, nicht kondensierend Anhang G: Spezifikationen 91
Wireless-G ADSL-Gateway Anhang H: Zulassungsinformationen FCC-Bestimmungen Dieses Gerät wurde geprüft und entspricht den Bestimmungen für ein digitales Gerät der Klasse B gemäß Teil 15 der FCC-Bestimmungen. Die Grenzwerte wurden so festgelegt, dass ein angemessener Schutz gegen Störungen in einer Wohngegend gewährleistet ist. Dieses Gerät erzeugt und verwendet Hochfrequenzenergie und kann diese abstrahlen.
Wireless-G ADSL-Gateway Informationen zur Einhaltung gesetzlicher Vorschriften bei 2,4-GHz-Wireless-Produkten für den Bereich der EU und anderer Länder gemäß der EU-Richtlinie 1999/5/EG (R&TTE-Richtlinie) Konformitätserklärung in Bezug auf EU-Richtlinie 1995/5/EG (R&TTE-Richtlinie) 93 Anhang H: Zulassungsinformationen
Wireless-G ADSL-Gateway Hinweis: Wenn Sie technische Dokumente benötigen, finden Sie im Abschnitt „Technische Dokumente unter www.linksys.com/international“ weitere Informationen.
Wireless-G ADSL-Gateway Nationale Beschränkungen This product may be used in all EU countries (and other countries following the EU directive 1999/5/EC) without any limitation except for the countries mentioned below: Ce produit peut être utilisé dans tous les pays de l’UE (et dans tous les pays ayant transposés la directive 1999/5/CE) sans aucune limitation, excepté pour les pays mentionnés ci-dessous: Questo prodotto è utilizzabile in tutte i paesi EU (ed in tutti gli altri paesi che seguono le direttive
Wireless-G ADSL-Gateway Tabelle 1: In Frankreich zulässige Leistungspegel Standort Frequenzbereich (MHz) Leistung (EIRP; Effective Isotropic Radiated Power) In Gebäuden (keine Beschränkungen) 2400-2483,5 100 mW (20 dBm) Im Freien 2400-2454 2454-2483,5 100 mW (20 dBm) 10 mW (10 dBm) Italien Dieses Produkt entspricht den nationalen Vorschriften für Funkschnittstellen und den in der nationalen Frequenzzuweisungstabelle für Italien aufgeführten Anforderungen.
Wireless-G ADSL-Gateway Hinweis: Die Einstellungen für die Ausgangsleistung sind u. U. nicht für alle Wireless-Produkte verfügbar. Weitere Informationen finden Sie in der Dokumentation auf der Produkt-CD oder unter http://www.linksys.com/ international. Wireless-Adapter Bei Wireless-Adaptern ist die Ausgangsleistung standardmäßig auf 100 % eingestellt. Die Ausgangsleistung der einzelnen Adapter beträgt maximal 20 dBm (100 mW), liegt aber gewöhnlich bei 18 dBm (64 mW) oder darunter.
Wireless-G ADSL-Gateway Technische Dokumente unter www.linksys.com/international Führen Sie die folgenden Schritte aus, um auf die gewünschten technischen Dokumente zuzugreifen: 1. Navigieren Sie mit dem Browser zur Website http://www.linksys.com/international. 2. Klicken Sie auf Ihre Region. 3. Klicken Sie auf den Namen Ihres Landes. 4. Klicken Sie auf Products (Produkte). 5. Klicken Sie auf die entsprechende Produktkategorie. 6. Wählen Sie ein Produkt aus. 7.
Wireless-G ADSL-Gateway Anhang I: Garantieinformationen Linksys sichert Ihnen für einen Zeitraum von drei Jahren (die „Gewährleistungsfrist“) zu, dass dieses Linksys Produkt bei normaler Verwendung keine Material- oder Verarbeitungsfehler aufweist. Im Rahmen dieser Gewährleistung beschränken sich Ihre Rechtsmittel und der Haftungsumfang von Linksys wie folgt: Linksys kann nach eigenem Ermessen das Produkt reparieren oder austauschen oder Ihnen den Kaufpreis abzüglich etwaiger Nachlässe zurückerstatten.
Wireless-G ADSL-Gateway Anhang J: Kontaktinformationen Möchten Sie sich persönlich an Linksys wenden? Informationen zu den aktuellen Produkten und Aktualisierungen für bereits installierte Produkte finden Sie online unter: http://www.linksys.com/international Wenn Sie im Zusammenhang mit Linksys Produkten auf Probleme stoßen, können Sie uns unter folgenden Adressen eine E-Mail senden: In Europa E-Mail-Adresse Belgien support.be@linksys.com Dänemark support.dk@linksys.com Deutschland support.