z User Guide Velop Plug-in 1
Table of Contents Product Overview___________________________________________________________________________________________ 3 Front____________________________________________________________________________________________________________3 Side/Back ______________________________________________________________________________________________________4 A Velop Plug-in requires an existing Velop system __________________________________________________ 6 Set Up ____________________________________________
Product Overview Front The light on the front of your node gives you information about the node’s operation. Light description Status Blue (blinking) Starting up Wait for the node to finish starting up. Purple Ready for setup Open the Linksys app to complete setup. Purple (binking) Setup in progress Follow instructions in the app. Blue Connected to internet Node is online, everything is good. Red No internet Not online, check with your ISP for service interruptions.
Side/Back Reset button—Press and hold until the light on front of the node turns red, fades and flashes bright red again to reset the node to its factory defaults.
Network of nodes Every home is unique. Velop creates a modular mesh system of Wi-Fi nodes to provide wireless coverage throughout your home. Whether you have one node, three nodes, or more, we'll help you get them in the right spot - one at a time - for the best performance everywhere. Velop Plug-in must be used with an existing Velop system and requires a Velop primary node connected to your modem with an ethernet cable.
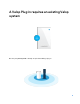
A Velop Plug-in requires an existing Velop system Be sure your primary node is already set up before adding a plug-in.
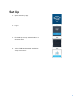
Set Up 1. Open the Linksys app. 2. Log in 3. Find and tap "Set up a New Product" in the main menu. 4. Select "Add Another Node" and follow setup instructions.
How to restore factory defaults You should never need to reset your Velop Plug-in to factory default settings—a very disruptive process. A factory reset restores your Velop Plug-in to the state it was when you took it out of its box, requiring you to go through the setup process again. To reset your Velop Plug-in to factory defaults: • With your node plugged in, use a press and hold the Reset button on the side. The light on front of the node will turn red and fade in pulses.
Help Where to find more help • Linksys.com/support/Velop • Linksys app help (launch the app and click Help in the main navigation menu) Note—Licenses and notices for third party software used in this product may be viewed on http://support.linksys.com/en-us/license. Please contact http://support.linksys.com/enus/gplcodecenter for questions or GPL source code requests.
Specifications Linksys Velop Plug-in Model Name Velop Plug-in Model Number WHW01P Radio Frequency 2.4 GHz and 5 GHz # of Antennas 3 Buttons Reset Lights One, multicolored light for power and status Security Features WPA2-Personal Security Key Bits Up to 128-bit encryption Environmental Dimensions 3.05” x 2.1” x 4.7” (77.47 mm x 53.34 mm x 119.38 mm) Unit Weight 0.57 lb (260 g) Power Internal AC/DC power supply: 100-240V ~1A, 50/60 Hz Certifications FCC, UL, Wi-Fi (IEEE 802.
Visit linksys.com/support/Velop for award-winning technical support. BELKIN, LINKSYS and many product names and logos are trademarks of the Belkin group of companies. Third-party trademarks mentioned are the property of their respective owners. © 2018 Belkin International, Inc. and/or its affiliates. All rights reserved.