Table of Contents Chapter 1: Product Overview 2 Front Panel . . . . . . . . . . . . . . . . . . . . . . . . . . . . . . . . . . . . . . . . . . . . . . . . . . 2 Back Panel . . . . . . . . . . . . . . . . . . . . . . . . . . . . . . . . . . . . . . . . . . . . . . . . . . . 2 Chapter 2: Wireless Security Checklist 3 General Network Security Guidelines . . . . . . . . . . . . . . . . . .
Table of Contents Appendix C: Warranty Information 30 Limited Warranty . . . . . . . . . . . . . . . . . . . . . . . . . . . . . . . . . . . . . . . . . . . . . 30 Appendix D: Regulatory Information 32 FCC Statement . . . . . . . . . . . . . . . . . . . . . . . . . . . . . . . . . . . . . . . . . . . . . . . 32 Industry Canada Statement . . . . . . . . . . . . . . . . . . . . . . . . . .
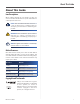
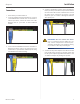
About This Guide About This Guide Icon Descriptions While reading through the User Guide you may see various icons that call attention to specific items. Below is a description of these icons: NOTE: This check mark indicates that there is a note of interest and is something that you should pay special attention to while using the product. WARNING: This exclamation point indicates that there is a caution or warning and it is something that could damage your property or product.
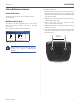
Overview Chapter 1 Chapter 1: Product Overview Back Panel Front Panel The HiPort +™ LEDs are located on the front panel. Reset The Reset button serves two purposes. You can restore its factory default settings or reboot the HiPort. •• To restore the factory default Power (Green/Amber) The Power LED lights up green and will stay on while the HiPort+ is powered on. When the HiPort+ goes through its self-diagnostic mode during every bootup, this LED will flash.
Wireless Security Checklist Chapter 2 Chapter 2: Wireless Security Checklist Wireless networks are convenient and easy to install, so homes with high-speed Internet access are adopting them at a rapid pace. Because wireless networking operates by sending information over radio waves, it can be more vulnerable to intruders than a traditional wired network. Like signals from your cellular or cordless phones, signals from your wireless network can also be intercepted.
Installation Chapter 3 Chapter 3: Installation SIM Card Installation To install the SIM card, follow these steps: 1. Before connecting the HiPort+, turn it over. Insert a coin into the the SIM card cover slot. 2. Press on the coin and the cover will open. SIM Card Cover Closed. 5. Slide the cover back into place. If you have an additional SIM card, insert it the same way into the second slot. SIM Card Removal To remove, follow steps 1 and 2 to open the cover, then pull out the SIM card.
Installation Chapter 3 Connections 1. Power down your network devices. 2. Locate an optimum location for the HiPort+. Connect a standard Ethernet network cable to the HiPort+’s Internet port. Then, connect the other end of the Ethernet cable to your cable or DSL broadband modem. 4. Connect a standard RJ-11 phone cable to the HiPort+’s Phone port. This port should correspond to the SIM slot into which the SIM card was installed. Then connect the other end to a telephone.
Installation Chapter 3 Table or Wall Mount Instructions Horizontal Placement The HiPort+ can be placed on a level surface near an electrical outlet. Wall-Mounting Placement The HiPort+ has two wall-mount slots on its bottom panel. The distance between the slots is 123 mm (2.36 inches). Two screws are needed to mount the HiPort+. 4-5 mm 1-1.5 mm 2.5-3.0 mm Suggested Mounting Hardware Follow these instructions: 1. Determine where you want to mount the HiPort+.
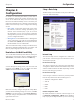
Configuration Chapter 4 Chapter 4: Configuration Setup > Basic Setup The Basic Setup screen is the first screen you see when you access the web-based utility. For details on connecting the HiPort+, please refer to the Installation chapter. This chapter will describe each screen of the web-based utility and each screen’s key functions. The web-based utility can be accessed via your web browser through use of a computer connected to the HiPort+.
Configuration Chapter 4 through a dynamic IP address. (This option usually applies to cable connections.) Internet Connection Type > Automatic Configuration - DHCP Static IP If you are required to use a permanent IP address to connect to the Internet, select Static IP. Internet Connection Type > Static IP IP Address This is the HiPort+’s IP address, when seen from the Internet. Your ISP will provide you with the IP Address you need to enter here.
Configuration Chapter 4 Connect on Demand: Max Idle Time You can configure the HiPort+ to cut the Internet connection after it has been inactive for a specified period of time (Max Idle Time). If your Internet connection has been terminated due to inactivity, Connect on Demand enables the HiPort+ to automatically re-establish your connection as soon as you attempt to access the Internet again. To use this option, select Connect on Demand.
Configuration Chapter 4 Static DNS 1-3 The Domain Name System (DNS) is how the Internet translates domain or Website names into Internet addresses or URLs. Your ISP will provide you with at least one DNS Server IP Address. You can enter up to three DNS Server IP Addresses here. The HiPort+ will use these for quicker access to functioning DNS servers. DHCP Server Setting DHCP Server DHCP is enabled by factory default.
Configuration Chapter 4 Setup > MAC (Address) Clone Every computer hardware device, including the network adapter of your computer has a unique code called a MAC address. Some Internet Service Providers (ISPs) require you to register this address with them in order to access the Internet. If you do not wish to re-register the MAC address with your ISP, you may assign the MAC address you have currently registered with your ISP to the HiPort+’s with the MAC Clone feature. Setup > DDNS > DynDNS.org DynDNS.
Configuration Chapter 4 Setup > Advanced Routing The Advanced Routing screen allows you to configure the dynamic and static routing settings. WAN (Internet) This option enables dynamic routing for the WAN side. Both This option enables dynamic routing for the WAN and LAN connections. Static Routing A static route is a pre-determined pathway that network information must travel to reach a specific host or network.
Configuration Chapter 4 Wireless > Basic Wireless Settings Wireless > Wireless Security The basic settings for wireless networking are set on this screen. The Wireless Security settings configure the security of your wireless network. There are six wireless security mode options supported by the HiPort+: WPA Personal, WPA Enterprise, WPA2 Personal, WPA2 Enterprise, RADIUS, and WEP. (WPA stands for Wi-Fi Protected Access, which is a security standard stronger than WEP encryption.
Configuration Chapter 4 server is connected to the HiPort+.) WPA2 Enterprise This option features WPA2 used in coordination with a RADIUS server. (This should only be used when a RADIUS server is connected to the HiPort+.) Security Mode > WPA Enterprise WPA Algorithm WPA supports two encryption methods, TKIP and AES, with dynamic encryption keys. Select the type of algorithm, TKIP or AES. (AES is a stronger encryption method than TKIP.
Configuration Chapter 4 IMPORTANT: If you are using WEP encryption, always remember that each device in your wireless network MUST use the same WEP encryption method and encryption key, or else your wireless network will not function properly. Wireless > Wireless MAC Filter Wireless access can be filtered by using the MAC addresses of the wireless devices transmitting within your network’s radius. RADIUS Server Address Enter the IP Address of the RADIUS server.
Configuration Chapter 4 Wireless > Advanced Wireless Settings This Wireless > Advanced Wireless Settings screen is used to set up the HiPort+’s advanced wireless functions. These settings should only be adjusted by an expert administrator as incorrect settings can reduce wireless performance.
Configuration Chapter 4 Security > Firewall Security > VPN The Firewall screen offers a firewall and filters that block specific Internet data types. The VPN Passthrough screen allows you to allow VPN tunnels using IPSec, L2TP, or PPTP protocols to pass through the HiPort+. Security > Firewall Security > VPN Firewall VPN Passthrough Firewall Protection A firewall enhances network security and uses Stateful Packet Inspection (SPI) for more detailed review of data packets entering your network.
Configuration Chapter 4 Access Restrictions > Internet Access The Internet Access screen allows you to block or allow specific kinds of Internet usage and traffic, such as Internet access, designated services, websites, and inbound traffic during specific days and times. affected by the policy. The List of PCs screen will appear. You can select a PC by MAC address or IP address. You can also enter a range of IP addresses if you want this policy to affect a group of PCs. 5.
Configuration Chapter 4 Applications & Gaming > Port Range Forward Port range forwarding sets up public services on your network, such as web servers, FTP servers, e-mail servers, or other specialized Internet applications. (Specialized Internet applications are any applications that use Internet access to perform functions such as videoconferencing or online gaming. Some Internet applications may not require any forwarding.
Configuration Chapter 4 Applications & Gaming > DMZ Applications and Gaming > QoS The DMZ screen allows one local user to be exposed to the Internet for use of a special-purpose service such as Internet gaming and videoconferencing. DMZ hosting forwards all the ports at the same time to one PC. The Port Range Forwarding is more secure because it only opens the ports you want to have opened, while DMZ hosting opens all the ports of one computer, exposing the computer to the Internet.
Configuration Chapter 4 Priority Select High or Low in the Priority column. The HiPort+’s four ports have been assigned low priority by default. Flow Control If you want the HiPort+ to control the transmission of data between network devices, select Enabled. To disable this feature, select Disabled. Ethernet Port Priority QoS does not require support from your ISP because the prioritized ports LAN ports 1-4 are in your network. This feature is enabled by default.
Configuration Chapter 4 Remote Router Access Administration > Log Remote Management To permit remote access of the HiPort+, from outside the local network, select Enable. Otherwise, keep the default setting, Disable. When you click the Administration tab, you will see the Log screen. It provides you with a log of all incoming and outgoing URLs or IP addresses for your Internet connection. Management Port Enter the port number that will be open to outside access.
Configuration Chapter 4 available on the right side of the screen. Help information is available on the right side of the screen. Administration > Diagnostics Administration > Factory Defaults The diagnostic tests (Ping and Traceroute) allow you to check the connections of your network devices, including the connection to the Internet. The Factory Defaults screen allows you to restore the HiPort+’s configuration to its factory default settings.
Configuration Chapter 4 Administration > Firmware Upgrade Administration > Config Management The Firmware Upgrade screen allows you to upgrade the HiPort+’s firmware. Do not upgrade the firmware unless you are experiencing problems with the HiPort+ or the new firmware has a feature you want to use. Administration > Config Management Administration > Firmware Upgrade Before upgrading the firmware, download the HiPort+’s firmware upgrade file from the Linksys Website, www.linksys.com.
Configuration Chapter 4 Status > Router The Router screen displays information about the HiPort+ and its current settings. The on-screen information will vary depending on the Internet Connection Type selected on the Setup screen. DNS1-3 Shown here are the DNS (Domain Name System) IP addresses currently used by the HiPort+. MTU Shown here is the MTU (Maximum Transmission Unit) setting for the HiPort+.