
User's Manual

Chapter 5
Advanced Configuration
18
Business Internet Video Camera with Audio
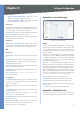
Access Co
de
Enter a co
d
e to use to access t
h
e
l
ive vi
d
eo
f
rom the Camera through cell phone connection.
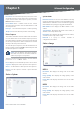
Vi
d
eo A
d
justment
s
Power L
i
ne Frequenc
y
Select the power line
f
requency
(50Hz or 60Hz) use
d
in your region, to improve t
h
e picture
quality under
f
luorescent lighting
.
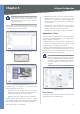
W
h
ite Ba
l
ance Se
l
ect t
h
e suita
bl
e w
h
ite
b
a
l
ance option
as you
d
esire
d.
Brig
h
tnes
s
I
f
necessary, you can adjust the brightness to
obtain a better image. For example, i
f
the camera is
f
acing
a
b
rig
h
t
l
ig
h
t, t
h
e image may
b
e too
d
ar
k
. In t
h
is case, you
can increase t
h
e
b
rig
h
tness.
S
h
arpnes
s
Select the desired option
f
or the sharpness.
You can se
l
ect a s
h
arpness va
l
ue
b
etween -3 an
d
3.
C
ontras
t
Select the desired option
f
or the contrast. You
can se
l
ect a contrast va
l
ue
b
etween -3 an
d
3.
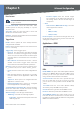
Opt
i
on
s
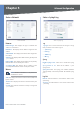
Ena
bl
e Time Stam
p
I
f
you want to display a time stamp
on the video, enable this
f
eature by checking the check
b
ox
.
Ena
bl
e Text Disp
l
a
y
I
f
you want to display text on the
video, enable this
f
eature by checking the check box. The
text can be up to 20 characters in length. This
f
eature is
o
f
ten used to identi
f
y the Camera location when multiple
Cameras are insta
ll
e
d.
Ena
bl
e Image Over
l
a
y
I
f
you want to display an image
on the video, enable this
f
eature by checking the check
b
ox.
Lin
k
sys Log
o
T
h
is option wi
ll
d
isp
l
ay a Lin
k
sys
logo on top o
f
the video. Positioning o
f
the logo is
determined by the x and y coordinates de
f
ined in the
Image
P
ositio
n
f
ields. Be sure not to de
f
ine a position
that is outside o
f
the de
f
ined resolution.
User De
f
ined Imag
e
T
h
is option a
ll
ows you to up
l
oa
d
a bitmap image
f
ile (smaller than 64Kb).
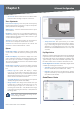
Image Pos
i
t
i
o
n
T
h
e Image
P
ositio
n
f
ields allow you
to de
f
ine the coordinates o
f
the Linksys logo or user
de
f
ined image. The upper le
f
t corner value is 0, 0.
Increasing t
h
e X va
l
ue (X: 0 - 639) wi
ll
move t
h
e image
to t
h
e rig
h
t. Increasing t
h
e Y va
l
ue (Y: 0 - 479) wi
ll
move
t
h
e image
d
own.
N
O
TE
:
Select values within the range o
f
the
se
l
ecte
d
image reso
l
ution.
•
•
•
•
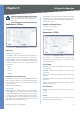
Image
P
ositio
n
Transparent Co
l
or This option allows you to de
f
ine
a co
l
or t
h
at s
h
ou
ld
appear transparent. T
h
is is a
ll
ows a
l
ogo or ot
h
er image to appear over t
h
e vi
d
eo wit
h
out
d
isp
l
aying a so
l
i
d
b
ac
k
groun
d
co
l
or. T
h
e co
l
or va
l
ue
must
b
e entere
d
in RGB
h
exa
d
ecima
l
co
l
or co
d
e, suc
h
as 0000
ff
.
Day/Nig
h
t Switc
h
When the available visible light
f
alls below the minimum
requirement, the Camera will be able to “see” in
f
rared light,
t
h
us ma
k
ing t
h
e image c
l
earer. W
h
en t
h
e avai
l
a
bl
e visi
bl
e
l
ig
h
t is average or a
b
ove t
h
e minimum requirement, an
d
t
h
e camera wi
ll
b
e a
bl
e to avoi
d
t
h
e c
h
rominance issue
.
Ena
bl
e Nig
h
t Vision Sc
h
e
d
u
l
e Ena
bl
e Da
y
/ Nig
h
t switc
h
sc
h
e
d
u
l
e
b
y c
h
ec
k
ing t
h
is c
h
ec
k
b
ox.
Start T
i
m
e
S
e
l
ect t
h
e evening start time
b
y se
l
ecting
the hour and minute (uses 24 hour time
f
ormat).
En
d
Tim
e
Enter t
h
e
h
our in t
h
e morning to en
d
t
h
e
night vision
f
eature, by selecting the hour and minute
(uses 24 hour time
f
ormat)
.
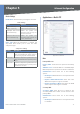
Au
d
io/Vi
d
eo > Au
d
i
o
Au
d
io
/
Vi
d
eo > Au
d
i
o
•
•
•