USER GUIDE Wireless-G Internet Home Monitoring Camera Model: WVC54GCA (EU)
About This Guide About This Guide Icon Descriptions While reading through the User Guide you may see various icons that call attention to specific items. Below is a description of these icons: NOTE: This check mark indicates that there is a note of interest and is something that you should pay special attention to while using the product. WARNING: This exclamation point indicates that there is a caution or warning and it is something that could damage your property or product.
Table of Contents Chapter 1: Product Overview 4 Front Panel . . . . . . . . . . . . . . . . . . . . . . . . . . . . . . . . . . . . . . . . . . . . . . . . . . 4 Back Panel . . . . . . . . . . . . . . . . . . . . . . . . . . . . . . . . . . . . . . . . . . . . . . . . . . . 4 Bottom Panel . . . . . . . . . . . . . . . . . . . . . . . . . . . . . . . . . . . . . . . .
Table of Contents Declaration of Conformity with Regard to EU Directive 1999/5/EC (R&TTE Directive) . . 36 Wireless Equipment (Wireless-N/G/A/B Products) . . . . . . . . . . . . . . . . . . . . . . . . . 37 CE Marking . . . . . . . . . . . . . . . . . . . . . . . . . . . . . . . . . . . . . . . . . . . . . . . . . 37 National Restrictions . . . . . . . . . . . . . . . . . . . . . . . . . . . . . . . .
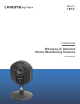
Product Overview Chapter 1 Bottom Panel Chapter 1: Product Overview Thank you for choosing the Linksys Wireless-G Internet Home Monitoring Camera. The Camera sends live video through the Internet to a web browser anywhere in the world! This compact, self-contained unit lets you keep an eye on your home, your kids, your workplace—whatever’s important to you. Reset Button Opening Front Panel Power LED Microphone Reset This button is used to reset the Camera. Insert a paper clip into the opening.
Wireless Security Checklist Chapter 2 Chapter 2: Wireless Security Checklist Wireless networks are convenient and easy to install, so homes with high-speed Internet access are adopting them at a rapid pace. Because wireless networking operates by sending information over radio waves, it can be more vulnerable to intruders than a traditional wired network. Like signals from your cellular or cordless phones, signals from your wireless network can also be intercepted.
Setting Up and Mounting the Camera Chapter 3 Chapter 3: Setting Up and Mounting the Camera Setup Wizard The Wireless-G Internet Home Monitoring Camera Setup Wizard will guide you through the installation and configuration procedure. 1. Insert the Setup CD-ROM into your CD-ROM drive. The Setup Wizard should run automatically, and the Welcome screen should appear. If not, click Start, then select Run, and then in the field provided, enter D:\SetupWizard.exe (if “D” is the letter of your CDROM drive).
Setting Up and Mounting the Camera Chapter 3 6. Plug the included power adapter into the Camera’s Power port. Plug the other end into an electrical outlet. Click Next. If the Camera you want is not displayed, click Search Again to run a new search for Cameras. Otherwise, in the Camera List box, click the name of the Camera you are installing. Write down the Camera’s IP address shown in the Status box, so you can use it to access the Web-based Utility later. Click Next. 9. Enter a name for the Camera.
Setting Up and Mounting the Camera Chapter 3 13. The Wizard displays the wireless security method that your network is using: WPA/WPA2-Personal, WEP (128-Bit), or WEP (64-Bit). Follow the appropriate instructions below. If you are not using wireless security, select Disabled and go to step 14. •• WPA/WPA2-Personal Enter a passphrase in the Passphrase field and click Next. The passphrase is casesensitive and must be from 8 to 63 characters in length. Enter the Static IP Address 11.
Setting Up and Mounting the Camera Chapter 3 14. Review the Camera’s settings. To make changes to the settings, click Back to go back to the previous screen. If the settings are correct, click Save to continue. 18. Reconnect the power to the Camera. Click Next. Reconnect the Power Save the Camera Settings 15. When the Wizard informs you that the new Camera settings have been saved, click Continue. 19. The Setup Wizard displays Camera successfully connected to network.
Setting Up and Mounting the Camera Chapter 3 Placement Options 5. Adjust the tilt of its head accordingly, as described below in section “Camera Head Tilting”. The Camera can stand on a surface or be mounted on a wall. Depending on the positioning you want, you attach the Camera head to its stand at two different points. Stand Option Follow these steps to stand the Camera on a surface. 1. Insert the screw end of the stand into the hole on the bottom panel.
Setting Up and Mounting the Camera Chapter 3 Camera Head Tilting After the Camera is assembled, you can tilt the Camera head on its ball joint using the lock nut on the camera stand. Loosen the lock nut, tilt the camera head as desired, then tighten the lock nut to secure the position. Lock Nut Camera Tilting Feature with Stand Option The installation of the Wireless-G Internet Home Monitoring Camera is complete. Go to Chapter 4: Installing and Using the Camera Utility, page 12.
Installing and Using the Camera Utility Chapter 4 Chapter 4: Installing and Using the Camera Utility Overview Using the Camera Utility for the First Time The Camera Utility starts up automatically after the Utility is successfully installed. This section describes the steps to follow to set up the Camera. 1. The Camera Utility displays the Setup screen and searches for your Wireless-G Camera. This chapter will instruct you on how to install and use the Camera Utility on your PC.
Installing and Using the Camera Utility Chapter 4 Using the Camera Utility After the Camera Utility is installed, its icon is displayed on the Desktop and in the System Tray of the Taskbar. To open the Camera Utility, use either icon as follows: •• Double-click the icon on your desktop •• Right-click the icon in the system tray, then click Wireless-G Internet Home Monitoring Camera.
Chapter 4 Installing and Using the Camera Utility Viewing Area Multiple-Camera Layouts The Viewing Area takes up most of the Monitor window. The Viewing Area can have four different layouts, with video windows for one, four, six, or nine Cameras. The layout is selected using the video layout controls described in “Video Layout Controls’”. In a multiple-Camera layout, one of the video windows is always outlined in green. This indicates the currently selected Camera.
Chapter 4 Installing and Using the Camera Utility Video Control Buttons Video Selection The video control buttons are located along the lower left edge of the viewing area. These buttons act upon the selected Camera as explained below. This section of the Playback window lets you select the video(s) for playback. Button Function View Click this button to view the current video. Record Click this button to record* the current video.
Chapter 4 Installing and Using the Camera Utility Basic Video Controls Hard Disk Quota This section of the Playback window lets you perform basic functions on the video(s) you have selected for playback. The controls and their functions are described below. This section of the Playback window indicates how much hard disk is allocated for recorded video. Hard Disk Quota Advanced Video Controls Basic Video Controls Control Advanced video functions are performed using the advanced video controls.
Chapter 4 Installing and Using the Camera Utility Setup Screen Port Number Displays the Camera’s port number. The Setup screen is accessed by clicking the Setup button on the Monitor window of the Camera Utility. There are four tabs along the left side of the Setup screen: Network Camera, Internet Camera, Recording Schedule, and Preferences. By default, the Network Camera tab is selected when the Setup screen is opened. These tabs display screens whose functions are described below.
Chapter 4 Installing and Using the Camera Utility Setup > Recording Schedule Memory Requirements for Video Recordings To set up a recording schedule for a Camera, then click the Recording Schedule tab. You may find it helpful to know how much memory is required to hold a video recording. For information on estimated bit rates for a typical video recording at each available resolution and video, refer to Setup > Image, page 23.
Chapter 4 Installing and Using the Camera Utility Instant Recording Time Limit Maximum Time Limit for Instant Recording This is the maximum length of a recording that is started by clicking the Record button on the Monitor window. The default is 10 min. Motion Detection The following two settings apply only if the Motion Detection Recording feature is enabled. •• Record before motion detected This is the length of time prior to the detection of motion that will be saved with the recording.
Advanced Configuration with the Web-based Utility Chapter 5 Chapter 5: Advanced Configuration with the Web-based Utility •• Linksys Web – Select this tab to go to the Linksys website, www.linksys.com. •• Help – Select this tab to display the Help screen. Go to the “Help” section for more information. •• Exit – Select this tab to close the Utility. View Video Overview Use the Camera’s Web-based Utility to access and alter its settings.
Advanced Configuration with the Web-based Utility Chapter 5 Resolution Snapshot Use the Resolution drop-down menu to select the display resolution. Possible values are Auto (default), 640x480, 320x240, or 160x120. The display changes to the new resolution immediately after it is selected. You use the Snapshot button to capture a still image of the video display. Snapshot Button When you click this button, the Snap Shot window appears.
Advanced Configuration with the Web-based Utility Chapter 5 Setup > Basic Network Settings The Setup > Basic screen appears when you click the Setup tab or Advanced Configuration on the Welcome screen. The Setup > Basic screen allows you to alter the Camera’s Device settings, Network settings, Wireless settings, and Security settings. •• Configuration Type If you want to automatically assign the Camera an IP address from a DHCP server, then select Obtain Address Automatically (DHCP) (default).
Advanced Configuration with the Web-based Utility Chapter 5 Setup > Image The Setup > Image screen allows you to alter the Camera’s video settings. Wireless Security - WEP Security Mode •• TX Key Select the number of the key used on the wireless network. •• WEP Encryption Select the appropriate option for key length based on your network settings. •• Passphrase Type in the passphrase used to generate WEP keys on your network and click Generate.
Advanced Configuration with the Web-based Utility Chapter 5 Estimated Bit Rates for Video Viewing or Recording Resolution Quality Level Bit Rate in kbps 640 x 480 Very High 4000 640 x 480 High 3200 640 x 480 Normal 1200 640 x 480 Low 480 640 x 480 Very Low 160 320 x 240 Very High 1000 320 x 240 High 800 320 x 240 Normal 300 320 x 240 Low 120 320 x 240 Very Low 40 160 x 128 Very High 800 160 x 128 High 400 160 x 128 Normal 200 160 x 128 Low 100 160 x 128 Very
Advanced Configuration with the Web-based Utility Chapter 5 To upgrade the firmware: Other operations: 1. Go to www.linksys.com, and download the firmware upgrade file for the Camera. Then extract the file. •• Clear While editing a user’s information, click Clear to 2. From the Setup > Administration screen, click Upgrade Firmware. 3. You will see the Upgrade Firmware screen. Click Browse to find the extracted file, and then double-click it. 4.
Chapter 5 Advanced Configuration with the Web-based Utility NOTE: Before you can use the Camera’s DDNS feature, you must configure the port forwarding feature on your network router. Go to http://kb.linksys.com/16337 for instructions on how to configure port forwarding on a Linksys router. For other routers, refer to your router’s documentation. RTSP Port To change the RTSP Port number, enter the desired number in the range of 1024 to 65535. The default is 554.
Advanced Configuration with the Web-based Utility Chapter 5 Setup > Motion Detection The Setup > Motion Detection screen allows you to configure the Camera’s motion detection settings. Send To Enter the e-mail address where e-mail will be sent upon motion detection. You can optionally specify up to three addresses. Show “From” as Enter the e-mail address to be used as the From field in the e-mail to be sent.
Chapter 5 Advanced Configuration with the Web-based Utility The following fields appear on the left side of the Set Sensitivity Area window for each sensitivity area. Specify the settings as needed, then click Apply. •• Full Screen or Window 2-4 This is the name of the Setup > Status The Setup > Status screen allows you to view the Camera’s status information and log. sensitivity area, either Full screen by default, or if Setting Custom Area is selected, Window 2, Window 3, or Window 4 (custom areas).
Advanced Configuration with the Web-based Utility Chapter 5 Help Through the Help screen, you’ll find links to additional resources for the Camera and its Utility. If you select the Help tab directly from the Welcome screen, then you will see the User Help screen and will only be able to access these resources.
Appendix A Troubleshooting Appendix A: Troubleshooting I’m not able to play my recording video files. I can’t view the Camera’s video using Internet Explorer. I have two Cameras and see two WVC54GCAs listed in my Camera Utility. When I click to view both Cameras, I see the video of only one Camera. Make sure the OCX plug-in was correctly installed. If you’re not sure, re-install the plug-in by following these instructions •• On the Welcome screen of the Camera’s Web- based Utility, click View Video.
Specifications Appendix B Appendix B: Specifications Minimum System Requirements 1 Camera PC with 2 GHz or faster processor 512 MB RAM Microsoft Windows 2000, XP or Vista 500MB of available hard drive space Graphics card with a minimum of 128 MB Internet Explorer 6.0 (or above), Mozilla Firefox, Netscape 7.0 (or above) DirectX 9.0 (or above) CD-ROM Drive Model WVC54GCA Standards IEEE 802.11g, IEEE 802.3, IEEE 802.
Appendix C Appendix C: Warranty Information Limited Warranty Linksys warrants that this Linksys hardware product will be substantially free of defects in materials and workmanship arising under normal use during the Warranty Period, which begins on the date of purchase by the original enduser purchaser and lasts for the period specified below: •• Two (2) years for new product •• Ninety (90) days for refurbished product This limited warranty is non-transferable and extends only to the original end-user pur
Appendix C Warranty Information and a copy of your dated proof of original purchase when returning your product. Products received without a RMA number and dated proof of original purchase will be rejected. Do not include any other items with the product you are returning to Linksys. Defective product covered by this limited warranty will be repaired or replaced and returned to you without charge.
Appendix D Appendix D: Regulatory Information FCC Statement This product has been tested and complies with the specifications for a Class B digital device, pursuant to Part 15 of the FCC Rules. These limits are designed to provide reasonable protection against harmful interference in a residential installation. This equipment generates, uses, and can radiate radio frequency energy and, if not installed and used according to the instructions, may cause harmful interference to radio communications.
Appendix D Regulatory Information Wireless Disclaimer The maximum performance for wireless is derived from IEEE Standard 802.11 specifications. Actual performance can vary, including lower wireless network capacity, data throughput rate, range and coverage.
Regulatory Information Appendix D Declaration of Conformity with Regard to EU Directive 1999/5/EC (R&TTE Directive) Nederlands [Dutch]: Dit apparaat voldoet aan de essentiele eisen en andere van toepassing zijnde bepalingen van de Richtlijn 1999/5/EC.
Regulatory Information Appendix D Wireless Equipment (Wireless-N/G/A/B Products) The following standards were applied during the assessment of the product against the requirements of the Directive 1999/5/EC: •• Radio: EN 300 328 and/or EN 301 893 as applicable •• EMC: EN 301 489-1, EN 301 489-17 •• Safety: EN 60950 and either EN 50385 or EN 50371 Dynamic Frequency Selection (DFS) and Transmit Power Control (TPC) are required for operation in the 5 GHz band.
Regulatory Information Appendix D France Product Usage Restrictions For 2,4 GHz, the product should not be used outdoors in the band 2454 - 2483,5 MHz. There are no restrictions when used in other parts of the 2,4 GHz band when used indoors. Check http://www.arcep.fr/ for more details. This product is designed for indoor usage only. Outdoor usage is not recommended, unless otherwise noted. Pour la bande 2,4 GHz, l’ équipement ne doit pas être utilisé en extérieur dans la bande 2454 - 2483,5 MHz.
Appendix D User Information for Consumer Products Covered by EU Directive 2002/96/EC on Waste Electric and Electronic Equipment (WEEE) This document contains important information for users with regards to the proper disposal and recycling of Linksys products.
Appendix D Regulatory Information Eesti (Estonian) - Keskkonnaalane informatsioon Euroopa Liidus asuvatele klientidele Français (French) - Informations environnementales pour les clients de l’Union européenne Euroopa Liidu direktiivi 2002/96/EÜ nõuete kohaselt on seadmeid, millel on tootel või pakendil käesolev sümbol , keelatud kõrvaldada koos sorteerimata olmejäätmetega. See sümbol näitab, et toode tuleks kõrvaldada eraldi tavalistest olmejäätmevoogudest.
Appendix D Regulatory Information Lietuvškai (Lithuanian) - Aplinkosaugos informacija, skirta Europos Sąjungos vartotojams Nederlands (Dutch) - Milieu-informatie voor klanten in de Europese Unie Europos direktyva 2002/96/EC numato, kad įrangos, kuri ir kurios pakuotė yra pažymėta šiuo simboliu (įveskite simbolį), negalima šalinti kartu su nerūšiuotomis komunalinėmis atliekomis. Šis simbolis rodo, kad gaminį reikia šalinti atskirai nuo bendro buitinių atliekų srauto.
Appendix D Regulatory Information Português (Portuguese) - Informação ambiental para clientes da União Europeia Slovenščina (Slovene) - Okoljske informacije za stranke v Evropski uniji A Directiva Europeia 2002/96/CE exige que o equipamento que exibe este símbolo no produto e/ou na sua embalagem não seja eliminado junto com os resíduos municipais não separados. O símbolo indica que este produto deve ser eliminado separadamente dos resíduos domésticos regulares.
Appendix E Appendix E: Software License Agreement Software in Linksys Products This product from Cisco-Linksys LLC or from one of its affiliates Cisco Systems-Linksys (Asia) Pte Ltd. or CiscoLinksys K.K. (“Linksys”) contains software (including firmware) originating from Linksys and its suppliers and may also contain software from the open source community. Any software originating from Linksys and its suppliers is licensed under the Linksys Software License Agreement contained at Schedule 1 below.
Software License Agreement Appendix E your Linksys product and/or the Software is being used in accordance with the terms of this Agreement; (iii) to provide improvements to the way Linksys delivers technology to you and to other Linksys customers; (iv) to enable Linksys to comply with the terms of any agreements it has with any third parties regarding your Linksys product and/or Software and/or (v) to enable Linksys to comply with all applicable laws and/or regulations, or the requirements of any regulat
Appendix E GNU General Public License is intended to guarantee your freedom to share and change free software–to make sure the software is free for all its users. This General Public License applies to most of the Free Software Foundation’s software and to any other program whose authors commit to using it. (Some other Free Software Foundation software is covered by the GNU Lesser General Public License instead.) You can apply it to your programs, too.
Appendix E c. If the modified program normally reads commands interactively when run, you must cause it, when started running for such interactive use in the most ordinary way, to print or display an announcement including an appropriate copyright notice and a notice that there is no warranty (or else, saying that you provide a warranty) and that users may redistribute the program under these conditions, and telling the user how to view a copy of this License.
Software License Agreement Appendix E 7. If, as a consequence of a court judgment or allegation of patent infringement or for any other reason (not limited to patent issues), conditions are imposed on you (whether by court order, agreement or otherwise) that contradict the conditions of this License, they do not excuse you from the conditions of this License.
Appendix E GNU LESSER GENERAL PUBLIC LICENSE Version 2.1, February 1999 Copyright (C) 1991, 1999 Free Software Foundation, Inc. 51 Franklin Street, Fifth Floor, Boston, MA 02110-1301, USA Everyone is permitted to copy and distribute verbatim copies of this license document, but changing it is not allowed. [This is the first released version of the Lesser GPL. It also counts as the successor of the GNU Library Public License, version 2, hence the version number 2.1.
Appendix E freedom and the wherewithal to run that program using a modified version of the Library. The precise terms and conditions for copying, distribution and modification follow. Pay close attention to the difference between a “work based on the library” and a “work that uses the library”. The former contains code derived from the library, whereas the latter must be combined with the library in order to run.
Appendix E Thus, it is not the intent of this section to claim rights or contest your rights to work written entirely by you; rather, the intent is to exercise the right to control the distribution of derivative or collective works based on the Library. In addition, mere aggregation of another work not based on the Library with the Library (or with a work based on the Library) on a volume of a storage or distribution medium does not bring the other work under the scope of this License. 3.
Appendix E Software License Agreement b) Use a suitable shared library mechanism for linking with the Library. A suitable mechanism is one that (1) uses at run time a copy of the library already present on the user’s computer system, rather than copying library functions into the executable, and (2) will operate properly with a modified version of the library, if the user installs one, as long as the modified version is interface-compatible with the version that the work was made with. 8.
Software License Agreement Appendix E on consistent application of that system; it is up to the author/donor to decide if he or she is willing to distribute software through any other system and a licensee cannot impose that choice. This section is intended to make thoroughly clear what is believed to be a consequence of the rest of this License. 12.
Appendix E 2. Redistributions in binary form must reproduce the above copyright notice, this list of conditions and the following disclaimer in the documentation and/or other materials provided with the distribution. 3. All advertising materials mentioning features or use of this software must display the following acknowledgment: “This product includes software developed by the OpenSSL Project for use in the OpenSSL Toolkit. (http://www.openssl.org/)” 4.
Appendix E Software License Agreement The license and distribution terms for any publicly available version or derivative of this code cannot be changed. i.e. this code cannot simply be copied and put under another distribution license [including the GNU Public License.