
Installation Guide


Acuity Brands Lighting, Inc.
One Lithonia Way, Conyers, GA 30012
www.AcuityBrands.com
TROUBLE SHOOTING GUIDE
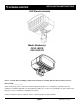
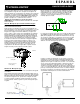
Vandalguard (polycarbonate shield)
To install vandalguard, unscrew the (2) 10-24 socket head screws
on the front face of the bezel and remove bezel. Replace glass
lens with vandalguard and re-install bezel. Note: do not touch
LED
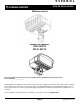
Wireguard
To install wireguard, unscrew the (2) 10-24 socket head screws
on the front face of the bezel and remove bezel. Insert Wireguard
and re-install bezel. Note: do not remove glass or touch LED
bezel
lens
screw (2)
Trouble Shooing Guide
If this fi xture fails to operate properly, use the guide below to
diagnose and correct the problem.
• Verify that power is turned on at switch and breaker
• Verify that fi xture is wired properly
• Verify that line voltage is correct
If further assistance is required, contact:
Technical Support at: (800) 279-8041
Cleaning and Maintenance
Caution: Be sure fi xture temperature is cool enough to touch. Do
not clean or maintain while fi xture is energized.
This LED light provides low maintenance service with no bulbs
to change. Clean surfaces with mild soap and water. Do not use
abrasive materials such as scouring pads or powders, steel wool
or abrasive paper.
Do not touch LED.
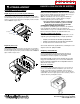
Driver Access
The driver is pre-wired so access to the driver during installation
is uncessary but in case of a driver failure the driver can be
accessed and replaced. To access the driver compartment,
unscrew the (4) 10-24 socket head screws in the back of the
housing and remove the bezel and heatsink assembly.
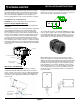
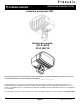
CAUTION: WIRING AND FIXTURE OPERATION
Make sure power is turned off.
To Ground fi xture use Wire Nut to connect the (copper) house
supply ground wire & the (green) fi xture ground wire. Note: If
house wiring does not include a ground wire, consult your local
electrical code for approved grounding methods.
For proper connection, place wire nut over
wires and twist clockwise until tight.
To connect supply wires use Wire Nuts to connect the black
fi xture wire to the black power supply wire and the white fi xture
wire to the white (neutral) supply wire.
ACCESSORIES (sold separately)