
Data Sheet
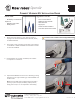

CONNECT UPGRADE KIT INSTALLATION GUIDE
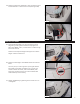
DISASSEMBLE YOUR LITTER-ROBOT
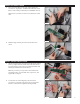
1. Press the Power button to turn the unit o and
unplug it from the wall. Remove the Bonnet, Globe,
and Waste Drawer.
2. The plastic component that covers the Control Panel
on the Base is called the Bezel. Unscrew the 5 screws
to remove the Bezel.
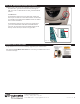
Upgrade Kit includes:
• Main Circuit Board
• WebConnect Module
• Wire Harness
• Applique
• Serial Number Stickers
• Connect Quick Start Guide
Open Air
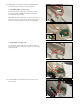
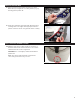
4. Separate the Bezel from the Control Panel by pushing
the buttons through and lifting up. Set the Bezel and
screws aside.
Note: The Circuit Board and Keypad may be held in
place by a piece of tape (assembly aid). If present,
simply remove it; it is not required for reassembly.
Figure 1
1
Installation Video
Contact Customer Service
Monday - Friday, 9am - 7pm ET
1-877-250-7729 or support@litter-robot.com
LR3-8060-0b
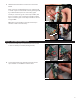
Figure 2
3. Lift the Bezel out of place; if needed, use needle-
nose pliers for assistance.
Figure 3
You will need:
• #2 Phillips screwdriver
Installation video at litter-robot.com/upgradekitinstall
Optional:
• Needle-nose pliers
• Utility knife