Gambrel Barn Construction Manual 8x8 through 16x24 Units Tools Needed: ® • • • • • • Cordless drill (12V or higher) #2 square drive bit Hammer 6’ step ladder Tape measure Square utility knife w/ blade & hook blade Little Cottage Co. PO Box 455 Berlin OH 44601 330-893-4212 © 2007 Little Cottage Co.
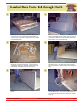
Gambrel 12x24 Gambrel Barn Barn Units Units-- 8x8 through 16x24 1 ® 2 Thank you for purchasing from Little Cottage Co! As shown above, all building materials necessary to construct your playhouse or storage barn are included in the materials skid. 3 4 Trusses Dripedge Place your materials skid in the exact location at which your building will be located. Remove the end and side wall sections from the materials and locate them close to your construction site.
Gambrel Barn Units 8x8 through through 16x24 12x24 Units-- 8x8 7 ® 8 Install the remaining wall section(s) in a similar manner. Locate the end wall section (without doors) and slide into place. 9 10 Note that the end wall section’s base 2X will rest on the floor while the remaining 2X’s will abut with the vertical 2X’s on the side wall sections. 11 From the outside, hold the end wall section firmly in place.
Gambrel Barn Barn Units Units-- 8x8 Gambrel 8x8 through through 16x24 12x24 13 ® 14 With the corners secure, now drive 2½” screws through the end wall’s base 2X and into the floor every 16.” Locate the remaining end wall section with the door and set in place. 15 16 From the outside, hold the end wall section firmly in place. 17 From the inside, drive a 2½” screws through the base 2X and into the floor at one corner.
® Gambrel Barn Barn Units Units-- 8x8 through 16x24 Gambrel 12x24 19 20 Hold the door in place (i.e., with door aligned to end wall and floor) and mark around the barrel bolt as shown. 21 Drill hole using a 5/16” drill bit to accommodate the barrel bolt. Slide bolt into hole and verify (when closed) both doors are aligned with end wall. 22 Next, locate the door latch as shown above. 23 Position outside latch in alignment with drill points. Secure handle using two 2½” screws.
Gambrel 12x24 Gambrel Barn Barn Units Units-- 8x8 through 16x24 25 ® 26 Locate the wall brace and secure to the center most 2X on one side wall. Note that the brace must be flush against the wall’s vertical 2X and siding. 27 Push the side walls inward against the wall brace. Then, secure the wall brace to the opposite side wall in a similar manner. 28 Truss Plate Truss Mark Now locate the first set of truss marks and truss plate (as above) and set the first truss in place (i.e., against the mark).
Gambrel 12x24 Gambrel Barn Barn Units Units-- 8x8 through 16x24 31 ® 32 Repeat on opposite side and install remaining trusses. 33 Secure the bottom of the end wall (w/o door) with 2½” screws every 12” (or every other board). 34 Then attach trim along corners. Next, secure the edges of the end wall with 2½” screws every 12.” Construction Manual © 2007 Little Cottage Co.
® Gambrel 12x24 Gambrel Barn Barn Units Units-- 8x8 through 16x24 35 36 Beginning on one side of structure and consistent with layout diagram provided, situate the OSB roofing panels consistent with their designated locations. 37 Center of truss Raise the first OSB panel to position. Use an angle square to ensure that it’s edge is flush with the corner of truss. Note that the edge of OSB panel must be centered along the truss’ edge. 38 Secure the base of the OSB panel to truss using a 1¼.
Gambrel Barn Units 8x8through through16x24 12x24 Units--8x8 41 ® 42 With all OSB panels in place, locate the rake block. Insert as shown above, using a angle square to ensure that it is level with the OSB and trim. Secure to wall using a 2½” screw. Repeat on opposite side. 43 Raise the rake and set in place underneath the OSB sheeting and abutted against the 2X frame and rake block. 45 Use an angle square to square the rake with the rake block.
® Gambrel 12x24 Gambrel Barn Barn Units Units-- 8x8 through 16x24 47 48 Install dripedge along sides of roof using 1¼” screws every 1’. 49 Then, install dripedge along the ends of structure using 1¼” screws, beginning at the front corner. 50 Continue to attach dripedge using 1¼” screws to the first bend. 51 52 1” screw just after bend Bend the dripedge along the edge of roof, securing it to the roof with a 1¼” screw just after the bend. Attach dripedge every 1.
® Gambrel Barn Units 8x8 through through 16x24 12x24 Units-- 8x8 53 1¼” screw just before bend 54 Secure the dripedge with a 1¼” screw just before the bend. Then, bend dripedge (along roof line) and attach along the remaining roof. Complete on the opposite end of structure. 55 Snap a chalk line along the OSB consistent with the width of the starter strip. Consult the instructions provided with your shingle package. 56 Align the top of starter shingles with the chalk line and attach.
® Gambrel Barn Barn Units Units-- 8x8 through 16x24 Gambrel 12x24 59 60 Once at the end of roof, use a metal square and carefully trim off excess shingles from the edge. Now begin attaching shingles to the upper section. As shown above, fold shingle over the bottom section. 61 62 Continue attaching shingles to the top roof section, staggering in a shown. 63 Continue attaching shingles to top roof section until reaching the ridge.
® Gambrel 12x24 Gambrel Barn Barn Units Units-- 8x8 through 16x24 65 66 Beginning above the door, cut the ridge cap (as shown) and attach to roof. Continue capping off roof until reaching the opposite edge of structure. 67 68 Once at the end of structure, finish the cap with a no adhesion strip. Once capped, staple shingles along the corners of roof line. 69 Your structure is now complete! Construction Manual © 2007 Little Cottage Co.