LITTLE WONDER ® Shredding Model 8160 © 2003 Little Wonder, Schiller Grounds Care, Inc. All Rights Reserved.
Table of Contents Important Information Important Information A. Introduction Introduction............................................................... 1 Service Information................................................... 1 Special Safety Information........................................ 1 Packaging Packaging Information................................
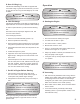
Packaging PACKAGE LID DISCHARGE CHUTE NOZZLE ASSEMBLY PARTS BOX: (2) HOSE BANDS (720333.17) (2) HOSE CLAMPS (720105) (1) HOSE FLANGE ASSEMBLY (720101.17) (1) FLANGE CLAMP PLATE (720253.
Safety and Warnings Start Stop Caution: Hot Surface Faster WARNING Slower Caution: Thrown objects. Keep bystanders away. WARNING WARNING P/NO. 720609 720600 P/NO.720600 P/No 910609 720603 -1 max. 3 700 min Item # XXXX-XX-XX Month/Year SERIAL No. LABEL 720602 P/NO. 720602 P/NO. 720601 3. P/NO. 720605 Serial # P/NO.
General Safety Rules 1. Read and understand manual. A. 2. Wear eye, hearing, and breathing protection, proper clothing and footwear. Don’t attempt to remove materials from intake or discharge when Shredding TruckLoader is running, or fan is rotating. 3. While operating the machine always be sure of a safe and secure operating position, maintain a firm footing and good balance at all times. 4. Keep area clear of children, pets and bystanders. 5.
B. Warnings - “Do’s” Con’t Always store Shredding TruckLoader indoors. When not in use, store Shredding TruckLoader indoors in a sheltered area (a dry place) where it’s not accessible to children. The Shredding TruckLoader, as well as fuel, should not be stored in a house. Keep throttle in the stop position. Always be sure Shredding TruckLoader is fully assembled. Never operate Shredding TruckLoader without all guards and defectors in place.
Assembly Instructions This unit is designed for vacuuming leaves, grass clippings, other organic materials, and quickly loading them from the ground into a truck. Vacuuming sand, rocks, and hard litter will affect the longevity of this machine, and can cause part damage. The Shredding TruckLoader is designed to be used in conjunction with a truck that has a receiver box installed. Be sure the receiver box is strong enough to withstand a high velocity and force of the incoming debris. WARNING DANGER 3.
2. The flange will activate the safety switch assy (720232) that will allow you to operate the unit. 3. When hose is disconnected you can use the flapper retainer to lock the flapper in the closed position during the transportation. E. Attach Boom to the Frame and Connect it to the Hose 1. Insert shaft of the boom assembly (720331.7) into the opening in the frame’s tube support assembly (720306.7). 2.
G. Use of Lifting Lug Little Wonder Shredding TruckLoader is supplied with convenient Lifting Lug that can be used when you need to move the unit. This Lug can hold weight up to a total of 500lbs. WARNING DANGER Do not use or service the unit when it’s suspended from the Lifting Lug. Operation WARNING DANGER THE OPERATOR OF THIS SHREDDING TRUCKLOADER IS RESPONSIBLE FOR ACCIDENTS OR HAZARDS OCCURRING TO HIMSELF, OTHER PEOPLE OR THEIR PROPERTY. A. Starting the Engine H.
WARNING DANGER Keep recoil starter screen and entire engine clear of all debris. Do not operate engine with an accumulation of grass, dirt, leaves or other combustible material near muffler. DO NOT operate unit if excessive vibration occurs; shut engine off immediately! Remove spark plug wires and check for damaged impeller or talon ring, loose impeller bolt, loose impeller key, or lodged foreign objects. C. Removing Clog in Hose 1.
Storage and Maintenance A. Storage 1. When not in use store Shredding TruckLoader, in sheltered area (a dry place) not accessible to children. Keep throttle in the “Slow” position and switch “OFF”. 2. The Shredding TruckLoader, as well as fuel, should not be stored in a house or poorly ventilated areas. 3. Do not store fuel in the engine’s gas tank longer then 30 days. 4.
C. Directions for removing the Fan and Talon ring, and reinstallation 1. Remove spark plug wires from spark plug. 2. Remove hose flange assembly. 3 Remove front plate assembly. 4. Remove bolt securing fan and talon ring to engine crankshaft. 9. Rotate the drive shaft with installed key by pulling the starter rope until key is aligned with one of the notches. Then align fan keyway with the drive shaft hey and install fan (#720220). 10.
D. Shredding TruckLoader bolt/nut Torque specification Location Bolt/ Nut Size Housing to engine face 3/ 4 Housing to engine mounting plate Engine to engine mounting plate Part No. Item # (Exploded View) Min torque Ft-Lbs (in-lbs) Max torque Ft-Lbs (in-lbs) 910503 18 22 (264) 28 (336) - 18 flange nut 64141-6 21 16 (192) 22 (276) - 18 x 1 - 3/4 gr.
Part Numbers A. Housing Assembly Key No. Part No. Description 1 2 3 4 6 7 8 9 10 11 12 13 15 17 18 20 21 22 23 24 25 26 27 30 31 32 33 35 720201.10 720211.10 720234.17 720214 720215 720216 720220 720255 4163559.10 720240.17 910131 720253.10 720232 720502 910503 310501 64141-6 310502 64229-02 720509 64163-03 64164-13 64123-100 720302.7 720306.7 720332.17 720311.7 720331.7 Key No. Part No. Description Qty.
14.
2 year limited Service & Warranty policy FOR GASOLINE POWERED for Shredding TruckLoader The Little Wonder Shredding TruckLoader is guaranteed against defects in material and workmanship for a period of TWO YEARS from date of purchase, when used for RESIDENTIAL SERVICE, or COMMERCIAL SERVICE. Any Little Wonder Shredding TruckLoader or part found to be defective within the warranty period is to be returned to any registered Little Wonder Dealer.