SBR-I-S Rev A Installation & Service Manual Models: 45,000 - 260,000 Btu/hr WARNING: This manual supplies information for the installation, operation, and servicing of the appliance. It is strongly recommended that this manual be reviewed completely before proceeding with an installation. Perform steps in the order given. Failure to comply could result in severe personal injury, death, or substantial property damage. Save this manual for future reference.
Contents HAZARD DEFINITIONS . . . . . . . . . . . . . . . . . . . . . . . . . . 2 PLEASE READ BEFORE PROCEEDING . . . . . . . . . . . . 3-4 RATINGS . . . . . . . . . . . . . . . . . . . . . . . . . . . . . . . . . . . . . . 5 THE SOLUTION --HOW IT WORKS . . . . . . . . . . . . . . . . . . . 6-8 1. DETERMINE BOILER LOCATION Location of Unit . . . . . . . . . . . . . . . . . . . . . . . . . . . . . . . . . 9 Clearances . . . . . . . . . . . . . . . . . . . . . . . . . . . . . . . . . . . . .
Installation & Service Manual Please read before proceeding NOTICE This is a gas appliance and should be installed by a licensed electrician and/or certified gas supplier. Service must be performed by a qualified service installer, service agency or the gas supplier. WARNING If the information in these instructions is not followed exactly, a fire or explosion may result causing property damage, personal injury, or death.
Installation & Service Manual Please read before proceeding WARNING To minimize the possibility of serious personal injury, fire, or damage to your appliance, never violate the following safety rules: 1. Boilers are heat producing appliances. To avoid damage or injury, do not store materials against the appliance or the vent-air intake system. Use proper care to avoid unnecessary contact (especially children) with the appliance and vent-air intake components. 2.
Installation & Service Manual Ratings Solution Boiler I=B=R Rating Input MBH Model Number Note: Change “N” to “L” for L.P. gas models. Other Specifications Gross Output MBH Net I=B=R Ratings Water, MBH (Note 1,5) (Note 1,5) (Note 4) Boiler Water Content Gallons Water Connections Vent Gas Connections Size Min Max CBN045 23 45 37 32 0.87 1 1/2" 1/2" 4" CBN075 38 75 62 54 0.91 1 1/2" 1/2" 5" CBN090 45 90 75 65 0.91 1 1/2" 1/2" 5" CBN135 68 135 112 97 0.
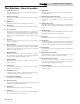
Installation & Service Manual The Solution - How it works... 1. Control panel cover The control panel cover provides access to the thermostat, ignition module, and transformer. 2. Burner (not shown) The burner is a cylindrical stainless steel tube used to regulate burner flame. 3. Drain port Location from which the heat exchanger can be drained. 4. Flue outlet The flue outlet allows the connection of the vent pipe to the unit. 5.
Installation & Service Manual The Solution - How it works...
Installation & Service Manual The Solution - How it works...
Installation & Service Manual 1 Determine boiler location Location of unit 1. Locate the appliance so that if water connections should leak, water damage will not occur. When such locations cannot be avoided, it is recommended that a suitable drain pan, adequately drained, be installed under the appliance. The pan must not restrict combustion air flow. Under no circumstances is the manufacturer to be held responsible for water damage in connection with this appliance, or any of its components. 2.
Installation & Service Manual 1 Determine boiler location Combustion and ventilation air requirements for conventionally vented appliances Provisions for combustion and ventilation air must be in accordance with, Air for Combustion and Ventilation, of the latest edition of the National Fuel Gas Code, ANSI Z223.1, in Canada, the latest edition of CGA Standard B149 Installation Code for Gas Burning Appliances and Equipment, or applicable provisions of the local building codes.
Installation & Service Manual 1 Determine boiler location (continued) CAUTION Figure 1-6_Combustion Air from Outside Single Opening 4. If a single combustion air opening is provided to bring combustion air in directly from the outdoors, the opening must be sized based on a minimum free area of one square inch per 3000 Btu/hr (7 cm2 per kW). This opening must be located within 12" (30 cm) of the top of the enclosure (see FIG. 1-6).
Installation & Service Manual 1 Determine boiler location TABLE - 1B MINIMUM RECOMMENDED COMBUSTION AIR SUPPLY TO EQUIPMENT ROOM Input Btu/hr *Outside Air from 2 Openings Directly from Outdoors Top Opening, in2 Bottom Opening, in2 45,000 12 (78 cm2) 12 (78 cm2) 75,000 19 (123 cm2) 90,000 *Outside Air from 1 Opening Directly from Outdoors, in2 *Outside Air from 2 Ducts Delivered from Outdoors **Inside Air from 2 Ducts Delivered from Interior Space Top Opening, in2 Bottom Opening, in2 Top Ope
Installation & Service Manual 2 Venting A Conventional Negative Draft Venting System The negative draft in a conventional vent installation must be within the range of a negative 0.02 to 0.05 inches water column to ensure proper operation. All draft readings are made while the appliance is in stable operation (approximately 2 to 5 minutes).
Installation & Service Manual 2 Venting Locate appliance as close as possible to a chimney or gas vent. Avoid long horizontal runs of the vent pipe, 90° elbows, reductions and restrictions. Horizontal portions of the venting system shall be supported to prevent sagging. Horizontal runs must slope upwards not less than 1/4 inch per foot (21 mm/m) from the appliance to the vent terminal. Follow manufacturer’s instructions.
Installation & Service Manual 2 Venting (continued) Vertical Vent Termination Clearances 10' OR LESS 10' OR LESS 10' OR LESS CHIMNEY 2' MIN 2' MIN 3' MIN 2' MIN 3' MIN RIDGE CHIMMEY Figure 2-2_Vent Termination from Peaked Roof 10' or Less from Ridge WALL OR PARAPET CHIMMEY Figure 2-4_Vent Termination from Flat Roof 10' or Less from Parapet Wall 10' OR MORE MORE THAN 10' 3' 10' 2' MIN CHIMNEY RIDGE 3' MIN NOTE: NO HEIGHT ABOVE PARAPET REQUIRED WHEN DISTANCE FROM WALLS OR PARAPETS IS MORE
Installation & Service Manual 2 Venting Masonry Chimney Installation A masonry chimney must be properly sized for the installation of a gas fired appliance. Venting of an appliance into a cold or oversized masonry chimney can result in operational and safety problems. Exterior masonry chimneys, with one or more sides exposed to cold outdoor temperatures, are more likely to have venting problems.
Installation & Service Manual 2 Venting (continued) Automatic Vent Damper VENT DAMPER This heating boiler is design certified for use with the automatic vent damper (FIG. 15) part number printed on the boiler’s rating plate. A vent damper must be installed on all residential heating boilers with inputs of less than 300,000 Btu/hr to comply with minimum efficiency requirements. A vent damper is factory supplied with residential heating boilers with inputs of 45,000 thru 260,000 Btu/hr.
Installation & Service Manual 3 Gas connections Gas Supply Gas Pressure Test Verify that the appliance is supplied with the type gas specified on the rating plate. This appliance is orificed for operation up to 2000 feet altitude. The appliance will be derated 4% per 1000 feet above 2000 feet elevation. Consult the factory for installations above 2000 feet elevation. Field conversions for operation at high altitude must be performed by certified personnel only.
Installation & Service Manual 3 Gas connections (continued) TABLE - 3E GAS PIPING SIZE CHART Nominal Iron Pipe Size Inches Length of Pipe in Straight Feet 10 20 30 40 50 60 70 80 90 100 125 150 175 3/4 369 256 205 174 155 141 128 121 113 106 95 86 79 1 697 477 384 328 292 267 246 226 210 200 179 164 149 1 1/4 1,400 974 789 677 595 543 502 472 441 410 369 333 308 1 1/2 2,150 1,500 1,210 1,020 923 830 769 707 666 636 564 513 472 2 4,100
Installation & Service Manual 3 Gas connections WHEN FLANGE IS USED 1. Turn the power “OFF” at the main disconnect switch. 2. Turn gas valve control knob to “OFF” position. 3. Remove the 1/8" hex plug located on the outlet side of the gas valve and install a fitting suitable to connect to a manometer or magnahelic gauge. See FIG. 3-3. Minimum range of scale should be up to 5" w.c. for Natural gas models and 10" w.c. for L.P. gas models. 4.
Installation & Service Manual 3 Gas connections (continued) Checking Gas Supply Pressure GAS SUPPLY PRESSURE MANOMETER 8. Set the thermostat(s) to call for heat. 9. Observe the gas supply pressure with all burners firing. Ensure inlet pressure is within specified range. Check gas supply pressure with all other gas fired appliances in operation to ensure proper gas volume during periods of peak gas usage. 10.
Installation & Service Manual 3 Gas connections Combination Gas Valves Venting of Combination Gas Valves PRESSURE REGULATOR ADJUSTMENT (UNDER CAP SCREW) WIRING TERMINALS OUTLET PRESSURE TAP INLET PRESSURE TAP PILOT OUTLET S GA CONTROL KNOB Figure 3-5_M9 Gas Valve Each unit has a combination gas valve to control the gas supply to the burners. The combination valve consists of a gas regulator and two valve seats to meet the requirements for redundant gas valves.
Installation & Service Manual 4 Water connections Relief Valve Water Flow Switch (if equipped) FLOW SWITCH FLOW RELIEF VALVE Figure 4-1_Relief Valve Figure 4-2_Water Flow Switch - Top Connections This appliance is supplied with a relief valve(s) sized in accordance with ASME Boiler and Pressure Vessel Code, Section IV (“Heating Boilers”). The relief valve(s) is mounted directly into the heat exchanger inside the header (see FIG. 4-1).
Installation & Service Manual 4 Water connections Low Water Cutoff (if equipped) Typical Heating Boiler Installations A hot water boiler installed above radiation level must be provided with a low water cutoff device either as part of the unit or installed at the time the boiler is installed. An electronic low water cutoff is available as a kit on all units. Low water cutoffs should be inspected every six months, including flushing of float types.
Installation & Service Manual 4 9. Water connections (continued) Inspect the liquid level in the expansion tank. The system must be full and under normal operating pressure to ensure proper water level in the expansion tank. Ensure that diaphragm type expansion tanks are properly charged and not water logged. 10. Start the boiler according to the Section 6 - “Start-Up Instructions” in this manual. Operate the system, including the pump, boiler and radiation units, for one hour. 11.
Installation & Service Manual 4 Water connections Hot water piping must be supported by suitable hangers or floor stands, NOT by the boiler. Copper pipe systems will be subject to considerable expansion and contraction. Rigid pipe hangers could allow the pipe to slide in the hanger resulting in noise transmitted into the system. Padding is recommended on rigid hangers installed with a copper system. The boiler pressure relief valve must be piped to a suitable floor drain.
Installation & Service Manual 4 Water connections (continued) PUMP INSTALLATION AND MAINTENANCE: The boiler circulating pump must be purchased locally. For installation and maintenance information on the circulator pump, refer to the pump manufacturers instruction package included with the pump. Circulator Pump Specifications 1. Maximum operating pressure for the pump must exceed system operating pressure. 2. Maximum water temperature should not exceed nameplate rating. 3.
Installation & Service Manual 4 Water connections Primary/Secondary Boiler Piping (continued) A primary/secondary piping system is ideal for systems filled with a propylene glycol and water mixture. A glycol and water mixture is more dense than water only and may result in a lower boiler flow rate. A lower boiler flow may cause noisy operation or short cycling of the burners. A larger secondary pump may be used on a primary/secondary system to provide an increased boiler flow rate.
Installation & Service Manual 4 Water connections (continued) Primary / Secondary Piping Figure 4-4_Primary / Secondary Piping of a Single Boiler PRESSURE REDUCING VALVE PRESSURE GAUGE BACKFLOW PREVENTER MAKE UP WATER SYSTEM SUPPLY SENSOR AIR SEPARATOR SYSTEM CIRCULATOR FROM SYSTEM TO SYSTEM NOT TO EXCEED 12" APART BALL VALVE (TYPICAL) BOILER CIRCULATOR EXPANSION TANK DRAIN POINT (TYPICAL) Y-STRAINER (RECOMMENDED) UNION (TYPICAL) TEMPERATURE / PRESSURE GAUGE DRAIN PRESSURE RELIEF VALVE SOL
Installation & Service Manual 4 Water connections Primary / Secondary Piping Figure 4-5_Single Boiler - Primary / Secondary with Low Temperature Bypass PRESSURE REDUCING VALVE PRESSURE GAUGE BACKFLOW PREVENTER MAKE UP WATER SYSTEM SUPPLY SENSOR AIR SEPARATOR SYSTEM CIRCULATOR FROM SYSTEM TO SYSTEM NOT TO EXCEED 12" APART BALL VALVE (TYPICAL) LOW TEMPERATURE BYPASS BOILER CIRCULATOR EXPANSION TANK DRAIN POINT (TYPICAL) Y-STRAINER (RECOMMENDED) UNION (TYPICAL) TEMPERATURE / PRESSURE GAUGE DRA
Installation & Service Manual 4 Water connections (continued) Primary / Secondary Piping Figure 4-6_Multiple Boilers Zoned with Circulators ZONE #1 ZONE CIRCULATORS (TYPICAL) PRESSURE REDUCING VALVE PRESSURE GAUGE ZONE #2 ZONE #3 ZONE #4 BACKFLOW PREVENTER MAKE UP WATER SYSTEM SUPPLY SENSOR (WHEN USED) AIR SEPARATOR NOT TO EXCEED 12" APART BALL VALVE (TYPICAL) EXPANSION TANK MAY SUBSTITUTE LOW LOSS HEADER DRAIN POINT (TYPICAL) HOT WATER OUT BOILER CIRCULATOR Y-STRAINER (RECOMMENDED) FLOW CH
Installation & Service Manual 4 Water connections Full System Flow Figure 4-7_Single Boiler Full System Flow PRESSURE REDUCING VALVE PRESSURE GAUGE BACKFLOW PREVENTER MAKE UP WATER SYSTEM SUPPLY SENSOR AIR SEPARATOR SYSTEM CIRCULATOR FROM SYSTEM TO SYSTEM BALL VALVE (TYPICAL) EXPANSION TANK Y-STRAINER (RECOMMENDED) UNION (TYPICAL) TEMPERATURE / PRESSURE GAUGE DRAIN PRESSURE RELIEF VALVE SOLUTION BOILER 32
Installation & Service Manual 4 Water connections (continued) Full System Flow Figure 4-8_Single Boiler Full System Flow with Low Temperature Bypass PRESSURE REDUCING VALVE PRESSURE GAUGE BACKFLOW PREVENTER MAKE UP WATER SYSTEM SUPPLY SENSOR AIR SEPARATOR SYSTEM CIRCULATOR FROM SYSTEM TO SYSTEM BALL VALVE (TYPICAL) 3-WAY VALVE W/BYPASS PIPE EXPANSION TANK BOILER CIRCULATOR Y-STRAINER (RECOMMENDED) UNION (TYPICAL) TEMPERATURE / PRESSURE GAUGE DRAIN PRESSURE RELIEF VALVE SOLUTION BOILER 33
Installation & Service Manual 5 Electrical connections This appliance is wired for 120 VAC service. The appliance, when installed, must be electrically grounded in accordance with the requirements of the authority having jurisdiction or in the absence of such requirements, with the latest edition of the National Electrical Code ANSI/NFPA No. 70. When the unit is installed in Canada, it must conform to the CSA C22.1, Canadian Electrical Code, Part 1 and/or local Electrical Codes. 1.
Installation & Service Manual 5 Electrical connections (continued) Pump Wiring for a Heating Boiler Temperature Adjustment The heating boiler circulating pump must be purchased locally. The maximum load for the pump switched by the internal pump relay must not exceed 1 HP. The current draw for a field installed 120 VAC pump MUST be added to the boiler’s current draw to determine the minimum wire size for 120 volt service.
Installation & Service Manual 5 Electrical connections Maximum Set Point Determination High-Fire Offset The maximum set point for the control is factory set. Boilers can be set to 240°F max. The temperature control operates a two-stage firing system. The two stages are High-Fire and Low-Fire. High-Fire operates all burners at full rate while Low-Fire operates the burners at approximately one-half rate.
Installation & Service Manual 5 Electrical connections (continued) Outdoor Air Temperature Sensor The outside air temperature sensor will only be used for boiler systems. The outside air sensor is optional. This sensor allows you to tie boiler operation to the outdoor air temperature. As outside temperatures drop, the control will increase the temperature setting of the boiler. As outdoor temperatures rise, the control will decrease the temperature to the selected set point of the boiler.
Installation & Service Manual 5 Electrical connections Outdoor Air Reset Option If the outdoor design and boiler design temperatures are known, the Ratio setting can be calculated using the following formula: For boilers ordered with the Outdoor Air Reset option, there is an additional control (FIG. 5-5). There are three setting knobs for Shutdown, Outdoor Air Max., and Ratio. There is also a switch to turn the outdoor air shutdown feature On or Off. An O.A. Sensor is also included.
Installation & Service Manual 5 Electrical connections (continued) Blocked Vent and Flame Roll-Out / Flame Interlock Switch OUTER AIR DEFLECTOR UPPER FRONT JACKET PANEL DETAIL A FLAME ROLL-OUT SWITCH / INTERLOCK SWITCH LOWER FRONT JACKET PANEL HEX FILLER BRACKET BLOCKED VENT SWITCH INVERTED TO SHOW RESET UNDERNEATH T ON FR DRAFT HOOD Figure 5-7_Blocked Vent Switch Location OF IT UN Figure 5-8_Flame Roll-Out / Flame Interlock Switch Location All units are equipped with manual reset blocked vent
Installation & Service Manual 6 Start-up Initial Start-up Follow the Lighting Instructions on the label applied to the appliance. A. On boilers with the system pump delay option, the operating temperature control will energize the pump relay which energizes the pump on a call for heat. The operating temperature control will deenergize the pump relay approximately 30 seconds after the call for heat ends.
Installation & Service Manual 6 Start-up (continued) To Turn Off Gas to Appliance Operating Instructions 1. STOP! Read the safety information first. 1. Set the thermostat to the OFF position. 2. Remove the control panel door. 2. Turn off all electric power to the appliance if service is to be performed. 3. Set the thermostat to the lowest setting (OFF). 4. Turn off all electrical power to the appliance. 5.
Installation & Service Manual 6 Start-up Intermittent Pilot Spark Ignition System WARNING 6. The ignition module is not repairable. Any modification or repairs will invalidate the warranty and may create hazardous conditions that result in property damage, personal injury, fire, explosion and/or toxic gases. A faulty ignition module must be replaced with a new module.
Installation & Service Manual 7 Maintenance Maintenance and annual startup Table 7A_Service and Maintenance Schedules Service technician Owner maintenance (see the following pages for instructions) (see the User’s Information Manual for instructions) General: • Check appliance area • Address reported problems • Inspect interior; clean and vacuum if necessary; • Check pressure/temperature gauge Daily • Check for leaks (water, gas, flue) • Examine venting system • Check system water pressure/syst
Installation & Service Manual 7 Maintenance WARNING Follow the service and maintenance procedures given throughout this manual and in component literature shipped with the appliance. Failure to perform the service and maintenance could result in damage to the appliance or system. Failure to follow the directions in this manual and component literature could result in severe personal injury, death, or substantial property damage.
Installation & Service Manual 7 Maintenance (continued) Check Expansion Tank 1. Expansion tanks provide space for water to move in and out as the heating system water expands due to temperature increase or contracts as the water cools. Tanks may be open, closed, diaphragm or bladder type. See Section 4 - Water Connections for suggested best location of expansion tanks and air eliminators. Check Relief Valve 1. Inspect the relief valve and lift the lever to verify flow.
Installation & Service Manual 7 Maintenance Check All Wiring Combustion Air 1. Inspect all wiring, making sure wires are in good condition and securely attached. This appliance uses an atmospheric combustion process. Combustion air is provided to the burners by the gas injection pressure into the venturi of the burners. The burners do not have an adjustable air shutter. Adequate combustion air must be supplied to the room where the appliance is installed to ensure proper burner operation.
Installation & Service Manual 7 Maintenance (continued) Avoid breathing dust and contact with skin and eyes. • Use NIOSH certified dust respirator (N95). This type of respirator is based on the OSHA requirements for cristobalite at the time this document was written. Other types of respirators may be needed depending on the jobsite conditions. Current NIOSH recommendations can be found on the NIOSH website at (http://www.cdc.gov/niosh/homepage.html).
Installation & Service Manual 7 Maintenance s. Ensure that all burner ports are cleaned to remove any soot. See Inspection and Cleaning Procedure, page 47. t. Carefully re-install the heat exchanger, “V” baffles, jacket panels, and wires. u. Reassemble all gas and water piping. Test for gas leaks. v. Cycle the appliance and check for proper operation.
Installation & Service Manual 8 Troubleshooting Troubleshooting Guide: M9 Solution Boilers Step 1: Is the spark ignitor sparking? Check continuity on the spark cable. Check for 24 VAC on the 24v terminal (gray wire) on the ignition module. No Check for an open sensor. If no open sensor, make sure there’s a call for heat. If call for heat is present, replace temperature control. Yes Step 2: Is the pilot staying on? Check the pilot tube for gas. Check draft.
Installation & Service Manual 9 Diagrams Schematic Diagram - M9 Unit 45,000 - 260,000 Btu/hr Models 50 Wiring Diagram - M9 Unit 45,000 - 260,000 Btu/hr Models
Notes 51
Revision A (ECO #C03746) initial release.