CFA-I-S Rev F Installation & Service Manual Models: 90,000 - 500,000 Btu/hr WARNING: This manual supplies information for the installation, operation, and servicing of the appliance. It is strongly recommended that this manual be reviewed completely before proceeding with an installation. Perform steps in the order given. Failure to comply could result in severe personal injury, death, or substantial property damage. Save this manual for future reference.
Contents HAZARD DEFINITIONS .................................................... 2 PLEASE READ BEFORE PROCEEDING ..................... 3-4 RATINGS ........................................................................ 5-6 THE COPPER-FIN -- HOW IT WORKS ............................... 7-9 1. DETERMINE UNIT LOCATION Location of Unit ................................................................ 10 Clearances from Combustible Construction ..................... 10 Combustion and Ventilation Air ............
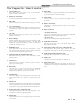
Installation & Service Manual Please read before proceeding NOTICE This is a gas appliance and should be installed by a licensed electrician and/or certified gas supplier. Service must be performed by a qualified service installer, service agency or the gas supplier. WARNING If the information in these instructions is not followed exactly, a fire or explosion may result causing property damage, personal injury, or death.
Installation & Service Manual Please read before proceeding WARNING To minimize the possibility of serious personal injury, fire, or damage to your appliance, never violate the following safety rules: 1. Boilers and water heaters are heat producing appliances. To avoid damage or injury, do not store materials against the appliance or the vent-air intake system. Use proper care to avoid unnecessary contact (especially children) with the appliance and vent-air intake components. 2.
Installation & Service Manual Ratings Copper-Fin Other Specifications AHRI Rating Input MBH Model Number (Note 4) Gross Output MBH Net AHRI Ratings Water, MBH (Note 1) (Note 2) Boiler Water Content Gallons Water Connections Gas Connections Vent Size Note: Change “N” to “L” for L.P. gas models MIN MAX CBN315 158 315 258 224 1.2 2" 3/4" 8" CBN360 180 360 295 257 1.2 2" 1" 9" CBN399 200 399 328 285 1.3 2" 1" 10" CBN500 250 500 410 357 1.
Installation & Service Manual Ratings HLW LOW LEAD CONTENT Copper-fin Specifications Model Number Note: Change “N” to “L” for L.P. gas models Input MBH Water Content Gallons Water Connections Gas Connections Vent Size (Note 1) CWN090 90 1.0 2" 1/2" 5" CWN135 135 1.0 2" 1/2" 6" CWN180 180 1.1 2" 3/4" 7" CWN199 199 1.1 2" 3/4" 7" CWN225 225 1.1 2" 3/4" 7" CWN270 270 1.1 2" 3/4" 8" CWN315 315 1.2 2" 3/4" 8" CWN360 360 1.2 2" 1" 9" CWN399 399 1.
Installation & Service Manual The Copper-fin - How it works... 1. Control panel cover The control panel cover provides access to the thermostat, ignition module, and transformer. 2. Drain port (not shown) Location from which the heat exchanger can be drained. 3. Flue outlet The flue outlet allows the connection of the vent pipe to the unit. 4.
Installation & Service Manual The Copper-fin - How it works...
Installation & Service Manual The Copper-fin - How it works...
Installation & Service Manual 1 Determine unit location Location of unit 1. Locate the appliance so that if water connections should leak, water damage will not occur. When such locations cannot be avoided, it is recommended that a suitable drain pan, adequately drained, be installed under the appliance. The pan must not restrict combustion air flow. Under no circumstances is the manufacturer to be held responsible for water damage in connection with this appliance, or any of its components.
Installation & Service Manual 1 Determine unit location Combustion and ventilation air requirements for conventionally vented appliances Provisions for combustion and ventilation air must be in accordance with the latest edition of the National Fuel Gas Code, ANSI Z223.1, in Canada, the latest edition of CGA Standard B149 Installation Code for Gas Burning Appliances and Equipment, or applicable provisions of the local building codes.
Installation & Service Manual 1 Determine unit location CAUTION Figure 1-6_Combustion Air from Outside Single Opening 4. If a single combustion air opening is provided to bring combustion air in directly from the outdoors, the opening must be sized based on a minimum free area of one square inch per 3000 Btu/hr (7 cm2 per kW). This opening must be located within 12" (30 cm) of the top of the enclosure (see FIG. 1-6).
Installation & Service Manual 1 Determine unit location (continued) TABLE - 1B MINIMUM RECOMMENDED COMBUSTION AIR SUPPLY TO EQUIPMENT ROOM Input Btu/hr *Outside Air from 2 Openings Directly from Outdoors Top Opening, in2 Bottom Opening, in2 90,000 23 (148 cm2) 23 (148 cm2) 135,000 34 (220 cm2) 180,000 *Outside Air from 1 Opening Directly from Outdoors, in2 *Outside Air from 2 Ducts Delivered from Outdoors **Inside Air from 2 Ducts Delivered from Interior Space Top Opening, in2 Bottom Opening
Installation & Service Manual 2 Venting The distance of the vent terminal from adjacent buildings, windows that open and building openings MUST comply with the latest edition of the National Fuel Gas Code, ANSI Z223.1, in Canada, the latest edition of CGA Standard B149 Installation Code for Gas Burning Appliances and Equipment. Vent connection is made directly to the top of the appliance. This appliance is designed with a built-in draft diverter. No additional external draft hood is required.
Installation & Service Manual 2 Venting (continued) Locate appliance as close as possible to a chimney or gas vent. Avoid long horizontal runs of the vent pipe, 90° elbows, reductions and restrictions. Horizontal portions of the venting system shall be supported to prevent sagging. Horizontal runs must slope upwards not less than 1/4 inch per foot (21 mm/m) from the appliance to the vent terminal. Follow manufacturer’s instructions.
Installation & Service Manual 2 Venting Vertical Vent Termination Clearances 10' OR LESS 10' OR LESS 10' OR LESS CHIMNEY 2' MIN 2' MIN 3' MIN 2' MIN 3' MIN RIDGE Figure 2-2_Vent Termination from Peaked Roof 10' or Less from Ridge CHIMMEY WALL OR PARAPET CHIMMEY Figure 2-4_Vent Termination from Flat Roof 10' or Less from Parapet Wall 10' OR MORE MORE THAN 10' 10' 3' 2' MIN CHIMNEY RIDGE 3' MIN NOTE: NO HEIGHT ABOVE PARAPET REQUIRED WHEN DISTANCE FROM WALLS OR PARAPETS IS MORE THAN 10'.
Installation & Service Manual 2 Venting (continued) Masonry Chimney Installation A masonry chimney must be properly sized for the installation of a gas fired appliance. Venting of an appliance into a cold or oversized masonry chimney can result in operational and safety problems. Exterior masonry chimneys, with one or more sides exposed to cold outdoor temperatures, are more likely to have venting problems.
Installation & Service Manual 2 Venting Automatic Vent Damper This heating boiler is design certified for use with the automatic vent damper (FIG. 2-7) part number printed on the boiler’s rating plate. A vent damper is optional on heating boilers above 360,000 Btu/hr. Automatic vent dampers are not required or furnished on potable water heaters. Water heaters with inputs of 360,000 Btu/hr and less may be ordered with the vent damper as an option.
Installation & Service Manual 3 Gas connections Gas Supply Gas Pressure Test Verify that the appliance is supplied with the type gas specified on the rating plate. This appliance is orificed for operation up to 2000 feet altitude. The appliance will be derated 4% per 1000 feet above 2000 feet elevation. Consult the factory for installations above 2000 feet elevation. Field conversions for operation at high altitude must be performed by certified personnel only.
Installation & Service Manual 3 Gas connections Pipe Size (Inches) TABLE - 3E Capacity of Schedule 40 Metallic Pipe in Cubic Feet of Natural Gas Per Hour (based on .60 specific gravity, 0.30" w.c.
Installation & Service Manual 3 Gas connections (continued) 2. Turn gas valve control knob to “PILOT” position on standing pilot models. Ensure that the standing pilot remains on. If the pilot goes out, follow the “Lighting Instructions” in Section 6 - Startup for standing pilot models to light the pilot. Turn gas valve control knob to “OFF” position on spark ignition models. 3.
Installation & Service Manual 3 Gas connections Checking Gas Supply Pressure MANOMETER GAS SUPPLY PRESSURE 9. Set the thermostat(s) to call for heat. 10. Observe the gas supply pressure with all burners firing. Ensure inlet pressure is within specified range. Check gas supply pressure with all other gas fired appliances in operation to ensure proper gas volume during periods of peak gas usage. 11.
Installation & Service Manual 3 Gas connections (continued) Combination Gas Valves PRESSURE REGULATOR ADJUSTMENT (UNDER CAP SCREW) OUTLET PRESSURE TAP INLET PRESSURE TAP PILOT OUTLET RED RESET BUTTON GAS CONTROL KNOB Figure 3-5_F1 Gas Valve, standing pilot PRESSURE REGULATOR ADJUSTMENT (UNDER CAP SCREW) Venting of Combination Gas Valves WIRING TERMINALS OUTLET PRESSURE TAP INLET PRESSURE TAP PILOT OUTLET GAS CONTROL KNOB Figure 3-6_F9 Gas Valve, spark ignition Each unit has a combination gas
Installation & Service Manual 4 Hydronic piping Relief Valve RELIEF VALVE Water Flow Switch (if equipped) FLOW SWITCH Figure 4-1_Relief Valve - CBN315-500 Figure 4-2_Water Flow Switch - CBN315-500 This appliance is supplied with a relief valve(s) sized in accordance with ASME Boiler and Pressure Vessel Code, Section IV (“Heating Boilers”). The relief valve(s) is mounted directly into the heat exchanger inside the header (see FIG.’s 4-1 and 4-2).
Installation & Service Manual 4 Hydronic piping (continued) A water flow switch meets most code requirements for a low-water cut off device on boilers requiring forced circulation for operation. Low Water Cutoff (if equipped) A hot water boiler installed above radiation level must be provided with a low water cutoff device either as part of the unit or installed at the time the boiler is installed. An electronic low water cutoff is available as a kit on all units.
Installation & Service Manual 4 9. Hydronic piping Piping of the Boiler System Inspect the liquid level in the expansion tank. The system must be full and under normal operating pressure to ensure proper water level in the expansion tank. Ensure that diaphragm type expansion tanks are properly charged and not water logged. The drawings in this section (see FIG’s 4-4 through 4-6) show typical heating boiler piping installations.
Installation & Service Manual Hydronic piping (continued) Hot water piping must be supported by suitable hangers or floor stands, NOT by the boiler. Copper pipe systems will be subject to considerable expansion and contraction. Rigid pipe hangers could allow the pipe to slide in the hanger resulting in noise transmitted into the system. Padding is recommended on rigid hangers installed with a copper system. The boiler pressure relief valve must be piped to a suitable floor drain.
Installation & Service Manual 4 Hydronic piping PUMP INSTALLATION AND MAINTENANCE: The boiler circulating pump must be purchased locally. For installation and maintenance information on the circulator pump, refer to the pump manufacturers instruction package included with the pump. Primary/Secondary Boiler Piping Heating boilers with inputs of 315,000 - 500,000 Btu/hr or larger installed on multiple zone systems are recommended to be installed with a primary/secondary piping system as shown in FIG. 4-4.
Installation & Service Manual 4 Hydronic piping (continued) Low Temperature Bypass Requirements This piping is like a primary/secondary boiler installation with a bypass in the secondary boiler piping. Inlet water temperatures below 140°F (60°C) can excessively cool the products of combustion resulting in condensation on the heat exchanger and in the flue.
Installation & Service Manual 4 Hydronic piping Primary / Secondary Piping Figure 4-4_Primary / Secondary Piping of a Single Boiler MAY SUBSTITUTE LOW LOSS HEADER OM FR AIR SEPARATOR DRAIN POINT (TYPICAL) EM ST SY NOT TO EXCEED 4 PIPE DIA OR MAX.
Installation & Service Manual 4 Hydronic piping (continued) Primary / Secondary Piping Figure 4-5_Single Boiler - Primary / Secondary with Low Temperature Bypass MAY SUBSTITUTE LOW LOSS HEADER OM FR AIR SEPARATOR DRAIN POINT (TYPICAL) EM ST SY NOT TO EXCEED 4 PIPE DIA OR MAX.
Installation & Service Manual 4 Hydronic piping Primary / Secondary Piping Figure 4-8_Multiple Boilers Zoned with Circulators TEMPERATURE LOOP 3 TEMPERATURE LOOP 2 TO EM ST SY TEMPERATURE LOOP 1 OM FR AIR SEPARATOR MAKE UP WATER EM ST SY Y-STRAINER (RECOMMENDED) (TYPICAL) FLOW CHECK VALVE (TYPICAL) SYSTEM SUPPLY SENSOR ( WHEN USED ) PRESSURE GAUGE DRAIN POINT (TYPICAL) BACK FLOW PREVENTER NOT EXCEED 12" APART PRESSURE REDUCING VALVE BOILER CIRCULATOR DRAIN ( TYPICAL ) MAY SUBSTITUTE LOW LOS
Installation & Service Manual 5 Electrical connections This appliance is wired for 120 VAC service. The appliance, when installed, must be electrically grounded in accordance with the requirements of the authority having jurisdiction or in the absence of such requirements, with the latest edition of the National Electrical Code ANSI/NFPA No. 70. When the unit is installed in Canada, it must conform to the CSA C22.1, Canadian Electrical Code, Part 1 and/or local Electrical Codes. 1.
Installation & Service Manual 5 Electrical connections Pump Wiring for a Heating Boiler The heating boiler circulating pump must be purchased locally. The maximum load for the pump switched by the internal pump relay must not exceed 1 HP. The current draw for a field installed 120 VAC pump MUST be added to the boiler’s current draw to determine the minimum wire size for 120 volt service.
Installation & Service Manual 5 Electrical connections (continued) Locating Temperature Control NOTICE Remove the control panel door on the front of the unit in order to locate and access the temperature control. Temperature Control Settings Remove the control panel door on the front of the unit unless your unit is specified as a boiler only with an outdoor air reset option. If your unit is a boiler only with an outdoor air reset option, there are additional controls for this option.
Installation & Service Manual 5 Electrical connections Temperature Control Sensors Tank Sensor This is a two-stage temperature control (M9/F9) that controls the burner ignition and pump functions. This temperature controller can measure up to three different sensor inputs, depending upon how the unit is set up. They are as follows: Water heaters are provided with an extra temperature sensor that MUST be field installed. The sensor is shipped loose in the I & O packet.
Installation & Service Manual 5 Electrical connections (continued) Installation of a Remote Sensor (Boiler Application) 1. Turn OFF the main electrical power and the main manual gas shutoff to the appliance. 2. Remove the side access panel from the appliance to gain access to the thermostat. 3. Locate the sensor in the kit. Determine the location of the remote sensor and measure the amount of wire needed to connect the sensor to the thermostat. See Wiring of Remote Sensors on page 36 for guidelines.
Installation & Service Manual 5 Electrical connections Shutdown The Shutdown knob specifies the outdoor air lockout temperature at which the control would prevent the unit from operating. Outdoor Air Max (O.A. Max) The O.A. Max knob allows a reset up to the maximum outdoor air temperature specified by this knob setting. When the outdoor air temperature is above the specified setting, the unit will not function in the O.A. Reset Mode, but will continue to run at the selected set point temperature.
Installation & Service Manual 5 Electrical connections (continued) Manual Reset High Water Temperature Limit Control (Standard Fixed Settings on Boilers and Water Heaters with Optional Adjustable Settings) Water heaters are supplied with a fixed setting, manual reset high water temperature limit control. This manual reset temperature limit control has a fixed limit setting of 230°F (110°C). If water temperature exceeds this setting, the limit will break the control circuit and shut down the unit.
Installation & Service Manual 6 Start-up Initial Start-up Follow the Lighting Instructions on the label applied to the appliance. A. On water heaters and boilers with the system pump delay option, the operating temperature control will energize the pump relay which energizes the pump on a call for heat. The operating temperature control will de-energize the pump relay approximately 30 seconds after the call for heat ends.
Installation & Service Manual 6 Start-up (continued) Lighting Instructions 1. Figure 6-2_Pilot Location Pilot Location STOP! Read the safety information (page 40). Main Burner 2. Remove the control panel door. 3. Set the thermostat to the lowest setting (OFF). 4. Turn off all electrical power to the appliance. 5. Turn the gas control knob on the gas valve clockwise to the “OFF” position.
Installation & Service Manual 6 Start-up 10. Use the loop end of the wire lighting wand, shipped with the instruction package, to hold the match and reach the pilot. An access slot is provided in the lower front jacket panel, beside the burner, to insert the lighting wand and match to the pilot. Lift the pilot cover (FIG. 6-3) to access the pilot. Push down and hold in the red button on the gas valve. This should start gas flow to the pilot.
Installation & Service Manual 6 Start-up (continued) Lighting Instructions for Spark Ignition Pilot Models (F9/M9) Models 90,000 through 500,000 Btu/hr Input FOR YOUR SAFETY READ BEFORE OPERATING WARNING If you do not follow these instructions exactly, a fire or explosion may result causing property damage, personal injury or loss of life. A. This appliance is equipped with an ignition device which automatically lights the pilot. Do not try to light the pilot by hand. B.
Installation & Service Manual 6 Start-up To Turn Off Gas to Appliance 1. Set the thermostat to the OFF position. 2. Turn off all electric power to the appliance if service is to be performed. 3a. 90,000 - 135,000 and 399,999 - 500,000 Btu/hr models, rotate the gas control knob on the gas valve clockwise to the “OFF” position. Do not force. 3b. 180,000 - 360,000 Btu/hr models, rotate the gas control knob on the gas valve clockwise to the line on the collar around the knob.
Installation & Service Manual 6 6. Start-up (continued) Shut-down and Draining - If for any reason, the appliance is to be shut off, the following precautionary measures must be taken: (a) Shut off gas supply. (b) Shut off water supply. (c) Shut off electrical supply. (d) Water Treatment In hard water areas, water treatment should be used to reduce the introduction of minerals to the system. Minerals in the water can collect in the heat exchanger tubes and cause noise on operation.
Installation & Service Manual 7 Domestic water heaters Domestic Water Heaters 90,000 500,000 Btu/hr Models This section applies only to those units used to supply direct fired domestic hot water and installed with a storage tank(s). The use of a properly sized pump and the control of water velocity, as explained in the Water Velocity Control section, are important for correct operation of your hot water heater. This section contains specific instructions for those units used to supply domestic hot water.
Installation & Service Manual 7 Domestic water heaters (continued) Water Chemistry The required temperature rise and the standard pump sizing are based on the heating of potable water with chemistry within the specified limits. Caution should be used when heating water softened to less than 5 grains per gallon. Many commercial water softeners reduce hardness to 0 grains which may result in long term problems in the system.
Installation & Service Manual 7 Domestic water heaters Figure 7-1_Single water heater_single tank BUILDING RETURN BALL VALVE (TYPICAL) FLOW CHECK VALVE (TYPICAL) COLD WATER SUPPLY MIXING VALVE EXPANSION TANK THERMOMETER HOT WATER SUPPLY UNION (TYPICAL) FLOW SWITCH TEMPERATURE & PRESSURE RELIEF VALVE (TYPICAL) WATER HEATER WATER HEATER CIRCULATOR STORAGE TANK NOTICE 48 DRAIN Y-STRAINER [RECOMMENDED] Please note that these illustrations are meant to show system piping concept only, the instal
Installation & Service Manual 7 Domestic water heaters (continued) Figure 7-2_Single water heater_multiple tank BUILDING RETURN COLD WATER SUPPLY FLOW CHECK VALVE (TYPICAL) MIXING VALVE THERMOMETER RELIEF VALVE ( TYPICAL ) HOT WATER SUPPLY EXPANSION TANK UNION (TYPICAL) TEMPERATURE/ PRESSURE GAUGE FLOW SWITCH TEMPERATURE & PRESSURE RELIEF VALVE (TYPICAL) WATER HEATER WATER HEATER CIRCULATOR BALL VALVE (TYPICAL) STORAGE TANK (TYPICAL) NOTICE Y-STRAINER (RECOMMENDED) DRAIN (TYPICAL) Please no
Installation & Service Manual 7 Domestic water heaters Figure 7-3_Multiple water heater_single tank BUILDING RETURN COLD WATER SUPPLY FLOW CHECK VALVE ( TYPICAL ) MIXING VALVE THERMOMETER EXPANSION TANK HOT WATER SUPPLY TEMPERATURE/PRESSURE GAUGE (TYPICAL) UNION (TYPICAL) PRESSURE RELIEF VALVE ( TYPICAL ) FLOW SWITCH ( TYPICAL ) TEMPERATURE & PRESSURE RELIEF VALVE (TYPICAL) BALL VALVE (TYPICAL) WATER HEATER STORAGE TANK WATER HEATER CIRCULATOR ( TYPICAL) DRAIN Y-STRAINER [RECOMMENDED] ( TYPI
Installation & Service Manual 7 Domestic water heaters (continued) Minimum Pump Performance Heat Exchanger Based on heating potable water with a hardness of 8 to 25 grains per gallon and total dissolved solids not exceeding 350 ppm. See “Water Chemistry”, page 47. On all models, header inspection plugs can be removed for field inspection and cleaning of copper tubes. The entire heat exchanger may be easily removed from the unit. BTU/hr INPUT 90,000 - 500,000 Thermostat Settings GPM 30 Ft. Hd.
Installation & Service Manual 7 Domestic water heaters CAUTION Setting the temperature selector to higher settings provides hotter water, which increases the risk of scald injury. The manufacturer recommends the use of a properly sized thermostatic mixing valve to supply domestic hot water at temperatures less than 140°F.
Installation & Service Manual 7 Domestic water heaters (continued) Relief Valve RELIEF VALVE FLOW SWITCH OW FL Figure 7-6_Relief Valve - Water heater This appliance is supplied with a relief valve sized in accordance with ASME Boiler and Pressure Vessel Code, Section IV (“Heating Boilers”). The relief valve is mounted directly into the heat exchanger inside the header (see FIG.’s 7-6 and 7-7).
Installation & Service Manual 8 Maintenance and annual startup Table 8A_Service and Maintenance Schedules Service technician (see the following pages for instructions) Owner maintenance (see the User’s Information Manual for instructions) General: Annual Startup Daily • Address reported problems.
Installation & Service Manual 8 Maintenance WARNING (continued) Follow the service and maintenance procedures given throughout this manual and in component literature shipped with the appliance. Failure to perform the service and maintenance could result in damage to the appliance or system. Failure to follow the directions in this manual and component literature could result in severe personal injury, death, or substantial property damage.
Installation & Service Manual 8 Maintenance Check Expansion Tank 1. Expansion tanks provide space for water to move in and out as the heating system water expands due to temperature increase or contracts as the water cools. Tanks may be open, closed, diaphragm or bladder type. See Section 4 - Hydronic Piping for suggested best location of expansion tanks and air eliminators. Check Relief Valve 1. Inspect the relief valve and lift the lever to verify flow.
Installation & Service Manual 8 Maintenance (continued) Check All Wiring Combustion Air Adjustment 1. Inspect all wiring, making sure wires are in good condition and securely attached. This appliance uses an atmospheric combustion process. Combustion air is provided to the burners by the gas injection pressure into the venturi of the burners. The burners do not have an adjustable air shutter.
Installation & Service Manual 8 Maintenance Inspect and Clean Burner WARNING The combustion chamber insulation in this appliance contains ceramic fiber material. The International Agency for Research on Cancer (IARC) has concluded, “Crystalline Silica in the form of quartz or cristobalite from occupational sources is carcinogenic to humans (Group 1).” Normal operating temperatures in this appliance are below the level to convert ceramic fibers to cristobalite.
Installation & Service Manual 8 Maintenance (continued) p. Check “V” baffles on top of the heat exchanger. Remove and clean if necessary. q. Remove soot from the heat exchanger with a stiff bristle brush. Soot may also be removed from the heat exchanger by washing thoroughly with detergent and water. Remove the heat exchanger before using water for cleaning. Rinse thoroughly and dry before re-installing. Use a vacuum to remove loose soot from surfaces and inner chamber. r.
Installation & Service Manual 8 Maintenance IMPORTANT Upon completion of any testing on the gas system, leak test all gas connections with a soap solution while main burners are operating. Immediately repair any leak found in the gas train or related components. Do Not operate an appliance with a leak in the gas train, valves or related piping. Gas Train and Controls Review with owner 1. Review the User’s Information Manual with the owner. 2.
Installation & Service Manual 9 Troubleshooting Troubleshooting Guide: 315,000 - 500,000 Btu/hr Models - Boilers 90,000 - 500,000 Btu/hr Water Heaters F9/M9 Step 1: Is the spark ignitor sparking? Check continuity on the spark cable. Check for 24 VAC on the 24v terminal (gray wire) on the ignition module No Check for an open sensor. If no open sensor, make sure there’s a call for heat.
Installation & Service Manual 9 Troubleshooting Troubleshooting Guide: 90,000 - 270,000 Btu/hr Models - Water Heaters F1 Step 1: Is the pilot lit? No Check gas pressure. Check the pilot assembly and thermocouple. Clean the thermocouple and pilot or replace.
Installation & Service Manual 10 Diagrams Schematic Diagram - F1 Unit 90,000 - 270,000 Btu/hr Models Wiring Diagram - F1 Unit 90,000 - 270,000 Btu/hr Models 63
Installation & Service Manual 10 Diagrams Schematic Diagram - F9 Unit 315,000 - 399,999 Btu/hr Models 64 Wiring Diagram - F9 Unit 315,000 - 399,999 Btu/hr Models
3 4 5 LBL20160 REV A BK=BLACK BL=BLUE BN-BROWN G=GREEN T R R CONTACTS ON ANY FAILURE GY=GRAY OR=ORANGE PK=PINK PR=PURPLE OFF RELAY Y CN7 1 CN8 W OR PR R R=RED T-TAN W=WHITE Y=YELLOW CN6 OR ARMING RELAY OFF RELAY BL Y R BL 24VDC RELAY OR TD Y 2 6 7 FAILURE CONTACTS TIMER ARMING RELAY 315&360 ONLY BOX DEPICTS OPTIONAL ITEMS BK BK JUNCTION BOX G W W TRANSFORMER G Y BL BN 4 W WHEN REPLACING WIRING, USE WIRE OF EQUAL OR HIGHER TEMPERATURE AND GAUGE.
AUTO RESET BK P W FLOW T BR O BK Y GY GY W W1 R1 B X R2 W2 GR BK C W BK PROVING SWITCH JUMPER REMOTE THERMOSTAT OPTIONAL LIMIT SWITCHES HIGH LIMIT AUTO-RESET HIGH-LIMIT A P2 P1 1 2 JUNCTION BOX MANUAL RESET POWER SUPPLY OPTIONAL VENT DAMPER 24VAC RELAY 5 3 T C V P BL R W W PR P O GY GY BK Y GY Y GY GY JUMPER 1 3 NO NC C NC Y PR O P 24V DC O P BK 24V AC BL Y W C PR NO Y 2 4 BK SPLICE SPLICE Y 24VAC GROUND BL PR PR C (+) 1 PR OPTI
Notes 67
Revision Notes: Revision A (ECO #C06290) initial release. Revision B (ECO C09691) reflects the update of AHRI/ASME logos on pages 5 and 6. Revision C (ECO C12077) reflects the update of ignition timing information on page 44 and heat exchanger information on page 51. Revision D (ECO #C13191) reflects the addition of the CSA Low Lead Content logo on page 6. Revision E (ECO #C14226) reflects the addition of cautionary statements and notes on page 17 beneath the “Vent Materials” table.