8.
Content Content................................................................................................................................................ 1 1 Introduction...................................................................................................................................... 3 1.1 Acknowledgement..............................................................................................................3 1.2 Announcements...................................................
6.3 Contact List...................................................................................................................... 50 7 Internet........................................................................................................................................... 51 7.1 Browser............................................................................................................................ 51 7.2 Email.........................................................................
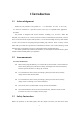
1 Introduction 1.1 Acknowledgement Thanks for your purchase of our product T1 , is a 7inch tablet . Its CPU is SC7731E, it is based on Android TM 8.1 operation system, and easy to expand the third application procedure. The product is designed with various functions, including LTE ,WCDMA, WIFI, BT, GPS,FM, voice call and so on.
information. For further details, please refer to the safety instructions and announcement. Never use the MID when driving car, in order to ensure safe driving. In the medical area, please abide by related rules and regulations. Please shut down the MID when it is near to the medical area.
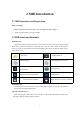
1.4 Abbreviation/Terminology Abbreviation/Terminology Full Name Description MID Mobile Internet Device Mobile Internet Terminal WIFI Wireless Fidelity Base on IEEE 802.11b\g\n standard wireless LAN TF TransFlash Alternative name Micro SD,super miniature memory card 5
2 MID Introduction 2.1 MID Operation and Preparation Battery Charging If this navigator is first used, please use AV adaptor to fully charge it. 1. Apply the power adaptor to charge for MID. 2.2MID Status and Reminder Reminder icons When some remind message appears in your reminder window, please click column and slip the screen to open the reminder list. Choose the menu you need, and confirm the information. Then you can close the reminder window through clicking the column to slide up.
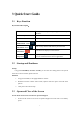
3 Quick Start Guide 3.1 Keys Function Keys Function Description: Power button Short press to sleep/wake up, long press to startup and shutdown. Volume +(up) increase the volume Volume -(down) decrease the volume Click it in any interface will return to main interface. HOME button(home) Back button(back) Menu button Setting button 3.2 click it in any interface will return to previous menu This button will display in menu interface.
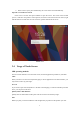
2. When screen is open, press POWER key, the screen will be closed immediately. Open the screen when it is closed. If the screen is closed, short press POWER to open the screen. The screen will be locked open it, it will show the picture as below picture, left slide to unlock and enter into camera, right slide the unlock icon and enter into Voice Search , upward slide unlock the screen. Picture 3.3-1 3.
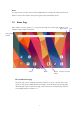
Rotate For most pictures, you only need to rotate the MID sidewise to change the screen direction from horizon to vertical. For instance, when you are typing words, and watching movies. 3.5 Home Page Main interface as below picture 3.5-1, long press the blank and it will popup windows to set Batty volume wallpaper, folder, widgets, and shortcut. time Notice column Picture 3.
Picture 3.5-2 The shortcut icons management in desktop application. Create folder icon in desktop 1. Drag the icons need to be put together on one icon(can also overlay several icons)as Picture 3.5-3. Picture 3.5-3 2. Then click the overlaid icons, the applications can be folded, as Picture 3.5-4. Click the unnamed folder in the black box, it will popup the hidden keyboard, the folder name can be renamed (this is similar with Apple IOS system), the icons position can be changed through long press.
Picture 3.5-4 3. Long press to enter the home screen settings,as Picture 3.5-5. you can set different application icon shapes, such as square、squircle、circle、teardrop as Picture 3.5-6 Picture 3.
Picture 3.5-6 Remove the icons in desktop 1. Long press the icons need to be remove, then on the right above of the screen, it will appear icons. 2. Drag the icon to the above of the remove icon, till the icon become red, then move your finger to delete the icon. Change the wallpaper of desktop 1. In home page, long press any blank space in main screen, it will popup a window to change the wallpaper. 2. Click the gallery or wallpaper gallery to select the wallpaper.
3.6 Visit Application Procedures in right top of Picture 3.5-1, enter into main interface as Picture 3.6-1, choose the application procedure you want to visit. Click Picture 3.6-1 Return to home page PinnedShortcuts If you press an application software, you can pop-up the sub menu, and then you can use this way to use some functions of the application quickly as Picture 3.6-2 Picture 3.
3.7 USB Connection MID storage configuration Before transmitting documents, you have to conduct storage configuration for your MID: 1. Connect the MID and computer by USB cable, the reminder column will show the remind information. 2. Open the reminder board; please view the MID status and reminder to learn how to open the board. 3. In the reminder board, click the “USB for file transfer”, it will as below Picture 3.7-1, then click “File transfers”. 4. Now the USB is connected successfully. Picture 3.
When you start the procedure or choose the words or numbers edition, it will show the screen keyboard. The keyboard contains below typing options: 1. Android keyboard Choose the typing method you want 1. Click Setting procedure application. 2. Click Language and Keyboard. 3. In the text setting area will reveal all the installed words-typing methods in your MID. 4. Tick the typing method you want. Use and switch of input method 5 4 1 2 Picture 3.
3.9 Operation Technique Enter widgets interface In the application interface, click widgets on the above of screen, or slide the screen, it will switch into widgets interface. Long press any widget to create its shortcut, then you can enter into the application through the shortcut icon.
Picture 3.10-2 4 Basic Setting 4.1 Network and Internet Reset Wi-Fi、mobile&Bluetooth Click icon in right top of Picture , as Picture 4.1-1, select Reset Wi-Fi、mobile&Bluetooth Picture 4.1-1 This will reset all network settings ,including as Picture 4.
Picture 4.1-2 4.1.1. Connect Wi-Fi 1) In the main menu or interface, choose setting application procedure. 2) Click WLAN, open wifi, MID will automatically search the available Wifi wireless internet. As Picture 4.1-3 3) Choose the Wi-Fi internet you want to connect, if it has password, it will popup the password window, enter password, click connect. Picture 4.1-3 1.
1) Click icon in right top, as Picture 4.1-4 Picture 4.1-4 2) Input network SSID, the wireless network name, click save. 3) Click user name already saved, click connect to use network, as Picture 4.1-5 Picture 4.1-5 2.Network Notice If you open Network Notice, when WIFI signal appears, the right bottom will remind you available WLAN network, as Picture 4.
4.1-2 Mobile Networks 1.Access Point Name( APN) Choose access points name (APN), choose SIM card you need to connect, Choose connect type Remark: (CMWAP transmitters data through GPRS, the webpage it visit belongs to wap webpage, and CMNET support www browse mobile phone network, it can also log in webpage in computer. And the charges are also different.) 2.Network Operator Click network operator, choose SIM card you need to connect, system will search available GSM and WCDMA network as Picture 4.
Picture 4.1-7 Check WIFI data usage Slide on the data usage page to find “Wi-Fi data usage” and click it, as Picture 4.1-8 Picture 4.1-8 4.1-4 Network sharing and portable hotspots Portable WI-FI hotspots 1. Click setting application in main menu. 2.
Picture 4.1-9 3. Click keep WI-FI hotspots on, choose open time. 4. Return to previous menu, open portable WLAN hotspots, click Set up WI-FI hotspots as Picture 4.1-10 Picture 4.1-10 5.Set passwords you want to, password should be more than 8 numbers. 4.1-5 VPN Open VPN, click add VPN network, as Picture 4.1-11. Input name and server address, then save.
Picture 4.1-11 Click VPN, as Picture 4.1-12, input VPN user name and password, click connect. Picture 4.1-12 4.1-6 Airplane Mode Airplane Mode can turn off WIFI and GSM card function quickly, when airplane mode is turned on, WIFI and GSM can’t get any signal, then airplane mode is turned off, WIFI and GSM module will recover to previous state.
4.2 Bluetooth Bluetooth function operation 1. Click setting application in main menu interface 2. Click Bluetooth and open it. 3. If somebody open Bluetooth in your surroundings, click search device in right above, then MID will automatically search the Bluetooth device nearby. As picture 4.2-1 Picture 4.2-1 4 . Click the available Bluetooth device, it will popup request window, enter into related password, and match the device to connect.
Picture 4.2-2 Bluetooth setting 1.Rename tablet Click icon in right top of Picture 4.5, as Picture 4.2-3, select rename tablet, you can rename it as you want Picture 4.2-3 2.Display the file you received Choose display the file you received in Picture 4.2-3, you can view download and upload files.
4.3 Apps & notification 4.3-1 APPS 1. Click setting application in Apps. 2. Select application, after enter, you can manage and delete installed application. (As Picture 4.3-1) Picture 4.3-1 4.3-2 Notification 1. Open settings, click Notification, as Picture 4.3-2 Picture 4.
2. Click on any app icon in the list, then you can choose to show notifications silently, block all notifications or don’t silence or block, as Picture 4.3-3 Picture 4.3-3 4.4 Battery Click setting function, select battery, you can view the battery situation, as Picture 4.4-1 Picture 4.
4.5 Display 4.5-1 Adjust the screen brightness 1. Click Setting application procedure. 2. Click display, choose brightness, 3. Drag the portico to adjust the brightness volume, as Picture 4.5-1 Picture 4.5-1 4.5-2 Wallpapers 1. Click setting application. 2. Click display, click wallpaper. 3. You can choose different wallpapers as you like—gallery---live wallpapers ---photos--- wallpapers (system defect), as Picture 4.
Picture 4.5-2 4.5-3 Auto rotation System is defaulted as open auto rotation, when it is turned off, system won’t rotate MID screen by G-sensor. 4.5-4 Sleep 1. Click setting application. 2. Click display. 3. Click sleep. 4. Set the sleep time as you want, as Picture 4.5-3 Picture 4.
4.5-5 Font size Click font size to adjust the size of the text, as Picture 4.5-4 Picture 4.5-4 4.5-6 Display size Click Display size to adjust the size of the icons, as Picture 4.5-5 Picture 4.5-5 4.5-7 Mira Vision Mira Vision is a set of engines to enhance display picture quality.
4.6 Sound Open settings, click Sound, as Picture 4.6-1 Picture 4.6-1 1.Vibrate In picture click Also vibrate for calls, MID will vibrate when someone calls you. 2.Volume In picture click volume, you can set ringtone, media, and alarm volume, as Picture 4.6-2 Picture 4.6-2 3.Voice call Ringtone In picture, click phone ringtone to choose voice call ringtone, as Picture 4.
Picture 4.6-3 4.7 Storage Open setting function, click Storage, as Picture 4.7-1 Picture 4.7-1 (1)Internal storage Internal storage is MID local NAND storage, as Picture 4.
content, you can check it in main menu. Picture 4.7-2 (2)SD card Click SD card to check the storage content ,as Picture 4.7-3 Picture 4.7-3 Safely remove or format SD card 1. Click in picture 4.
2. Click Settings 3. After the above two steps you can choose what you want to do,remove or format SD card Note: Removing SD card safely can protect SD card and increase its lifetime. 4.8 Security&location 4.8-1 Set locked screen Lock the touch screen by unlock icon or password to protect your MID. Note: After setting screen locked, you should enter the pass code each time when you startup or screen is locked Set unlocked picture 1. Click setting application in main interface. 2. Click security. 3.