
User manual
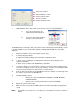


- 11 -
5.2 Record Video Images Using the Netviewer
Using the Netviewer software, you can initiate recording onto the DVR/Monitor’s hard drive or
onto the computer’s hard drive where the Netviewer software is installed.
To start / stop recording video onto the DVR/Monitor’s Hard Drive, press the
button (on
the Netviewer application). starts or stops recording on the DVR/Monitor.
To start / stop recording video onto the computer’s hard drive, press the
button.
To start / stop recording on the DVR/Monitor’s Hard Drive and the Computers Hard Drive, both
buttons (
, ) must be pressed.
5.2.1 Rec Window
The REC window allows you to configure the video capture settings to save and capture the
video of the DVR/Monitor on your computer.
PROCEDURE
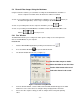
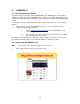
1 Start the NETVIEWER application by clicking on the Netviewer icon
2 Press the SETUP BUTTON
to open the SETUP window.
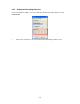
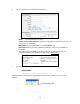
3 The SETUP window will come out (see Figure 11).
Figure 11: Netviewer Setup Window
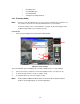
4 From the SETUP window, select the REC tab and the REC window will appear. The REC
window is used to set the values for saving the images displayed in the Netviewer.
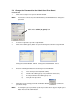
5 Choose the video capture settings you wish to configure when saving and capturing
video:
Set the video compress Codec.
Select the folder to save the video.
Set the video format to be saved.
Select the channel to be saved.