
- Lorex Digital Video Surveillance Recorder Instruction Manual

11
Getting Started
Touch Screen Control
This DVR features unique touch screen navigation capabilities. It supports Windows 7®
Touch compatible touch screen monitors without needing any additional configuration.
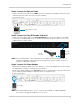
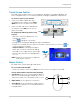
To connect a touch screen monitor:
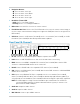
HDMI
VGA
USB
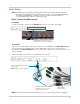
1 Connect the VGA or HDMI cable (not
included) from the monitor to the VGA or
HDMI port on the rear panel of the DVR.
2 Connect a USB cable (not included) from
the monitor to the USB port
on the rear
panel of the DVR.
To navigate the DVR using touch
screen
controls:
• T
ouch the icons on the display to access
/ nav
igate the menus.
• Touch
to go back / exit menus.
• Change menu settings by swiping your finger up and down.
• In Split-Screen mode, Touch a camera to view
that camera in full-screen. Touch to
return to Split-Screen mode.
• Swip
e-to-Switch: In Vie
wing or Playback
mode, you can switch cameras by swiping
your finger left or right. Release your finger
when the desired camera is highlighted to
select it.
NOTE: In Split-Screen view, this changes the
order of your cameras.
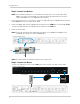
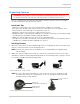
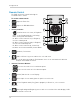
Mouse Control
The DVR can be controlled using a USB mouse.
To use a mouse with the DVR:
• Connect the mouse to one of the USB
ports on the fr
ont or rear panels of the DVR.
Use the mouse buttons to perform
the following:
1 Left-Button: Click to select a menu option. While in
Split-Scr
een mode (Viewing or Playback), click on a
camera to view the selected channel in full-screen.
1
2
3
2 Right-Button: Click to go back / exit menus.
3 Scroll-Wheel: Scr
oll up / down to change values in
selected menu options or select Playback Markers
in Playback Bar.