
Troubleshooting


3
www.lorextechnology.com
Copyright 2013 Lorex Technology
3 Power on the monitor.
4 P
ower on the DVR. Wait for it to boot into the main window.
NOTE: Aft
er you re-connect the VGA cable between the monitor and DVR, ensure that you
first turn on the monitor, and then turn on the DVR. This allows the DVR to auto-detect
the connected VGA monitor.
NOTE: If y
ou still cannot see the mouse cursor or access the menu, press the 0 (zero) button
on the remote control.
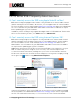
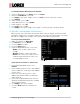
Manually setting the DVR output mode
You can set the DVR to always output to the VGA port by manually configuring the output
settings.
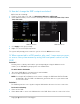
To manually adjust the output
settings:
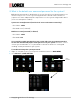
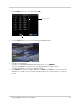
Select VGA
4/8 Channel
Select VGA
16 Channel
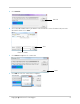
1 Right-click and click Main
Menu.
2 Click Adv
anced>A/V Setup.
3 In the
Output Device drop-down
menu, select VGA.
NOTE: In the
16-channel model,
select VGA in the Init DEV
drop-down menu.
4 Click Appl
y to save your
settings.
Q: How do I set up the DVR to record only when there is motion
detected?
A: To set up the DVR to record only when motion is detected, you will need to configure a
recording schedule that will record events only (events include motion, video loss from a
camera, hard drive loss, or hard drive nearing capacity), copy the schedule to all channels,
and configure your cameras for motion detection.
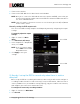
To configure an event-only recording schedule:
1 Right-click and s
elect Main Menu.
2 Click Rec
ord.