
Owner's Manual


7
Basic Setup
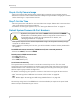
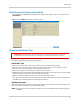
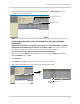
Quick Access to System Information
• To quickly open a window that displays vital system information, right-click and then click
Information.
OR, press the INFO button
on the remote control.
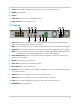
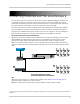
Camera Installation Tips
ATTENTION: Cameras differ in terms of installation or mounting instructions. Please see
the documentation that came with your camera(s) for specific installation instructions.
Test the cameras before permanent installation. Plan where you will route the wiring for
the camera and where you will aim the camera.
Installation Tips
• Mount the camera where the lens is away from direct and intense sunlight.
• Plan your cable wiring so that it does not interf
ere with power lines or telephone lines.
• Ensure that the camera wiring is not exposed or easily cut.
• Mount the camera in an area that is visibl
e, but out of reach.
• Avoid pointing the camera at a glass window to see outside, as this may result in a
poor image
caused by glare from indoor / outdoor lighting conditions.
• Adjust the camera angle so that it covers an area with high traffic.
• In "high-risk" locations, have multiple cameras point in the same area. This provides camera
re
dundancy if a vandal attempts to damage the camera.
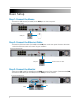
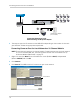
Installing Cameras
1 Mount the camera(s) to the desired mounting surface according to the instructions that came
with the camera(s). Choose a firm mounting surface.
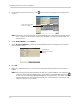
NOTE: If you wish to mount cameras to drywall, it is r
ecommended to use drywall plugs (not
included).