Owner's Manual
Table Of Contents
- NVR Overview
- Basic Setup
- Step 1: Connect the IP Cameras
- Step 2: Connect the Mouse
- Step 3: Connect the Ethernet Cable
- Step 4: Connect the Monitor
- Step 5: Connect the Power Adapter and Power on the NVR
- Step 6: Verify Camera Image
- Step 7: Set the Time
- Default System Password & Port Numbers
- Quick Access to System Information
- Installing Cameras
- Mouse Control
- Remote Control
- Using the On-Screen Display
- Setting the Date and Time
- Recording
- Playback
- Backing Up Video
- Managing Passwords
- Using the Main Menu
- Manual
- HDD
- Record
- Camera
- Configuration
- Maintenance
- Shutdown
- Setting up your NVR for Remote Connectivity
- Client Software for PC
- Control Panel
- Main View
- Video Player
- E-Map
- Event Search
- Remote Playback
- Add Camera
- Local Log Search
- Account Management
- Device Management
- Configuring an NVR Through Device Management
- Camera Settings
- Adjusting Picture Settings
- Configuring Video Quality
- Configuring Camera Recording Schedules
- Configuring the Camera Video Display (OSD) and Privacy Masks
- Configuring Motion Detection Settings
- Configuring Tampering Alarm Settings
- Configuring Video Loss Alarms
- PTZ Control (Not Supported)
- Network Connection (Not Supported)
- System Configuration
- Connecting to your NVR Using a Web Browser
- Mobile Apps: Accessing your NVR Using a Mobile Device
- Appendix A: System Specifications
- Appendix B: Installing or Replacing the Hard Drive
- Troubleshooting
- Getting Started

84
Setting up your NVR for Remote Connectivity
Step 4 of 4: Connect to the DDNS Address in the Client Software
NOTE: Please allow 10~15 minutes for the DDNS servers to update with your new DDNS address
before attempting to connect.
Finally you must connect to the NVR’s DDNS address. You will use the
DDNS address
whenever you want to connect to your NVR over the Internet.
To connect to the NVR’s DDNS address:
1 Ins
tall the Cl
ient Software for PC on a remote computer, and double-click the desktop icon
(
) to open.
2 The Add NVR Wizard
opens. Click Enter Wizard.
NOTE: If the Add NVR Wizard doesn’t open, click Help
>Open Wizard.
3 Click Ad
d.
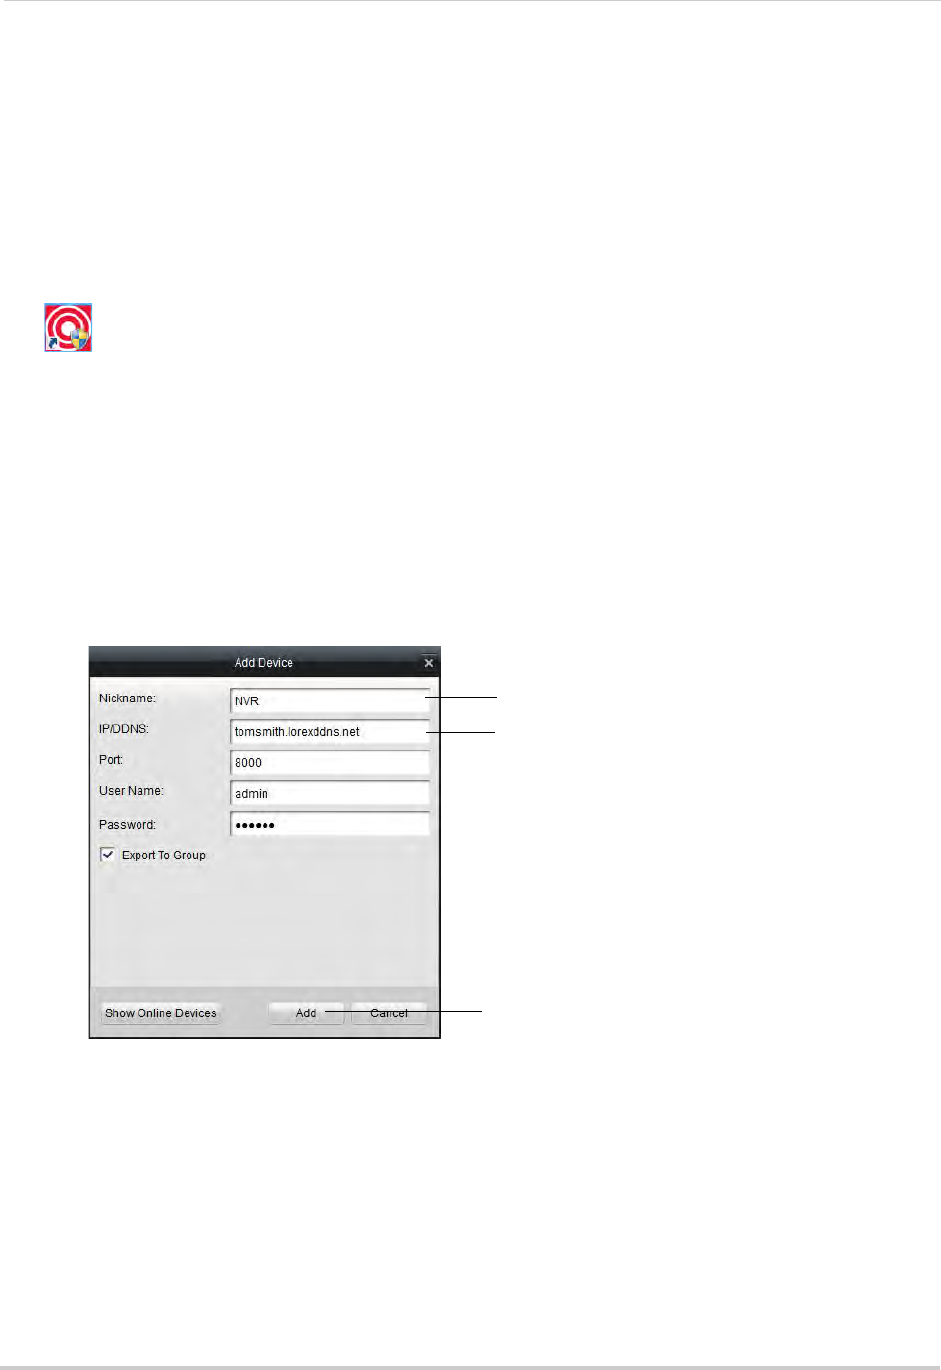
4 Configure the following:
• Nickname: Ent
er a name for your NVR of your choice (e.g. home or office).
• IP/DDNS: Ent
er the Domain Name/URL Request from the confirmation email, followed by
.lorexddns.net. For example, if your Domain Name/URL Request is
tomsmith
, enter
tomsmith.lorexddns.net
.
Enter a name for your NVR
Enter Domain Name/URL Request,
followed by .lorexddns.net
Click Add
NOTE: If you have changed the Client Port, User Name, or Password from the defaults, you
must update them to connect to the NVR.
5 Click Ad
d.
6 Click Next 3 times, t
hen click Finished. The NVR opens in Main View and streams video from
your cameras.
NOTE: If Main View
does not open, click Control Panel>Main View to open the Main View menu.


