
Owner's Manual


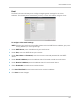


Table Of Contents
- NVR Overview
- Basic Setup
- Step 1: Connect the IP Cameras
- Step 2: Connect the Mouse
- Step 3: Connect the Ethernet Cable
- Step 4: Connect the Monitor
- Step 5: Connect the Power Adapter and Power on the NVR
- Step 6: Verify Camera Image
- Step 7: Set the Time
- Default System Password & Port Numbers
- Quick Access to System Information
- Installing Cameras
- Mouse Control
- Remote Control
- Using the On-Screen Display
- Setting the Date and Time
- Recording
- Playback
- Backing Up Video
- Managing Passwords
- Using the Main Menu
- Manual
- HDD
- Record
- Camera
- Configuration
- Maintenance
- Shutdown
- Setting up your NVR for Remote Connectivity
- Client Software for PC
- Control Panel
- Main View
- Video Player
- E-Map
- Event Search
- Remote Playback
- Add Camera
- Local Log Search
- Account Management
- Device Management
- Configuring an NVR Through Device Management
- Camera Settings
- Adjusting Picture Settings
- Configuring Video Quality
- Configuring Camera Recording Schedules
- Configuring the Camera Video Display (OSD) and Privacy Masks
- Configuring Motion Detection Settings
- Configuring Tampering Alarm Settings
- Configuring Video Loss Alarms
- PTZ Control (Not Supported)
- Network Connection (Not Supported)
- System Configuration
- Connecting to your NVR Using a Web Browser
- Mobile Apps: Accessing your NVR Using a Mobile Device
- Appendix A: System Specifications
- Appendix B: Installing or Replacing the Hard Drive
- Troubleshooting
- Getting Started
130
Connecting to your NVR Using a Web Browser
Connecting to your NVR Using a Web Browser
The NVR includes a built in web browser software. You can connect to your NVR in Internet
Explorer 8 and above, Apple Safari, Mozilla Firefox, and Google Chrome.
NOTE: Before you can connect to your NVR over the Internet, you must complete port forwarding
and DDNS
setup. For details, see steps 1, 2, and 3 under “Accessing your NVR Remotely
over the Internet” on page 78.
Connecting to your NVR Using a DDNS or Local IP Address
You must enter your NVR’s DDNS or Local IP address in the address bar to connect using
a web browser.
• A DDNS address is formatted http://, the Domain Name/URL Req
uest you received in the
email after registering for your DDNS account, followed by .lorexddns.net, colon (:), and the
HTTP port of your NVR (e.g.
http://tomsmith.lorexddns.net:80
). A DDNS address is required
to connect to your NVR over the Internet.
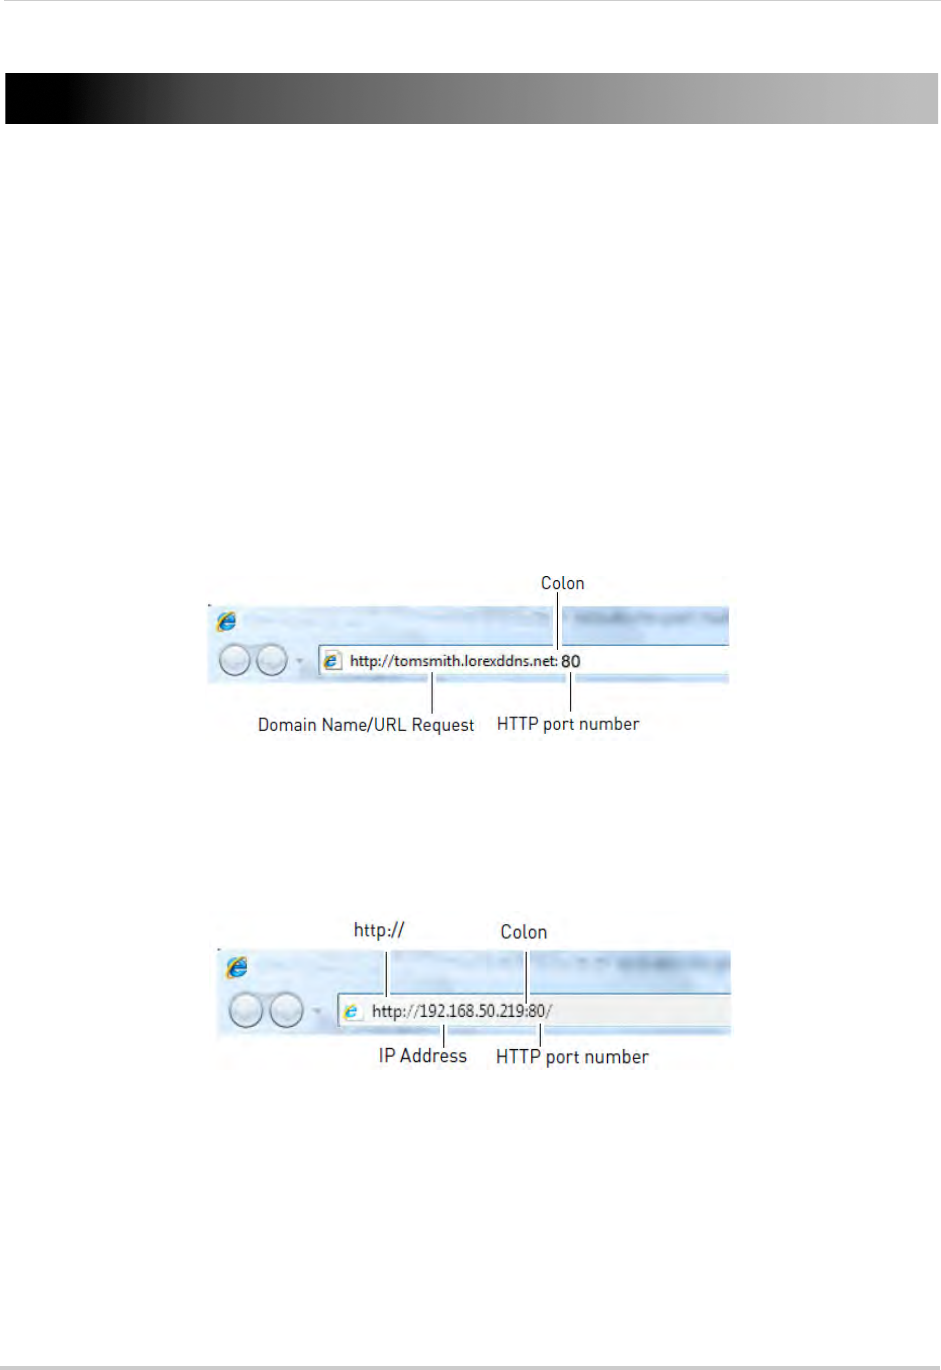
• The local IP address is formatted http://, the IP address (can be found by right-clicking and
selecting Information), colon (:), and the HTTP port of your NVR (e.g.
http://192.168.50.219:80
). You may only connect to the local IP address of the NVR within your
own local network.
Connecting Using Internet Explorer
NOTE: The steps below describe how to connect to the NVR in Internet Explorer 9 or 10. The
steps may vary for earlier versions of Internet Explorer.