
Owner's Manual


Table Of Contents
- NVR Overview
- Basic Setup
- Step 1: Connect the IP Cameras
- Step 2: Connect the Mouse
- Step 3: Connect the Ethernet Cable
- Step 4: Connect the Monitor
- Step 5: Connect the Power Adapter and Power on the NVR
- Step 6: Verify Camera Image
- Step 7: Set the Time
- Default System Password & Port Numbers
- Quick Access to System Information
- Installing Cameras
- Mouse Control
- Remote Control
- Using the On-Screen Display
- Setting the Date and Time
- Recording
- Playback
- Backing Up Video
- Managing Passwords
- Using the Main Menu
- Manual
- HDD
- Record
- Camera
- Configuration
- Maintenance
- Shutdown
- Setting up your NVR for Remote Connectivity
- Client Software for PC
- Control Panel
- Main View
- Video Player
- E-Map
- Event Search
- Remote Playback
- Add Camera
- Local Log Search
- Account Management
- Device Management
- Configuring an NVR Through Device Management
- Camera Settings
- Adjusting Picture Settings
- Configuring Video Quality
- Configuring Camera Recording Schedules
- Configuring the Camera Video Display (OSD) and Privacy Masks
- Configuring Motion Detection Settings
- Configuring Tampering Alarm Settings
- Configuring Video Loss Alarms
- PTZ Control (Not Supported)
- Network Connection (Not Supported)
- System Configuration
- Connecting to your NVR Using a Web Browser
- Mobile Apps: Accessing your NVR Using a Mobile Device
- Appendix A: System Specifications
- Appendix B: Installing or Replacing the Hard Drive
- Troubleshooting
- Getting Started
163
Appendix B: Installing or Replacing the Hard Drive
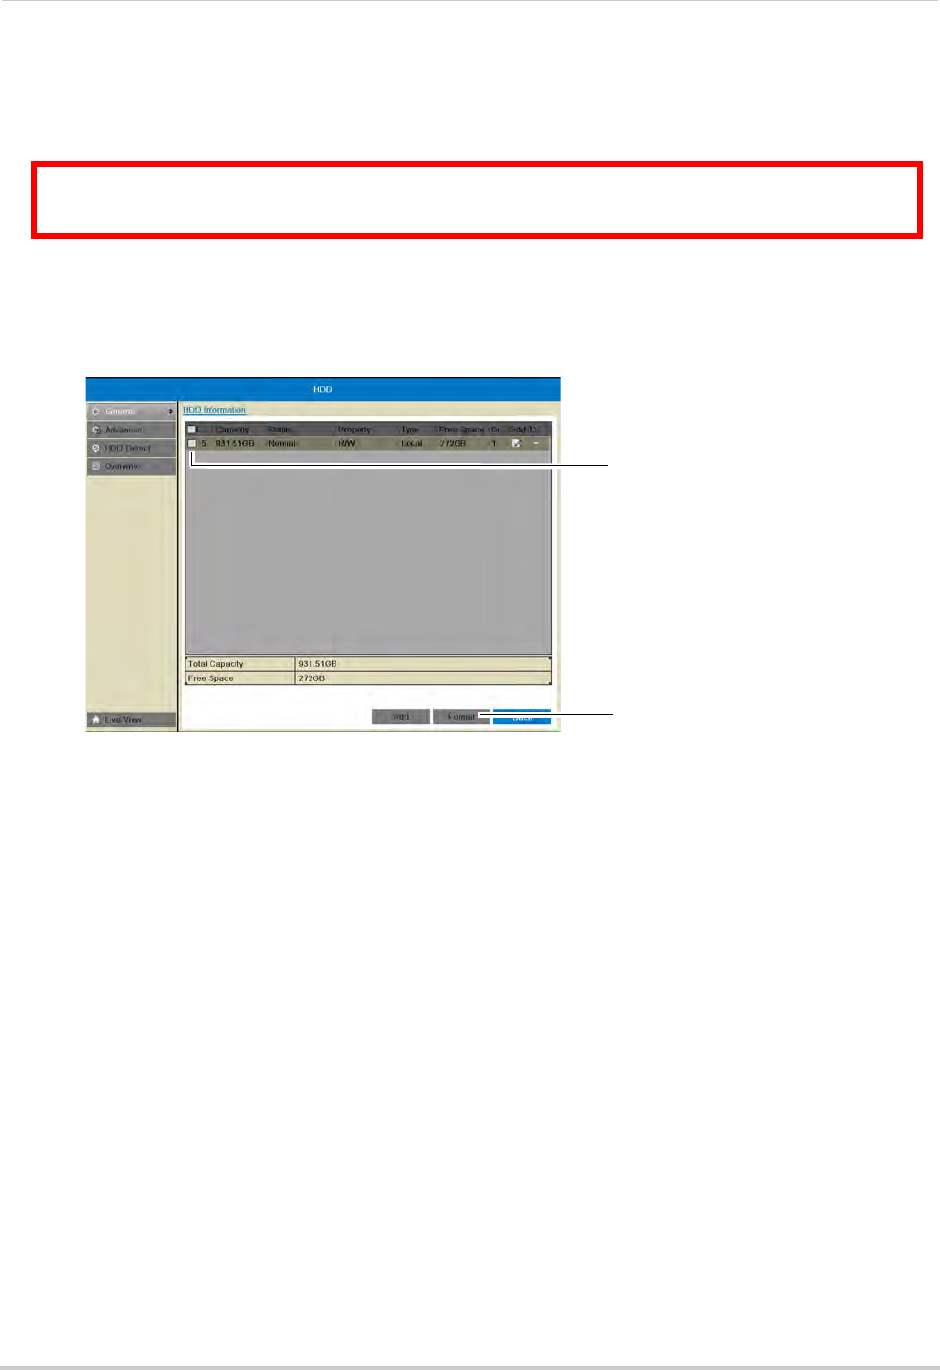
Formatting the Hard Drive
If you replace the pre-installed hard drive or install a new hard drive, it
must
be formatted
in order to function properly with the system.
ATTENTION: Formatting the HDD erases all data on the hard disk.
This step cannot be undone.
To format the hard disk:
1 Right-click and then click Menu>HDD>Gener
al.
2 Check the har
d drive that you would like to format.
Check the hard
drive
Click Format
3 Click Format. Click OK to confirm. Wait for the formatting to complete. Right-click repeatedly
to return to live view.
NOTE: You will notice that the size of the HDD and the free space are not the same. The system
uses a portion of the disk spac
e for the operating system and initialization. This is
common in all security NVRs as well as computer hard drives.