
Owner's Manual


Table Of Contents
- NVR Overview
- Basic Setup
- Step 1: Connect the IP Cameras
- Step 2: Connect the Mouse
- Step 3: Connect the Ethernet Cable
- Step 4: Connect the Monitor
- Step 5: Connect the Power Adapter and Power on the NVR
- Step 6: Verify Camera Image
- Step 7: Set the Time
- Default System Password & Port Numbers
- Quick Access to System Information
- Installing Cameras
- Mouse Control
- Remote Control
- Using the On-Screen Display
- Setting the Date and Time
- Recording
- Playback
- Backing Up Video
- Managing Passwords
- Using the Main Menu
- Manual
- HDD
- Record
- Camera
- Configuration
- Maintenance
- Shutdown
- Setting up your NVR for Remote Connectivity
- Client Software for PC
- Control Panel
- Main View
- Video Player
- E-Map
- Event Search
- Remote Playback
- Add Camera
- Local Log Search
- Account Management
- Device Management
- Configuring an NVR Through Device Management
- Camera Settings
- Adjusting Picture Settings
- Configuring Video Quality
- Configuring Camera Recording Schedules
- Configuring the Camera Video Display (OSD) and Privacy Masks
- Configuring Motion Detection Settings
- Configuring Tampering Alarm Settings
- Configuring Video Loss Alarms
- PTZ Control (Not Supported)
- Network Connection (Not Supported)
- System Configuration
- Connecting to your NVR Using a Web Browser
- Mobile Apps: Accessing your NVR Using a Mobile Device
- Appendix A: System Specifications
- Appendix B: Installing or Replacing the Hard Drive
- Troubleshooting
- Getting Started
9
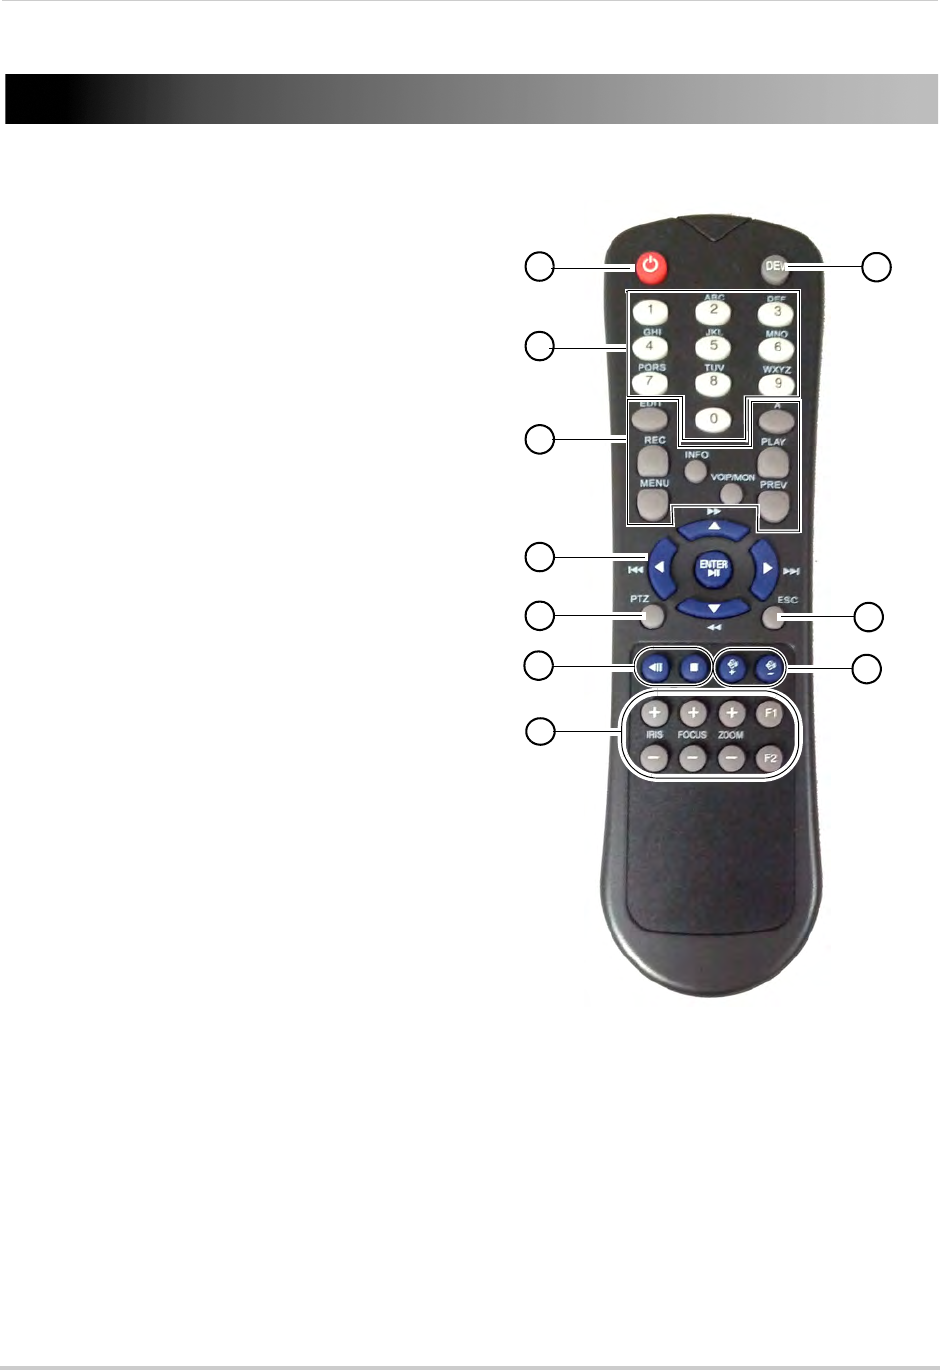
Remote Control
Remote Control
You can also control the NVR using the
included remote control.
3
5
6
8
10
1
4
2
7
9
1 Power: Press and hold to power off the NVR.
Wait for the message that the NVR has shut
down, then use the power switch to power off
the NVR.
2 DEV:
Use to pair the remote control with a
specific LNR200 Series NVR. For details, see
“Pairing the Remote Control” on page 63.
3 Number Keys:
•
In live view, press to select a channel.
• In menus, press to enter characters.
4 F
unction Buttons:
• EDIT: Pr
ess while a menu option is selected
to enable numeric or text input. For details,
see “Using the Remote Control to Enter Text
or Numbers” on page 10.
• REC: Press to open the manual recording
menu.
• MENU:
Press to open the Main Menu.
• INFO:
Press to view system information.
• PLAY:
Press to open Playback mode.
• A: When Edit
Mode is selected, press
repeatedly to select keyboard types.
• PREV: In live view, press to select different
sp
lit-screen views.
• VOIP/MON: Not
supported.
5 Navigation Curs
ors / Playback Controls:
• Press to move the cursor in menus.
• ENTER /
: Press to enter menu selections. In Playback Mode, press to pause / play video.
In live view, press to start / stop Sequence mode.
•
: In Playback Mode, press to fast forward / increase fast forward speed.
•
: In Playback Mode, press for slow playback. Press repeatedly to reduce playback speed.
•
: In Playback Mode, press to skip ahead 30 seconds.
•
: In Playback Mode, press to skip back 30 seconds.
6 PTZ: Not support
ed.
7 ESC: Pres
s to go back / exit menus.