
Owner's Manual


Table Of Contents
- NVR Overview
- Basic Setup
- Step 1: Connect the IP Cameras
- Step 2: Connect the Mouse
- Step 3: Connect the Ethernet Cable
- Step 4: Connect the Monitor
- Step 5: Connect the Power Adapter and Power on the NVR
- Step 6: Verify Camera Image
- Step 7: Set the Time
- Default System Password & Port Numbers
- Quick Access to System Information
- Installing Cameras
- Mouse Control
- Remote Control
- Using the On-Screen Display
- Setting the Date and Time
- Recording
- Playback
- Backing Up Video
- Managing Passwords
- Using the Main Menu
- Manual
- HDD
- Record
- Camera
- Configuration
- Maintenance
- Shutdown
- Setting up your NVR for Remote Connectivity
- Client Software for PC
- Control Panel
- Main View
- Video Player
- E-Map
- Event Search
- Remote Playback
- Add Camera
- Local Log Search
- Account Management
- Device Management
- Configuring an NVR Through Device Management
- Camera Settings
- Adjusting Picture Settings
- Configuring Video Quality
- Configuring Camera Recording Schedules
- Configuring the Camera Video Display (OSD) and Privacy Masks
- Configuring Motion Detection Settings
- Configuring Tampering Alarm Settings
- Configuring Video Loss Alarms
- PTZ Control (Not Supported)
- Network Connection (Not Supported)
- System Configuration
- Connecting to your NVR Using a Web Browser
- Mobile Apps: Accessing your NVR Using a Mobile Device
- Appendix A: System Specifications
- Appendix B: Installing or Replacing the Hard Drive
- Troubleshooting
- Getting Started
52
Camera
OSD
The OSD sub-menu allows you to configure custom names for your cameras or configure
the on-screen text shown for your cameras.
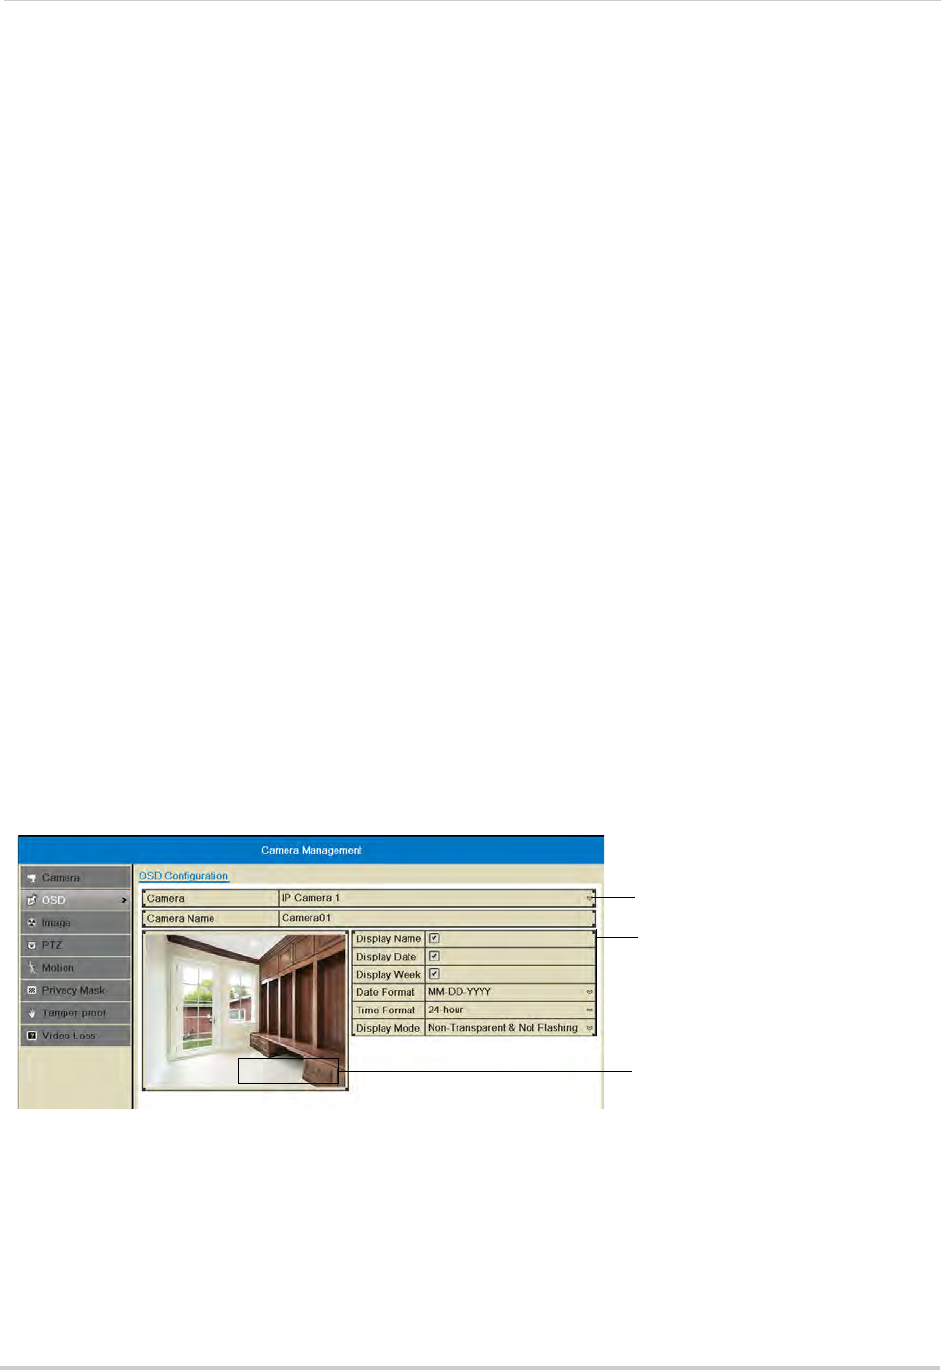
Configuring the On-Screen Display and Camera Name
You can customize the appearance of on-screen text.
To configure the on-screen display:
1 Right-click and click Menu>Camer
a>OSD.
2 Under Camera, sel
ect the camera you would like to modify.
3 Under Camera Name,
enter the desired camera name.
4 Check Display Na
me to show the camera name.
5 Check Display Date t
o show the current date and time.
6 Check Display Week
to show the day of the week in the date.
7 Under Date Fo
rmat, select the desired date format.
8 Under Time Fo
rmat, select 24-hour or 12-hour time.
9 Under Display Mode, sele
ct Non-Transparent and Not Flashing to have the on-screen text
shown at all times, or select Non-Transparent and Flashing to have the on-screen text flash
on the screen.
10 Click and
dr
ag the boxes in the image preview to change the position of the on-screen display
text. The yellow box controls the position of the time and date, and the red box controls the
position of the camera name.
Select the camera
Configure on-screen text
Camera01
Click and drag messages to
adjust their position
NOTE: The position of the on-screen text will not update until you click Apply.
11 Click A
pply to save your changes. Right-click repeatedly to return to live view.